前回: 【入門向け】Node.js + Express4 + MongoDB + Vagrant + foreverでChatWorkと連動するCRUDアプリを開発する。(1)(導入編)
Vagrantで開発環境を作る。
ここからは、実際に開発環境を用意しアプリを動かす所までを説明します。ざっくりとした方針は以下の通りです。
- Vagrantで仮想環境を立ち上げて開発環境にする。
- chefでパッケージ管理する。
chefのknifeコマンドにはknife-soloというプラグインがあるので、これをインストールすればBerksfileが含まれたディレクトリを作成することができます。BerksfileとはBerkshelfの設定ファイルで、BerkshelfはChefのCookBookの依存関係を解消してくれるツールです。
VagrantもBerksfileを使用できるので、このディレクトリの中でVagrantfileを編集し、仮想サーバを起動すれば良いと考えるのは自然です。早速やってみましょう。
$  knife solo init chef-repo
Creating kitchen...
Creating knife.rb in kitchen...
Creating cupboards...
Setting up Berkshelf...
$ cd chef-repo
$ vagrant init
$ vim Berksfile # Berksfileの編集
$ vim Vagrantfile # Vagrantfileの編集
$ vagrant up
Chef Soloの正しい始め方 | tsuchikazu blog
初心者にお勧めするChefの正しいインストール方法 - Qiita
ところがこれで設定した場合、今回は使いませんがnginxが入らないという類の問題が発生します。どういうことでしょうか。
実は、CookBookがCentOSのyumコマンドを呼び出しCookBookに記述されたパッケージをインストールしているのですが、yumが古いので、Berksfileが指定したnginxのバージョンが無く、エラーになってしまいます。なので、yum installの前にyum updateをしなくてはなりません。
また
- vagrant経由で入っているberksfileのバージョンが違うため、記法を修正しなければならない
- vagrantプラグインのberksfileが何かと競合しているかも・・・
などの問題や課題が出てきてやや面倒です。そこで、少なくとも依存関係でバッティングしないようBerkshelfでCookBookを管理するようにします。Berkshelfのberks cookbookコマンドを使えば、Vagrantfileまで一括で作成してくれるので、Vagrantプラグインとの依存関係の心配がありません。
berkshelfを使ってchef連携したvagrantを立ち上げる
BerkshelfでVagrantとCookBookを用意する。
さっそくberksコマンドでcookbookを作成します。ここではvagrantのディレクトリ名をexampleにしました。
$ berks cookbook example
      create  example/files/default
      create  example/templates/default
      create  example/attributes
      create  example/libraries
      create  example/providers
      create  example/recipes
      create  example/resources
      create  example/recipes/default.rb
      create  example/metadata.rb
      create  example/LICENSE
      create  example/README.md
      create  example/CHANGELOG.md
      create  example/Berksfile
      create  example/Thorfile
      create  example/chefignore
      create  example/.gitignore
      create  example/Gemfile
      create  .kitchen.yml
      append  Thorfile
      create  test/integration/default
      append  .gitignore
      append  .gitignore
      append  Gemfile
      append  Gemfile
You must run `bundle install' to fetch any new gems.
      create  example/Vagrantfile
$ cd example
$ bundle install
chefはrubyなのでbundle installが必要です。
$ bundle install
Fetching gem metadata from https://rubygems.org/.......
Fetching additional metadata from https://rubygems.org/..
Resolving dependencies...
Using addressable 2.3.6
Using multipart-post 2.0.0
Using faraday 0.9.1
...
準備ができたので、まずはBerksfileを編集します。必要なパッケージを入力しましょう。
source "https://supermarket.getchef.com"

metadata
cookbook "nginx"
cookbook "mongodb"
cookbook 'nodejs'
cookbook 'npm'
cookbook 'forever'
cookbook 'git'
nginxは使いませんが、一応入れておきます。
上記のように記述することで、面倒なインストール作業をせずともchefが自動でダウンロードからインストールまで行ってくれます。とても便利ですね。
次にVagrantfileを設定します。
config.vm.box = "centos6"
config.vm.box_url = "http://developer.nrel.gov/downloads/vagrant-boxes/CentOS-6.4-x86_64-v20130731.box"
config.vm.network :private_network, ip: "192.168.33.17"
config.vm.synced_folder "../", "/share"
最初の2行でOSを指定し、あとの2行でゲストOSのIPとホストとゲストの共有フォルダを指定しています。次にゲストOSの起動時に実行されるパッケージをrun_listに指定します。
config.vm.provision :chef_solo do |chef|
    chef.json = {
    }
    chef.run_list = [
      'recipe[nginx]',
      'recipe[nodejs]',
      "recipe[mongodb]",
      "recipe[forever]",
      "recipe[git]"
    ]
end
編集が終わったらサーバを起動しましょう。--provisionオプションを付けるとcookbookで管理されているパッケージを更新し、再インストールや削除などをしてくれます。
$ vagrant up --provision
この時、以下のようなエラーが出る時があります。
vagrant.rb:144:in `has_plugin?': wrong number of arguments (0 for 1) (ArgumentError)
Vgrant-berkshelfを使用したとき特有の問題で、Vagrantfileの編集が必要です。
 //if Vagrant.has_plugin?
      config.omnibus.chef_version = 'latest'
 //end
Vgrant-berkshelfはサポートが止まっており、現在は非推奨になっていますので、ご利用の際はご注意ください。
Wrong number of arguments with 'has_plugin?
改めて仮想環境を起動し、ログインできたら成功です。
$ vagrant up --provision
...
$ vagrant ssh
Last login: Tue Jan 20 04:32:27 2015 from 10.0.2.2
Welcome to your Vagrant-built virtual machine.
[vagrant@berkshelf ~]$ //成功
Express4で開発の準備をする。
ここからはExpress4を使った開発について説明します。前項の手順で構築されたVagrantの開発環境には、既にnode.jsやexpress4が入っている状態なので環境に関する作業をする必要はありません。
$ cd
$  express -e ejs test

   create : test
   create : test/package.json
   create : test/app.js
   create : test/public
   create : test/public/javascripts
   create : test/public/images
   create : test/public/stylesheets
   create : test/public/stylesheets/style.css
   create : test/routes
   create : test/routes/index.js
   create : test/routes/users.js
   create : test/views
   create : test/views/index.ejs
   create : test/views/error.ejs
   create : test/bin
   create : test/bin/www

   install dependencies:
     $ cd test && npm install

   run the app:
     $ DEBUG=test ./bin/www

$ cd test && npm install
npm http GET https://registry.npmjs.org/cookie-parser
npm http GET https://registry.npmjs.org/serve-favicon
npm http GET https://registry.npmjs.org/debug
npm http GET https://registry.npmjs.org/ejs
npm http GET https://registry.npmjs.org/body-parser
npm http GET https://registry.npmjs.org/express
npm http GET https://registry.npmjs.org/morgan
...
npm installで必要なモジュール類をインストールします。npm installが終わるとnode-modulesというディレクトリがルートパスにあることが分かります。準備ができたので一度、アプリを起動してみます。
$ npm start
> test@0.0.0 start /home/vagrant/test
> node ./bin/www
npm startはショートカットコマンドで、package.jsonを見ると紐づいているコマンドが書いてあります。
{
    "name": "test",
    "version": "0.0.0",
    "private": true,
    "scripts": {
      "start": "node ./bin/www"
    },
npm startと打つとnode ./bin/wwwが実行されるという意味になります。expressのバージョンが古いとnode app.jsなどになっています。ここはforeverでデーモン管理するときに見るものなので、変更にはご注意ください。(後述)
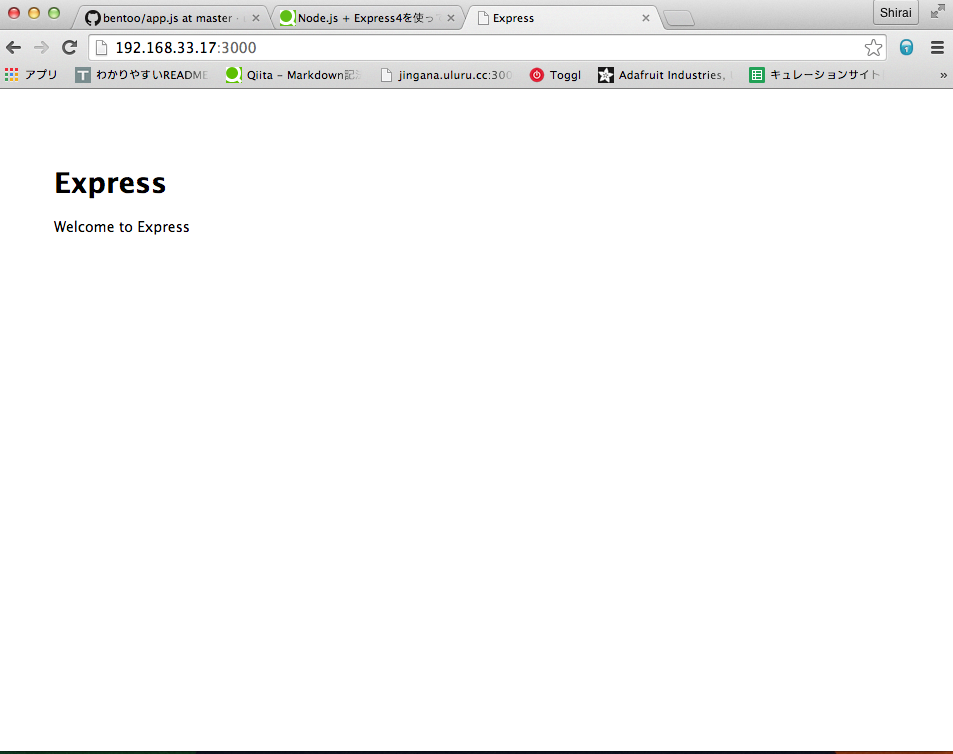
さて、エラーが無ければ
http://(-IPaddress-):3000
にアクセス。以下のように表示されていれば成功です。
IPアドレスはifconfigで確認できます。ホストOSからゲストOSを見るために使うIPアドレスは、Vagrantfileに記述したものと同じアドレスです。
次回: 【入門向け】Node.js + Express4 + MongoDB + Vagrant + foreverでChatWorkと連動するCRUDアプリを開発する。(3)(開発編)
