最近Flutterを始めました.
1つ目のDropdownButtonで選んだ回答によって,2つ目のDropdownButtonメニューを変える方法について結構手こずったので備忘録も兼ねて書いていこうと思います.
DropdownButtonとは
こんなやつ↓
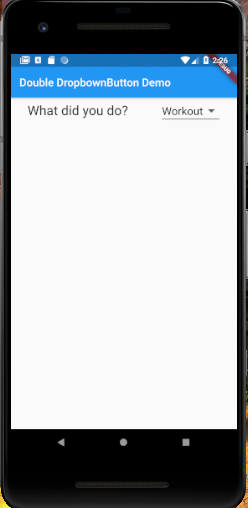
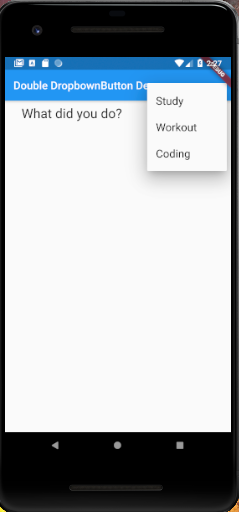
選択肢クリックするとニョキって出てくるやつです.
1つだけ使う場合はこうなり,公式の通りに書けば簡単に作ることができます.
https://api.flutter.dev/flutter/material/DropdownButton-class.html
import 'package:flutter/material.dart';

void main() => runApp(const MyApp());

class MyApp extends StatelessWidget {
  // This widget is the root of your application.

  const MyApp({Key? key}) : super(key: key);

  @override
  Widget build(BuildContext context) {
    return const MaterialApp(
      title: 'Flutter Demo',
      home: _DropdownButtonDemo(),
    );
  }
}

class _DropdownButtonDemo extends StatefulWidget {
  const _DropdownButtonDemo({Key? key}) : super(key: key);

  @override
  _DropdownButtonDemoState createState() => _DropdownButtonDemoState();
}

class _DropdownButtonDemoState extends State<_DropdownButtonDemo> {
  final Map<String, List<String>> _dropDownMenu = {
    'Study': ['Math', 'English', 'Japanese'],
    'Workout': ['Shoulder', 'Chest', 'Back'],
    'Coding': ['Flutter', 'Python', 'C#']
  };

  String? _selectedKey;

  @override
  Widget build(BuildContext context) {
    return Scaffold(
      appBar: AppBar(
        title: Text('Double DropbownButton Demo'),
      ),
      body: Column(
        children: <Widget>[
          Row(
            mainAxisAlignment: MainAxisAlignment.spaceAround,
            children: <Widget>[
              const Text(
                'What did you do?',
                style: TextStyle(fontSize: 24),
              ),
              DropdownButton<String>(
                value: _selectedKey,
                icon: const Icon(Icons.arrow_drop_down),
                iconSize: 30,
                elevation: 16,
                style: const TextStyle(fontSize: 20, color: Colors.black),
                underline: Container(
                  height: 2,
                  color: Colors.grey,
                ),
                onChanged: (newValue) {
                  setState(() {
                    _selectedKey = newValue;
                  });
                },
                items: _dropDownMenu.keys
                    .map<DropdownMenuItem<String>>((String value) {
                  return DropdownMenuItem<String>(
                    value: value,
                    child: Text(value),
                  );
                }).toList(),
              ),
            ],
          )
        ],
      ),
    );
  }
}
ちなみに選択肢はMapで事前に作っております.
final Map<String, List<String>> _dropDownMenu = {
    'Study': ['Math', 'English', 'Japanese'],
    'Workout': ['Shoulder', 'Chest', 'Back'],
    'Coding': ['Flutter', 'Python', 'C#']
  };
DropdownButtonのitemsのところにMapのkeysを指定すれば,まずkeysをアイテムとしたDropdownButtonが出来上がります.
items: _dropDownMenu.keys
                    .map<DropdownMenuItem<String>>((String value) {
                  return DropdownMenuItem<String>(
                    value: value,
                    child: Text(value),
                  );
                }).toList(),
1つ目のDropdownButtonで選択したアイテムで,2つ目のDropdownButtonを作る
もう察しの良い方は予測がついておられるかもしれませんが,選択したアイテムを _selectedKeyの中に取り込んでいるので,
これを使って次の選択肢を参照すればOKです.
import 'package:flutter/material.dart';

void main() => runApp(const MyApp());

class MyApp extends StatelessWidget {
  // This widget is the root of your application.

  const MyApp({Key? key}) : super(key: key);

  @override
  Widget build(BuildContext context) {
    return const MaterialApp(
      title: 'Flutter Demo',
      home: _DropdownButtonDemo(),
    );
  }
}

class _DropdownButtonDemo extends StatefulWidget {
  const _DropdownButtonDemo({Key? key}) : super(key: key);

  @override
  _DropdownButtonDemoState createState() => _DropdownButtonDemoState();
}

class _DropdownButtonDemoState extends State<_DropdownButtonDemo> {
  final Map<String, List<String>> _dropDownMenu = {
    'Study': ['Math', 'English', 'Japanese'],
    'Workout': ['Shoulder', 'Chest', 'Back'],
    'Coding': ['Flutter', 'Python', 'C#']
  };

  String? _selectedKey;
  String? _selectedItem;

  @override
  Widget build(BuildContext context) {
    return Scaffold(
      appBar: AppBar(
        title: const Text('Double DropbownButton Demo'),
      ),
      body: Column(
        children: <Widget>[
          Row(
            mainAxisAlignment: MainAxisAlignment.spaceAround,
            children: <Widget>[
              const Text(
                'What did you do?',
                style: TextStyle(fontSize: 24),
              ),
              DropdownButton<String>(
                value: _selectedKey,
                icon: Icon(Icons.arrow_drop_down),
                iconSize: 30,
                elevation: 16,
                style: const TextStyle(fontSize: 20, color: Colors.black),
                underline: Container(
                  height: 2,
                  color: Colors.grey,
                ),
                onChanged: (newValue) {
                  setState(() {
                    _selectedKey = newValue;
                    _selectedItem = null;
                  });
                },
                items: _dropDownMenu.keys
                    .map<DropdownMenuItem<String>>((String value) {
                  return DropdownMenuItem<String>(
                    value: value,
                    child: Text(value),
                  );
                }).toList(),
              ),
            ],
          ),
          _selectedKey != null
              ? Row(
                  mainAxisAlignment: MainAxisAlignment.spaceAround,
                  children: <Widget>[
                    const Text(
                      'Which one?',
                      style: TextStyle(fontSize: 24),
                    ),
                    DropdownButton<String>(
                      value: _selectedItem,
                      icon: const Icon(Icons.arrow_drop_down),
                      iconSize: 30,
                      elevation: 16,
                      style: const TextStyle(fontSize: 20, color: Colors.black),
                      underline: Container(
                        height: 2,
                        color: Colors.grey,
                      ),
                      onChanged: (newValue) {
                        setState(() {
                          _selectedItem = newValue;
                        });
                      },
                      items: _dropDownMenu[_selectedKey]!
                          .map<DropdownMenuItem<String>>((String value) {
                        return DropdownMenuItem<String>(
                          value: value,
                          child: Text(value),
                        );
                      }).toList(),
                    ),
                  ],
                )
              : Container(),
        ],
      ),
    );
  }
}
注意点
2つ注意点があります.手こずりました。
デバッグ時には _selectedKeyがnull
まず,2個目のDropdownButtonですが _selectedKeyの中身によって選択肢が変わるため,初期の状態ではnullです.
そのため,事前に設定したMap _dropDownMenuのnullを参照しにいってエラーがでます.
これを回避するためにif文を組んで, _selectedKeyがnullなら空のContainerを返すようにしてます.
Textを返して,次の選択肢があることを暗示しても良いと思います.
_selectedKey != null
              ? Row(
                  mainAxisAlignment: MainAxisAlignment.spaceAround,
                  children: <Widget>[
                    const Text(
                      'Which one?',
                      style: TextStyle(fontSize: 24),
                    ),
                    DropdownButton<String>(
                      value: _selectedItem,
                      icon: const Icon(Icons.arrow_drop_down),
                      iconSize: 30,
                      elevation: 16,
                      style: const TextStyle(fontSize: 20, color: Colors.black),
                      underline: Container(
                        height: 2,
                        color: Colors.grey,
                      ),
                      onChanged: (newValue) {
                        setState(() {
                          _selectedItem = newValue;
                        });
                      },
                      items: _dropDownMenu[_selectedKey]!
                          .map<DropdownMenuItem<String>>((String value) {
                        return DropdownMenuItem<String>(
                          value: value,
                          child: Text(value),
                        );
                      }).toList(),
                    ),
                  ],
                )
              : Container(),
        ],
2つ目のDropdownButtonを選択した状態で1つ目のDropdownButtonを変えようとするとエラー
これが一番てこずりました.
2つ目のDropdownButtonが選択された状態で,1つ目を変えに行くと2つ目のDropdownButtonにある _selectedItemに2つの値が入ろうとします.
そのため,「2つ以上の値を入れることはできない」といったエラーが出ます.
そこで,1つ目のDropdownButtonが選択された時点で一度 _selectedItemにnullを代入することで初期化します.
これによって,2つの値が入ることを防いでおります.
DropdownButton<String>(
                value: _selectedKey,
                icon: const Icon(Icons.arrow_drop_down),
                iconSize: 30,
                elevation: 16,
                style: const TextStyle(fontSize: 20, color: Colors.black),
                underline: Container(
                  height: 2,
                  color: Colors.grey,
                ),
                onChanged: (newValue) {
                  setState(() {
                    _selectedKey = newValue;
                    _selectedItem = null;
                  });
                },
                items: _dropDownMenu.keys
                    .map<DropdownMenuItem<String>>((String value) {
                  return DropdownMenuItem<String>(
                    value: value,
                    child: Text(value),
                  );
                }).toList(),
              ),
うまくいくとこういう感じになります.
勉強の記録をつけるアプリとかであれば,最初に自分でリスト作っちゃってドロップダウンメニューから選べる方が楽ですよね.
読んでいただきありがとうございました。