WireGuardを使ってみたら高速で良かったので、GWサーバーを構築して遊んでいました。ふと思い立ってSynologyルーターにパッケージで対応できないから調べていたら、非公式ですがインストールする方法がありました。試してみたら思いのほか簡単にできたので紹介しておきます。
はじめに
手順としては下記サイトの「Scripts collection for Synology routers」のwireguard_install.shを利用します。
スクリプトはオープンになっていますが、ここの手順では短縮URLを使ったroot権限でのスクリプト実行とコンパイル済のビルドを使うので利用に伴うリスクなどを検討の上、インストールを行って下さい。
対応機種
インストール
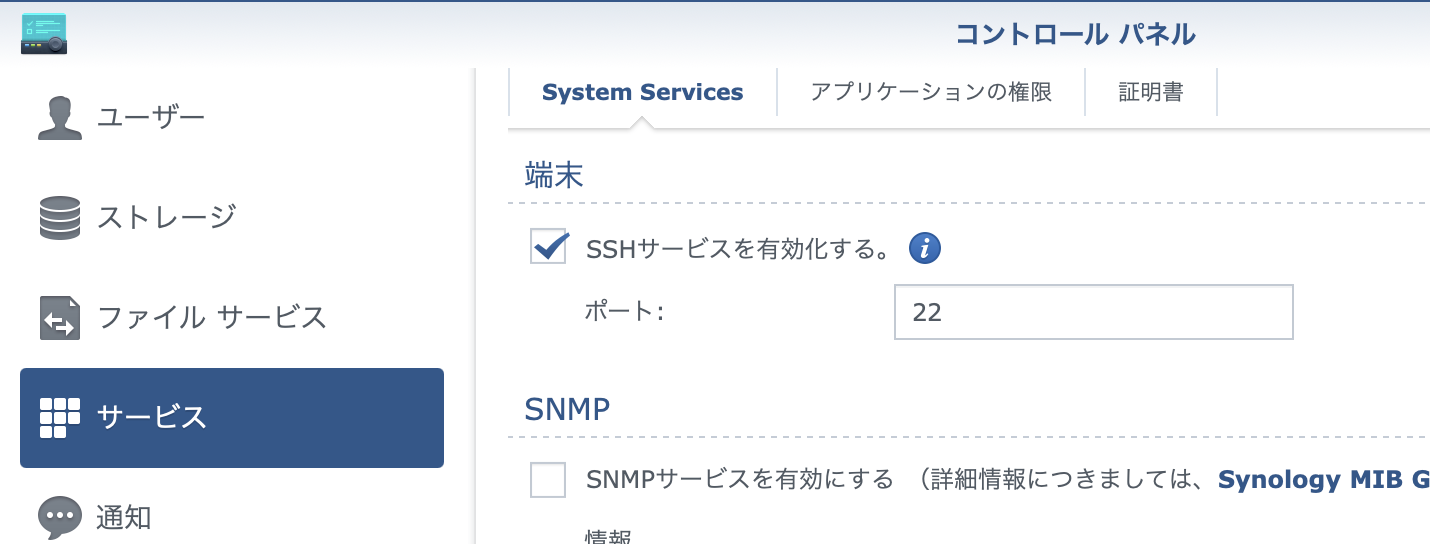
SSHの許可
まず、SynologyルータのSSHアクセスを許可します。
「コントロール」→「サービス」→「SSHサービスの有効化」を適用します。
ログイン
「root」でSSHログインします。パスワードはadminユーザーと同じです。
(ユーザー一覧では表示されませんが、内部的に生成されているようです)
インストールスクリプト実行
下記コマンドでwireguard_install.shスクリプトを実行します。
sh -c "$(wget -O- goo.gl/FuupYm)"
WireGuard server installer script for Synology routers v1.8 by Kendek

 1 - Install through the existing Entware environment
 2 - Install through the existing Ubuntu chroot environment
 3 - Install to the router's internal storage or repair missing wg utility
 4 - Update the wireguard.ko kernel module and the wg utility
 5 - Add an additional peer and show the client's QR code
 6 - Reinitialize the current configuration
 0 - Quit (default)

Select an option [0-6]: 3
3を選択します。
 Okay, all done!

 The wg utility is ready, just perform a logout from this SSH session, and
 login again.

 Please set the following firewall rules in the SRM:

  Protocol        Source IP        Source port   Dest. IP   Dest. port   Action
 ===============================================================================
    UDP              All               All         SRM        51820      Allow
  TCP/UDP   10.7.0.0/255.255.255.0     All         All         All       Allow

 Note that you may not be able to connect if the router is behind a
 carrier-grade NAT!

Press any key to show the client's QR code.
エンターを押すと設定用のQRコードが出てきます。iOSのWireGuardアプリなどで読み込みます。
設定等
SynologyルーターのFirewall
Synologyの「ネットワークセンター」→「セキュリティ」→「ファィアウォール」から最後の画面で出た設定情報を設定します。

最後に「保存」を押してFirewallルールを適用します。 ←忘れていた
WireGuardのPeerの追加等
sh -c "$(wget -O- goo.gl/FuupYm)"
WireGuard server installer script for Synology routers v1.8 by Kendek

 1 - Install through the existing Entware environment
 2 - Install through the existing Ubuntu chroot environment
 3 - Install to the router's internal storage or repair missing wg utility
 4 - Update the wireguard.ko kernel module and the wg utility
 5 - Add an additional peer and show the client's QR code
 6 - Reinitialize the current configuration
 0 - Quit (default)

Select an option [0-6]: 5
5を選択するとPeerを追加してQRコードが表示されます
手動設定
設定は以下のファイルになります。viで編集できます。
/volume1/WireGuard/etc/wireguard/wg0.conf
サーバーの公開鍵は普通にwgコマンドで表示できます。
/volume1/WireGuard/bin/wg
interface: wg0
  public key: xxxxxxxxxxxx
  private key: (hidden)
  listening port: 51820

peer: zzzzzzzz
 ....
通常のWireGuardと同じですので省略します。
最後に
使わないときは安全のため、SSHサービスを停止しておきましょう。
むにゃむにゃ
QRコードの設定を見るとちゃんとエンドポイントにSynologyのDDNSが設定されていました。グローバルIPが振られている環境であれば簡単に使う事ができます。WireGurdであればポート番号も自由に変更できますので、いろいろな環境で利用できるかと思います。
SynologyルーターはVPNも動きますしWiFiルーターとしても高速で良いです。WiFiクライアントの時間制限や、遠隔設定もできるので管理するのにも便利です。少し高めですが個人的にはオススメです。