6
5

Delete article

Deleted articles cannot be recovered.

Draft of this article would be also deleted.

Are you sure you want to delete this article?

More than 3 years have passed since last update.

Android StudioでエミュレータをIDE内に表示する

Last updated at Posted at 2021-02-28

概要

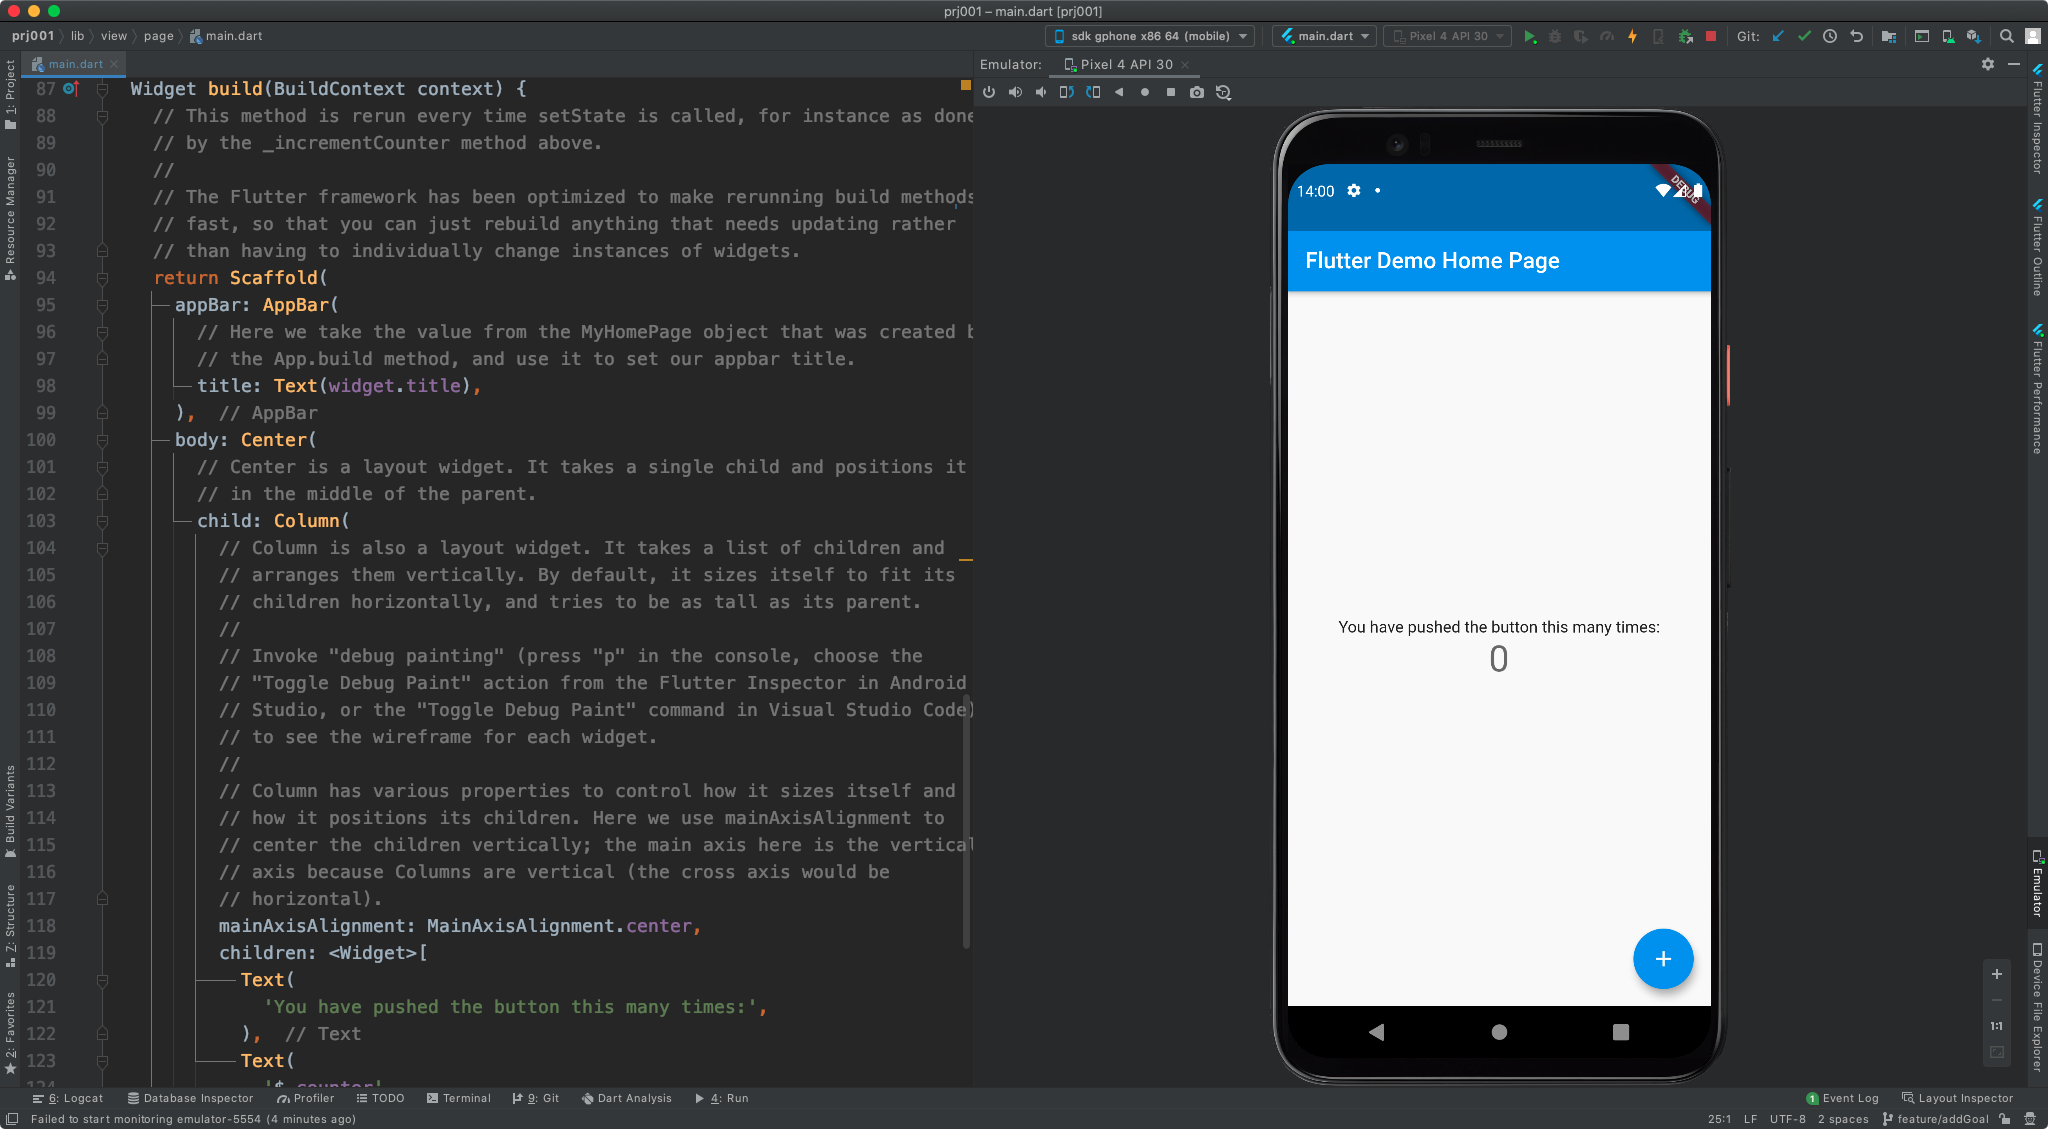
Android 4.1 より、Android Studio の IDE 内にエミュレータを表示できるようになりました。
IDEの上にエミュレーターが重なって手動で移動させたり、アクティブにしたりなどの手間もなくなるので、ディスプレイのサイズが広い場合は、こちらが使いやすいかもしれません。

また、デフォルトでは無効となっているので、設定を調整する必要があります。

スクリーンショット 2021-02-28 14.00.57.png

必要環境

  • Android Studio 4.1 以降
  • Android Emulator の バージョン 30.0.10 以降

やり方

以下OS毎のメニュー箇所を参照に [Launch in a tool window] にチェックを入れてください。
次回エミュレーター起動時からIDE内に表示されるようになります。

mac

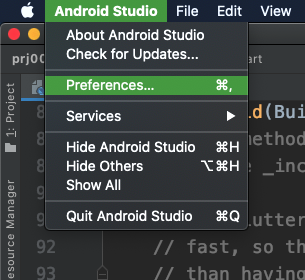
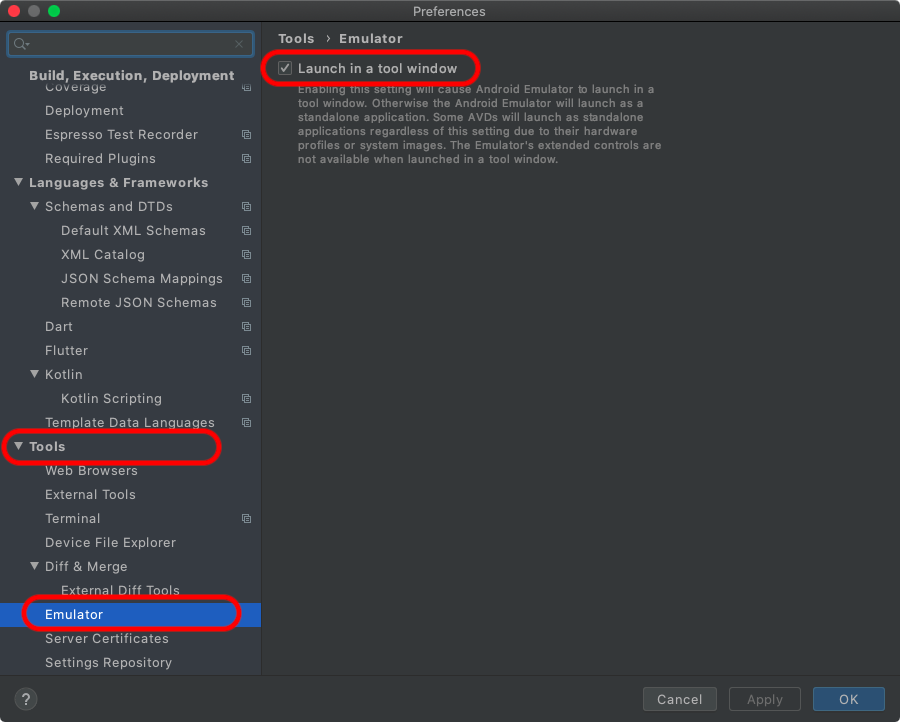
[Android Studio] > [Preferences] > [Tools] > [Emulator]
の項目を開いて、 [Launch in a tool window] にチェック

スクリーンショット 2021-02-28 13.58.39.png
スクリーンショット 2021-02-28 13.59.36.png

Windows

[File] > [Settings] > [Tools] > [Emulator]
の項目を開いて、 [Launch in a tool window] にチェック

エミュレーターのタブが自動的に表示されない場合

[View] > [Tool Windows] > [Emulator] で表示できます。
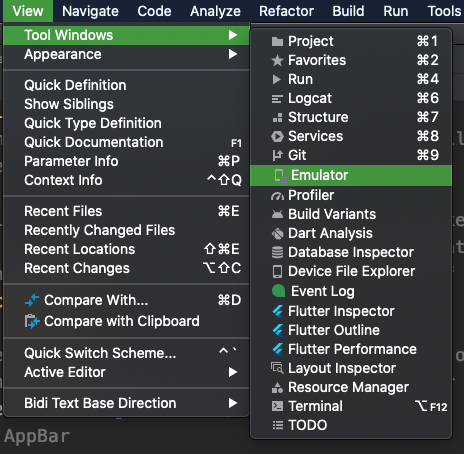
スクリーンショット 2021-02-28 14.09.45.png

公式情報

こちらの情報は公式ページより参照しました。
詳しくはこちらをご覧ください。

■ Android Studio で Android Emulator を直接実行する
6
5
0

Register as a new user and use Qiita more conveniently

  1. You get articles that match your needs
  2. You can efficiently read back useful information
  3. You can use dark theme
What you can do with signing up
6
5

Delete article

Deleted articles cannot be recovered.

Draft of this article would be also deleted.

Are you sure you want to delete this article?