概要
__TwitterAPI__を利用していろいろ遊んでみる!
ドキュメントはコチラ
以下の初心者向け記事も宜しければご覧ください♪
【随時追記】今夜寿命を迎えても良いようにPythonの基礎学習内容をメモしとく。
手順
Twtterアプリケーションの作成
まずは__TwtterAPI__を利用するために、対象のアカウントにて、__アプリケーション登録__をして、
- Consumer Key
- Consumer Secret
- Access Token
- Access Token Secret
を__発行する必要__があります。
コチラにアクセスし、__対象のアカウント__でログインしましょう。
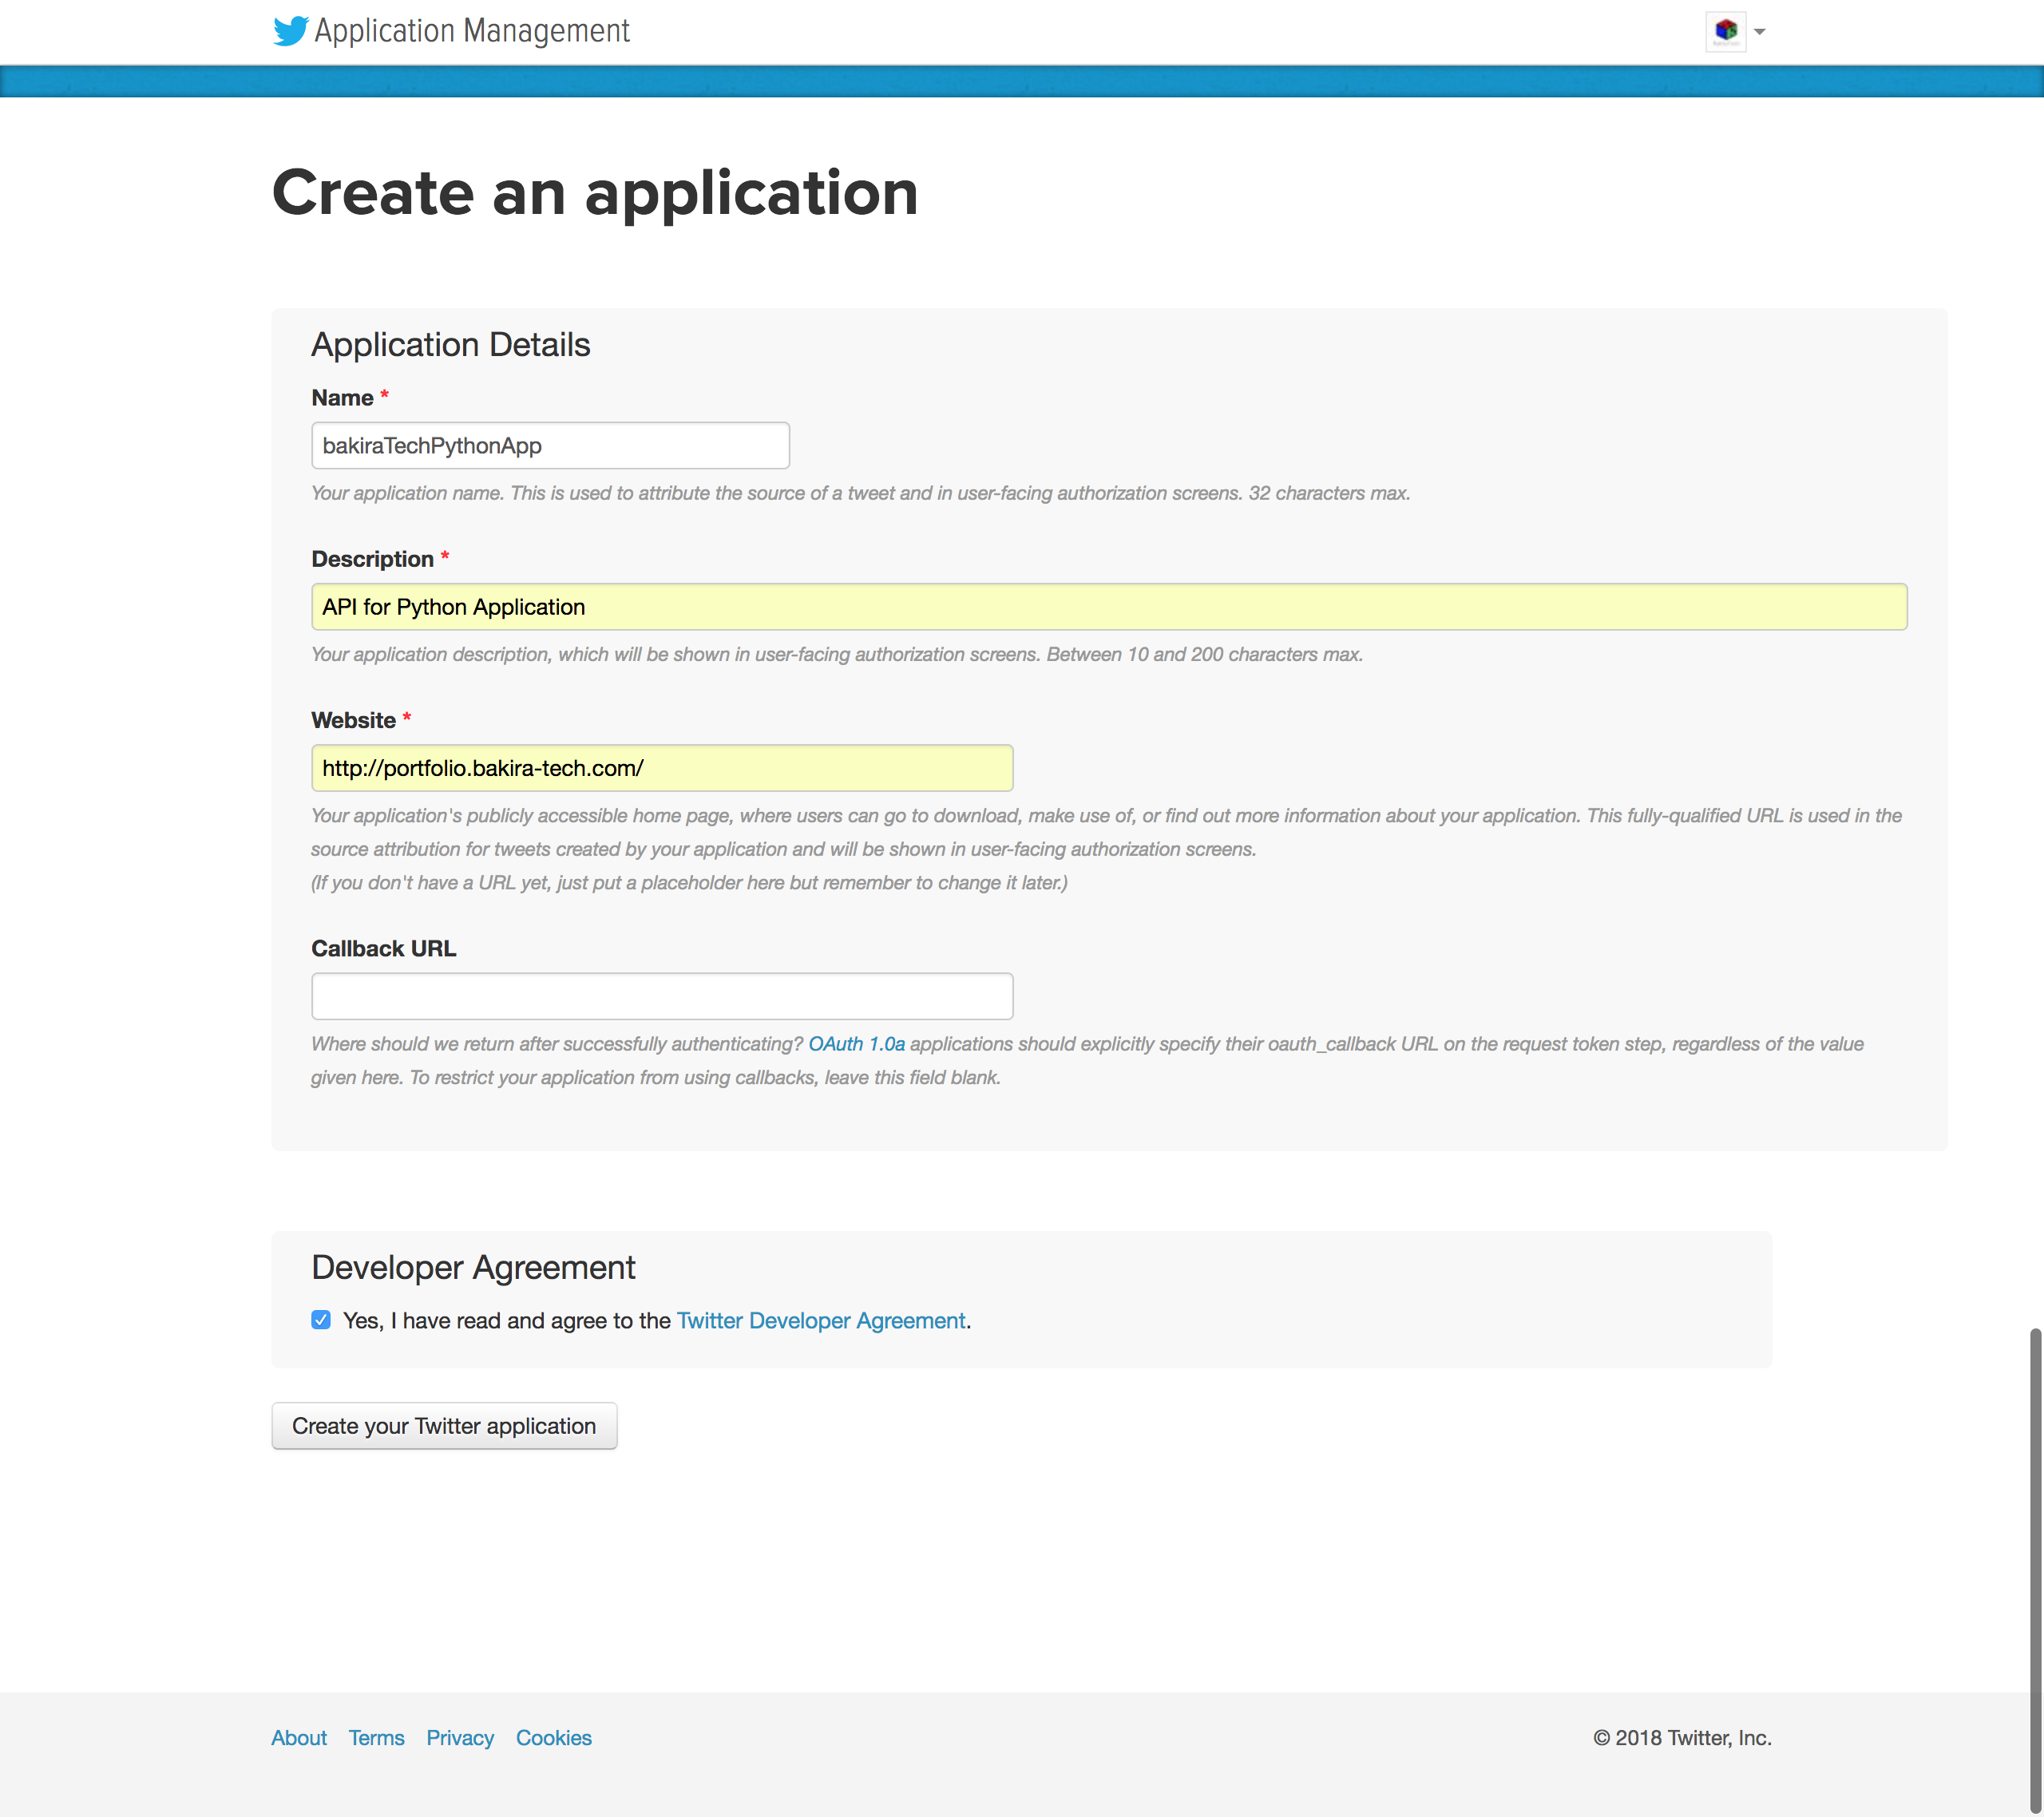
ログインすると、__Create New Appボタン__が表示されるので__クリック__します。

__必須情報__を適当に入力後に__同意__し、__Create your Twitter applicationボタン__を__クリック__します。
Consumer情報の確認
__Consumer Key__と__Consumer Secret__は以下の画面から確認することが可能です。

アクセス情報の生成及び確認
初期では、Access Token__と__Access Token Secret__は発行されていない__ので、同ページ下部の__Create my access tokenボタン__を__クリック__して、生成する必要があります。

生成されると__以下__のように確認出来るようになります。

ライブラリのインストール
requestsとrequests-oauthlib
requests:
Pythonで__Rest API操作__を__簡単__に行うためのライブラリ。
直感的で分かりやすいです!
requests-oauthlib:
Pythonで__OAuth認証__を__簡単__に行うためのライブラリ。
直感的で分かりやすいです!
__以下のコマンド__でまとめてインストールします。
pip install requests requests-oauthlib
ファイルの準備
階層
__ファイル構成__は以下のようになっています
.
├── config.py #認証情報を管理
├── xxx.py #各スクリプト
└── ...
CONSUMER_KEY = "**************"
CONSUMER_SECRET = "**************"
ACCESS_TOKEN = "**************"
ACCESS_TOKEN_SECRET = "**************"
試しにタイムラインを取得
まずは、pythonスクリプトから正常に__API通信__が出来ているかの確認を含めて__タイムラインを取得__してみましょう。
import json, config #標準のjsonモジュールとconfig.pyの読み込み
from requests_oauthlib import OAuth1Session #OAuthのライブラリの読み込み

CK = config.CONSUMER_KEY
CS = config.CONSUMER_SECRET
AT = config.ACCESS_TOKEN
ATS = config.ACCESS_TOKEN_SECRET
twitter = OAuth1Session(CK, CS, AT, ATS) #認証処理

url = "https://api.twitter.com/1.1/statuses/user_timeline.json" #タイムライン取得エンドポイント

params ={'count' : 5} #取得数
res = twitter.get(url, params = params)

if res.status_code == 200: #正常通信出来た場合
    timelines = json.loads(res.text) #レスポンスからタイムラインリストを取得
    for line in timelines: #タイムラインリストをループ処理
        print(line['user']['name']+'::'+line['text'])
        print(line['created_at'])
        print('*******************************************')
else: #正常通信出来なかった場合
    print("Failed: %d" % res.status_code)
これを実行すると認証情報が正しければ、タイムラインの情報が取得されます。
python getTimelines.py
こんな感じ

しゅごい(小並感)
ツイートをしてみよう!!
以下のファイルを作成します。
import json, config #標準のjsonモジュールとconfig.pyの読み込み
from requests_oauthlib import OAuth1Session #OAuthのライブラリの読み込み

CK = config.CONSUMER_KEY
CS = config.CONSUMER_SECRET
AT = config.ACCESS_TOKEN
ATS = config.ACCESS_TOKEN_SECRET
twitter = OAuth1Session(CK, CS, AT, ATS) #認証処理

url = "https://api.twitter.com/1.1/statuses/update.json" #ツイートポストエンドポイント

print("内容を入力してください。")
tweet = input('>> ') #キーボード入力の取得
print('*******************************************')

params = {"status" : tweet}

res = twitter.post(url, params = params) #post送信

if res.status_code == 200: #正常投稿出来た場合
    print("Success.")
else: #正常投稿出来なかった場合
    print("Failed. : %d"% res.status_code)
実行!!
python postTweet.py
こんな感じ


しゅごい(小並感)
注意
__TwitterAPI__は、ほぼすべての操作__をAPI操作出来ますが、ゆえに各エンドポイントごとにリクエスト制限__を設けています。
この値は__レスポンスに含まれる__ので取得することが可能です。
import config
from requests_oauthlib import OAuth1Session
import datetime, time

CK = config.CONSUMER_KEY
CS = config.CONSUMER_SECRET
AT = config.ACCESS_TOKEN
ATS = config.ACCESS_TOKEN_SECRET
twitter = OAuth1Session(CK, CS, AT, ATS) #認証処理

url = "https://api.twitter.com/1.1/statuses/user_timeline.json" #タイムライン取得エンドポイント

res = twitter.get(url)

limit = res.headers['x-rate-limit-remaining'] #リクエスト可能残数の取得
reset = res.headers['x-rate-limit-reset'] #リクエスト叶残数リセットまでの時間(UTC)
sec = int(res.headers['X-Rate-Limit-Reset']) - time.mktime(datetime.datetime.now().timetuple()) #UTCを秒数に変換

print ("limit: " + limit)
print ("reset: " +  reset)
print ('reset sec:  %s' % sec)
こんな感じ

なるほど。
ちなみに__エンドポイントによって上限やリセット時間は異なる__らしいので気をつけましょう!
上限を超えてしまうと、__429エラー__が返るようになってしまいます。
もちろん、フォローを解除__するためのfriendships/destroy__とかいう、__地獄__のようなエンドポイントもあるので色々楽しそうですね。
叩き尽くしてやりましょう!!!
