はい、前回の続き。
前回で下準備できてるからあとは差を計算して
見栄え良く並べたりとかしてねってところ。
方針としては
前回作ったテキストファイルを読み込む
元の絵をある程度の数で平均色取得処理した色情報のデータ取得
テキストファイル一行ずつループ
元画像を処理したデータをx yでループで回す
x yの色と テキストファイルの一行ごとのいろごとの差を計算。
現在設定されているものより差がちかければその差をセットしつつ画像を差し替える。
これでやれば徐々に元の絵に近づいてくような演出も見えて楽しい!はず
ではやるぞ
・・・・約一時間後・・・
とりあえずできました〜。今回は元のイラストをあゆめぐにします!

20*20で画像100枚ほどでやった感じ。右の画像が完成図。
見ていて楽しいように無駄にyeild入れてます。
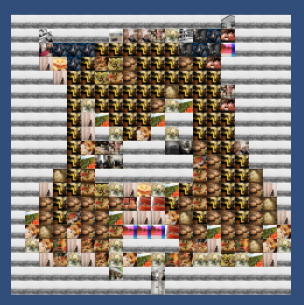
50x50だとこれくらいになります。

こちら完成時
おおだいぶいい感じ。画像の種類とかもう少し増やせばいい感じになるのかな〜。ほっぺとか口とか。もうちょっと画像の色の種類を豊富にしないとね・・・。

ソースはこの1ファイルのみ
using UnityEngine;
using UnityEngine.UI;
using System.Collections;
using System.Collections.Generic;
using System.IO;
using System;

public class PhotoMozaiku2 : MonoBehaviour {

	private string pathImgList;

	public RawImage baseImg;
	public RawImage resultImg;
	public Texture2D baseTex;

	public Transform imgParentTran;
	public GameObject imgPrefab;

	private int cellCount = 20;	// サイズ

	void Start () {
		StartCoroutine(PhotoMozikeAnim());
	}

	private IEnumerator PhotoMozikeAnim()
	{
		pathImgList = Application.dataPath + "/Resources/Texture";

		// マス目の画像作成
		for(int y = 0; y < cellCount; y++)
		{
			for(int x = 0; x < cellCount; x++)
			{
				GameObject imgObj = Instantiate(imgPrefab) as GameObject;
				imgObj.transform.SetParent(imgParentTran);
				imgObj.transform.localScale = Vector3.one;
				imgObj.transform.localPosition = new Vector3(x * 50, y * 50, 0);
				imgObj.name = "img" + x +":" + y;
			}
		}

		// 前回作ったテキストファイルを読み込む
		string result = System.IO.File.ReadAllText(Application.dataPath + "/Resources/imgData.txt");
		string[] lines = result.Split("\n"[0]);

		// 元の絵をある程度の数で平均色取得処理した色情報のデータ取得
		List<Color> baseImgColorList = GetAvarageImg();
		List<float> diffList = new List<float>();		// 画像との差のリスト


		// テキストファイル一行ずつループ
		for (int i = 0; i < lines.Length; i++)
		{
			if(string.IsNullOrEmpty(lines[i])) break;
			var tmp = lines[i].Split(":"[0]);
			string imgName = tmp[0];
			tmp = tmp[1].Split(","[0]);
			Color imgColor = new Color(float.Parse(tmp[0]), float.Parse(tmp[1]), float.Parse(tmp[2]), 1);

			// 元画像を処理したデータをx yでループで回す
			for(int y = 0; y < cellCount; y++)
			{
				for(int x = 0; x < cellCount; x++)
				{
					int cellNo = x + cellCount * y;
					Color baseImgCellColor = baseImgColorList[cellNo];

					// x yの色と テキストファイルの一行ごとのいろごとの差を計算。
					float diff = Mathf.Pow(baseImgCellColor.r - imgColor.r, 2) + Mathf.Pow(baseImgCellColor.g - imgColor.g, 2) + Mathf.Pow(baseImgCellColor.b - imgColor.b, 2);
					// 初回は必ず登録
					if(diffList.Count <= cellNo)
					{
						diffList.Add(diff);
						UpdatePicture(x, y, imgName);
					}
					else
					{
						// 差が既存よりも小さい場合のみ画像更新
						if(Mathf.Abs(diffList[cellNo]) >  Mathf.Abs(diff))
						{
							diffList[cellNo] = diff;
							UpdatePicture(x, y, imgName);
						}
					}
				}
			}
			yield return new WaitForSeconds(0.25f);
		}
		Debug.LogWarning("完了");
	}

	// 指定されたますめのの画像を更新する
	private void UpdatePicture(int x, int y, string path)
	{
		RawImage rawImg = imgParentTran.FindChild("img" + x +":" + y).GetComponent<RawImage>();
		var s = File.ReadAllBytes(pathImgList + "/" + path);
		Texture2D tex = new Texture2D(2, 2);
		tex.LoadImage(s);
		rawImg.texture = tex;
	}

	private List<Color> GetAvarageImg()
	{
		List<Color> colorList = new List<Color>();
		int w = baseImg.texture.width;
		int h = baseImg.texture.height;
		int cellSize = w / cellCount;

		Texture2D avarageTex = new Texture2D(cellCount, cellCount, TextureFormat.RGBA32, false);
		int xIndex = 0;
		int yIndex = 0;
		for(int y = 0; y < h; y += cellSize)
		{
			xIndex = 0;
			for(int x = 0; x < w; x += cellSize)
			{
				Color c = GetAvarageColor(baseTex, x, y, cellSize, cellSize);
				colorList.Add(c);
				avarageTex.SetPixel(xIndex, yIndex, c);
				xIndex++;
			}
			yIndex++;
		}
		avarageTex.Apply();
		resultImg.texture = avarageTex;
		return colorList;
	}


	// 1ます分の平均色を計算
	private Color GetAvarageColor(Texture2D tex, int startX, int startY, int cellWidth, int cellHeight)
	{
		float rrr = 0;
		float ggg = 0;
		float bbb = 0;

		for(int y = startY; y < startY + cellHeight; y++)
		{
			for(int x = startX; x < startX + cellWidth; x++)
			{
				Color c = tex.GetPixel(x,y);
				rrr += c.r;
				ggg += c.g;
				bbb += c.b;
			}
		}

		rrr /= (float)cellWidth * (float)cellHeight;
		ggg /= (float)cellWidth * (float)cellHeight;
		bbb /= (float)cellWidth * (float)cellHeight;

		return new Color(rrr, ggg, bbb, 1);
	}

}
はい、今回はここまで。