概要
カメラロールのようなシンプルなイメージピッカーを作る方法について説明します。
CollectionViewを用意し、PHFetchResultで取得したPHAssetから画像を取得し、表示します。
また、iOS10より導入されたCollectionViewのprefetchを利用します。
ImagePickerViewControllerの説明
クラス定義
各種定数の定義と変数の初期化をします。kColumnCntやkCellSpacingの値を変えることで、CollectionViewの見た目を変更できます。
targetSizeはCollectionViewCellの大きさであり、後から読み込む画像サイズの大きさにもなります。(initView内で計算するため、CGSize.zeroを仮に代入する。)
class ImagePickerViewController: UIViewController {
    @IBOutlet fileprivate weak var collectionView: UICollectionView!

    fileprivate let kCellReuseIdentifier = "Cell"
    fileprivate let kColumnCnt: Int = 3
    fileprivate let kCellSpacing: CGFloat = 2
    fileprivate var fetchResult: PHFetchResult<PHAsset>!
    fileprivate var imageManager = PHCachingImageManager()
    fileprivate var targetSize = CGSize.zero

    override func viewDidLoad() {
        super.viewDidLoad()

        initView()
        loadPhotos()
    }
}
ビューの初期化と写真の読み込み
カラム数とマージンサイズ、CollectionViewのwidthよりtargetSizeを決定します。
また、loadPhotos内では、PHFetchOptionsにより写真を作成日時の降順に読み込みます。
なお、CollectionViewのdelegateとdataSourceへの紐づけは、Interface Builder上で行っています。
fileprivate extension ImagePickerViewController {
    fileprivate func initView() {
        let imgWidth = (collectionView.frame.width - (kCellSpacing * (CGFloat(kColumnCnt) - 1))) / CGFloat(kColumnCnt)
        targetSize = CGSize(width: imgWidth, height: imgWidth)

        let layout = UICollectionViewFlowLayout()
        layout.itemSize = targetSize
        layout.minimumInteritemSpacing = kCellSpacing
        layout.minimumLineSpacing = kCellSpacing
        collectionView.collectionViewLayout = layout

        collectionView.register(UICollectionViewCell.self, forCellWithReuseIdentifier: kCellReuseIdentifier)
    }

    fileprivate func loadPhotos() {
        let options = PHFetchOptions()
        options.sortDescriptors = [
            NSSortDescriptor(key: "creationDate", ascending: false)
        ]
        fetchResult = PHAsset.fetchAssets(with: .image, options: options)
    }
}
UICollectionViewDataSourceの実装
UICollectionViewDataSourceを実装します。fetchResult.object(at: indexPath.item)により、PhotoAssetオブジェクトを取得し、その後requestImageによりUIImageを取得します。
extension ImagePickerViewController: UICollectionViewDataSource {
    func collectionView(_ collectionView: UICollectionView, cellForItemAt indexPath: IndexPath) -> UICollectionViewCell {
        let cell = collectionView.dequeueReusableCell(withReuseIdentifier: kCellReuseIdentifier, for: indexPath)
        let photoAsset = fetchResult.object(at: indexPath.item)
        imageManager.requestImage(for: photoAsset, targetSize: targetSize, contentMode: .aspectFill, options: nil) { (image, info) -> Void in
            let imageView = UIImageView(image: image)
            imageView.frame.size = cell.frame.size
            imageView.contentMode = .scaleAspectFill
            imageView.clipsToBounds = true
            cell.contentView.addSubview(imageView)
        }
        return cell
    }

    func collectionView(_ collectionView: UICollectionView, numberOfItemsInSection section: Int) -> Int {
        return fetchResult.count
    }
}
UICollectionViewDelegateの実装
UICollectionViewDelegateを実装し、Cellのサイズやセクション数を決定します。
また、didSelectItemAtで写真選択時の処理を記述します。
extension ImagePickerViewController: UICollectionViewDelegate {
    func numberOfSections(in collectionView: UICollectionView) -> Int {
        return 1
    }

    func collectionView(_ collectionView: UICollectionView, layout: UICollectionViewLayout, sizeForItemAtIndexPath indexPath: IndexPath) -> CGSize {
        return targetSize
    }

    func collectionView(_ collectionView: UICollectionView, didSelectItemAt indexPath: IndexPath) {
        let photoAsset = fetchResult.object(at: indexPath.item)
        print(photoAsset.description)
    }
}
UICollectionViewDataSourcePrefetchingの実装
iOS10より追加されたUICollectionViewDataSourcePrefetchingを実装します。
prefetchItemsAtで写真をキャッシュし、cancelPrefetchingForItemsAtでキャッシュを開放します。
extension ImagePickerViewController: UICollectionViewDataSourcePrefetching {
    func collectionView(_ collectionView: UICollectionView, prefetchItemsAt indexPaths: [IndexPath]) {
        DispatchQueue.main.async {
            self.imageManager.startCachingImages(for: indexPaths.map{ self.fetchResult.object(at: $0.item) }, targetSize: self.targetSize, contentMode: .aspectFill, options: nil)
        }
    }

    func collectionView(_ collectionView: UICollectionView, cancelPrefetchingForItemsAt indexPaths: [IndexPath]) {
        DispatchQueue.main.async {
            self.imageManager.stopCachingImages(for: indexPaths.map{ self.fetchResult.object(at: $0.item) }, targetSize: self.targetSize, contentMode: .aspectFill, options: nil)
        }
    }
}
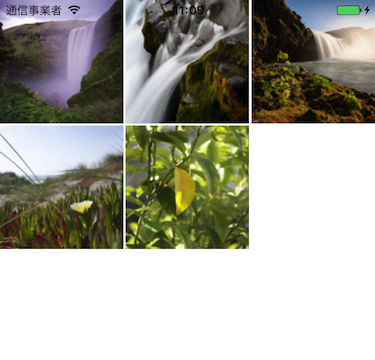
サンプル
Image-Picker@githubに動作するプロジェクトがあります。
動作確認
このTipsは、「スマホの写真素材が売買できるサイトSnapmart」を開発する中で生まれました。
実際の動作をSnapmartアプリ(iOS)から確認できますので、是非ダウンロードしてみてください!