目次
- 赤外線リモコンを自作する - その1データ解析編
- 赤外線リモコンを自作する - その2データ送信編
- 赤外線リモコンを自作する - その3温度/湿度センサー編
- 赤外線リモコンを自作する - その4サーバサイド編
- 赤外線リモコンを自作する - その5クライアント編
赤外線リモコンを自作する - その3温度/湿度センサー編
今回は、前回取得した赤外線データを赤外線LEDより送信できるようにする。
用意するもの
| 機器 | 型番 | 参考価格 |
|---|---|---|
| Arduino互換機 | ESP32-DevKitC-32D | 1,480円 |
| 温湿度センサ | AHT25 | 350円 |
回路
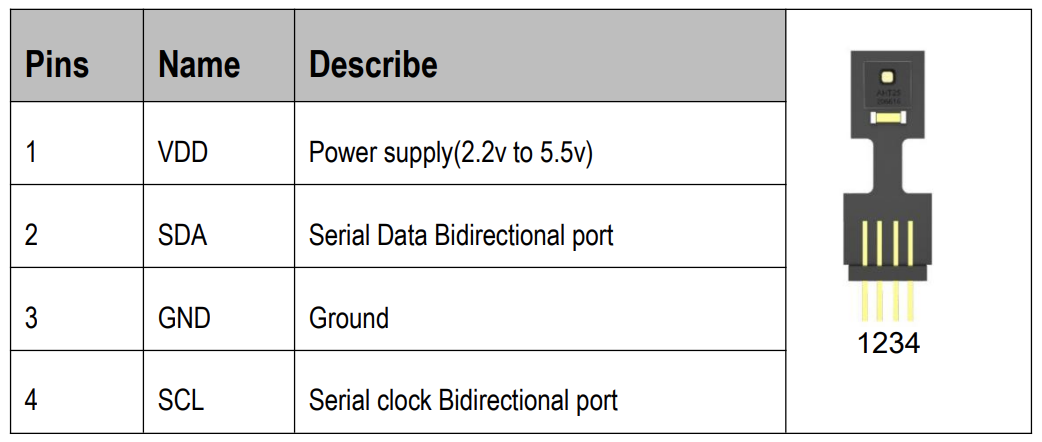
使用する温湿度センサAHT25は、I2C通信によりデータの取得ができます。
向かって左から、VDD、SDA(データ)、GND、SCL(クロック)なので、
VDD→3.3V
SDA→14pin
GND→GND
SCL→13pin
と繋ぎます。

必要ライブラリ
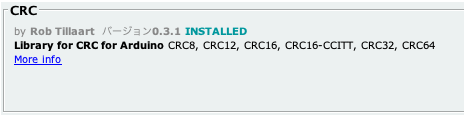
CRCをインストールする必要があります。
スケッチ > ライブラリをインクルード > ライブラリを管理よりインストールしてください。
いくつかヒットすると思うのですが、説明文にLibrary for CRC for Arduino CRC8, CRC12...と書いているものなので注意してください。
温湿度取得プログラム
取得プログラムは、 developersIOのESP32をAWSに接続してみた(1) ハードウェアの製作記事に書かれているものを参照してください。
念の為、こちらにもほぼ同様のものを書いておきます。
// see also) https://dev.classmethod.jp/articles/connect-esp32-to-iot-core-1-make-hardware/
#include <Arduino.h>
#include <Wire.h>
#include <CRC8.h>

const int PIN_I2C_SDA = 14;
const int PIN_I2C_SCL = 13;
const byte AHT25_ADDR = 0x38;
const double ERROR_VALUE = 999.0;

CRC8 crc;
double temperature;
double humidity;

void initAht25(void) {
  delay(100);
  Wire.beginTransmission(AHT25_ADDR);
  Wire.write(0x71);
  Wire.endTransmission();
  delay(10);

  crc.setPolynome(0x31);
  crc.setStartXOR(0xFF);
}

void updateAht25(void) {
  byte buf[7];
  uint32_t humidity_raw;
  uint32_t temperature_raw;
  byte state;

  Wire.beginTransmission(AHT25_ADDR);
  Wire.write(0xAC);
  Wire.write(0x33);
  Wire.write(0x00);
  Wire.endTransmission();
  do {
    delay(80);
    Wire.requestFrom(AHT25_ADDR, 7);
    if (Wire.available() >= 7) {
      for(int i=0; i<7; i++) {
        buf[i] = Wire.read();
      }
    }
  } while((buf[0] & 0x80) != 0);

  crc.restart();
  crc.add(buf, 6);

  if (buf[6] == crc.getCRC()) {
    state = buf[0];
    humidity_raw = ((uint32_t)buf[1] << 12)|((uint32_t)buf[2] << 4)|(((uint32_t)buf[3] >> 4) & 0x0F);
    temperature_raw = (((uint32_t)buf[3] & 0x0F) << 16)|((uint32_t)buf[4] << 8)|((uint32_t)buf[5]);

    humidity = humidity_raw / 1048576.0 * 100;
    temperature = temperature_raw / 1048576.0 * 200 - 50;
  } else {
    // error
    humidity = ERROR_VALUE;
    temperature = ERROR_VALUE;
  }
}

void printSensorValues() {
  if (temperature == ERROR_VALUE || humidity == ERROR_VALUE) return;

  Serial.print("temperature: ");
  Serial.println(temperature);
  Serial.print("humidity: ");
  Serial.println(humidity);
}

void setup(void) {
  Serial.begin(115200);
  Wire.begin(PIN_I2C_SDA, PIN_I2C_SCL);
  initAht25();
}

void loop() {
  updateAht25();
  printSensorValues();

  delay(3000);
}
実行結果
ボーレート115200にてシリアルモニタを開き、下記のように温湿度が表示されたら成功です。
temperature: 25.82
humidity: 62.12
temperature: 25.89
humidity: 62.43