TWitterOAuthでログイン機能実装が思ったより苦戦したので、エラーになったポイントを伝えていきます。
AWS上でやっていきます。
AWSでComposerをインストール
①下記手順を実施してPHPを入れる。(実施済みの方は飛ばす。)
AWS EC2 AmazonLinux2 PHPをインストールする
②公式のインストール方法に記載されているコマンドを実行してcomposer本体を取得する。
コマンドは変更になる可能性があるので最新のコマンドは公式ページをご確認してください。
php -r "copy('https://getcomposer.org/installer', 'composer-setup.php');"
php -r "if (hash_file('sha384', 'composer-setup.php') === '795f976fe0ebd8b75f26a6dd68f78fd3453ce79f32ecb33e7fd087d39bfeb978342fb73ac986cd4f54edd0dc902601dc') { echo 'Installer verified'; } else { echo 'Installer corrupt'; unlink('composer-setup.php'); } echo PHP_EOL;"
php composer-setup.php
php -r "unlink('composer-setup.php');"
③下記コマンドを実行してcomposerの実行ファイルを移動する。
$ sudo mv composer.phar /usr/local/bin/composer
④下記コマンドを実行してcomposerの実行ファイルを実行する。
$ php /usr/local/bin/composer
⑤下記コマンドを実行してパスを通す。(ユーザ名にはssh接続しているEC2インスタンスのユーザ名を入力する。Apacheのディレクトリルートで実行することを考えフルパスでパスを通す。)
$ echo "export PATH=/home/ec2-user/.config/composer/vendor/bin:$PATH" >> ~/.bash_profile
$ source ~/.bash_profile
Twitteroauthをインストール
⑥公式Twitteroauthサイトで書いてある通りに実行する。
composer require abraham/twitteroauth
⑦vendorのフォルダの中に実行ファイルのautoload.phpがある為、htmlフォルダに移動。
mv vendor /var/www/html/
Twitter OAuth認証のPHP実装
⑧動作環境
PHP Version 5.3以上であること(phpinfo();関数で確認)
cURL support enabledであること(phpinfo();関数で確認)
デフォルトで多分、大丈夫です。
⑨Callback URLは忘れずに
Twitterアプリケーションの「Settings」→「Application Details」→「Callback URLs」には、「callback.php」のURLを指定します。以下のサンプルコードでは、「'http://' . $_SERVER['HTTP_HOST'] . 'callback.php」が「Callback URLs」に指定されています。
⑩config.php
<?php
//アプリケーションの Consumer Key と Consumer Secret
$sTwitterConsumerKey = '***********************************'; //Consumer Key (API Key)
$sTwitterConsumerSecret = '***********************************'; //Consumer Secret (API Secret)

//アプリケーションのコールバックURL
$sTwitterCallBackUri = 'http://' . $_SERVER['HTTP_HOST'] . '/callback.php'; //コールバックURL

//変数初期化
$objTwitterConection = NULL; //TwitterOAuthクラスのインスタンス化
$aTwitterRequestToken = array(); //リクエストトークン
$sTwitterRequestUrl = ''; //認証用URL
$objTwitterAccessToken = NULL; //アクセストークン
$objTwUserInfo = NULL; //ユーザー情報
?>
⑪login.php
<?php
##############################################
### 初期設定
//エラー詳細
ini_set('display_errors', 1);

//セッションスタート
session_start();

//文字セット
header("Content-type: text/html; charset=utf-8");

//インクルード
require_once(__DIR__ . '/config.php');
require_once(__DIR__ . '/vendor/autoload.php');

//インポート
use Abraham\TwitterOAuth\TwitterOAuth;

##############################################
### twitter oauth request token 取得

//TwitterOAuthクラスをインスタンス化
$objTwitterConection = new TwitterOAuth($sTwitterConsumerKey, $sTwitterConsumerSecret);

//oauthリクエストトークンの取得
$aTwitterRequestToken = $objTwitterConection->oauth('oauth/request_token', array('oauth_callback' => $sTwitterCallBackUri));

//oauthリクエストトークンをセッションに格納
$_SESSION['twOauthToken'] = $aTwitterRequestToken['oauth_token'];
$_SESSION['twOauthTokenSecret'] = $aTwitterRequestToken['oauth_token_secret'];

##############################################
### twitter 認証へ

//Twitter認証URLの作成
$sTwitterRequestUrl = $objTwitterConection->url('oauth/authenticate', array('oauth_token' => $_SESSION['twOauthToken']));

//Twitter認証画面へリダイレクト
header('location: '.$sTwitterRequestUrl);
?>
⑫logout.php
<?php
##############################################
### 初期設定

//セッションスタート
session_start();

//文字セット
header("Content-type: text/html; charset=utf-8");

//セッション変数を全て解除
$_SESSION = array();
$_COOKIE = array();

//クッキー削除
setcookie("PHPSESSID", '', time() - 1800, '/');

//セッションを破棄する
session_destroy();
?>
<html lang="ja">
<head>
<meta charset="UTF-8">
<meta name="description" content="">
<meta name="viewport" content="width=device-width, initial-scale=1.0">
<title>タイトル</title>
<meta http-equiv="Content-Style-Type" content="text/css">
</head>

<h2>Twitter アカウント ログアウト</h2>

<?php
echo "ログアウトしました。";
echo "<a href='https://wepicks.net/code-example/twitter-restapi/login/login.php'>ログインへ</a>";
?>

</body>
</html>
⑬member.php
<?php
##############################################
### 初期設定

//セッションスタート
session_start();

//文字セット
header("Content-type: text/html; charset=utf-8");

//インクルード
require_once(__DIR__ . '/config.php');
require_once(__DIR__ . '/vendor/autoload.php');

//インポート
use Abraham\TwitterOAuth\TwitterOAuth;

##############################################
### アクセストークン確認
if(empty($_SESSION['twAccessToken'])){
 echo 'error access token!!';
 exit;
}

##############################################
### ユーザー情報の取得

//TwitterOAuthクラスをインスタンス化
$objTwitterConection = new TwitterOAuth
 (
 $sTwitterConsumerKey,
 $sTwitterConsumerSecret,
 $_SESSION['twAccessToken']['oauth_token'],
 $_SESSION['twAccessToken']['oauth_token_secret']
 );

//ユーザー情報を取得
$objTwUserInfo = $objTwitterConection->get("account/verify_credentials");
?>
<html lang="ja">
<head>
<meta charset="UTF-8">
<meta name="description" content="">
<meta name="viewport" content="width=device-width, initial-scale=1.0">
<title>タイトル</title>
<meta http-equiv="Content-Style-Type" content="text/css">
</head>

<h2>Twitter アカウント ログイン完了!</h2>

<?php echo $_SERVER['REQUEST_URI']; ?><br/>
<a href="logout.php">ログアウト</a>

<pre>
<?php var_dump($_SESSION['twAccessToken']); ?>
</pre>

<pre>
<?php var_dump($objTwUserInfo); ?>
</pre>

</body>
</html>
⑭callback.php
<?php
##############################################
### 初期設定

//セッションスタート
session_start();

//文字セット
header("Content-type: text/html; charset=utf-8");

//インクルード
require_once(__DIR__ . '/config.php');
require_once(__DIR__ . '/vendor/autoload.php');

//インポート
use Abraham\TwitterOAuth\TwitterOAuth;

##############################################
### oauthトークン確認
if(empty($_SESSION['twOauthToken']) || empty($_SESSION['twOauthTokenSecret']) || empty($_REQUEST['oauth_token']) || empty($_REQUEST['oauth_verifier'])){
 echo 'error token!!';
 exit;
}
if($_SESSION['twOauthToken'] !== $_REQUEST['oauth_token']) {
 echo 'error token incorrect!!';
 exit;
}

##############################################
### アクセストークン作成

//取得したoauthトークンでTwitterOAuthクラスをインスタンス化
$objTwitterConection = new TwitterOAuth
 (
 $sTwitterConsumerKey,
 $sTwitterConsumerSecret,
 $_SESSION['twOauthToken'],
 $_SESSION['twOauthTokenSecret']
 );

//アクセストークンの取得
$_SESSION['twAccessToken'] = $objTwitterConection->oauth("oauth/access_token", array("oauth_verifier" => $_REQUEST['oauth_verifier']));

//メンバーページへリダイレクト
header('location: member.php');
⑮確認
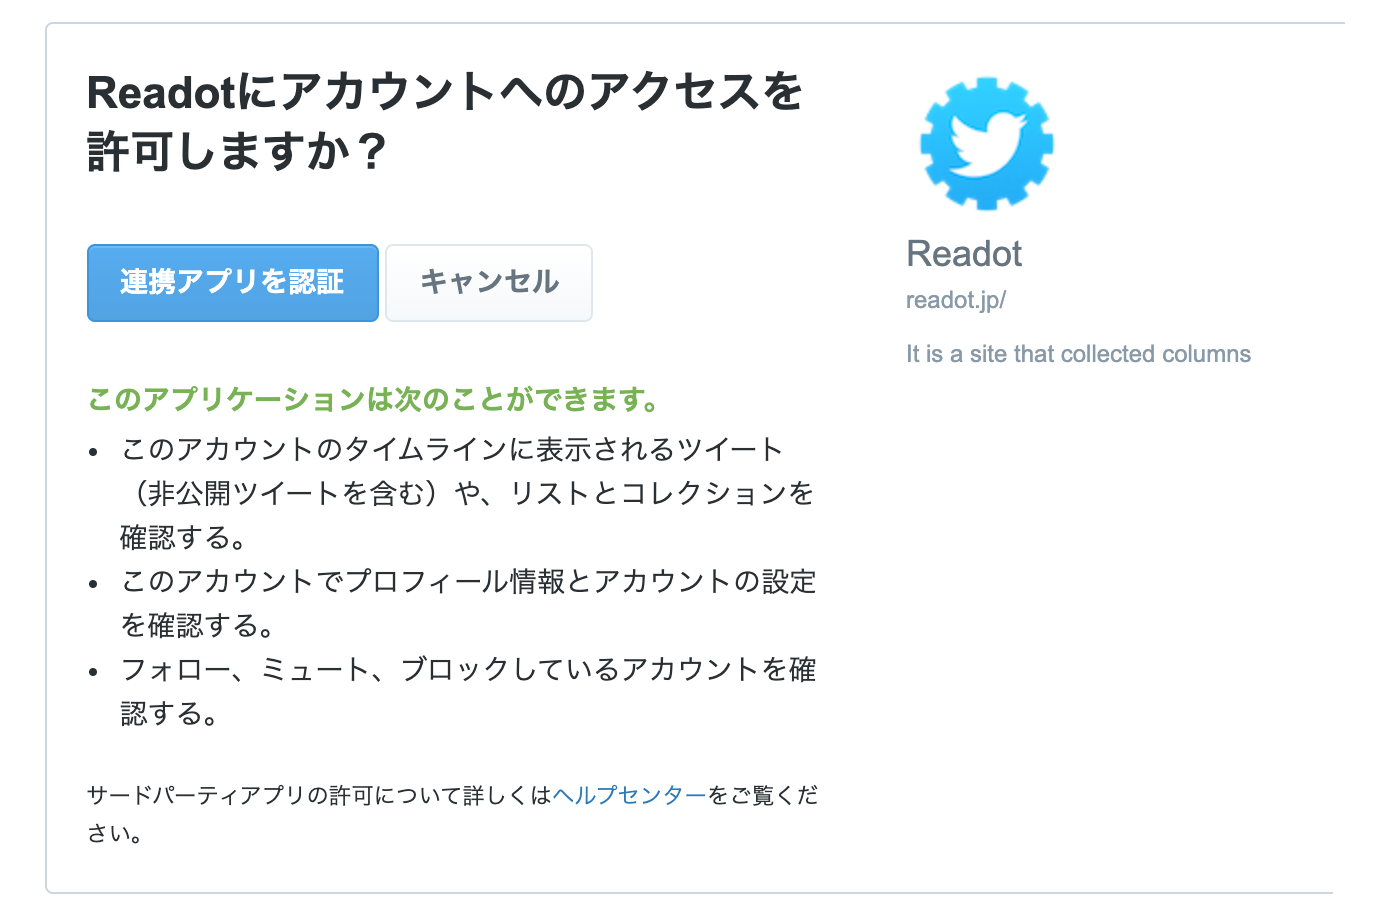
完成したのか、確認をします。
login.phpにアクセスしてみます。
こんなになってたら、完成です。

参照させていただきました。
PHP で Twitter API OAuth 認証 「ログイン」
twitteroauthのインストール方法
[AWS EC2 AmazonLinux2 composerをインストールする]
(https://qiita.com/miriwo/items/b25f9d4d74b7103f6ff6)