こんにちは、ATL Systems 鍋島です。
今回は、Azure Functionsで Google Workspaceのレポートデータを取得する手順について説明していきます。
ちなみに、Consoleアプリで実行する場合は、こちらのドキュメントを公式参考にしてください。
OAuth 認証を使ったサンプルコードがあります。
Google Workspace Admin SDK > .Net >.NET quickstart
Reports APIをAzure Functionsなどサーバーで利用する場合、OAuthによる認証を利用できません。今回は検証のため、その代わりにサービスアカウントを使っています。
サービス アカウント キーは、不正使用されるとセキュリティ上のリスクになる可能性があります。サービス アカウント キーをダウンロードするのではなく、代わりに Workload Identity 連携を使用することをおすすめします。
Workload Identityについては以下のドキュメントを参照してください。
Google Consoleでプロジェクトを追加
まずはサービスアカウントを作る前にプロジェクトを作成します。
Google Consoleにログインします。
https://console.cloud.google.com/
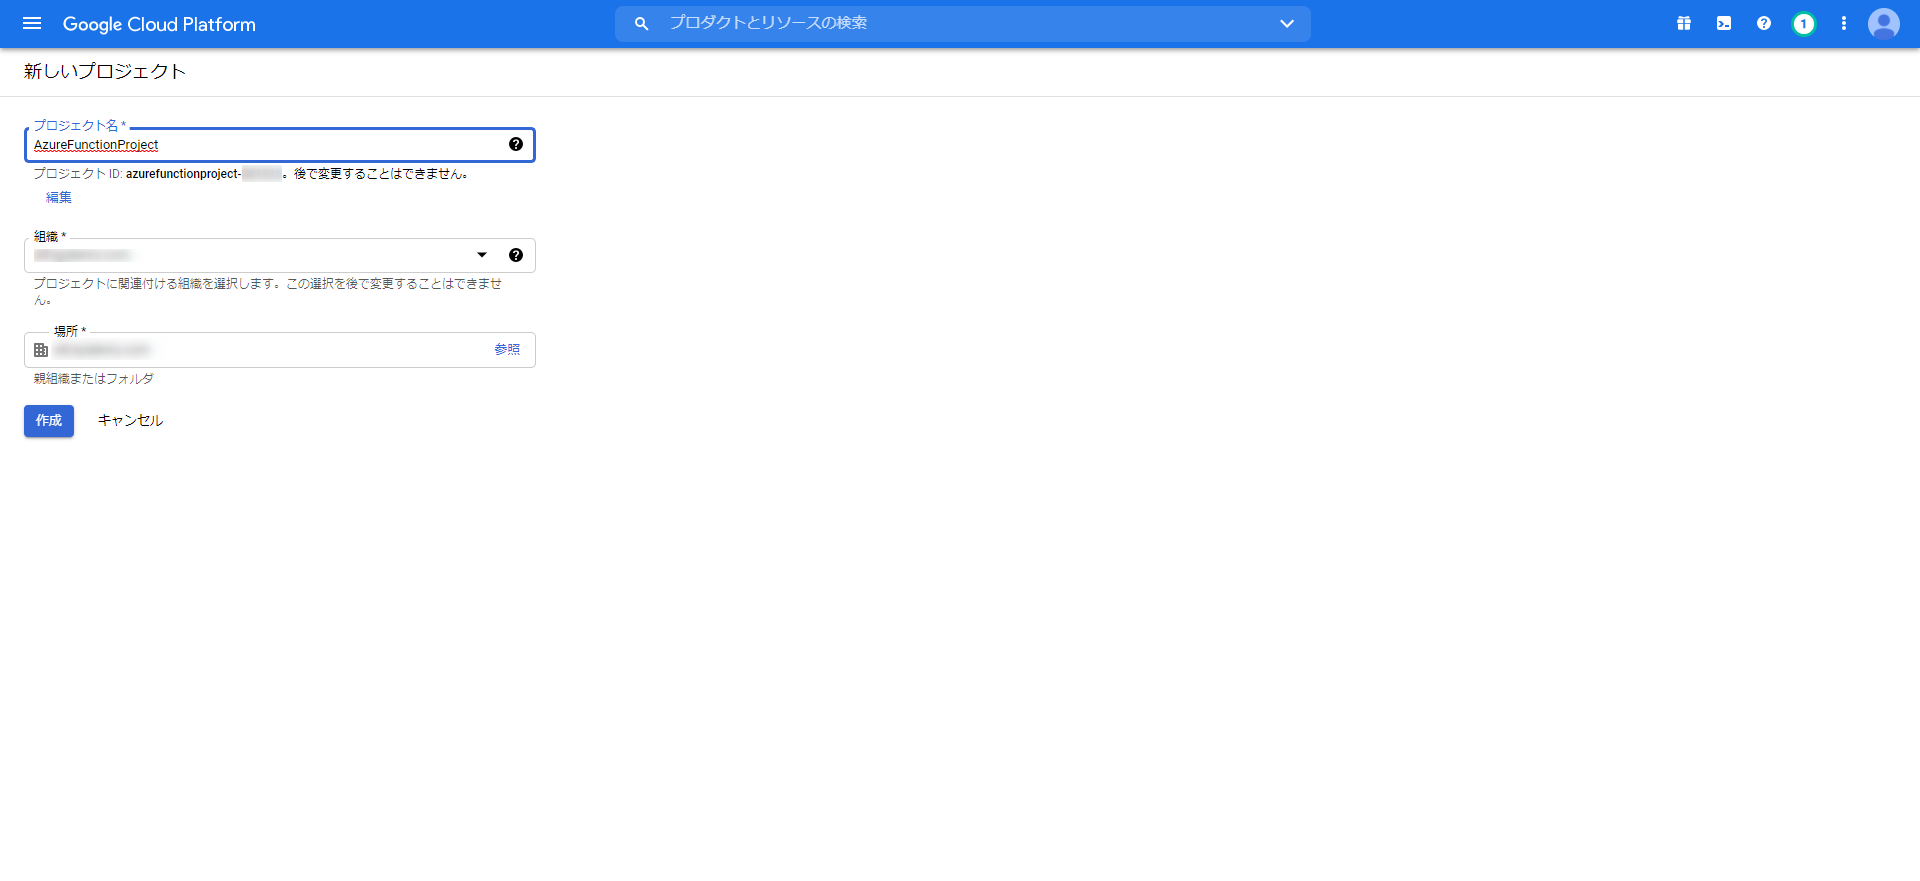
次に、Google Cloud Platformで新しいプロジェクトを追加します。
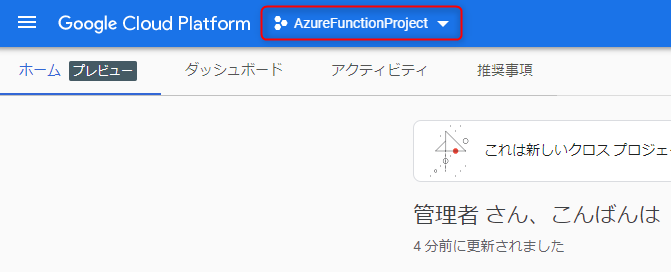
ここではプロジェクト名を AzureFunctionProject とします。
プロジェクトを作成したら、作成したプロジェクトに切り替えます。
Admin SDK APIの有効化
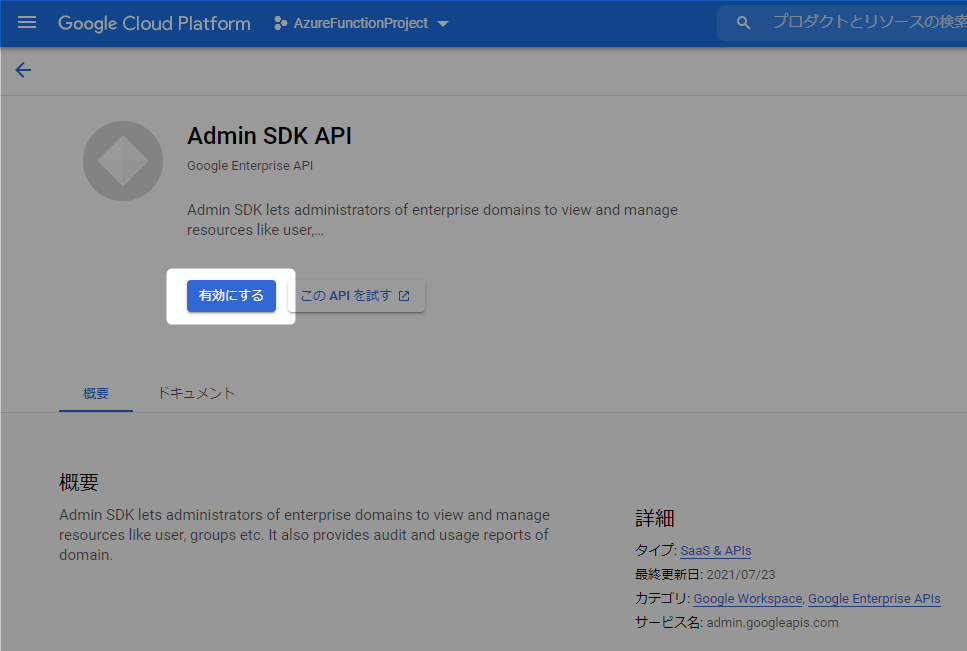
次に利用するAPIを有効化します。ここでは Admin SDK APIを有効化していきます。
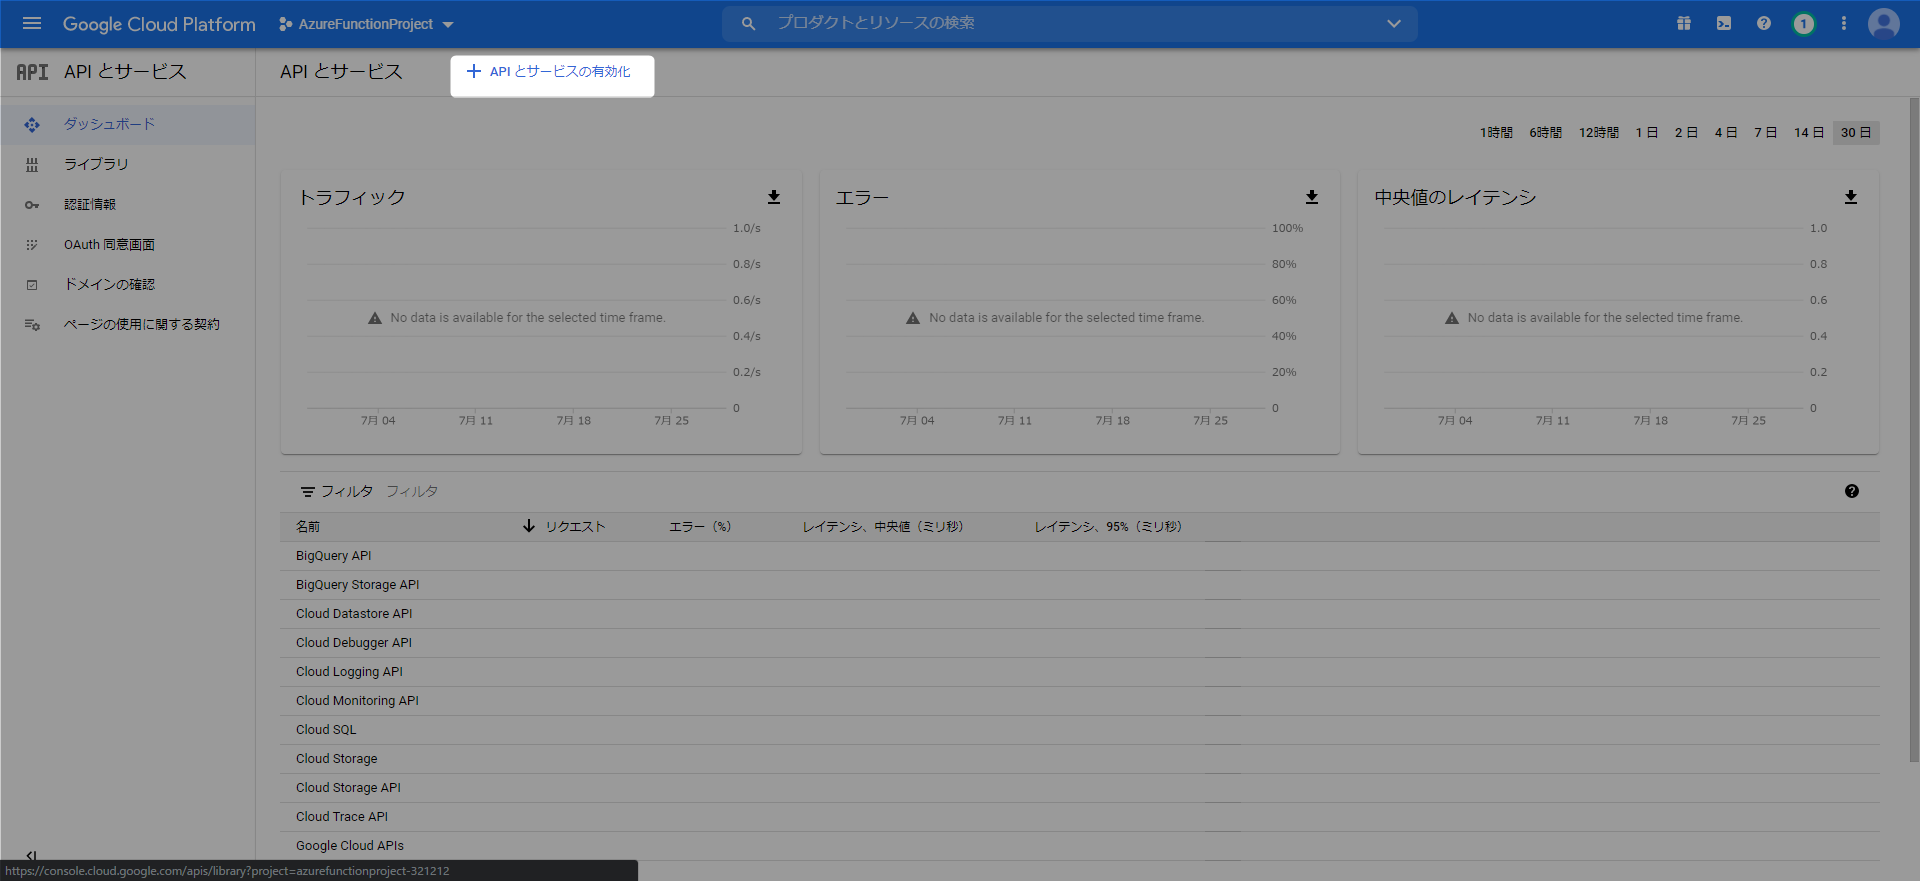
Admin SDK API を検索して、有効にする ボタンをクリックします。
Google Consoleでサービスアカウントの追加
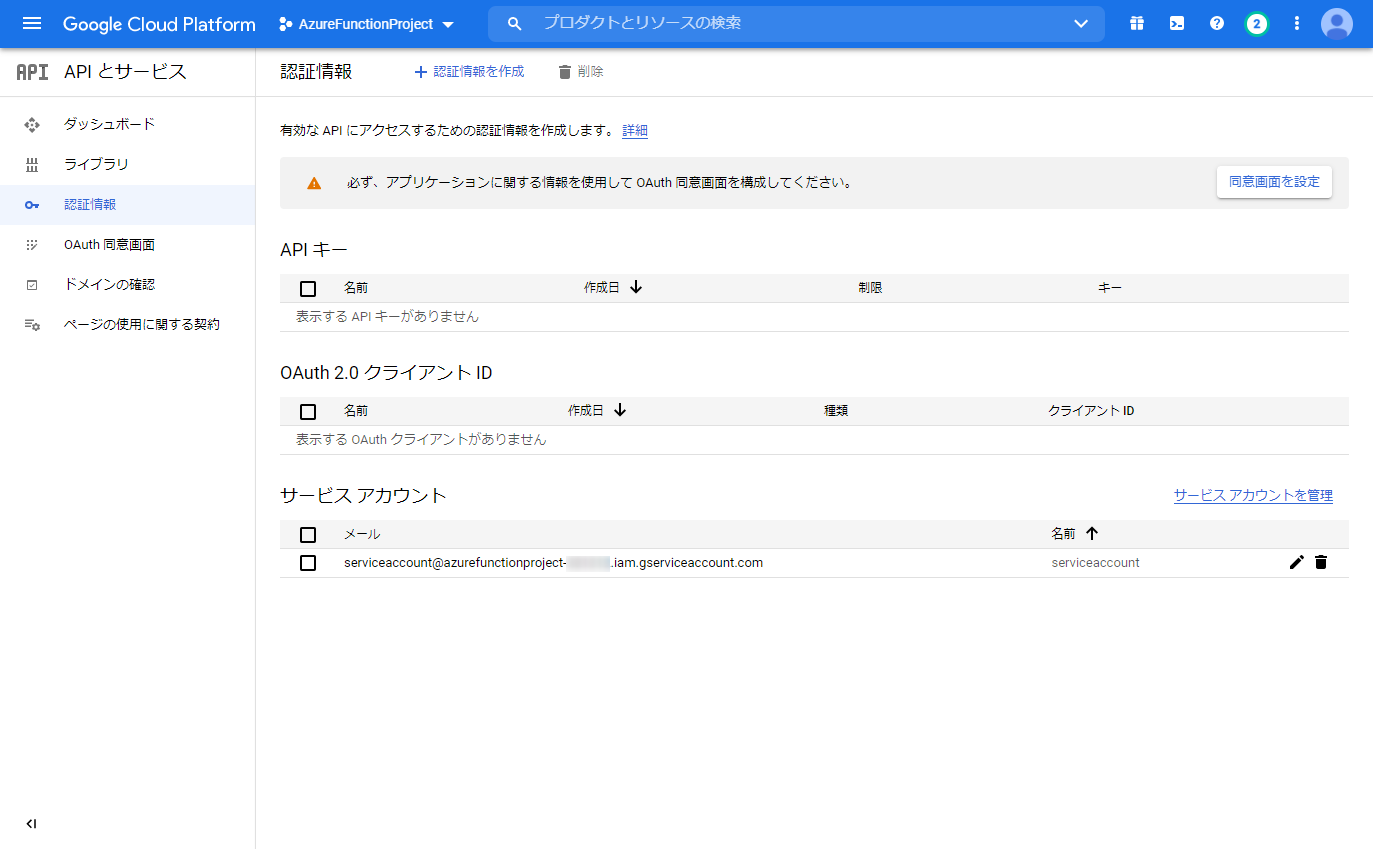
次に、認証情報を作成ボタンをクリックして、認証情報追加していきます。
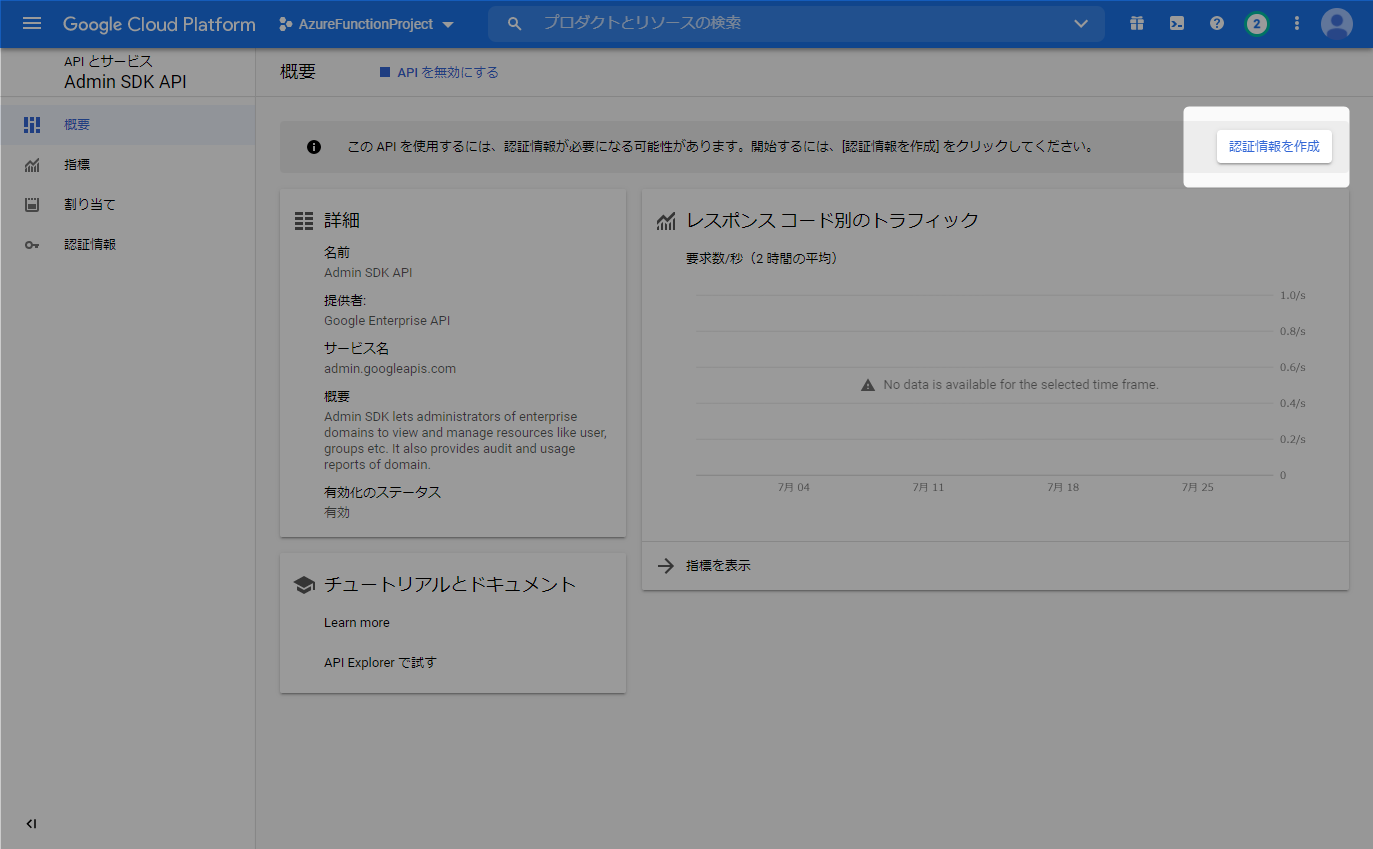
使用するAPIはAdmin SDK APIを選択し、アクセスするデータの種類は アプリケーションデータを選択します。
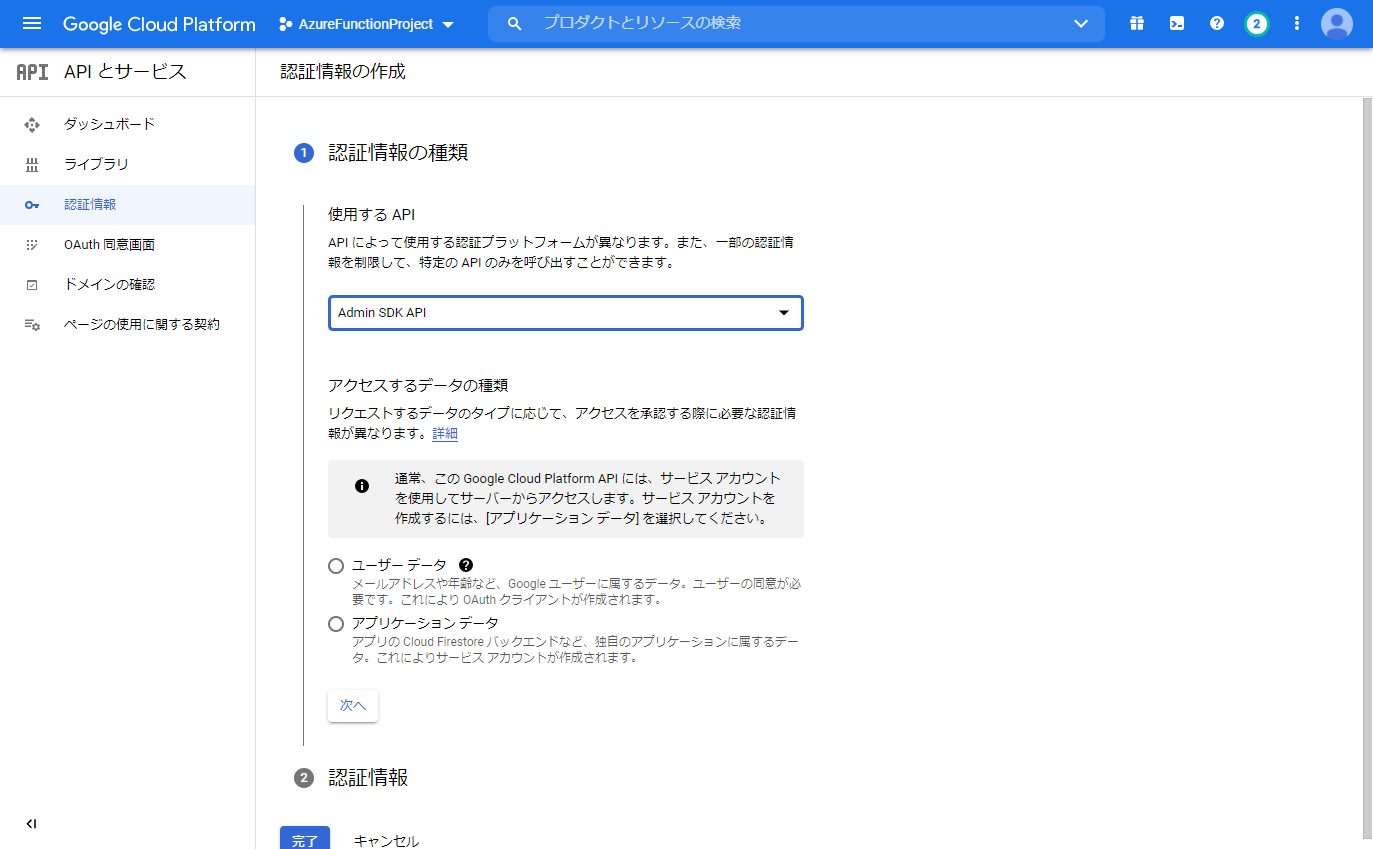
ロールはオーナーを選択します。
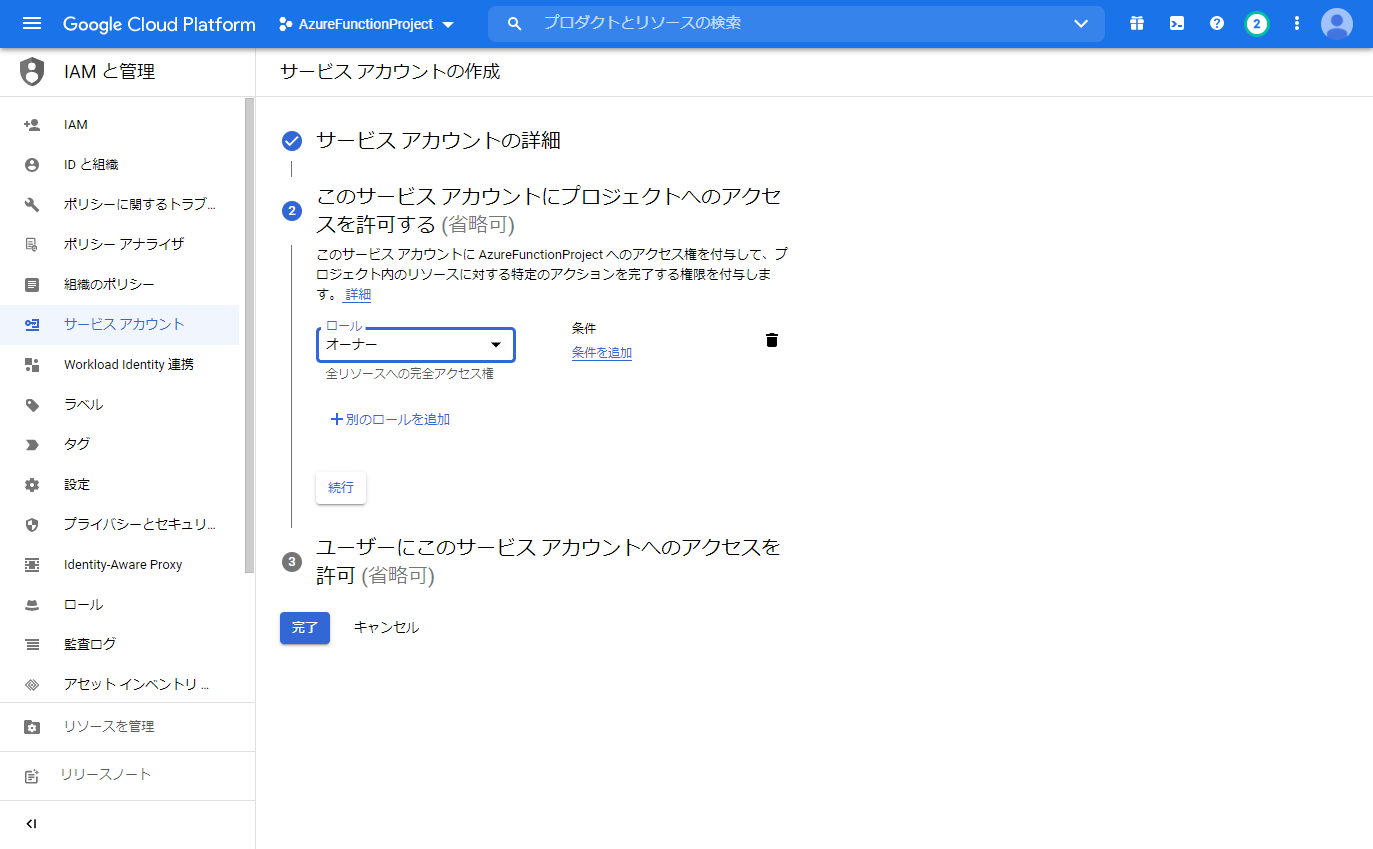
最後に完了をクリックして、認証情報の追加を完了します。
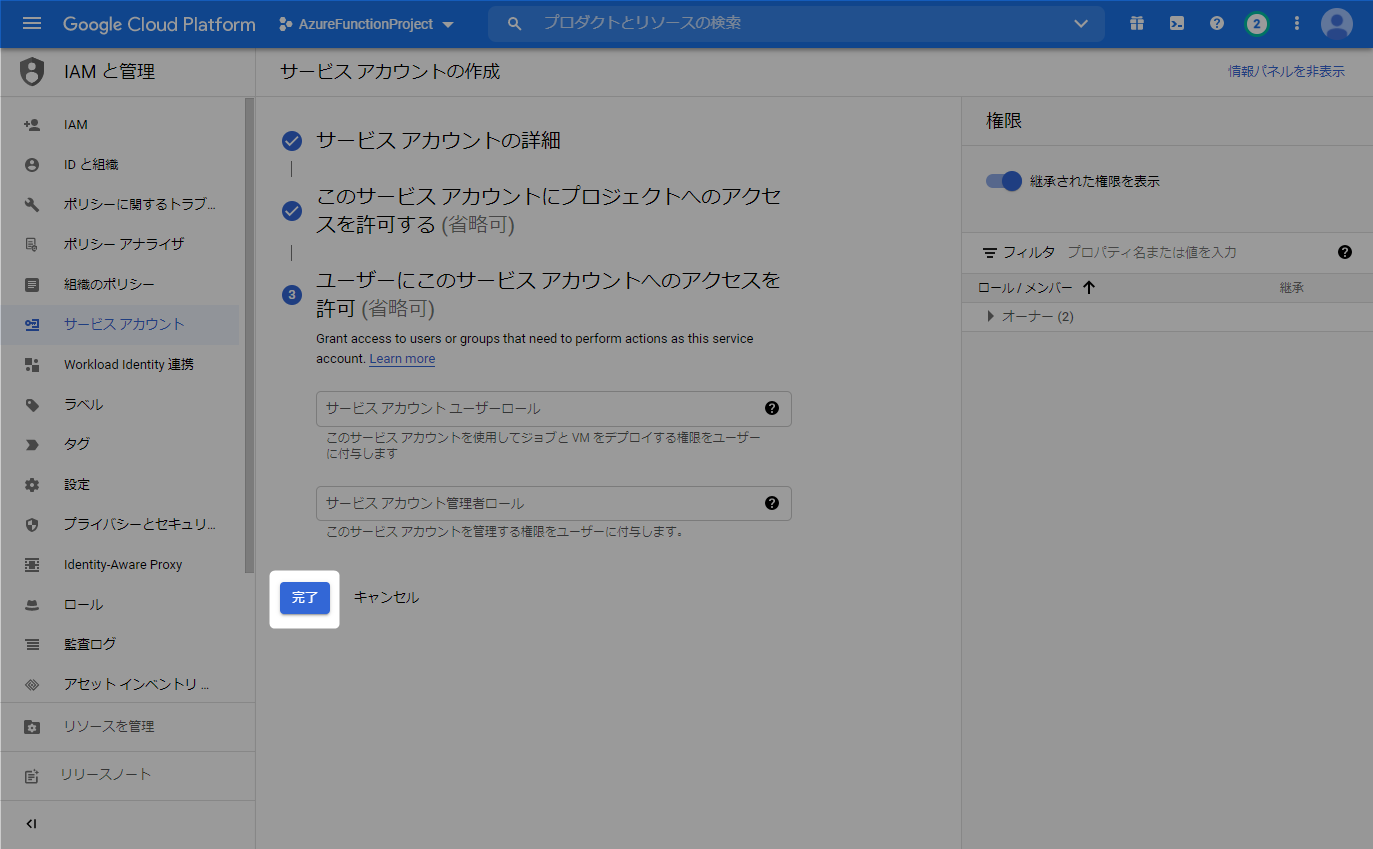
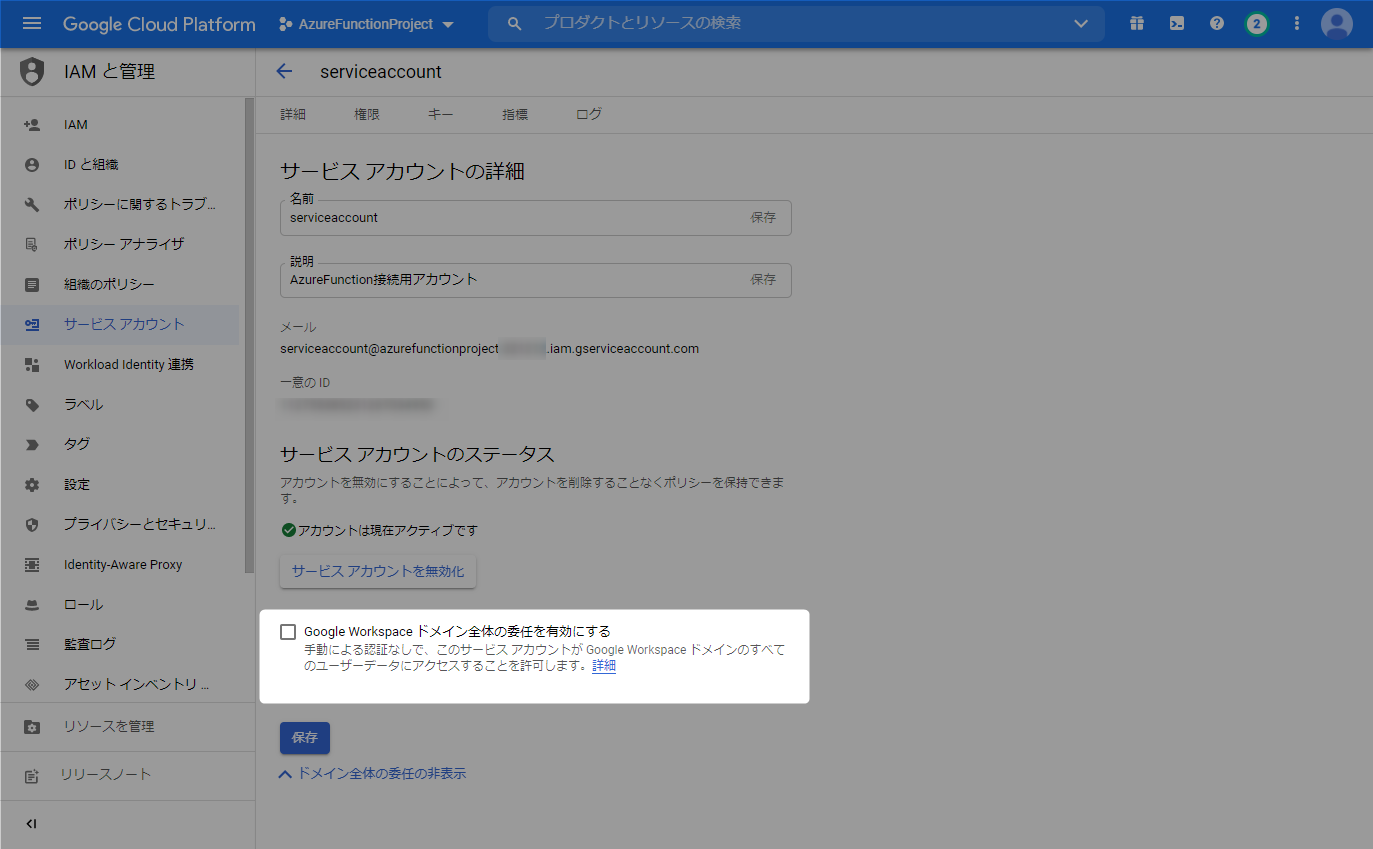
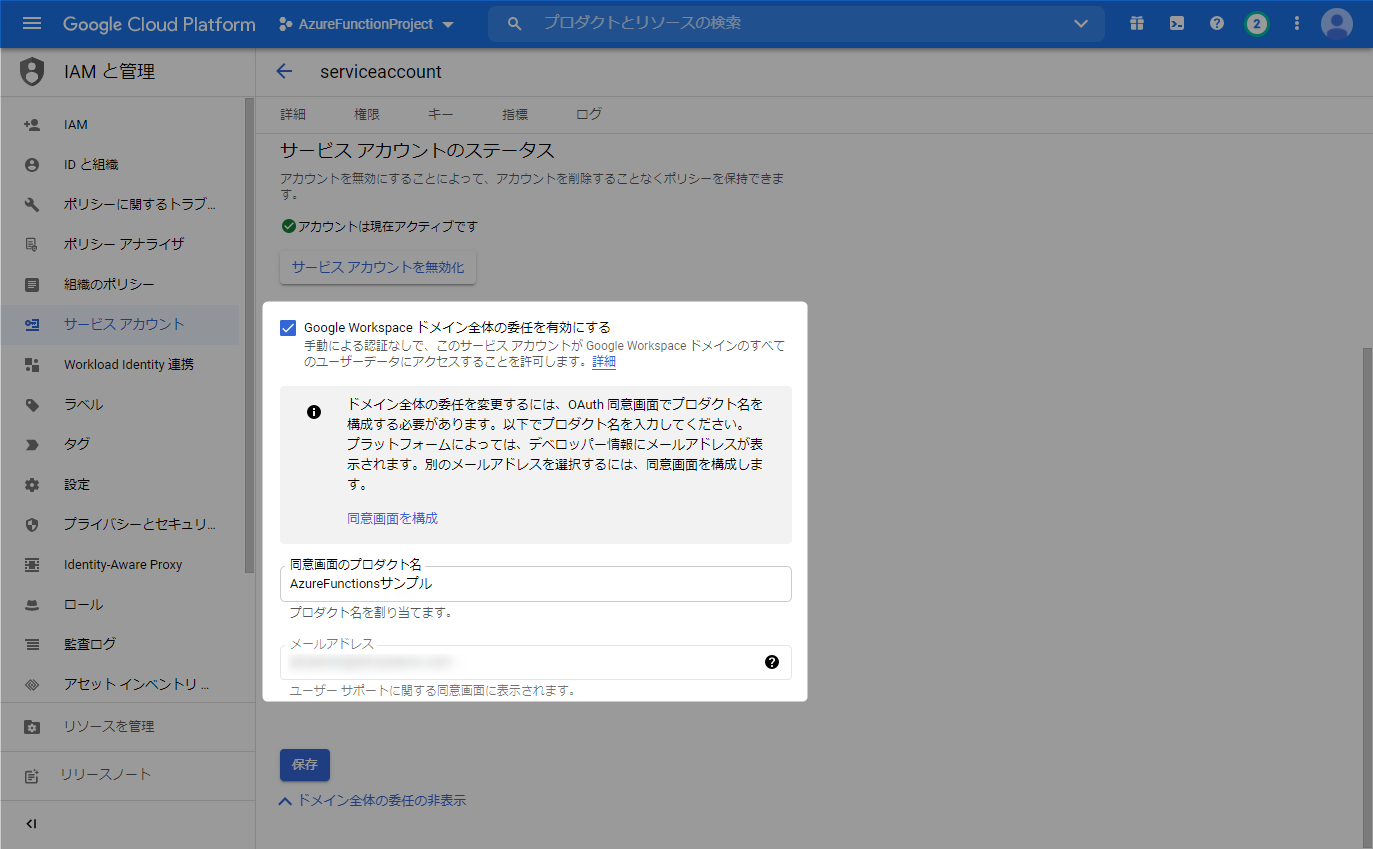
次にReports APIを利用するために、サービスアカウントの設定を変更て、
Google Workspace ドメイン全体の委任を有効にする にチェックを入れます。
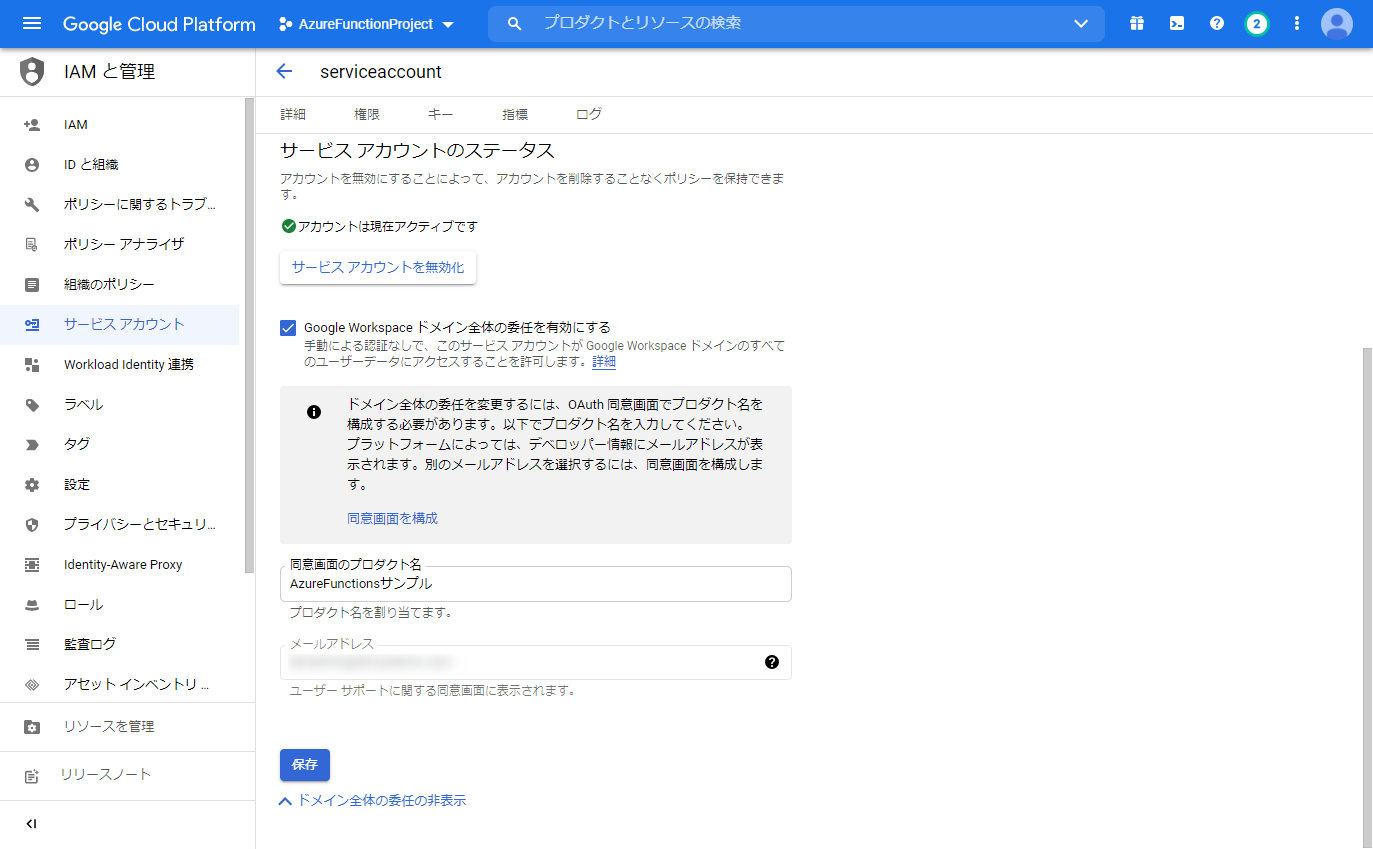
チェックを入れると
ドメイン全体の委任を変更するには、OAuth 同意画面でプロダクト名を構成する必要があります。
と表示されるので、プロダクト名を入力して、保存 ボタンをクリックします。
Google AdminでクライアントIDの追加
Google Admin で APIの制御 にアクセスします。
Google Admin > セキュリティ > APIの制御 にアクセスします。
https://admin.google.com/ac/owl/domainwidedelegation?hl=ja
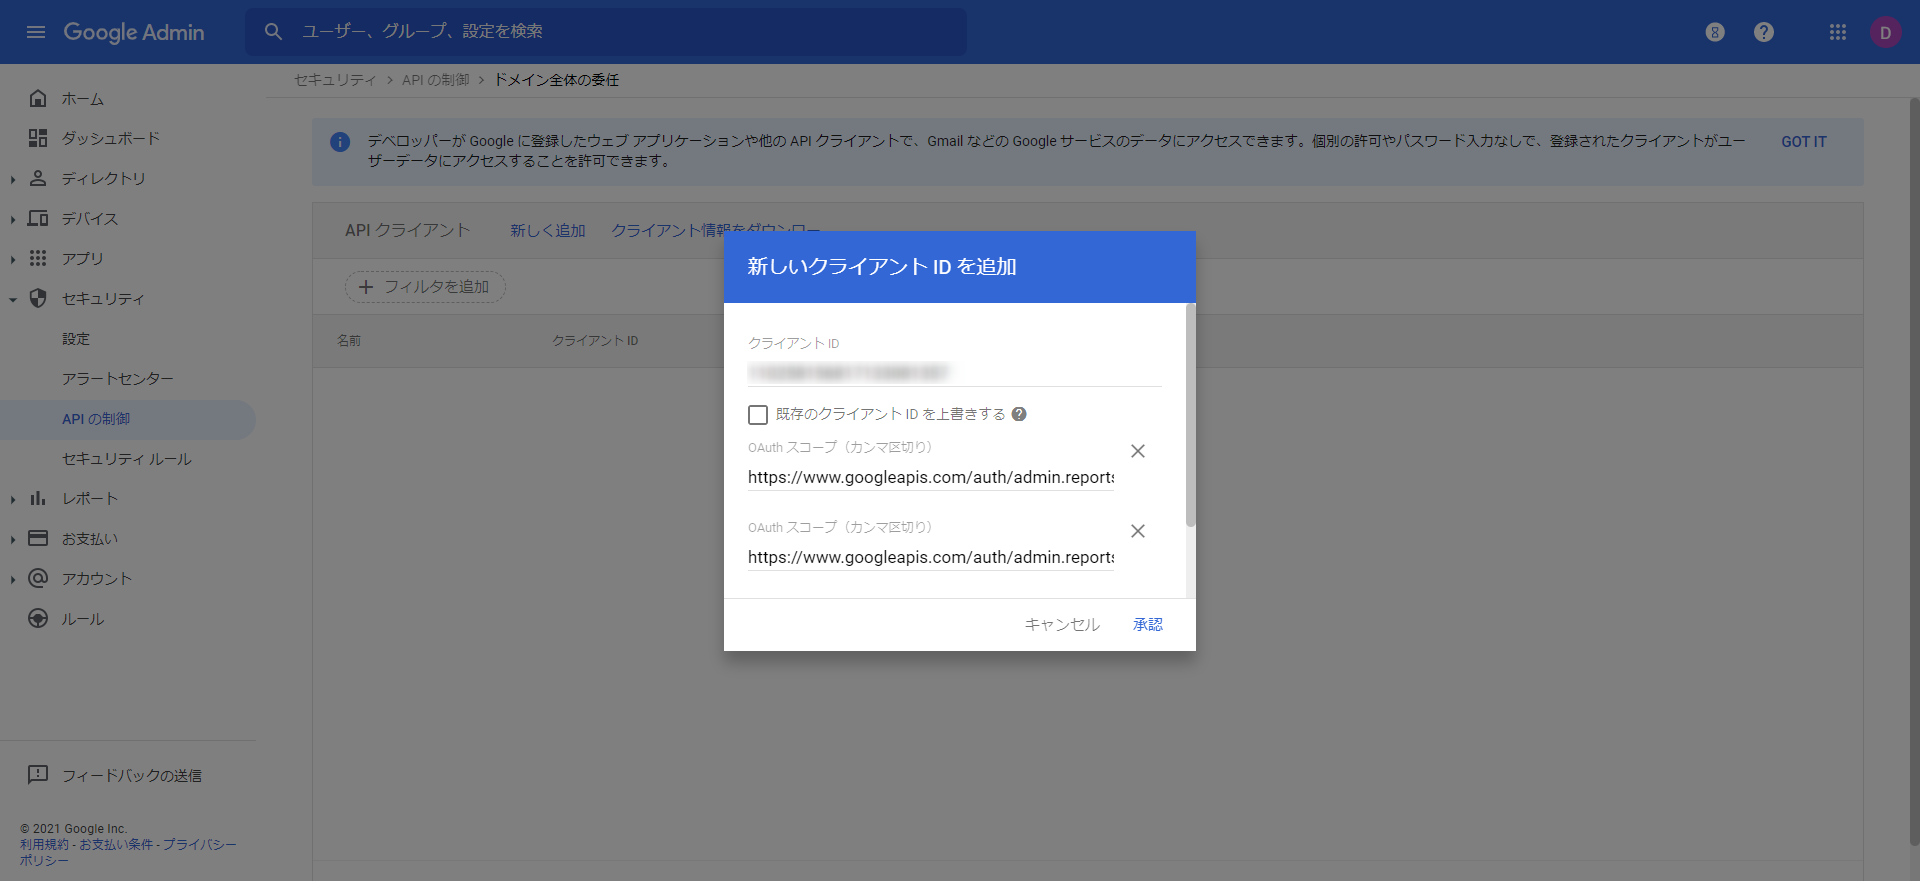
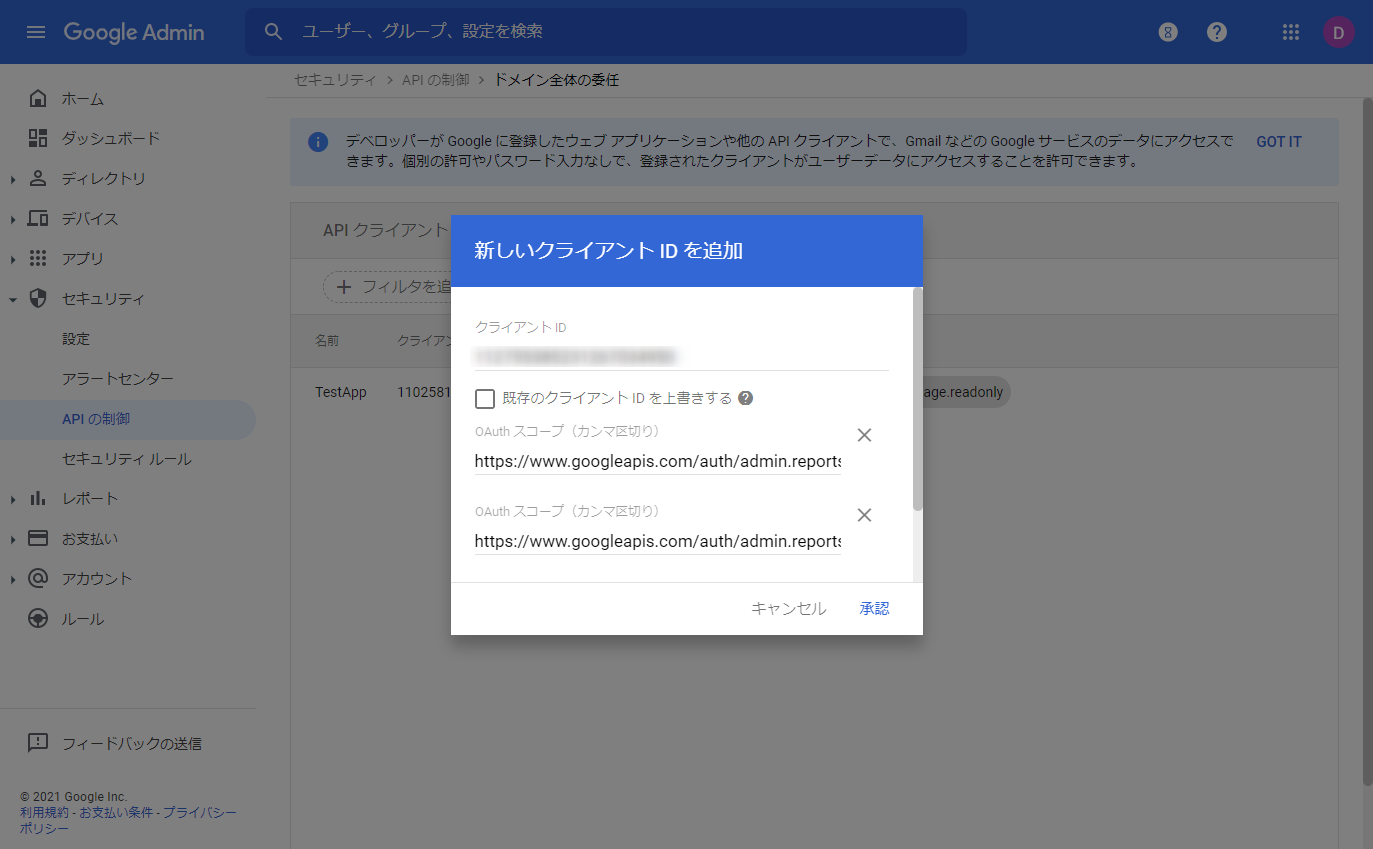
次に[新しく追加] ボタンをクリックして、新しいクライアントIDを追加します。ここで登録するクライアントIDは Google Cloud Consoleで追加したサービスアカウントのクライアントIDです。
以下のドキュメントを参考にOAUTHスコープも追加します。
https://developers.google.com/admin-sdk/reports/v1/guides/authorizing
| 範囲 | 意味 |
|---|---|
| https://www.googleapis.com/auth/admin.reports.audit.readonly | アクティビティレポートを取得するときの読み取り専用アクセス。 |
| https://www.googleapis.com/auth/admin.reports.usage.readonly | 使用状況レポートを取得するときの読み取り専用アクセス。 |
サービスアカウントで秘密鍵の作成
Google Cloud Platformに戻り、サービスアカウントメニューから作成したサービスアカウントを表示して、キータブを表示します。
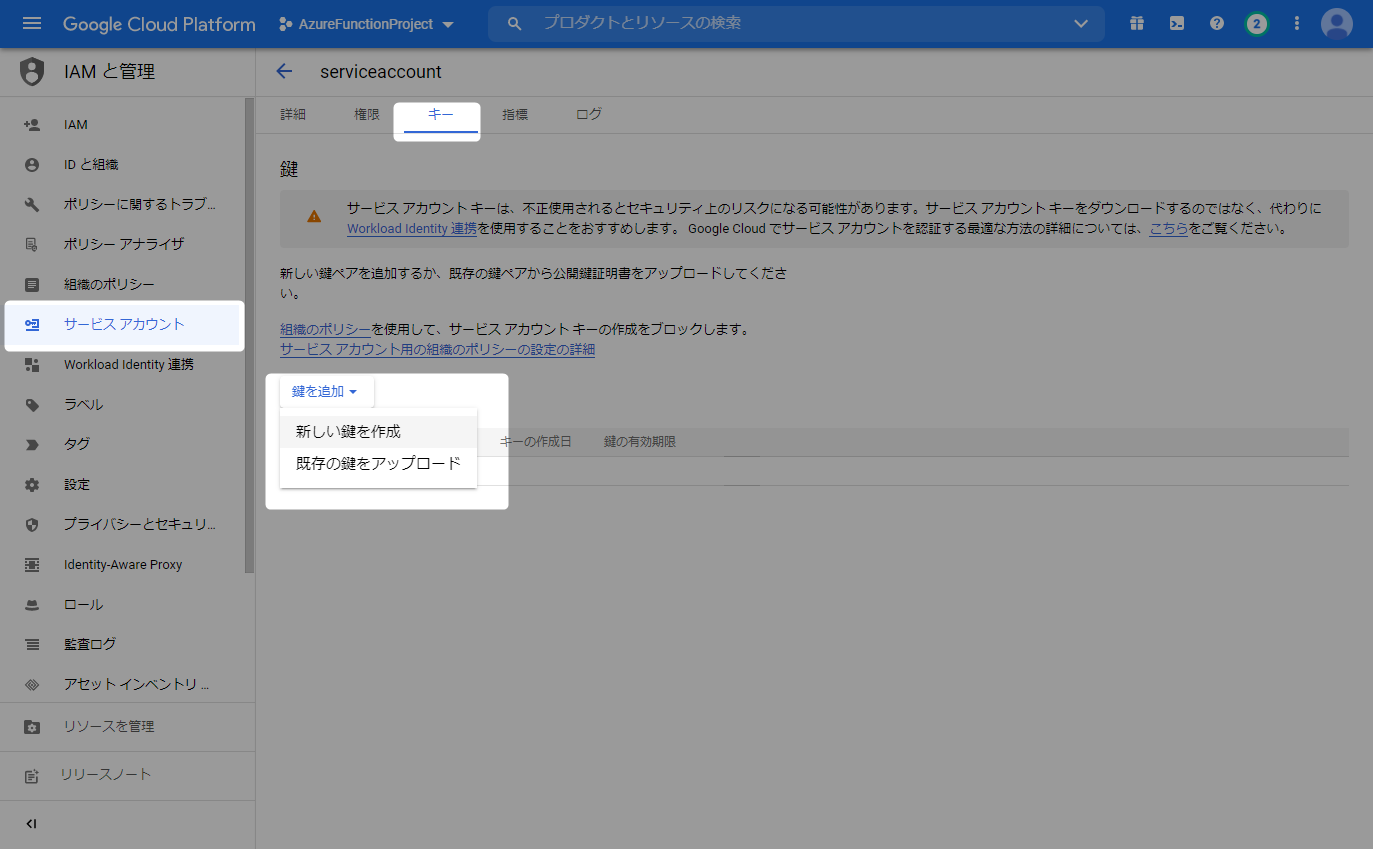
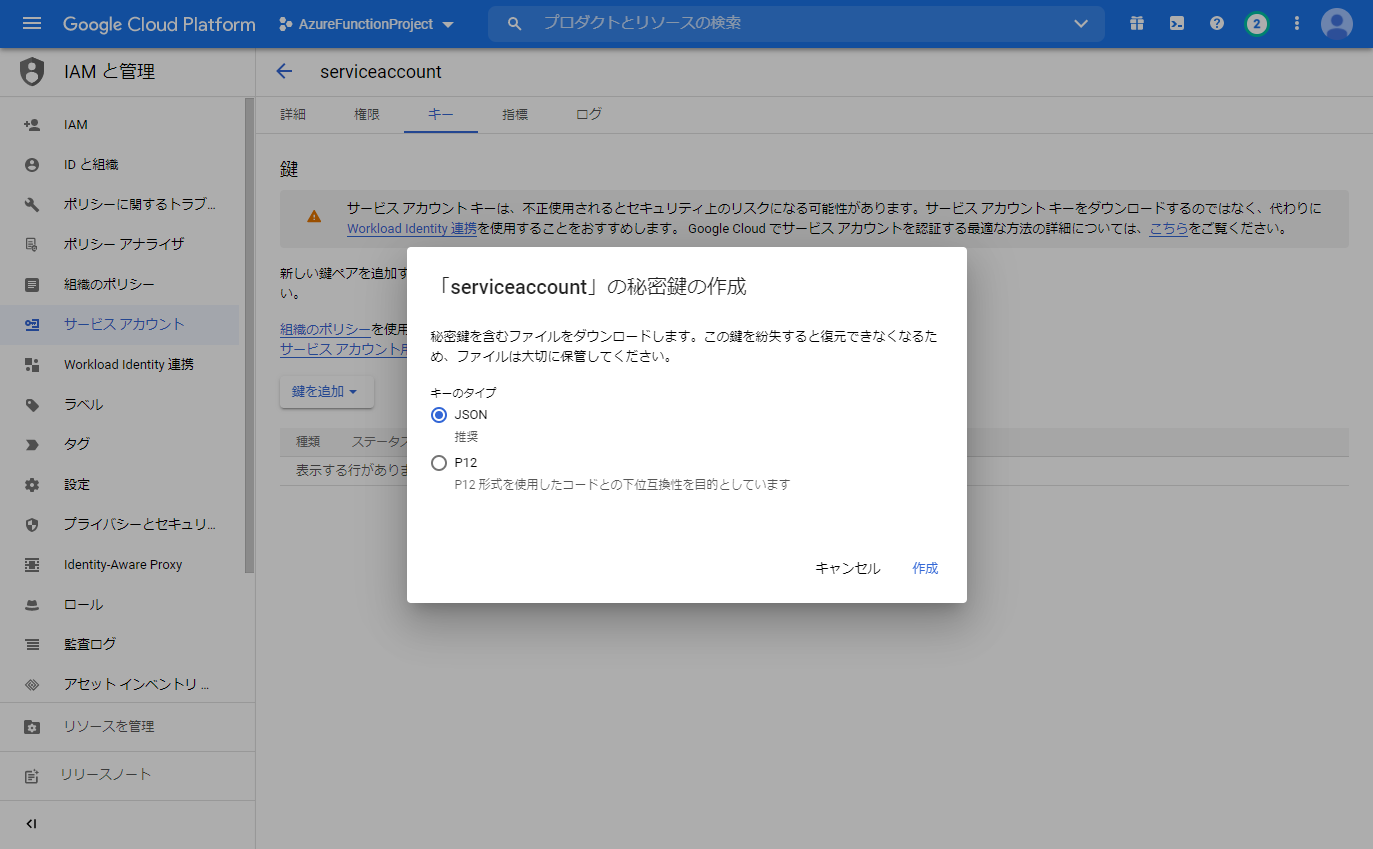
JSONを選択して、作成ボタンをクリックして、秘密鍵ファイルを作成します。
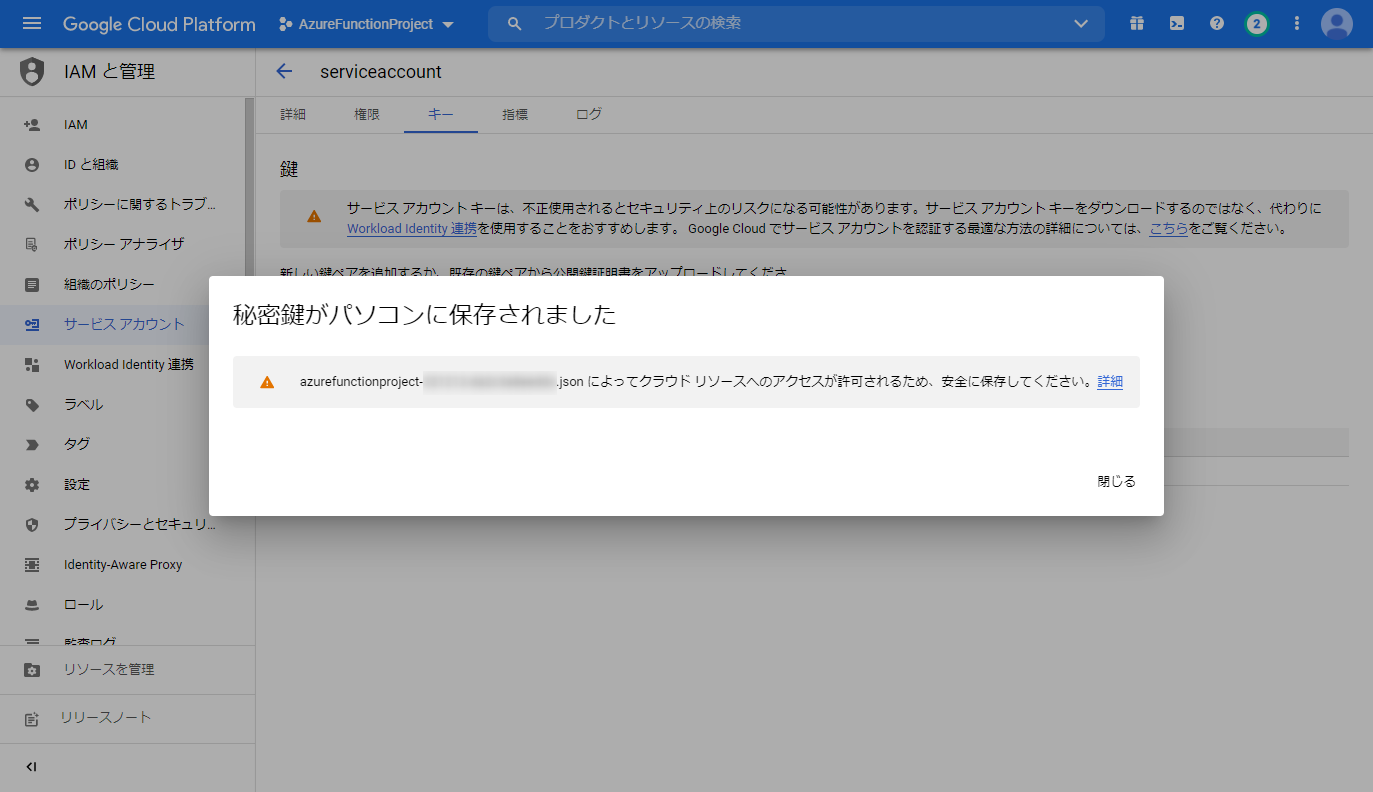
秘密鍵入りのJSONファイルが端末へ保存されると、以下のメッセージが表示されます。
AzureFunctions のプロジェクトの作成
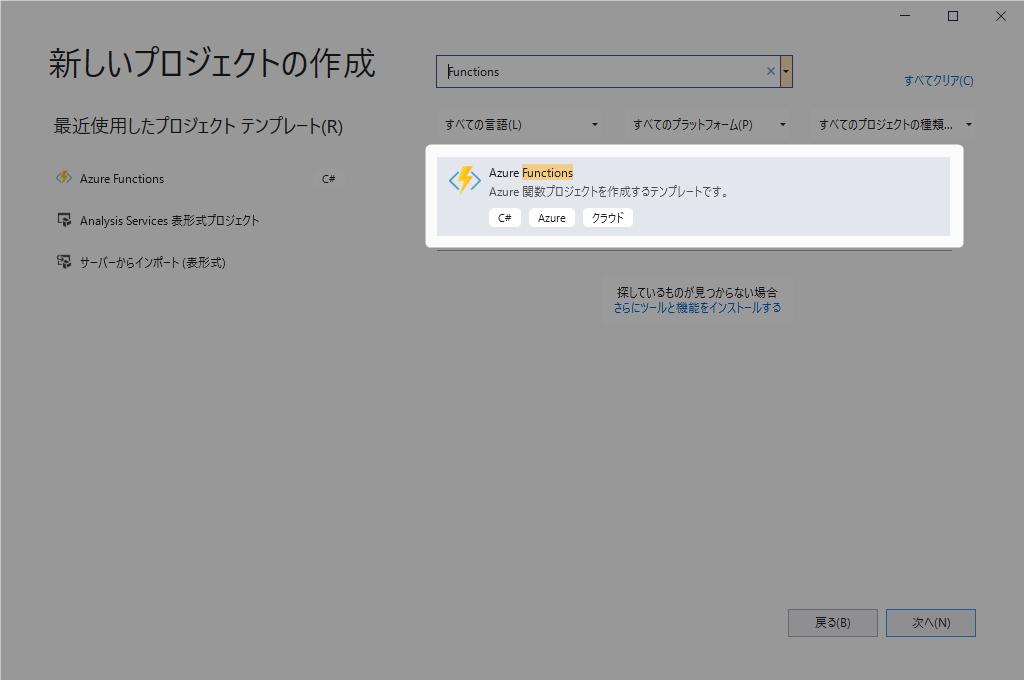
Visual Studio 2019を起動し、新しいプロジェクトを作成します。
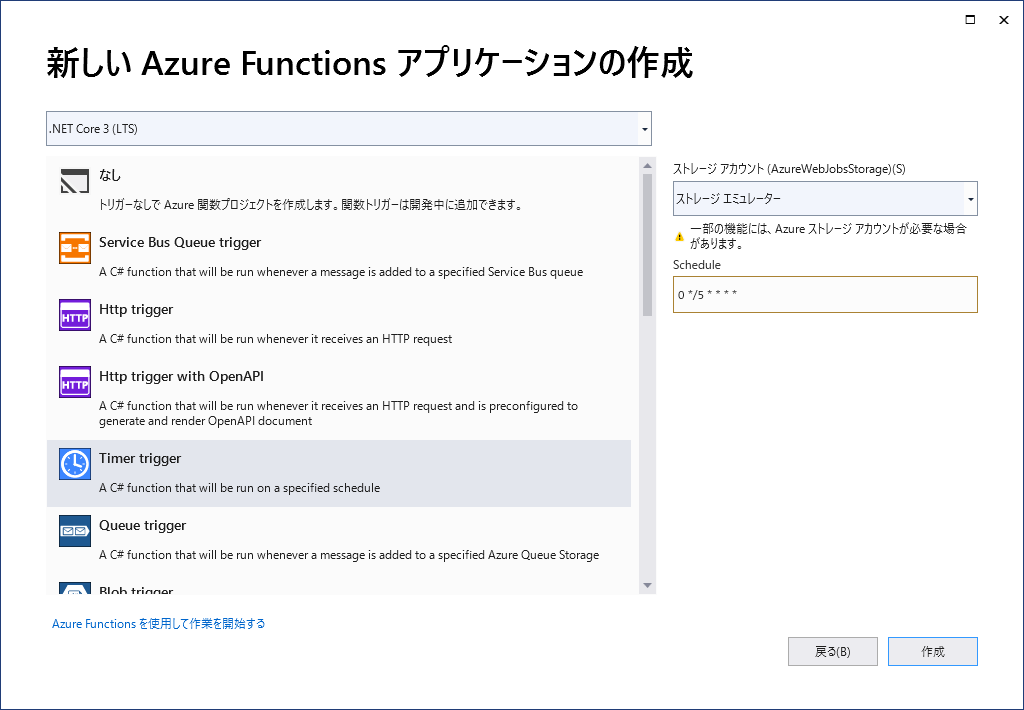
スケジュールされた間隔で実行される、Time trigger を選択します。
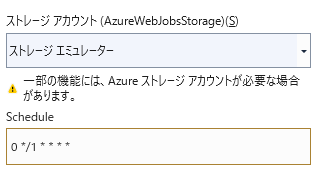
ちなみに実行間隔を5分から1分に変更するには 5 を 1に変更します。
パッケージマネージャーコンソールで必要なパッケージ Google.Apis.Admin.Reports.reports_v1を追加します。
PM> Install-Package Google.Apis.Admin.Reports.reports_v1
秘密鍵ファイルを追加します。
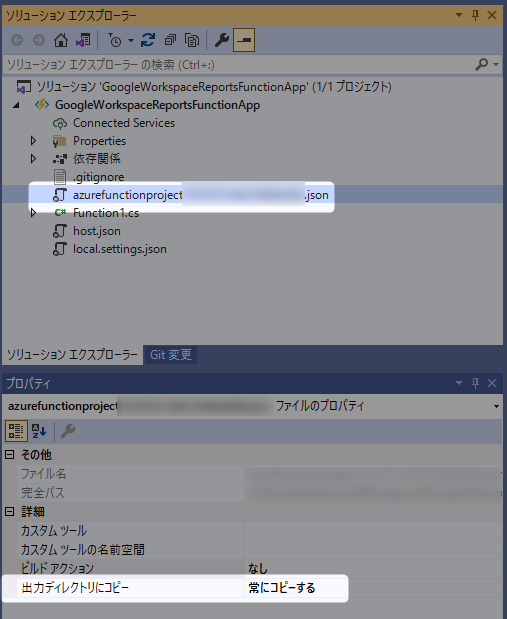
サービスアカウントで作成した秘密鍵ファイルをプロジェクトに追加します。
その際、ファイルのプロパティで出力ディレクトリにコピーを常にコピーするに変更します。
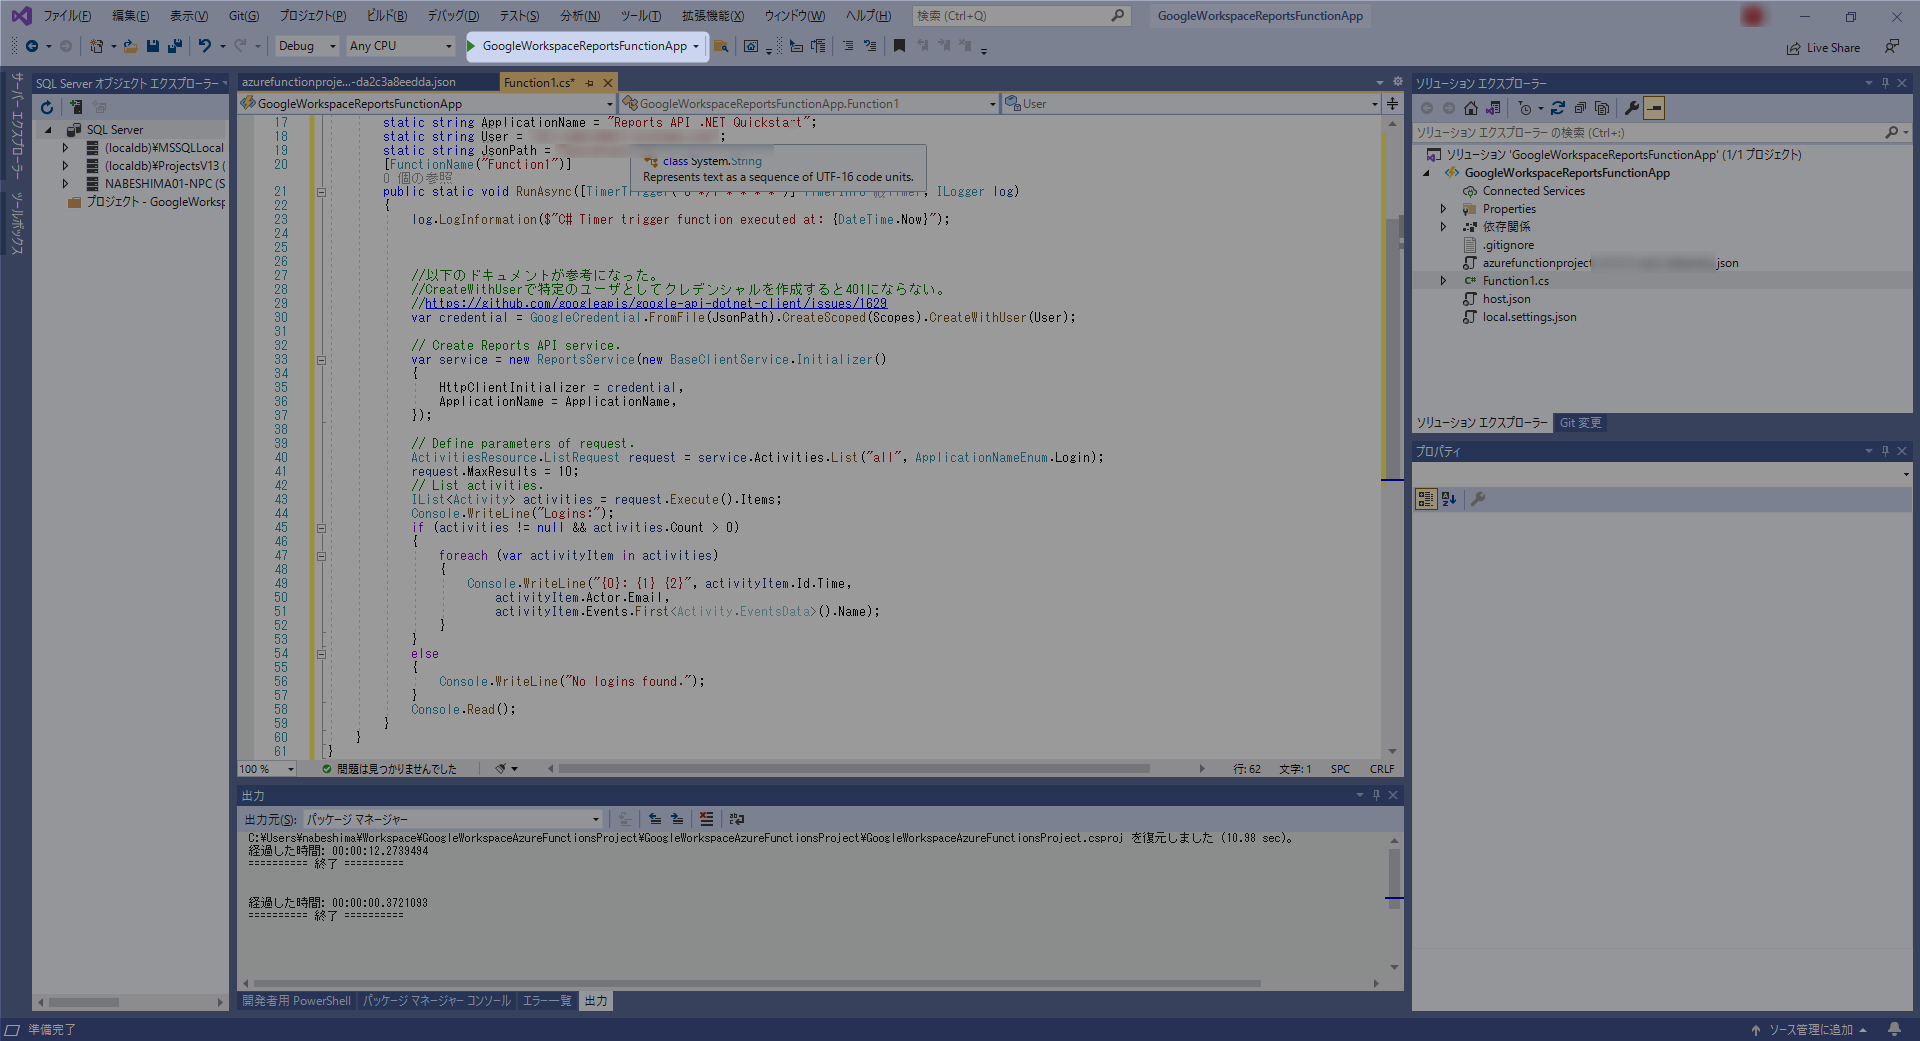
最後に、Azure Functionsのコードを変更します。
Functions1.csを開いて、以下のコードを貼り付けます。
コード中の以下のワークスペース名や定数については各自の環境に合わせて変更してください。
| 項目 | 値 |
|---|---|
| Google Workspaceの管理者ユーザ | foo@exmaple.com |
| 秘密鍵のファイル名 | azurefunctionproject-123456789.json |
using Google.Apis.Admin.Reports.reports_v1;
using Google.Apis.Admin.Reports.reports_v1.Data;
using Google.Apis.Auth.OAuth2;
using Google.Apis.Services;
using Microsoft.Azure.WebJobs;
using Microsoft.Extensions.Logging;
using System;
using System.Collections.Generic;
using System.Linq;
using static Google.Apis.Admin.Reports.reports_v1.ActivitiesResource.ListRequest;

namespace GoogleWorkspaceReportsFunctionApp
{
    public static class Function1
    {
        static string[] Scopes = { ReportsService.Scope.AdminReportsAuditReadonly, ReportsService.Scope.AdminReportsUsageReadonly };
        static string ApplicationName = "Reports API .NET Quickstart";
        static string User = "foo@example.com";
        static string JsonPath = "azurefunctionproject-123456789.json";
        [FunctionName("Function1")]
        public static void RunAsync([TimerTrigger("0 */1 * * * *")] TimerInfo myTimer, ILogger log)
        {
            log.LogInformation($"C# Timer trigger function executed at: {DateTime.Now}");


            //以下のドキュメントが参考になった。
            //CreateWithUserで特定のユーザとしてクレデンシャルを作成すると401にならない。
            //https://github.com/googleapis/google-api-dotnet-client/issues/1629
            var credential = GoogleCredential.FromFile(JsonPath).CreateScoped(Scopes).CreateWithUser(User);

            // Create Reports API service.
            var service = new ReportsService(new BaseClientService.Initializer()
            {
                HttpClientInitializer = credential,
                ApplicationName = ApplicationName,
            });

            // Define parameters of request.
            ActivitiesResource.ListRequest request = service.Activities.List("all", ApplicationNameEnum.Login);
            request.MaxResults = 10;
            // List activities.
            IList<Activity> activities = request.Execute().Items;
            Console.WriteLine("Logins:");
            if (activities != null && activities.Count > 0)
            {
                foreach (var activityItem in activities)
                {
                    Console.WriteLine("{0}: {1} {2}", activityItem.Id.Time,
                        activityItem.Actor.Email,
                        activityItem.Events.First<Activity.EventsData>().Name);
                }
            }
            else
            {
                Console.WriteLine("No logins found.");
            }
            Console.Read();
        }
    }
}
エミュレーターの実行
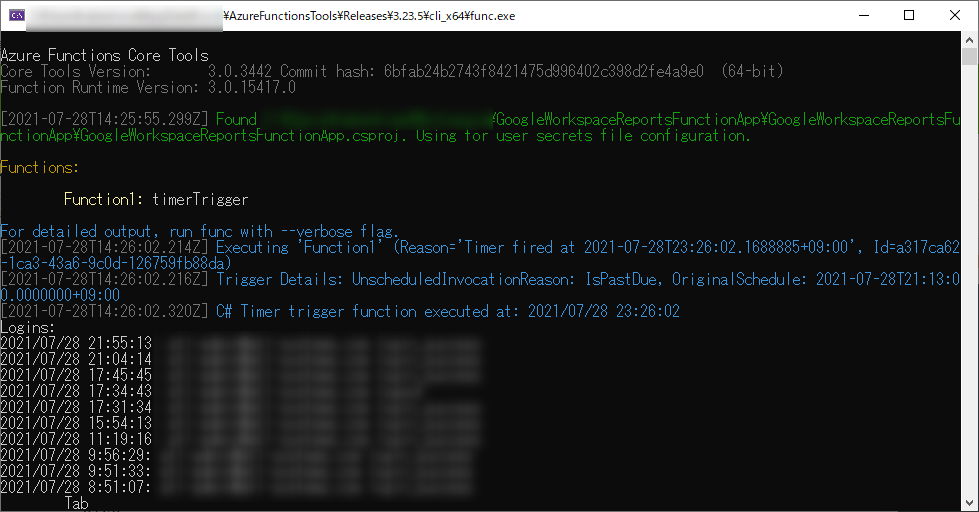
最後にエミュレータを実行して試します。
うまくいきましたね!
#まとめ
Azure Functionsのエミュレータで Google Workspaceのレポートデータを取得できました。
