できそうでできなくて苦労したのでメモ。
環境
PHP:7.0.9
Xdebug:2.4.1
PHPStorm:2016.2.2
前提
Vagrantの仮想環境にApache、PHP、Xdebugはインストール済み
Vagrant(の仮想環境)
CentOSで試しましたが、特にOS依存はないです、たぶん。
php.ini
Xdebug用の設定値を追記します。他にも設定値がありますが、とりあえず動けばいいや的な。
[xdebug] zend_extension=/opt/remi/php70/root/usr/lib64/php/modules/xdebug.so ; Xdebugモジュールのパス xdebug.remote_enable=On xdebug.remote_autostart=On xdebug.remote_host=192.168.33.1 ;デバッグ接続するPCのIPアドレス xdebug.remote_port=9000 xdebug.idekey="PHPSTORM" ; PHPStormとのセッションクッキー名
PHPStrom側の設定
こっちの設定がけっこう手こずりました。
PHPStorm -> Preferences から設定します。
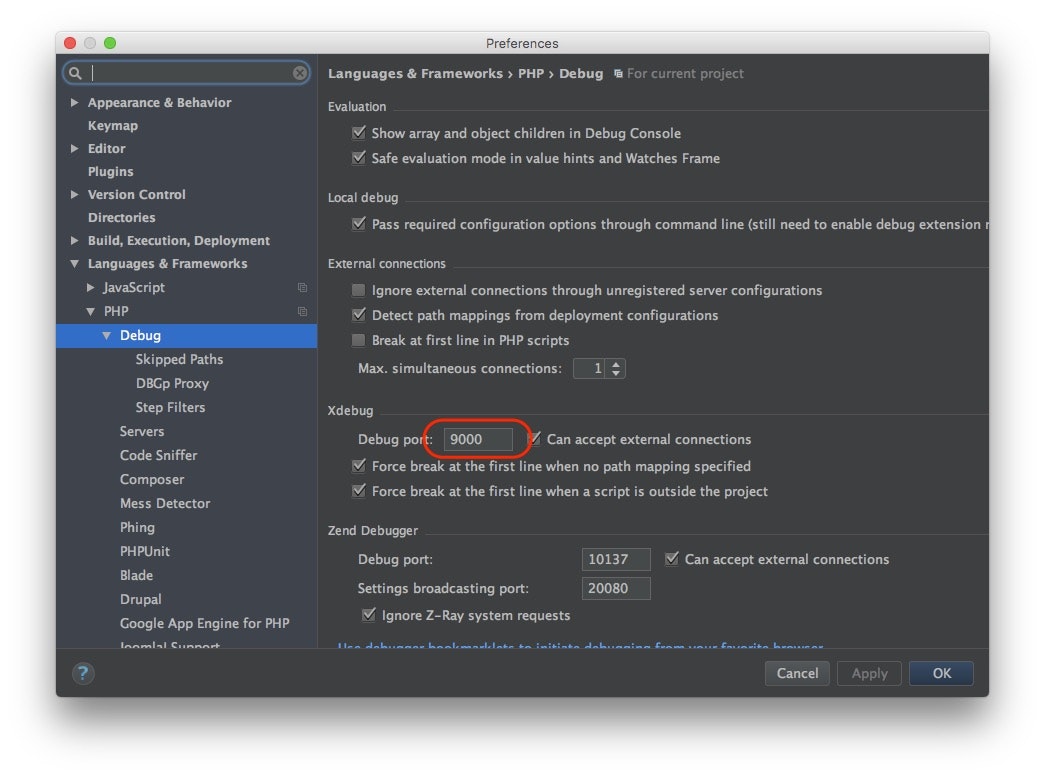
Languages & Frameworks > Debug
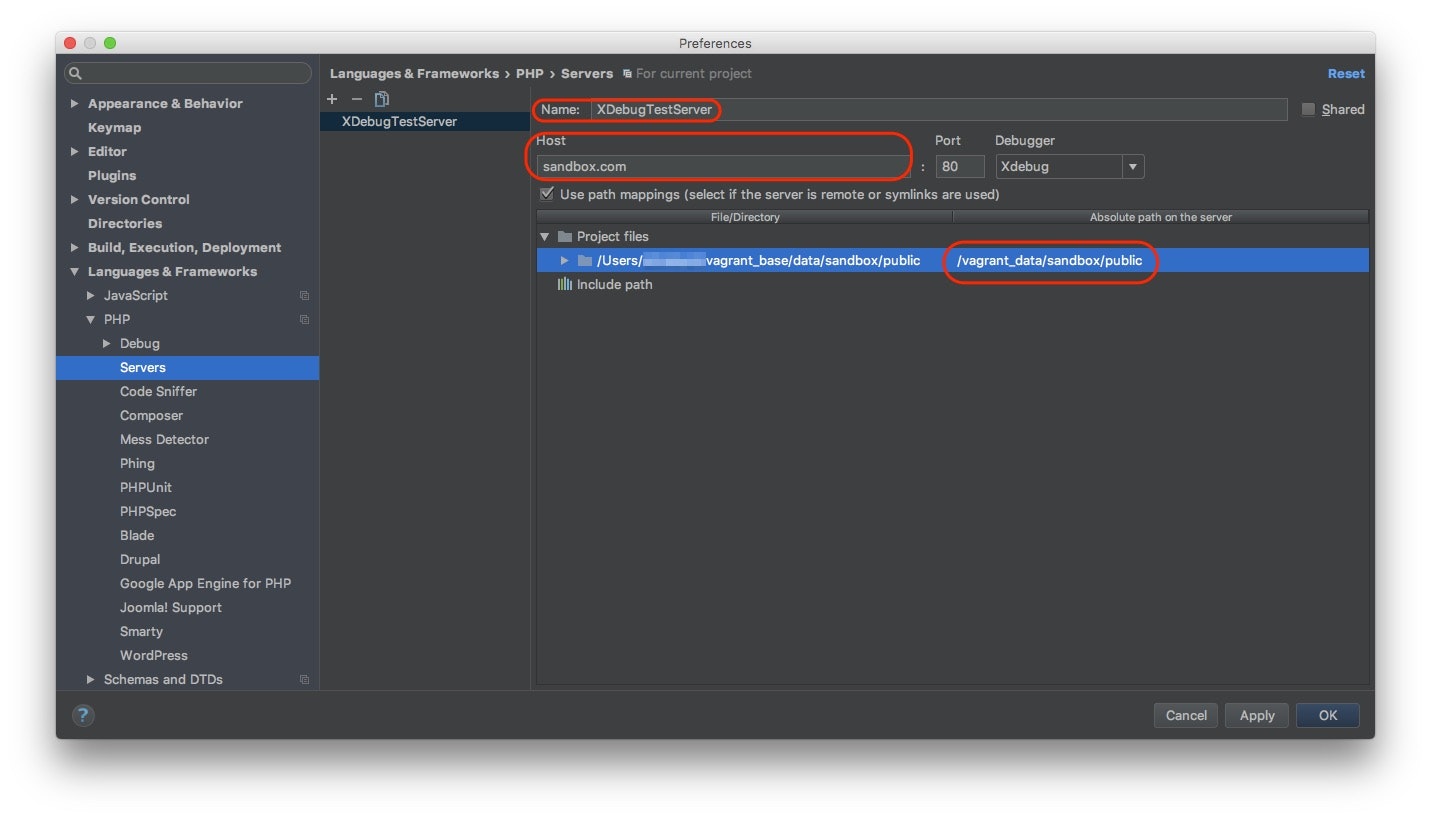
Languages & Frameworks > Servers
「+」からサーバを追加します。
- Name
適当でよいです - Host
デバッグ対象のURL - Absolute path on the server
Vagrant上のプロジェクトのパスを選びます。デフォルトは空欄なので、セレクトボックスから絶対パスを選択します

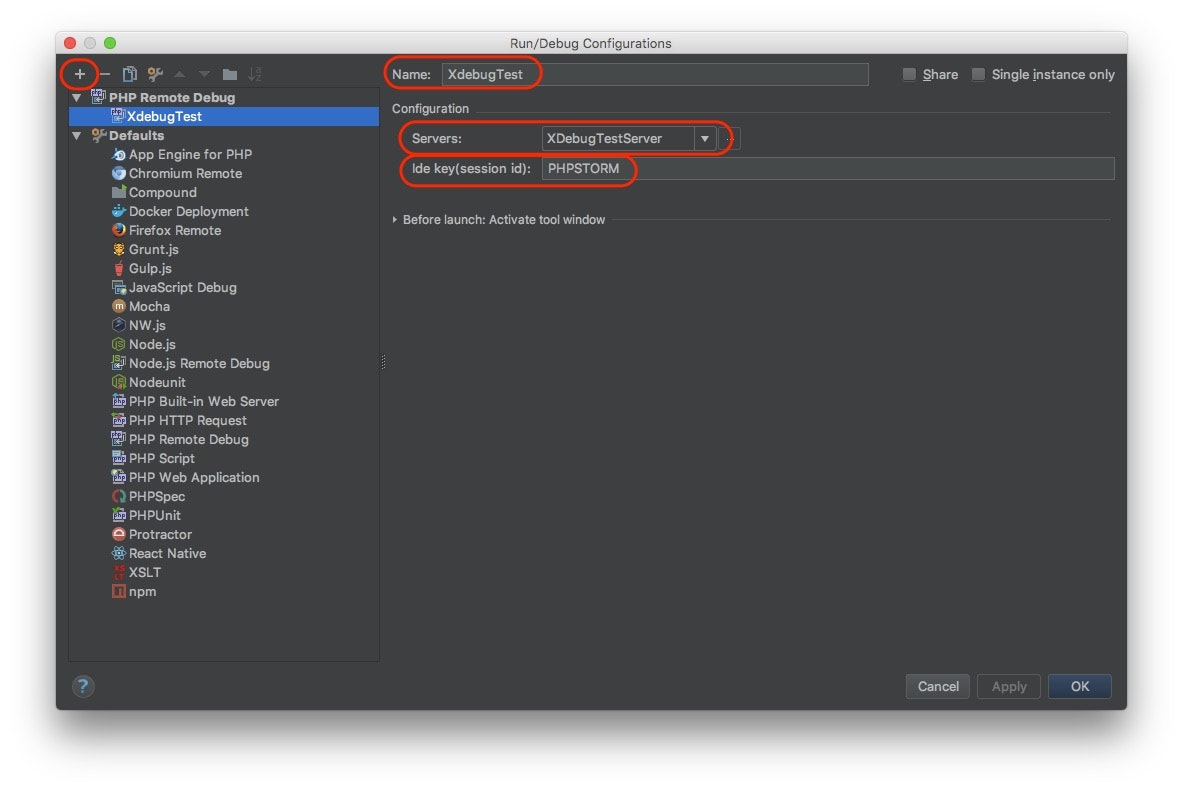
メニューのRun > Edit Configurations
左上の「+」から、「PHP Remote Debug」を選択し、設定を追加します
-
Name
適当でよいです -
Servers
さっき作成したサーバ情報を選択します -
ide key
"PHPSTORM"を指定します
デバッグ

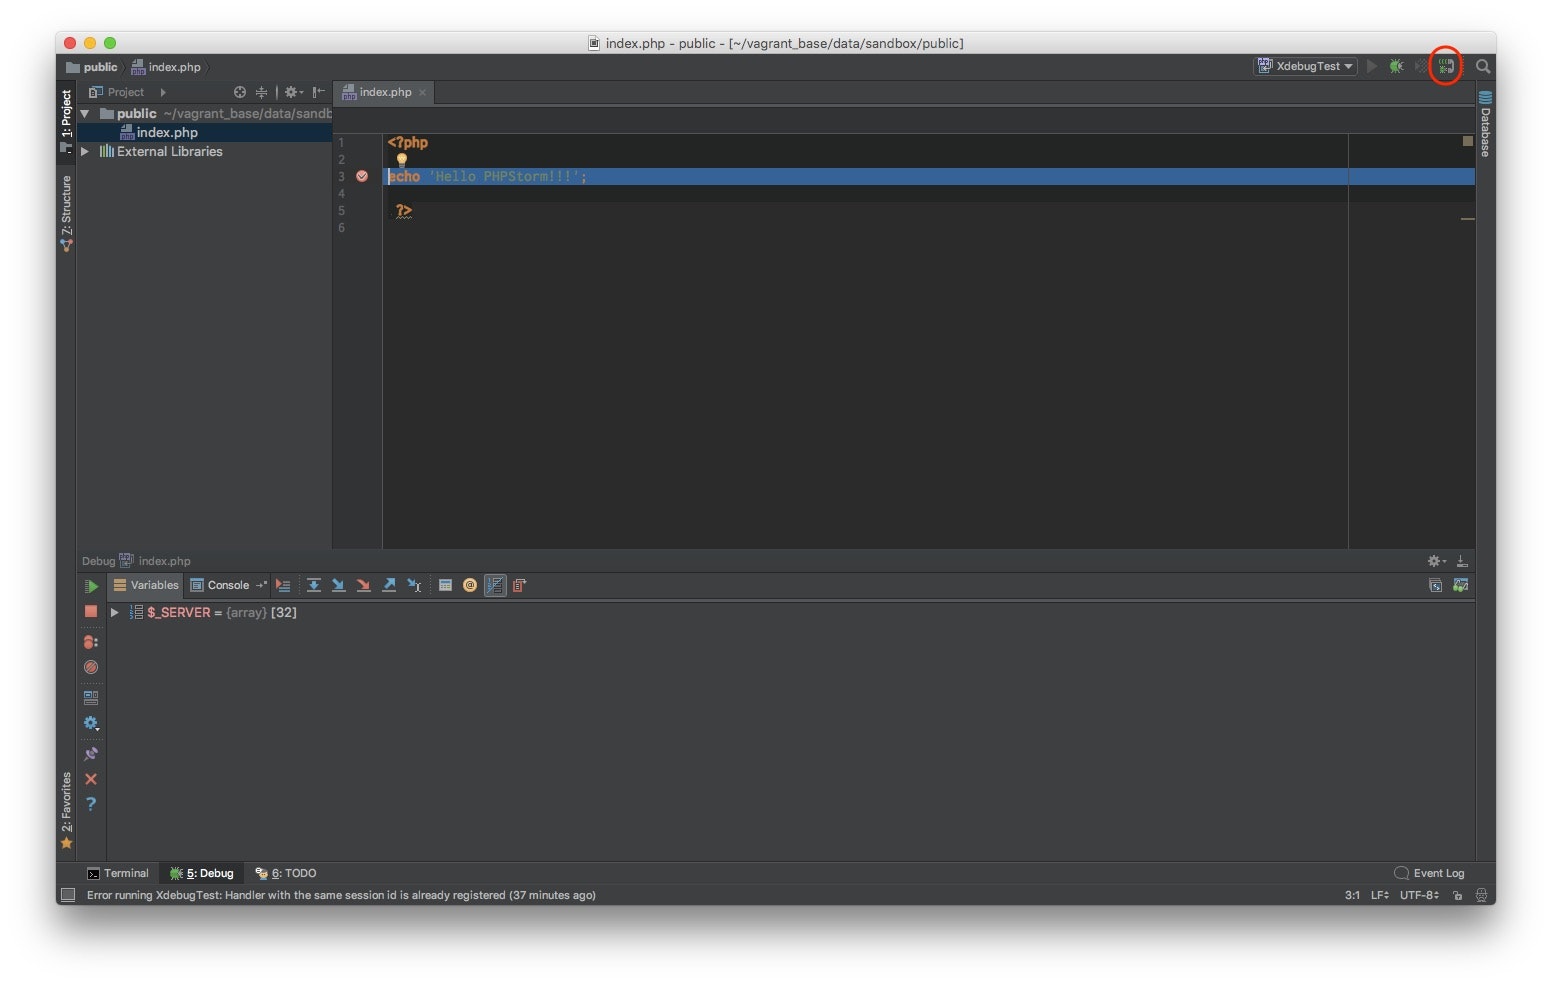
右上の電話の受話器マークを有効にして(緑っぽくする)URLにアクセスすると、ブレークポイントでめでたく停止。
こちらからは以上です

