Androidにおけるカメラの取り扱い
Androidにおけるカメラの取扱いは,ちょっと古いけどこの資料が分かりやすい.
基本的に,libcamera.soがカーネルさんにお伺いを立てたりして画像を取得,それをCameraHardwareInterface経由でlibcameraservice.soに渡すって感じ.
何らかの画像処理アルゴリズムを組み込む場合,libcamera.soに組み込むのがベストではあるが,この部分は基本的にプロプライエタリなのでSOC屋さんと契約が必要.
なので,今回は若干のオーバーヘッドは生じるけどCameraクラスにラッパ経由でアクセスすることで画像を取得する.これならAPKで配布もできるしね!!
作成したプログラム
基本的にはNDKのサンプルにあるnative-activityにOpenCVのプレビュー表示を組み込む感じで実装した.
AndroidのOpenCVについては,このページとかを参考にすると良いと思う.
とあえず,コードについては以下の感じ.
camera_test.cpp
/*
 * Copyright (C) 2010 The Android Open Source Project
 *
 * Licensed under the Apache License, Version 2.0 (the "License");
 * you may not use this file except in compliance with the License.
 * You may obtain a copy of the License at
 *
 *      http://www.apache.org/licenses/LICENSE-2.0
 *
 * Unless required by applicable law or agreed to in writing, software
 * distributed under the License is distributed on an "AS IS" BASIS,
 * WITHOUT WARRANTIES OR CONDITIONS OF ANY KIND, either express or implied.
 * See the License for the specific language governing permissions and
 * limitations under the License.
 *
 */

# include <android_native_app_glue.h>

# include <errno.h>
# include <jni.h>
# include <sys/time.h>
# include <time.h>
# include <android/log.h>

# include <stdio.h>
# include <stdlib.h>
# include <math.h>

# include "opencv2/highgui/highgui.hpp"

# define  LOG_TAG    "native_camera_demo"
# define  LOGI(...)  __android_log_print(ANDROID_LOG_INFO,LOG_TAG,__VA_ARGS__)
# define  LOGW(...)  __android_log_print(ANDROID_LOG_WARN,LOG_TAG,__VA_ARGS__)
# define  LOGE(...)  __android_log_print(ANDROID_LOG_ERROR,LOG_TAG,__VA_ARGS__)

static uint16_t  make565(int red, int green, int blue)
{
    return (uint16_t)( ((red   << 8) & 0xf800) |
                       ((green << 2) & 0x03e0) |
                       ((blue  >> 3) & 0x001f) );
}

// ----------------------------------------------------------------------

struct engine {
    struct android_app* app;

    int animating;
    cv::Mat* frame;
    cv::VideoCapture* capture;
};

static void engine_draw_frame(struct engine* engine) {
    if (engine->app->window == NULL) {
        // No window.
        return;
    }

    ANativeWindow_Buffer buffer;
    if (ANativeWindow_lock(engine->app->window, &buffer, NULL) < 0) {
        LOGW("Unable to lock window buffer");
        return;
    }

    {
        uint16_t* pixels = (uint16_t*)buffer.bits;

        for( int y = 0; y < engine->frame->size().height; y ++ )
        {
            for( int x = 0; x < engine->frame->size().width; x ++ )
            {
                cv::Vec3b bgr = engine->frame->at< cv::Vec3b >( y, x );
                pixels[x] = make565( bgr[2], bgr[1], bgr[0] );
            }
            pixels = (uint16_t*)pixels + buffer.stride;
        }
    }

    ANativeWindow_unlockAndPost(engine->app->window);
}

static int engine_term_display(struct engine* engine) {
    engine->animating = 0;
}

static int32_t engine_handle_input(struct android_app* app, AInputEvent* event) {
    struct engine* engine = (struct engine*)app->userData;
/*
    if (AInputEvent_getType(event) == AINPUT_EVENT_TYPE_MOTION) {
        return 1;
    } else if (AInputEvent_getType(event) == AINPUT_EVENT_TYPE_KEY) {
        LOGI("Key event: action=%d keyCode=%d metaState=0x%x",
                AKeyEvent_getAction(event),
                AKeyEvent_getKeyCode(event),
                AKeyEvent_getMetaState(event));
    }
*/
    return 0;
}

static void engine_handle_cmd(struct android_app* app, int32_t cmd) {
    struct engine* engine = (struct engine*)app->userData;
    switch (cmd) {
        case APP_CMD_INIT_WINDOW:
            if (engine->app->window != NULL) {
                engine_draw_frame(engine);
                engine->animating = 1;
            }

            engine->capture->open( CV_CAP_ANDROID + 0 );

            break;
        case APP_CMD_TERM_WINDOW:
            engine_term_display(engine);
            engine->capture->release();

            break;
        case APP_CMD_LOST_FOCUS:
            engine->animating = 0;
            engine_draw_frame(engine);
            break;
    }
}

void android_main(struct android_app* state) {
    struct engine engine;

    // Make sure glue isn't stripped.
    app_dummy();

    memset(&engine, 0, sizeof(engine));
    state->userData = &engine;
    state->onAppCmd = engine_handle_cmd;
    state->onInputEvent = engine_handle_input;
    engine.app = state;

    engine.frame = new cv::Mat();
    engine.capture = new cv::VideoCapture( );

    // loop waiting for stuff to do.

    while (1) {
        // Read all pending events.
        int ident;
        int events;
        struct android_poll_source* source;

        // If not animating, we will block forever waiting for events.
        // If animating, we loop until all events are read, then continue
        // to draw the next frame of animation.
        while ((ident=ALooper_pollAll( 0, NULL, &events, (void**)&source)) >= 0) {

            // Process this event.
            if (source != NULL) {
                source->process(state, source);
            }

            // Check if we are exiting.
            if (state->destroyRequested != 0) {
                LOGI("Engine thread destroy requested!");
                engine_term_display(&engine);
                return;
            }
        }

        if (engine.animating) {
            if( engine.capture->isOpened() )
            {
                *(engine.capture) >> *(engine.frame);
            }
            engine_draw_frame(&engine);
        }
    }

    delete engine.capture;
    delete engine.frame;
}
基本的な処理の流れは以下の通り.
- Matクラス,VideoCaptureクラスのインスタンスを作成
- アプリ終了時にonAppCmdに設定したコールバック(ここではengine_handle_cmd)のAPP_CMD_INIT_WINDOWでカメラをオープン
- メインループ中でプレビュー画像を取得(168行目)
- 取得したプレビュー画像をフレームバッファに描画
- アプリ終了時にonAppCmdに設定したコールバックのAPP_CMD_TERM_WINDOWで取得したカメラをリリース
単純にプレビューを描画したかっただけなのでアクティビティのライフサイクルとか全然考えてません.
なので,時々システムを巻き込んで固まりますww
プロジェクト一式を見たい人はこちらからどうぞ.
実行結果
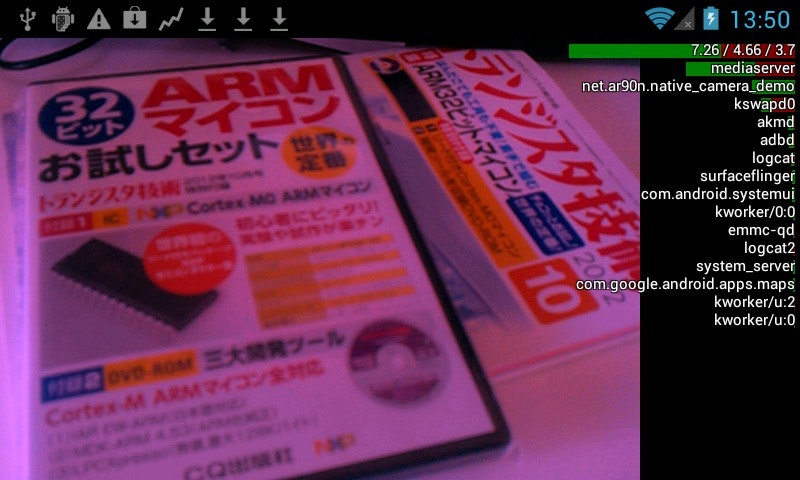
全体的に赤みがかってるのはなんでだろう??ホワイトバランスの設定が失敗してるのかな.