本稿は「Nuxt.js(v2.6.x)やっておきたい設定シリーズ」の第2段です。
- その1/3|create-nuxt-app〜各種プラグインの導入まで。
- その2/3|SEOに必要なmetaとogpの設定及びpwa(Manifest、Icon、Workbox)の設定
- その3/3|コンポーネントフィアルの管理方法とloading・各種トランジションの設定
「Nuxt.jsやっておきたい設定:その2/3」として、SEOに必要なmetaとOgpの基本的な設定及びpwa(Manifest、Icon、Workbox)の設定(OneSignalはサーバーが関わるの本稿ではやらない)をまとめた。とりあえず、以下「その2/3」の設定をすれば、SEOやPWAに関して指摘されることは少ない…はず。「その1/3」「その2/3」を習得し、スタート時に設定できるようになれば、実開発はコンテンツのクオリティアップに集中できるぞ!
今から…
SEOに必要なmeta関連と、必須対応となったOGP関連を設定した後に、@nuxtjs/pwaのディフォルト設定ではやってくれないPWA関連を追加していく。同じような記述が頻出するので、共通化できるところはまとめつつ、一括変更が必要なところは環境変数で変更できるようにしておく。
手間ではあるものの、やっておいて損はない(どころか恩恵が大きい)ので、めげずに頑張ること。
共通&一括変更箇所を設定
共通&一括変更箇所を、path/meta/images/pwa/etcに分けて、nuxt.config.jsに追記していく。
const webpack = require('webpack')

// path
const baseUrl = process.env.BASE_URL || 'http://localhost:3000'
const baseDir = process.env.BASE_DIR || '/'
const basePath = baseUrl + baseDir

// meta
const lang = 'ja'
const siteName = '株式会社アミテン'
const siteDesc = '共通のディスクリプション。'
const siteKeywords = '1つ目,2つ目,3つ目,4つ目'

// images
const iconImages = baseDir + 'img/icons/'
const ogpImages = basePath + 'img/ogp/'

// pwa
const shortName = 'アミテン'
const manifestIcon = 'img/icons/icon-1024.png'
const splashscreens = baseDir + 'img/splashscreens/'

// etc
// const apiUrl = process.env.API_URL || 'https://example.com'
// const colorPrimary = '#0A428C'
// const colorSecondary = '#FA4988'

module.exports = {
  router: {
    base: baseDir, // ←これも忘れずに入れる!
  },
  ...
}
以下説明
path
全部で3つのパスを使い分ける必要がある。
1.絶対URL(httpから始まるURL ※例:https://exaple.com/baseDir/)
ogp:images属性(ogp画像)やogp:url属性(ページURL)などは、絶対URLで指定する。今回は使わないけど、canonical属性なんかも絶対URL。これが厄介で、状況によって変わる。
ありえる話として…
- 本番リリース時:https://example.com/
- 本番リリース直前:https://example.com/test/
- テスト環境:https://stg.example.com/
- 簡易テスト:http://192.168.xx.xx:8888/example-com/
- ローカル作業中:http://localhost:3000/
など、ドメインとアプリケーションのソースディレクトリがバラバラ。
毎回変更しているとそのうち書き換えミスが起きるので、process.env.BASE_URL || 'http://localhost:3000'の用に書くことで、nodeの環境変数で変更できるようにしておく。例えばBASE_DIR=/test-dir/ npm run devと実行すれば、http://localhost:3000/test-dir/が絶対URLになる。
2.絶対パス(/から始まるパス ※例:/test-dir/img/xxx.jpg)
staticディレクトリに設置したファイルにアクセスする場合に使う。今回の場合は、favicon用画像やsplash画像なんかが該当する。絶対URLでも構わない気もするが助長な記述は避けるべきなので、指定がなければ絶対パスの方を利用する。
3.アプリケーションパス(今回の設定では、src/static/img/xxx.jpgなど)
nuxt.config.jsの置かれたディレクトリ(通常はトップディレクトリ)からの相対パスで記載する。今回はpwa用iconの自動生成時に概念的にでてくる。何かファイルの自動生成などを行うときは使う考えなので覚えておく。
meta
metaに記載する基本的な項目です。詳しく説明いらないかな。
最低でのmeta用とopg用の2回づつ、pwaや下層ページも入れると何度も記述することになるので、共通項目としてまとめておく。
keywordsはいらない派だけど、何故か根強い支持があるのでとりあえず入れてある。
images
statcディレクトリ内にfavicon用画像とOGP用画像を格納する。ベースディレクトリやURLを変更しても大丈夫なように設定。
pwa
metaでちゃんとしてれば追加で必要な情報は意外と少ない。
-
shortName
モバイルでホーム画面に追加したときに出てくるアイコンの下の名前(Chrome で推奨される最大文字数は12文字だけど、覚えやすいように6文字程度に抑えたほうが良いと思う。) -
manifestIcon
PWAのmanifest用アイコンは種類が多い(少なくとも7つほしい)ので自動生成をする。nuxtのお作法?に合わせて、もととなる1024x1024pxのアイコンをfavicon制作時に作っておいて一緒に設置しておく。 -
splashscreens
アプリケーションを起動するときに表示されるスプラッシュ(Splash)画面。説明によってはローンチスクリーン(Launch Screen)とも言う。作らなければ行けないサイズが多いので、AppscopeのAbout splash-screensが提供しているAPSを利用して生成する。とりあえず格納場所だけ書いておく。
headの設定・ogp画像の設置
Nuxt.jsの基本機能「head」を利用してmeta(OGP)を設定する。おすすめ論は多岐に当たるため今回は、The Open Graph protocolを参考にし、ちょっとアレンジを加えた。
ogp画像はfacebook合わせの1200 × 630pxで作成して、はじめに指定したstatic内のディレクトリに設置しておく。ogp画像ファイルのサイズに合わせてtwitter:cardをsummary_large_imageに指定しておく。シェアしたときに見栄えがいい。ファイル名はご自由に。
module.exports = {
  ...
  // Doc: http://ogp.me/
  head: {
    htmlAttrs: {
      prefix: 'og: http://ogp.me/ns#',
      lang: lang
    },
    titleTemplate: `%s - ${siteName}`,
    meta: [
      // 設定関連
      { charset: 'utf-8' },
      { 'http-equiv': 'x-ua-compatible', content: 'ie=edge' },
      { name: 'viewport', content: 'width=device-width, initial-scale=1' },
      { name: 'format-detection', content: 'telephone=no, email=no, address=no' },

      // SEO関連
      { hid: 'description', name: 'description', content: siteDesc },
      { hid: 'keywords', name: 'keywords', content: siteKeywords },

      // ogp関連
      { hid: 'og:site_name', property: 'og:site_name', content: siteName },
      { hid: 'og:type', property: 'og:type', content: 'website' },
      { hid: 'og:url', property: 'og:url', content: basePath },
      { hid: 'og:title', property: 'og:title', content: siteName },
      { hid: 'og:description', property: 'og:description', content: siteDesc },
      { hid: 'og:image', property: 'og:image', content: `${ogpImages}home.jpg` },
      { name: 'twitter:card', content: 'summary_large_image' },
      // { name: 'twitter:site', content: '@Twitter' },
      // { property: 'article:publisher', content: 'FacebookURL' },
      // { property: 'fb:app_id', content: 'FacebookAppID' },
    ],
  }
}
CDN関連を設定
よく使うpolifillと、cdn経由のfontを登録しておく。polifillは必要なときにすぐコメントアウトはずせるように。fontは…ならべく指定しない派なんだけど、流石に明朝体は指定しておきたい。個人的には「NotoSerifJPとyakuhanjp」の重ね技が扱いやすくて好き。
module.exports = {
  head: {
    htmlAttrs: {...},
    titleTemplate: `%s - ${siteName}`,
    meta: [...],
    script: [
      // polifills
      // { src: '//polyfill.io/v2/polyfill.min.js?features=IntersectionObserver' },
      // { src: '//cdnjs.cloudflare.com/ajax/libs/web-animations/2.3.1/web-animations.min.js' }
    ],
    link: [
      // fonts
      { rel: 'stylesheet', href: 'https://cdn.jsdelivr.net/npm/yakuhanjp@3.0.0/dist/css/yakuhanmp.min.css' },
      { rel: 'stylesheet', href: 'https://fonts.googleapis.com/css?family=Noto+Serif+JP:400,700&subset=japanese' },
    ]
  }
}
faviconを設置・設定
IE11以上対応なのでicoファイルは設置しない。作るのめんどくさいから必要ないものとはならべく距離を置きたい。
以下6つのサイズのpngアイコンを作成して、最初に指定した場所に設置しておく。
- 16x16px:favicon-16.png
- 32x32px:favicon-32.png
- 48x48px:favicon-48.png
- 62x62px:favicon-62.png
- 180x180px:apple-touch-icon.png ※iOSホーム画面追加用アイコン
- 1024x1024px:icon-1024.png ※自動生成用のベースアイコン
設置が済んだら、nuxt.config.jsに追加していく。
module.exports = {
  head: {
    htmlAttrs: {...},
    titleTemplate: `%s - ${siteName}`,
    meta: [...],
    script: [...],
    link: [
      // fonts
      ...
      // icons
      { rel: 'icon', sizes: '16x16', type: 'image/png', href: iconImages + 'favicon-16.png' },
      { rel: 'icon', sizes: '32x32', type: 'image/png', href: iconImages + 'favicon-32.png' },
      { rel: 'icon', sizes: '48x48', type: 'image/png', href: iconImages + 'favicon-48.png' },
      { rel: 'icon', sizes: '62x62', type: 'image/png', href: iconImages + 'favicon-62.png' },
      // apple touch icon
      { rel: 'apple-touch-icon', sizes: '180x180', href: iconImages + 'apple-touch-icon.png' },
    ]
  }
}
これで、meta関連の設定完了。次からPWAの設定を行う。
PWAの動作確認方法を覚えておく
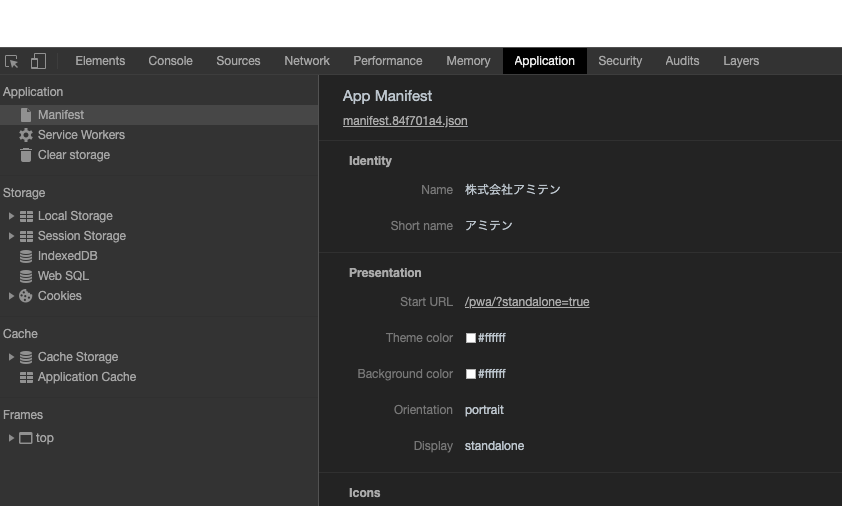
本題のPWAの設定をしていく前に、chromeでProgressive Web App のデバッグをする方法を確認。さすがgoogleさん、ちゃんとまとめて書いてある。Progressive Web App のデバッグを一読。
言い直すと、公式のドキュメントを読む癖と、確認方法を事前に調べておく癖を付けるように。
manufestを設定
ウェブアプリ マニフェストとにらめっこしながら@nuxtjs/pwaの機能を使ってmanifestを設定する。
といっても、基本的なことはディフォルトで抑えてくれているのでコピペでOK。color周りやdisplayはご自由に。
module.exports = {
  ...
  manifest: {
    lang: lang,
    name: siteName,
    short_name: shortName,
    description: siteDesc,
    background_color: '#ffffff',
    theme_color: '#ffffff',
    display: 'standalone',
    orientation: 'portrait'
  },
}
OK。
manifest用iconの設定
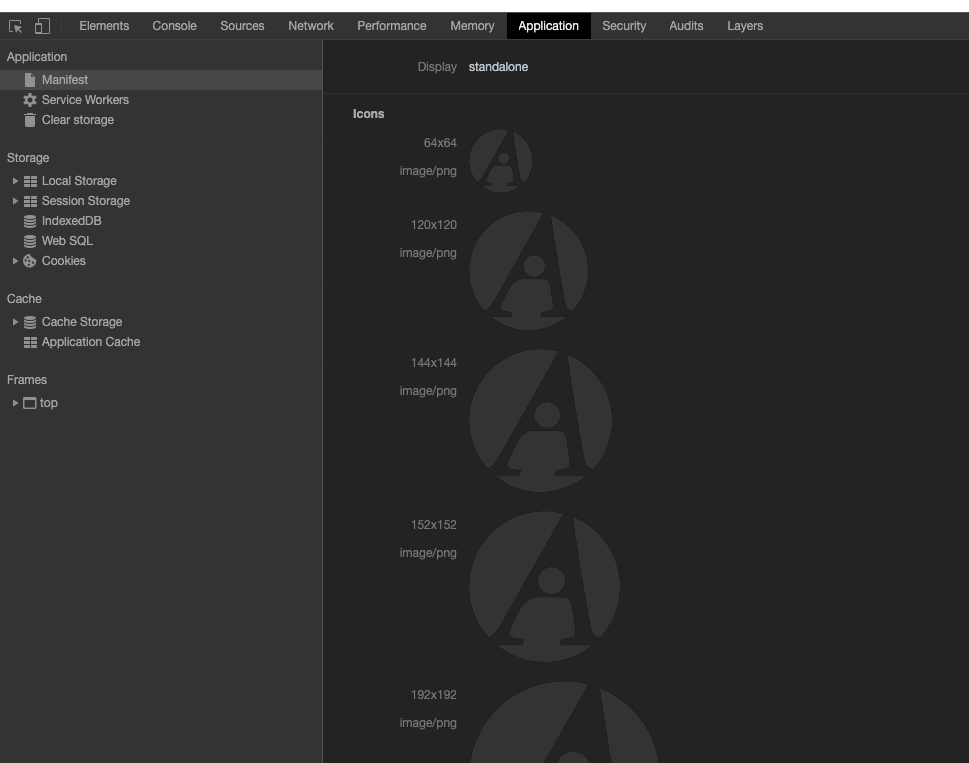
manifest用のアイコンは種類が多いので@nuxtjs/pwaの力を借りて自動生成する。
もととなる画像は、favicon制作時に作った1024x1024pxサイズのアイコンを利用する。
まずは、moduleでicon: falseのオプションが付いていた場合は削除する。
module.exports = {
  modules: [
    // ['@nuxtjs/pwa', { icon: false }], もし「icon: false」になっていたらオプションを外す。
    // ↓
    '@nuxtjs/pwa',
  ],
}
favicon制作時に作った1024x1024pxサイズのアイコンを(icon-1024.png)を登録。
const manifestIcon = 'img/icons/icon-1024.png'
module.exports = {
  icon: {
    iconFileName: manifestIcon
  },
}
npm run devで確認。
OK。すごいぞNuxt!
iOS(safari)用のmetaを設定
manifestも万能ではないので、Apple公式のSafari Web Content Guideの項を見ながらheadに追加していく。と言っての2つだけ。設定はプロジェクトに合わせてご自由に。
module.exports = {
  head: {
    htmlAttrs: {...},
    titleTemplate: `%s - ${siteName}`,
    meta: [
     ...
      // pwa iOS
      { name: 'apple-mobile-web-app-capable', content: 'yes' },
      { name: 'apple-mobile-web-app-status-bar-style', content: 'black-translucent' },
    ],
    script: [...],
    link: [...]
  }
}
iOS(safari)用のスプラッシュ画像を設定・設置
スプラッシュ画像についてはAppscopeのAbout splash-screensの項を確認しながら追加。
項目数が多いので自作すると大変…なので、同ページにあるジェネレーターにお世話になる。生成された画像を始めに設定した場所へ設置したら、nuxt.config.jsに追加していく。
module.exports = {
  head: {
    htmlAttrs: {...},
    titleTemplate: `%s - ${siteName}`,
    meta: [...],
    script: [...],
    link: [
      ...
      // pwa splash screens
      // Doc: https://appsco.pe/developer/splash-screens
      { href: splashscreens + 'iphone5_splash.png', media: '(device-width: 320px) and (device-height: 568px) and (-webkit-device-pixel-ratio: 2)', rel: 'apple-touch-startup-image' },
      { href: splashscreens + 'iphone6_splash.png', media: '(device-width: 375px) and (device-height: 667px) and (-webkit-device-pixel-ratio: 2)', rel: 'apple-touch-startup-image' },
      { href: splashscreens + 'iphoneplus_splash.png', media: '(device-width: 621px) and (device-height: 1104px) and (-webkit-device-pixel-ratio: 3)', rel: 'apple-touch-startup-image' },
      { href: splashscreens + 'iphonex_splash.png', media: '(device-width: 375px) and (device-height: 812px) and (-webkit-device-pixel-ratio: 3)', rel: 'apple-touch-startup-image' },
      { href: splashscreens + 'iphonexr_splash.png', media: '(device-width: 414px) and (device-height: 896px) and (-webkit-device-pixel-ratio: 2)', rel: 'apple-touch-startup-image' },
      { href: splashscreens + 'iphonexsmax_splash.png', media: '(device-width: 414px) and (device-height: 896px) and (-webkit-device-pixel-ratio: 3)', rel: 'apple-touch-startup-image' },
      { href: splashscreens + 'ipad_splash.png', media: '(device-width: 768px) and (device-height: 1024px) and (-webkit-device-pixel-ratio: 2)', rel: 'apple-touch-startup-image' },
      { href: splashscreens + 'ipadpro1_splash.png', media: '(device-width: 834px) and (device-height: 1112px) and (-webkit-device-pixel-ratio: 2)', rel: 'apple-touch-startup-image' },
      { href: splashscreens + 'ipadpro3_splash.png', media: '(device-width: 834px) and (device-height: 1194px) and (-webkit-device-pixel-ratio: 2)', rel: 'apple-touch-startup-image' },
      { href: splashscreens + 'ipadpro2_splash.png', media: '(device-width: 1024px) and (device-height: 1366px) and (-webkit-device-pixel-ratio: 2)', rel: 'apple-touch-startup-image' },
    ]
  }
}
エミュレーターで動作確認。OK。
これでiOS用の対策もできました。
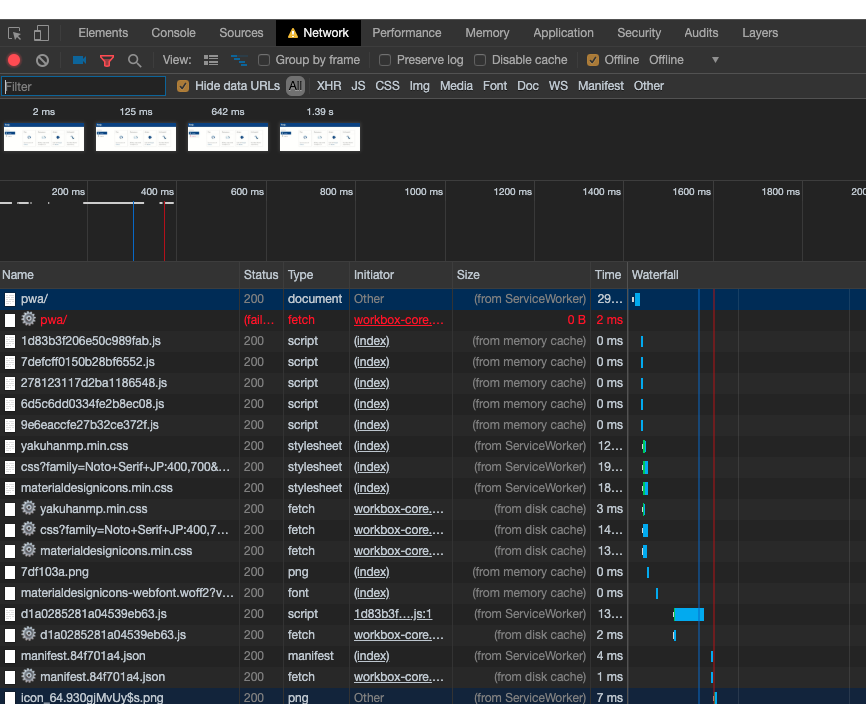
workboxを使ってキャッシュ設定
あとちょっと…workboxを使っていろいろキャッシュさせる。
@nuxtjs/pwaはデフォルトで、/_nuxt /のリソースはcacheFirstでキャッシュする(cacheFirstとは、キャッシュ優先に使ってねの意)。
それ故に@nuxtjs/pwaを入れておくと何も設定しなくても表示が早くなるだが、CDNや/_nuxt /以外についての設定を追加することでもっと早くなる。
以下をnuxt.config.jsにworkboxの設定を記載。もし他にCDNを利用している場合は追加すると幸せになれる。
module.exports = {
  workbox: {
    runtimeCaching: [
      {
        urlPattern: '^https://fonts.(?:googleapis|gstatic).com/(.*)',
        handler: 'cacheFirst'
      },
      {
        urlPattern: 'https://cdn.jsdelivr.net/.*',
        handler: 'cacheFirst'
      },
      {
        urlPattern: 'https://cdn.materialdesignicons.com/.*',
        handler: 'cacheFirst'
      },
      {
        urlPattern: baseDir + '.*',
        handler: 'staleWhileRevalidate',
        strategyOptions: {
          cacheName: 'my-cache',
          cacheExpiration: {
            maxAgeSeconds: 24 * 60 * 60 * 30
          }
        }
      }
    ]
  },
}
オフライン環境でもイケてる。OK。
generate用にhtaccessを設置・設定
ラスト。
generate(静的書き出し)する人は、.htaccessを用意しつつキャッシュを強化。また、ディフォルトだと200.htmlで書き出されるエラーページを404.htmlになうるように設定。
nuxt.config.jsに以下追記。
module.exports = {
  generate: {
    fallback: true,
  },
}
以下.htaccessをstaticディレクトリ直下に配置。
制作ディレクトリに合わせて、RewriteBase /を変更することを忘れずに。例:RewriteBase /test-dir/など。
# === RewriteRuleセット ================================

<IfModule mod_rewrite.c>

# --- RewriteEngineをOn、ドキュメントルートを設定する ---

RewriteEngine on
RewriteBase /

# --- index.html/phpなしに統一 ---

RewriteCond %{THE_REQUEST} ^.*/index.html
# ↓指定のディレクトリを対象外にする
# RewriteCond %{REQUEST_URI} !(xxx/)
RewriteRule ^(.*)index.html$ $1 [R=301,L]

RewriteCond %{THE_REQUEST} ^.*/index.php
# ↓指定のディレクトリを対象外にする
# RewriteCond %{REQUEST_URI} !(xx/)
RewriteRule ^(.*)index.php$ $1 [R=301,L]

# --- wwwあり・なしに統一 ---

# あり
# RewriteCond %{HTTP_HOST} ^example\.com$
# RewriteRule ^(.*)$ https://www.example.com/$1 [R=301,L]

# なし
RewriteCond %{HTTP_HOST} ^www\.example\.com$
RewriteRule ^(.*)$ https://example.com/$1 [R=301,L]

# --- httpsに統一 ---

RewriteCond %{SERVER_PORT} 80
# ↓指定のディレクトリを対象外にする
# RewriteCond %{REQUEST_URI} !(xxx/)
RewriteRule ^(.*)$ https://%{HTTP_HOST}%{REQUEST_URI} [R=301,L]

# --- ディレクトリダイレクト ---

RewriteRule ^oldDir/(.*)$ newDir/$1 [R=301,L]

# --- ページリダイレクト ---

RewriteRule ^oldDir/index.html newDir/new.html [R=301,L]

# --- 404リダイレクト ---

RewriteCond %{REQUEST_FILENAME} !-f
RewriteCond %{REQUEST_FILENAME} !-d
RewriteRule ^.*$ 404.html

</IfModule>


# === キャッシュコントロール ================================
# Thanks:https://html5boilerplate.com/


<IfModule mod_expires.c>

  ExpiresActive on
  ExpiresDefault                                      "access plus 1 month"

  # CSS
  ExpiresByType text/css                              "access plus 1 year"

  # Data interchange
  ExpiresByType application/atom+xml                  "access plus 1 hour"
  ExpiresByType application/rdf+xml                   "access plus 1 hour"
  ExpiresByType application/rss+xml                   "access plus 1 hour"
  ExpiresByType application/json                      "access plus 0 seconds"
  ExpiresByType application/ld+json                   "access plus 0 seconds"
  ExpiresByType application/schema+json               "access plus 0 seconds"
  ExpiresByType application/vnd.geo+json              "access plus 0 seconds"
  ExpiresByType application/xml                       "access plus 0 seconds"
  ExpiresByType text/calendar                         "access plus 0 seconds"
  ExpiresByType text/xml                              "access plus 0 seconds"


  # Favicon (cannot be renamed!) and cursor images
  ExpiresByType image/vnd.microsoft.icon              "access plus 1 week"
  ExpiresByType image/x-icon                          "access plus 1 week"

  # HTML
  ExpiresByType text/html                             "access plus 0 seconds"

  # JavaScript
  ExpiresByType application/javascript                "access plus 1 year"
  ExpiresByType application/x-javascript              "access plus 1 year"
  ExpiresByType text/javascript                       "access plus 1 year"

  # Manifest files
  ExpiresByType application/manifest+json             "access plus 1 week"
  ExpiresByType application/x-web-app-manifest+json   "access plus 0 seconds"
  ExpiresByType text/cache-manifest                   "access plus 0 seconds"

  # Markdown
  ExpiresByType text/markdown                         "access plus 0 seconds"

  # Media files
  ExpiresByType audio/ogg                             "access plus 1 month"
  ExpiresByType image/bmp                             "access plus 1 month"
  ExpiresByType image/gif                             "access plus 1 month"
  ExpiresByType image/jpeg                            "access plus 1 month"
  ExpiresByType image/png                             "access plus 1 month"
  ExpiresByType image/svg+xml                         "access plus 1 month"
  ExpiresByType image/webp                            "access plus 1 month"
  ExpiresByType video/mp4                             "access plus 1 month"
  ExpiresByType video/ogg                             "access plus 1 month"
  ExpiresByType video/webm                            "access plus 1 month"

  # WebAssembly
  ExpiresByType application/wasm                      "access plus 1 year"

  # Web fonts
  # Collection
  ExpiresByType font/collection                       "access plus 1 month"

  # Embedded OpenType (EOT)
  ExpiresByType application/vnd.ms-fontobject         "access plus 1 month"
  ExpiresByType font/eot                              "access plus 1 month"

  # OpenType
  ExpiresByType font/opentype                         "access plus 1 month"
  ExpiresByType font/otf                              "access plus 1 month"

  # TrueType
  ExpiresByType application/x-font-ttf                "access plus 1 month"
  ExpiresByType font/ttf                              "access plus 1 month"

  # Web Open Font Format (WOFF) 1.0
  ExpiresByType application/font-woff                 "access plus 1 month"
  ExpiresByType application/x-font-woff               "access plus 1 month"
  ExpiresByType font/woff                             "access plus 1 month"

  # Web Open Font Format (WOFF) 2.0
  ExpiresByType application/font-woff2                "access plus 1 month"
  ExpiresByType font/woff2                            "access plus 1 month"

  # Other
  ExpiresByType text/x-cross-domain-policy            "access plus 1 week"

</IfModule>
おまけ
metaモジュールはどこいった?
@nuxtjs/pwaには、便利なmetaモジュールが含まれている。しかしながら、metaモジュールでできることはheadでやっているので追加設定はいらない。
ふぅ。
これでやっと、コンテンツ制作に手がつけられる。


