つい最近まで PCL な Xamarin.Forms では、 ReactiveProperty の 2.x 系しか使えないと思っていたのですが、いろいろな方の協力で使える方法が分かったので示しておきます。
今から ReactiveProperty を(Xamarin で)使ってみたいぞ、という人向けのクイックスタートも兼ねて。
1. ソリューションを作る
Visual Studio for Mac で行きます。
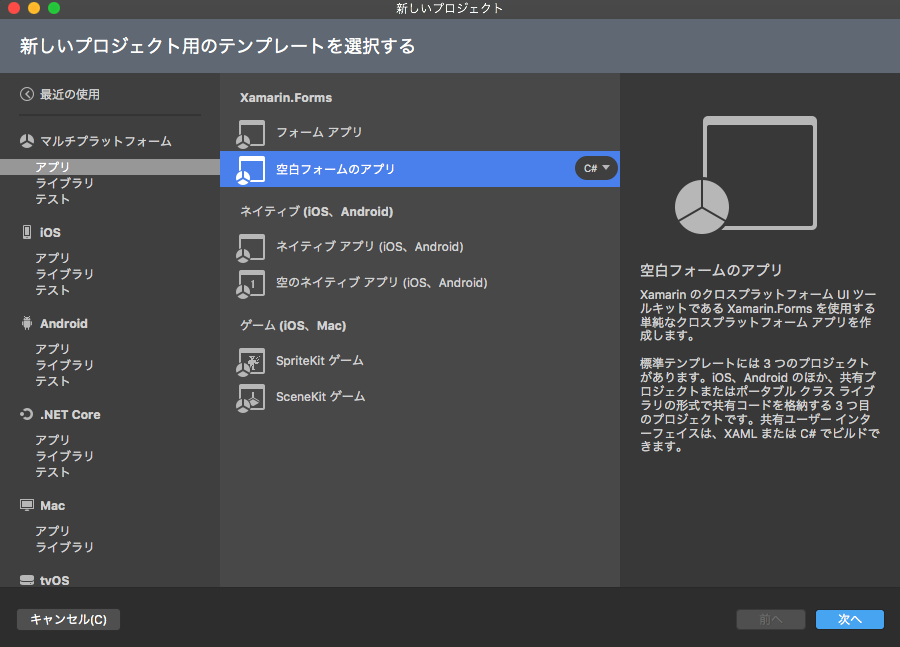
新しいソリューションから、 アプリ - 空白フォームのアプリ を選んで、適当な名前で作成します。ここでは 「ReactivePropertySample」 としますね。
2. PCL のプロファイルを "44" に変える
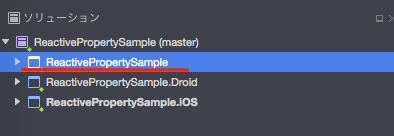
ソリューションが作成できたら、3つあるプロジェクトの中のコアプロジェクト(.Droid や .iOS のついてないもの)を選択して右クリック → 「オプション」を開きます。
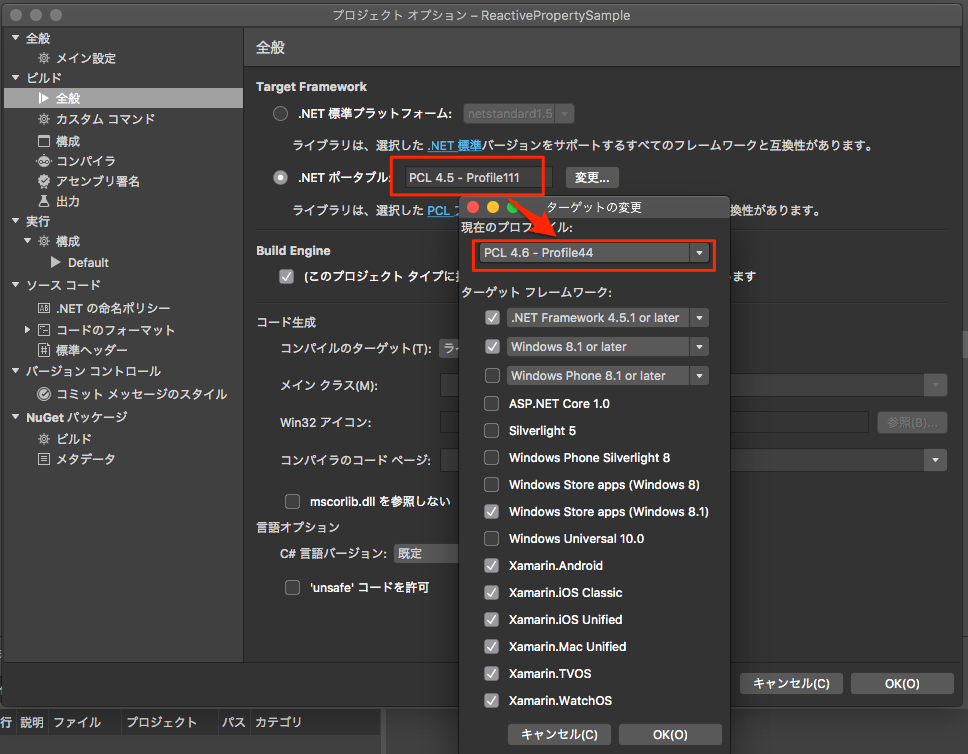
ダイアログから、「ビルド」 → 「全般」を選択して、Target Framework の 「.NET ポータブル」の横にある「変更」を押し、プロファイルを 「PCL 4.6 - Profile44」 に変更して OK を押します。対応プラットフォームから Windows Phone のチェックが外れますが まったく問題ありません 。
3. System.Runtime.InteropServices.RuntimeInformation の nuget パッケージを追加する
@yamachu さんが書かれた、
の通りです。ReactiveProperty 3.x が依存している System.Reactive をインストールするには、まず
System.Runtime.InteropServices.RuntimeInformation を入れる必要があります。
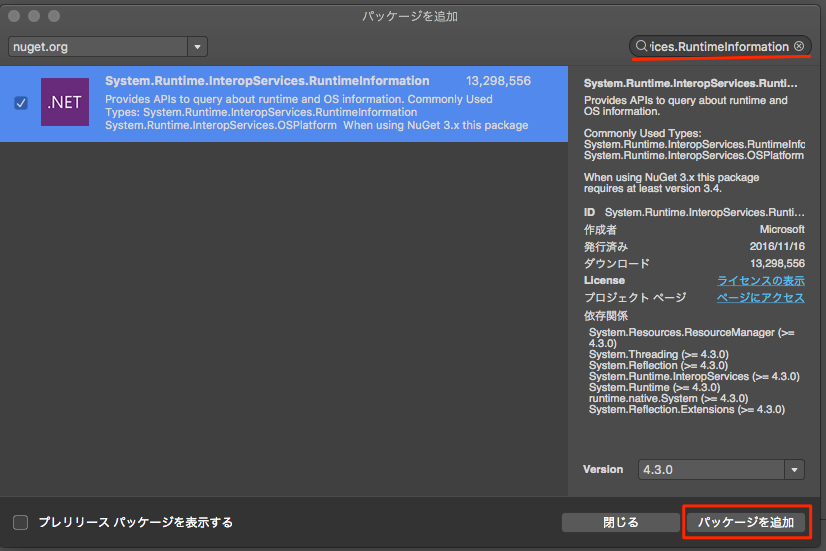
コアプロジェクトを選択して、 メニュー → プロジェクト → Nuget パッケージの追加 とし、右上検索ボックスに "System.Runtime.InteropServices.RuntimeInformation" をタイプして絞り込みます。
見つかったら、右下の追加ボタンでインストールします。現在の最新バージョンは 4.3.0 です。
4. System.Reactive の nuget パッケージを追加する
次に、ReactiveProperty 3.x が依存している System.Reactive をインストールします(いきなり ReactiveProperty を入れてもよいのかもだけど、まあ順番にやってみましょう)。
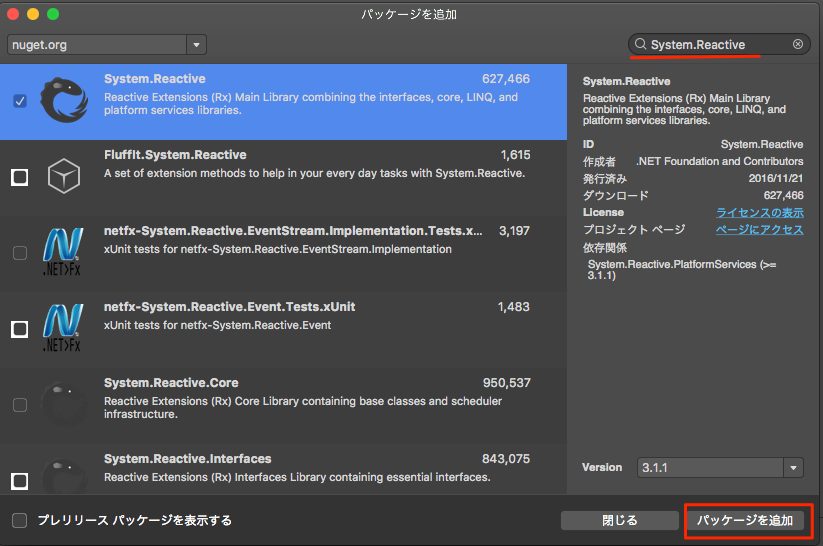
方法は 3. と同じです。 nuget のダイアログボックスで System.Reactive とタイプして、結果から選択して追加します(雑になってきたw)。
5. ReactiveProperty の nuget パッケージを追加する
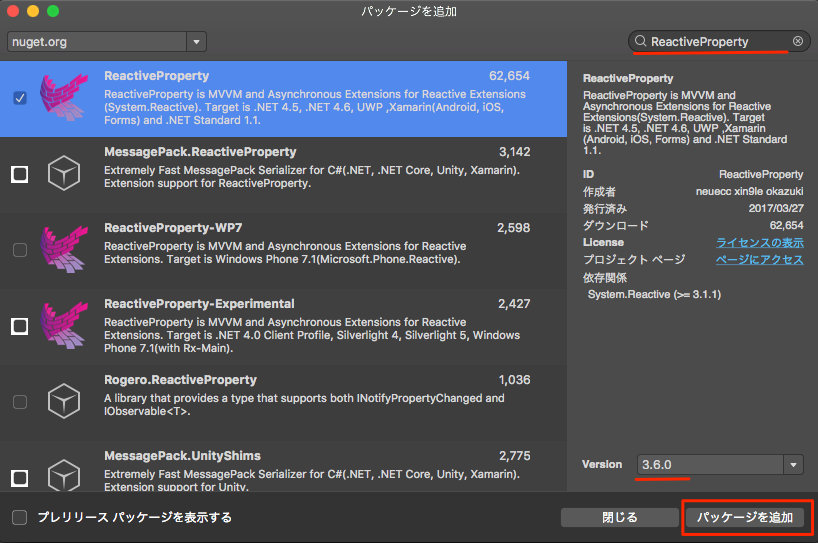
ついに ReactiveProperty のインストールです。 3. 4. と同じ方法で追加しましょう(雑)。
バージョン 3.x 系をついにいれる事ができました。現在の最新stableは 3.6.0 です。
できてしまえば簡単ですが、この方法に辿りつくまでに多くの労力と時間とご協力をいただきました。みなさまありがとうございました。
うーん,なんというか微妙なハックですけど,System.Runtime.InteropServices.RuntimeInformation 4.0.0(Reactive 3.1.1が依存しているバージョン)の依存にMicrosoft.NETCore.Platformsが含まれていて,そのせいでPCLのでの展開が出来ないんじゃないかなぁと睨んでいます.
— 留まり奈緒 (@y_chu5) 2017年11月18日
PCL Profile111 が Windows Phone を含んでるならそのせいですね
— かずき@66.8kg (@okazuki) 2017年11月21日
ReactiveProperty を使ってみよう
せっかくいれたのでちゃちゃっと使ってみましょう。
ぜんぶコアプロジェクトでやります。
I. MainViewModel を作る
MainViewModel というクラスを作って、次のように書きます。
using System;
using System.Reactive.Linq;
using Reactive.Bindings;

namespace ReactivePropertySample
{
    public class MainViewModel
    {
        public ReactiveProperty<long> Counter { get; }

        public MainViewModel()
        {
            Counter = Observable.Interval(TimeSpan.FromSeconds(1)).ToReactiveProperty();
        }
    }
}
Counter という変更通知プロパティを ReactiveProperty を使ってつくります。
Reactive Extensions の機能を使って、「1秒おきに1ずつカウントアップ」していきます。
II. 画面(Page)とバインドする
プロジェクトを作った時に ReactivePropertySamplePage.xaml という画面ができていると思うので、それを編集します。 XAML の編集だけでいきましょう。
<?xml version="1.0" encoding="utf-8"?>
<ContentPage
    xmlns="http://xamarin.com/schemas/2014/forms"
    xmlns:x="http://schemas.microsoft.com/winfx/2009/xaml"
    xmlns:local="clr-namespace:ReactivePropertySample"
    x:Class="ReactivePropertySample.ReactivePropertySamplePage">

    <ContentPage.BindingContext>
        <local:MainViewModel />
    </ContentPage.BindingContext>

    <Label Text="{Binding Counter.Value}"
        VerticalOptions="Center"
        HorizontalOptions="Center" />

</ContentPage>
<ContentPage.BindingContext> で、 MainViewModel をバインド対象としています。
そして、ラベルの Text に "{Binding Counter.Value}" と書くことで、 Counter 値をデータバインドしています。 .Value を付けるのを忘れずに!(と言っても忘れるんだよ、分かる。みんなやってる。)
III. 動かす
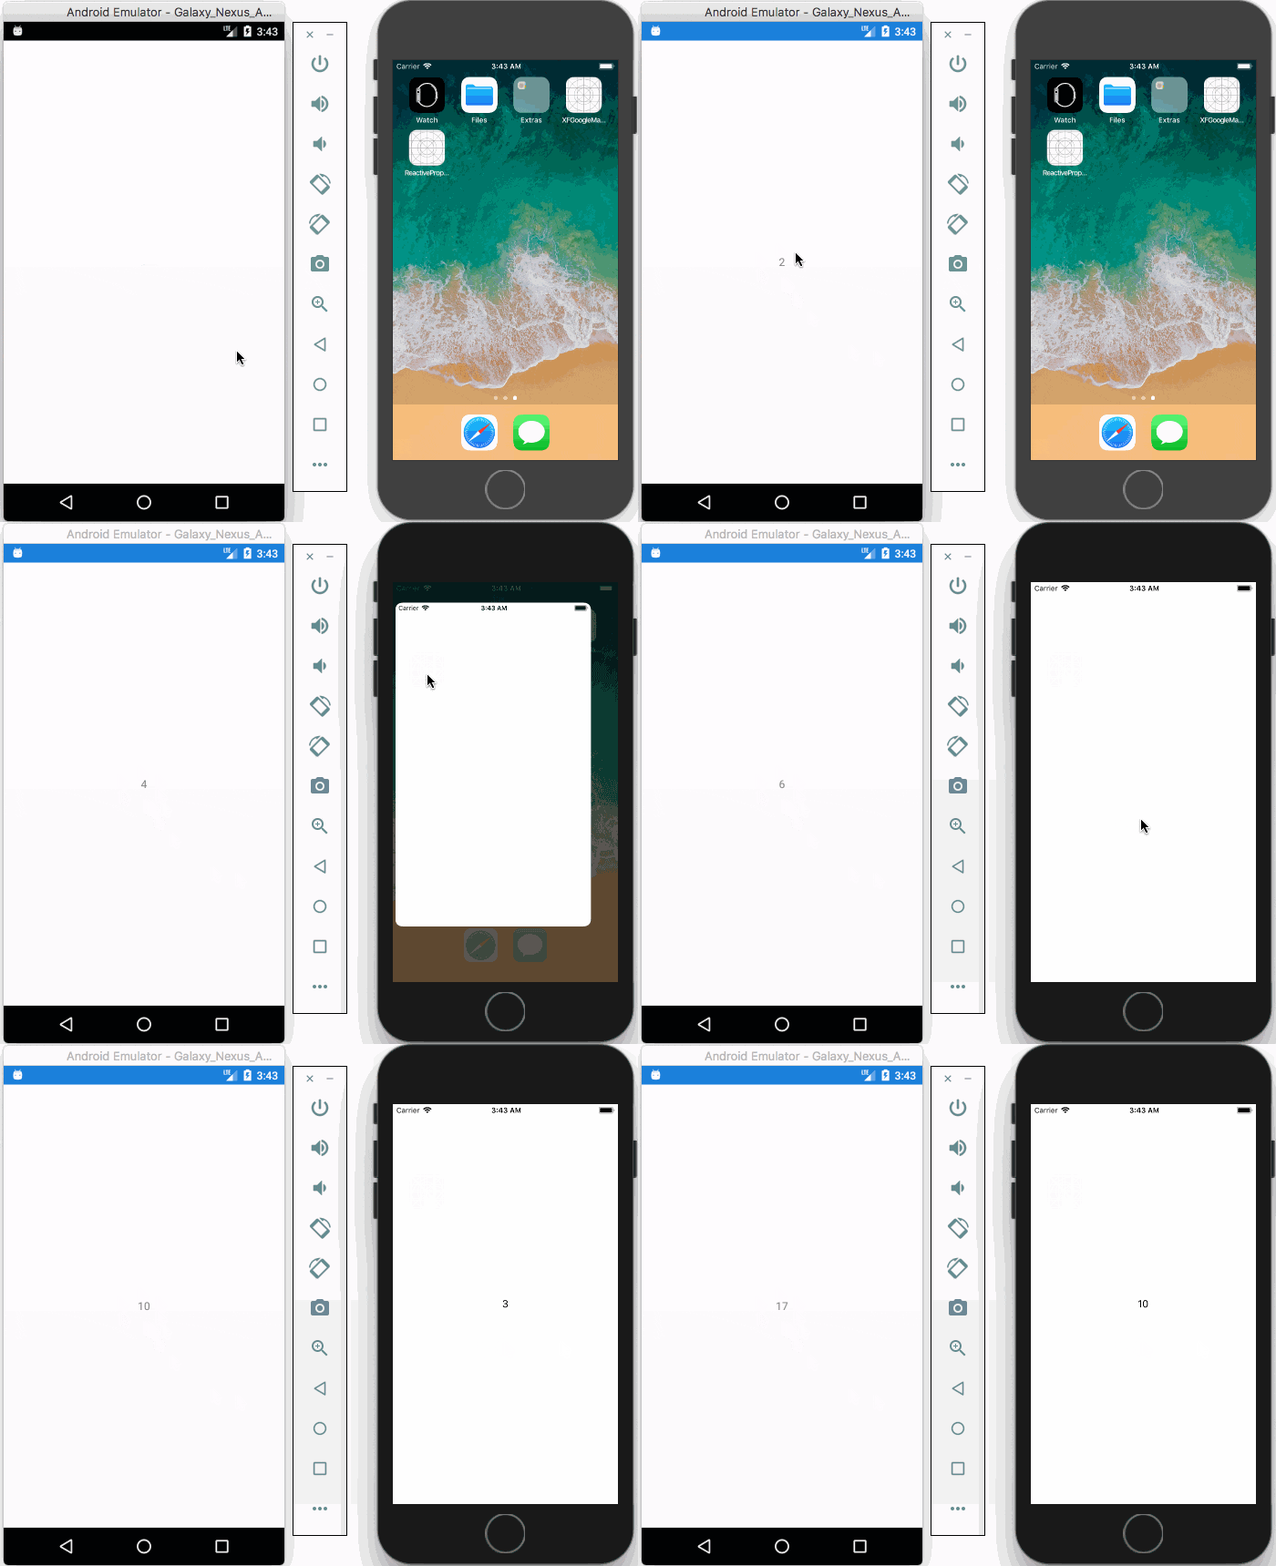
OK, これで完成です。 Android でも iOS でも動きます。
文字ちっさ!
まとめ
最新の環境で ReactiveProperty を使う方法を紹介しました。
ReactiveProperty は、Reactive Extension のパワーを View とのデータバインディングにそのまま活用できる、現代においては必須のライブラリです。
もちろん、変更通知プロパティを手書きする手間をなくす目的で使うのもよいですね。
「ReactiveProperty のここがすごい!」というのをもう少し、別記事で紹介していきたいと思います。
ちなみに、コアプロジェクトが PCL でなく .NET Standard なら、もうちょっといろいろ楽…なハズ!それについては誰かが書いてくれることを望みます ![]()
おまけ
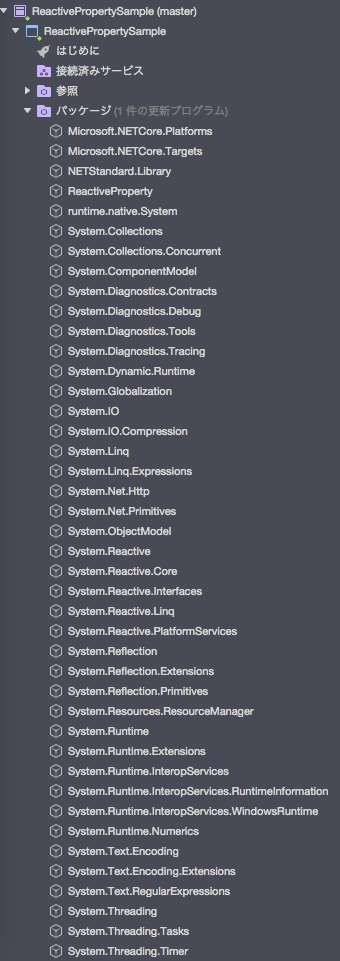
これだけなのにインストールされたパッケージ群がえらいことになった。。。。
