前書き
iOSでPush通知を実装しようと奮闘していましたが、
プログラミング初心者の私がつまずいた点をいくつか紹介します
サーバーはニフクラを使用しました
以下の記事を参考に作成しました
Swiftでプッシュ通知を送ろう!
NIFCLOUDのgithub
つまずいた点
1,証明書を何度も作り直してしまった
証明書を何度も作り直すことにより、PCが混乱してしまうことがあるので
キーチェーンアクセスから必要のない証明書を削除しましょう
2,APNs用証明書(.p12)の作り方がわからなかった
以下参照
iosでプッシュ通知の証明書を.p12形式でexportしようとしたら.p12形式が選択できない問題について
3,AppleDeveloperのProfileがinvalid(無効)になっていた
これはどうやって解決したのか詳しくは覚えていないが、すでにあるProvisioningProfileを削除した後、再度Profileを作成しProvisioningProfileをダウンロード

その後Xcodeで正しいProfileが入っているか確認

これは関係あるかわからないがProfileを作成する際のCertificates(証明書)を全てに選択した
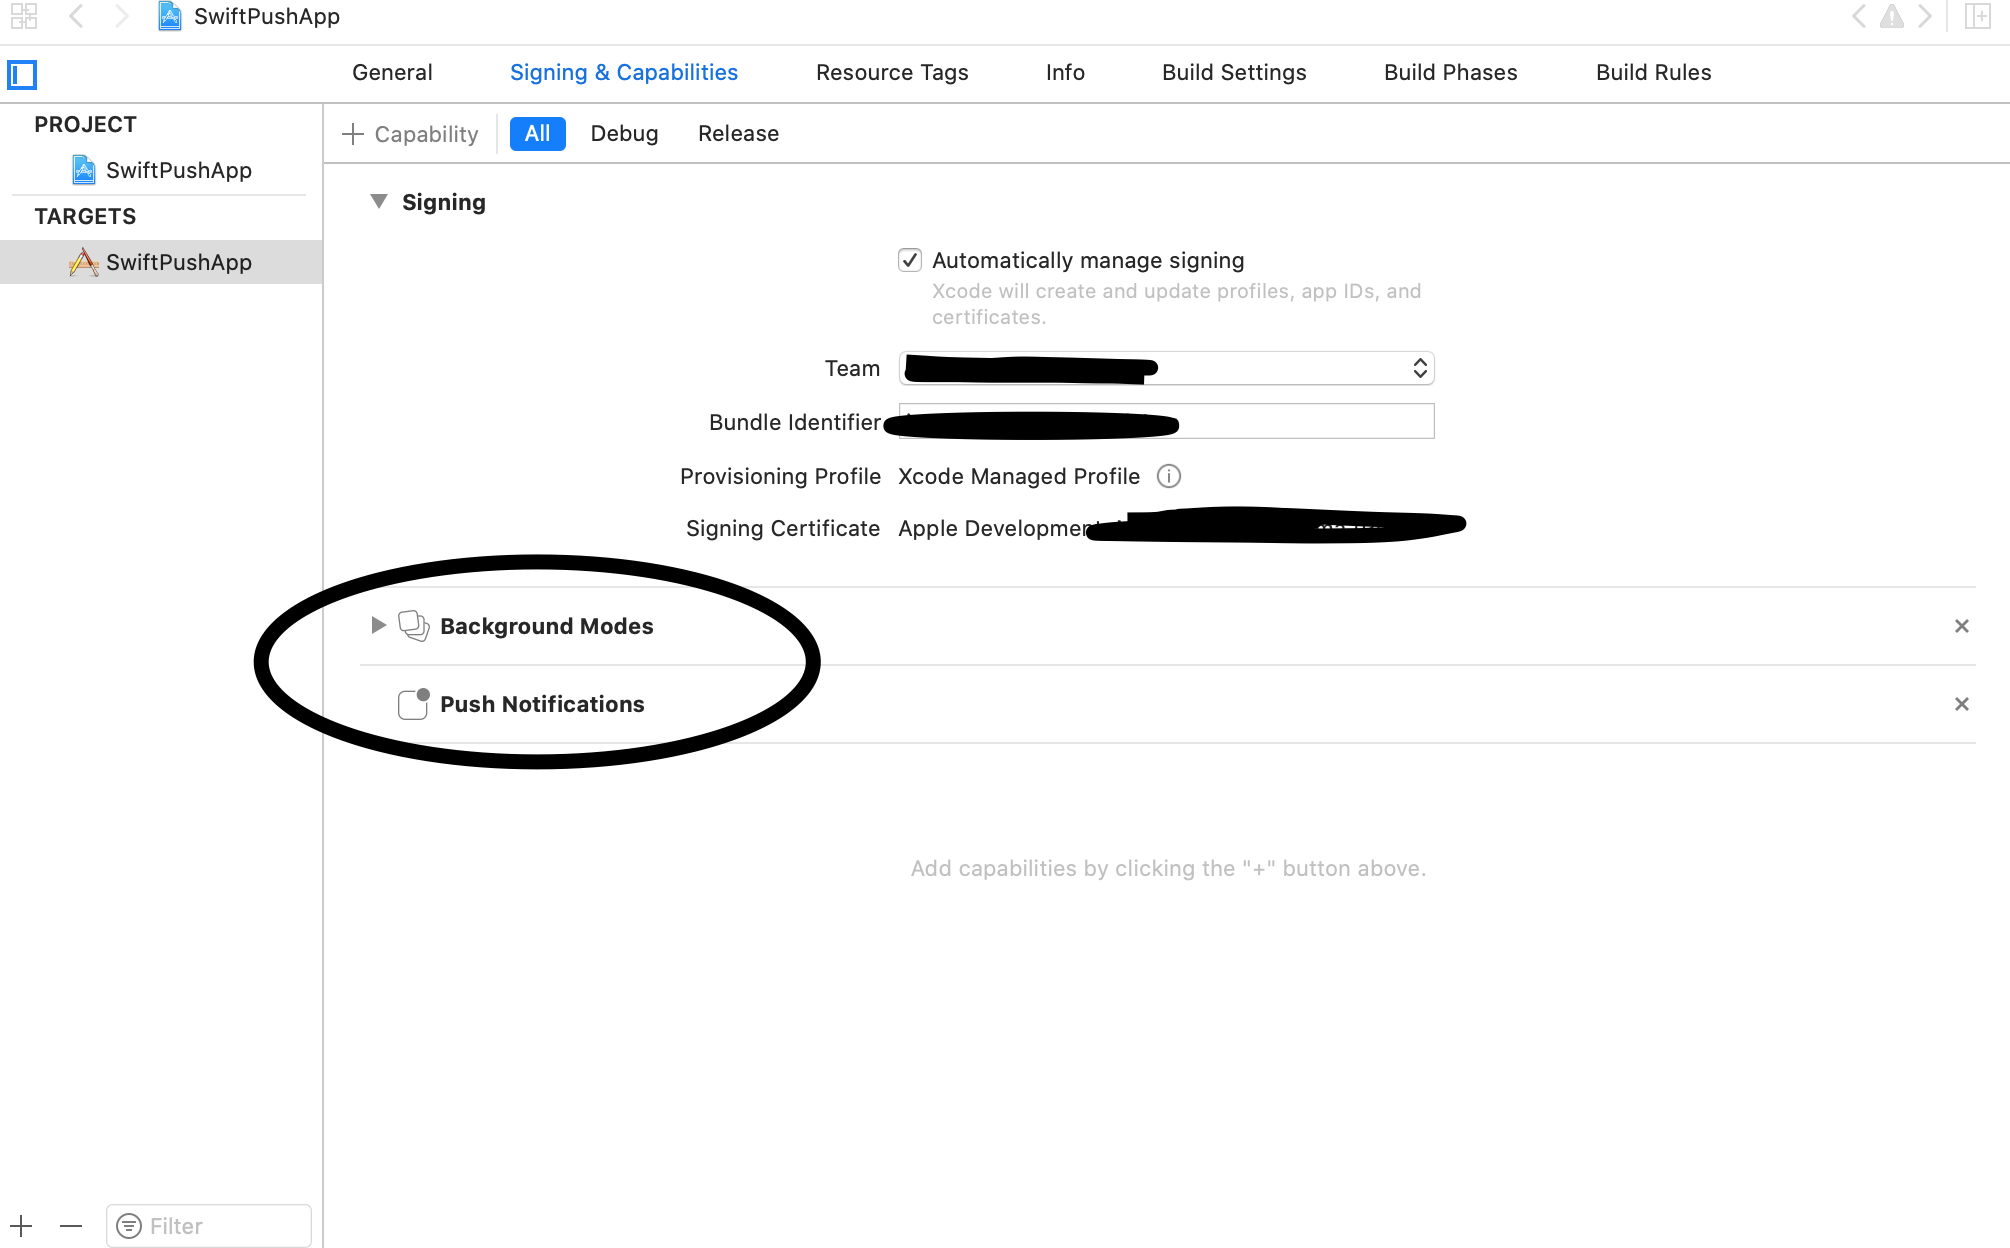
4,Capabilityのつけ忘れ
Push Notificationsをつけ忘れるとAppDelegate内の
didRegisterForRemoteNotificationsWithDeviceToken deviceToken
が呼び出されずに端末情報を登録できないので注意
5,ドキュメントを読まなかった
きちんと書いてある。読んでクローンや!
NIFCLOUDのgithub
証明書についてはこの記事から
プッシュ通知に必要な証明書の作り方2020
6,UIApplication.registerForRemoteNotifications() must be used from main thread onlyのエラーが出る
訳すと「メインスレッドから使用しろやボケ」とのこと

DispatchQueue.main.async(execute: {
  UIApplication.shared.registerForRemoteNotifications()
})
これで解決
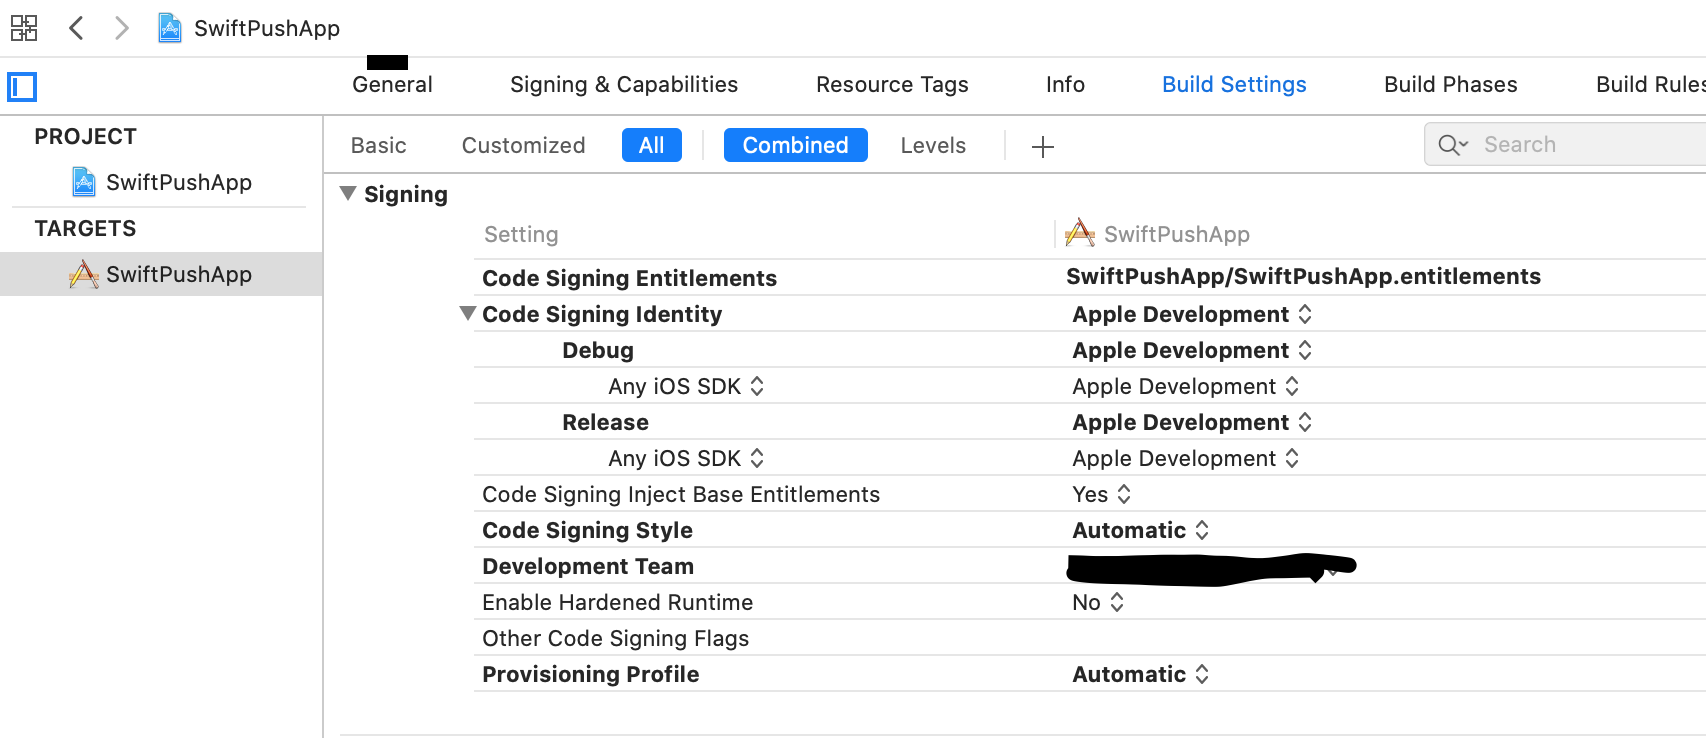
7,Build SettingsのSigningの設定
8,BundleIdentifierについて
AppleDeveloperで作成したbundleIdentifier(ここではAとする)を作成後、
違うアプリのbundleIdentifierをAと書き換えることは可能
9,なぜAppleDeveloperでデバイスの登録が必要なのか
未公開のアプリがセキュリティーに関係する機能を使用する際は、登録したデバイスのみであるため。
アプリが公開されればデバイス登録は必要ない。
10,コード
最後にコードを載せておく
githubにコードは上がっているため必要ないと思うが一応
import UIKit
import UserNotifications
import NCMB

@UIApplicationMain
class AppDelegate: UIResponder, UIApplicationDelegate {

    var window: UIWindow?
    //********** APIキーの設定 **********
    let applicationkey = "あなたのキー"
    let clientkey      = "あなたのキー"

    func application(_ application: UIApplication, didFinishLaunchingWithOptions launchOptions: [UIApplication.LaunchOptionsKey: Any]?) -> Bool {
        //********** SDKの初期化 **********
        NCMB.initialize(applicationKey: applicationkey, clientKey: clientkey)

        let center = UNUserNotificationCenter.current()
        center.requestAuthorization(options: [.alert, .badge, .sound]) {granted, error in
            if error != nil {
                // エラー時の処理

                return
            }
            if granted {
                // デバイストークンの要求
                DispatchQueue.main.async(execute: {
                  UIApplication.shared.registerForRemoteNotifications()
                })
                // UIApplication.shared.registerForRemoteNotifications()
            }
        }

        return true
    }

    // デバイストークンが取得されたら呼び出されるメソッド
    func application(_ application: UIApplication, didRegisterForRemoteNotificationsWithDeviceToken deviceToken: Data) {
        // 端末情報を扱うNCMBInstallationのインスタンスを作成
        let installation : NCMBInstallation = NCMBInstallation.currentInstallation
        // デバイストークンの設定
        installation.setDeviceTokenFromData(data: deviceToken)
        // 端末情報をデータストアに登録
        installation.saveInBackground {result in
            switch result {
                case .success:
                    // 端末情報の登録に成功した時の処理
                    break
            case let .failure(error):
                    // 端末情報の登録に失敗した時の処理
                    print(error)
                    break
            }
        }

    }

    func applicationWillResignActive(_ application: UIApplication) {
        // Sent when the application is about to move from active to inactive state. This can occur for certain types of temporary interruptions (such as an incoming phone call or SMS message) or when the user quits the application and it begins the transition to the background state.
        // Use this method to pause ongoing tasks, disable timers, and invalidate graphics rendering callbacks. Games should use this method to pause the game.
    }

    func applicationDidEnterBackground(_ application: UIApplication) {
        // Use this method to release shared resources, save user data, invalidate timers, and store enough application state information to restore your application to its current state in case it is terminated later.
        // If your application supports background execution, this method is called instead of applicationWillTerminate: when the user quits.
    }

    func applicationWillEnterForeground(_ application: UIApplication) {
        // Called as part of the transition from the background to the active state; here you can undo many of the changes made on entering the background.
    }

    func applicationDidBecomeActive(_ application: UIApplication) {
        // Restart any tasks that were paused (or not yet started) while the application was inactive. If the application was previously in the background, optionally refresh the user interface.
    }

    func applicationWillTerminate(_ application: UIApplication) {
        // Called when the application is about to terminate. Save data if appropriate. See also applicationDidEnterBackground:.
    }
}
最後に
一度成功すれば、なんて事のない実装だが、エラーが起きた際のデバックが大変だった。
また、証明書あたりを詳しく理解する必要がある。