はじめに
以前の記事でDockerでのAerospikeの起動を行いました。
この記事では、Aerospike Enterprise Server限定の機能であるGraphデータベース機能をDockerで試してみます。
有償のAerospike Enterprise Serverですが、1ノードでの使用であれば無償で利用できます。(本格的にベンチマーク等を行う時は評価ライセンスもあります。)
AerospikeのGraphデータベースについての詳細は、以下のURLに記載があります。
https://docs.aerospike.com/graph
この記事は、この記載を元に試しています。
AerospikeのGraphデータベースの構成
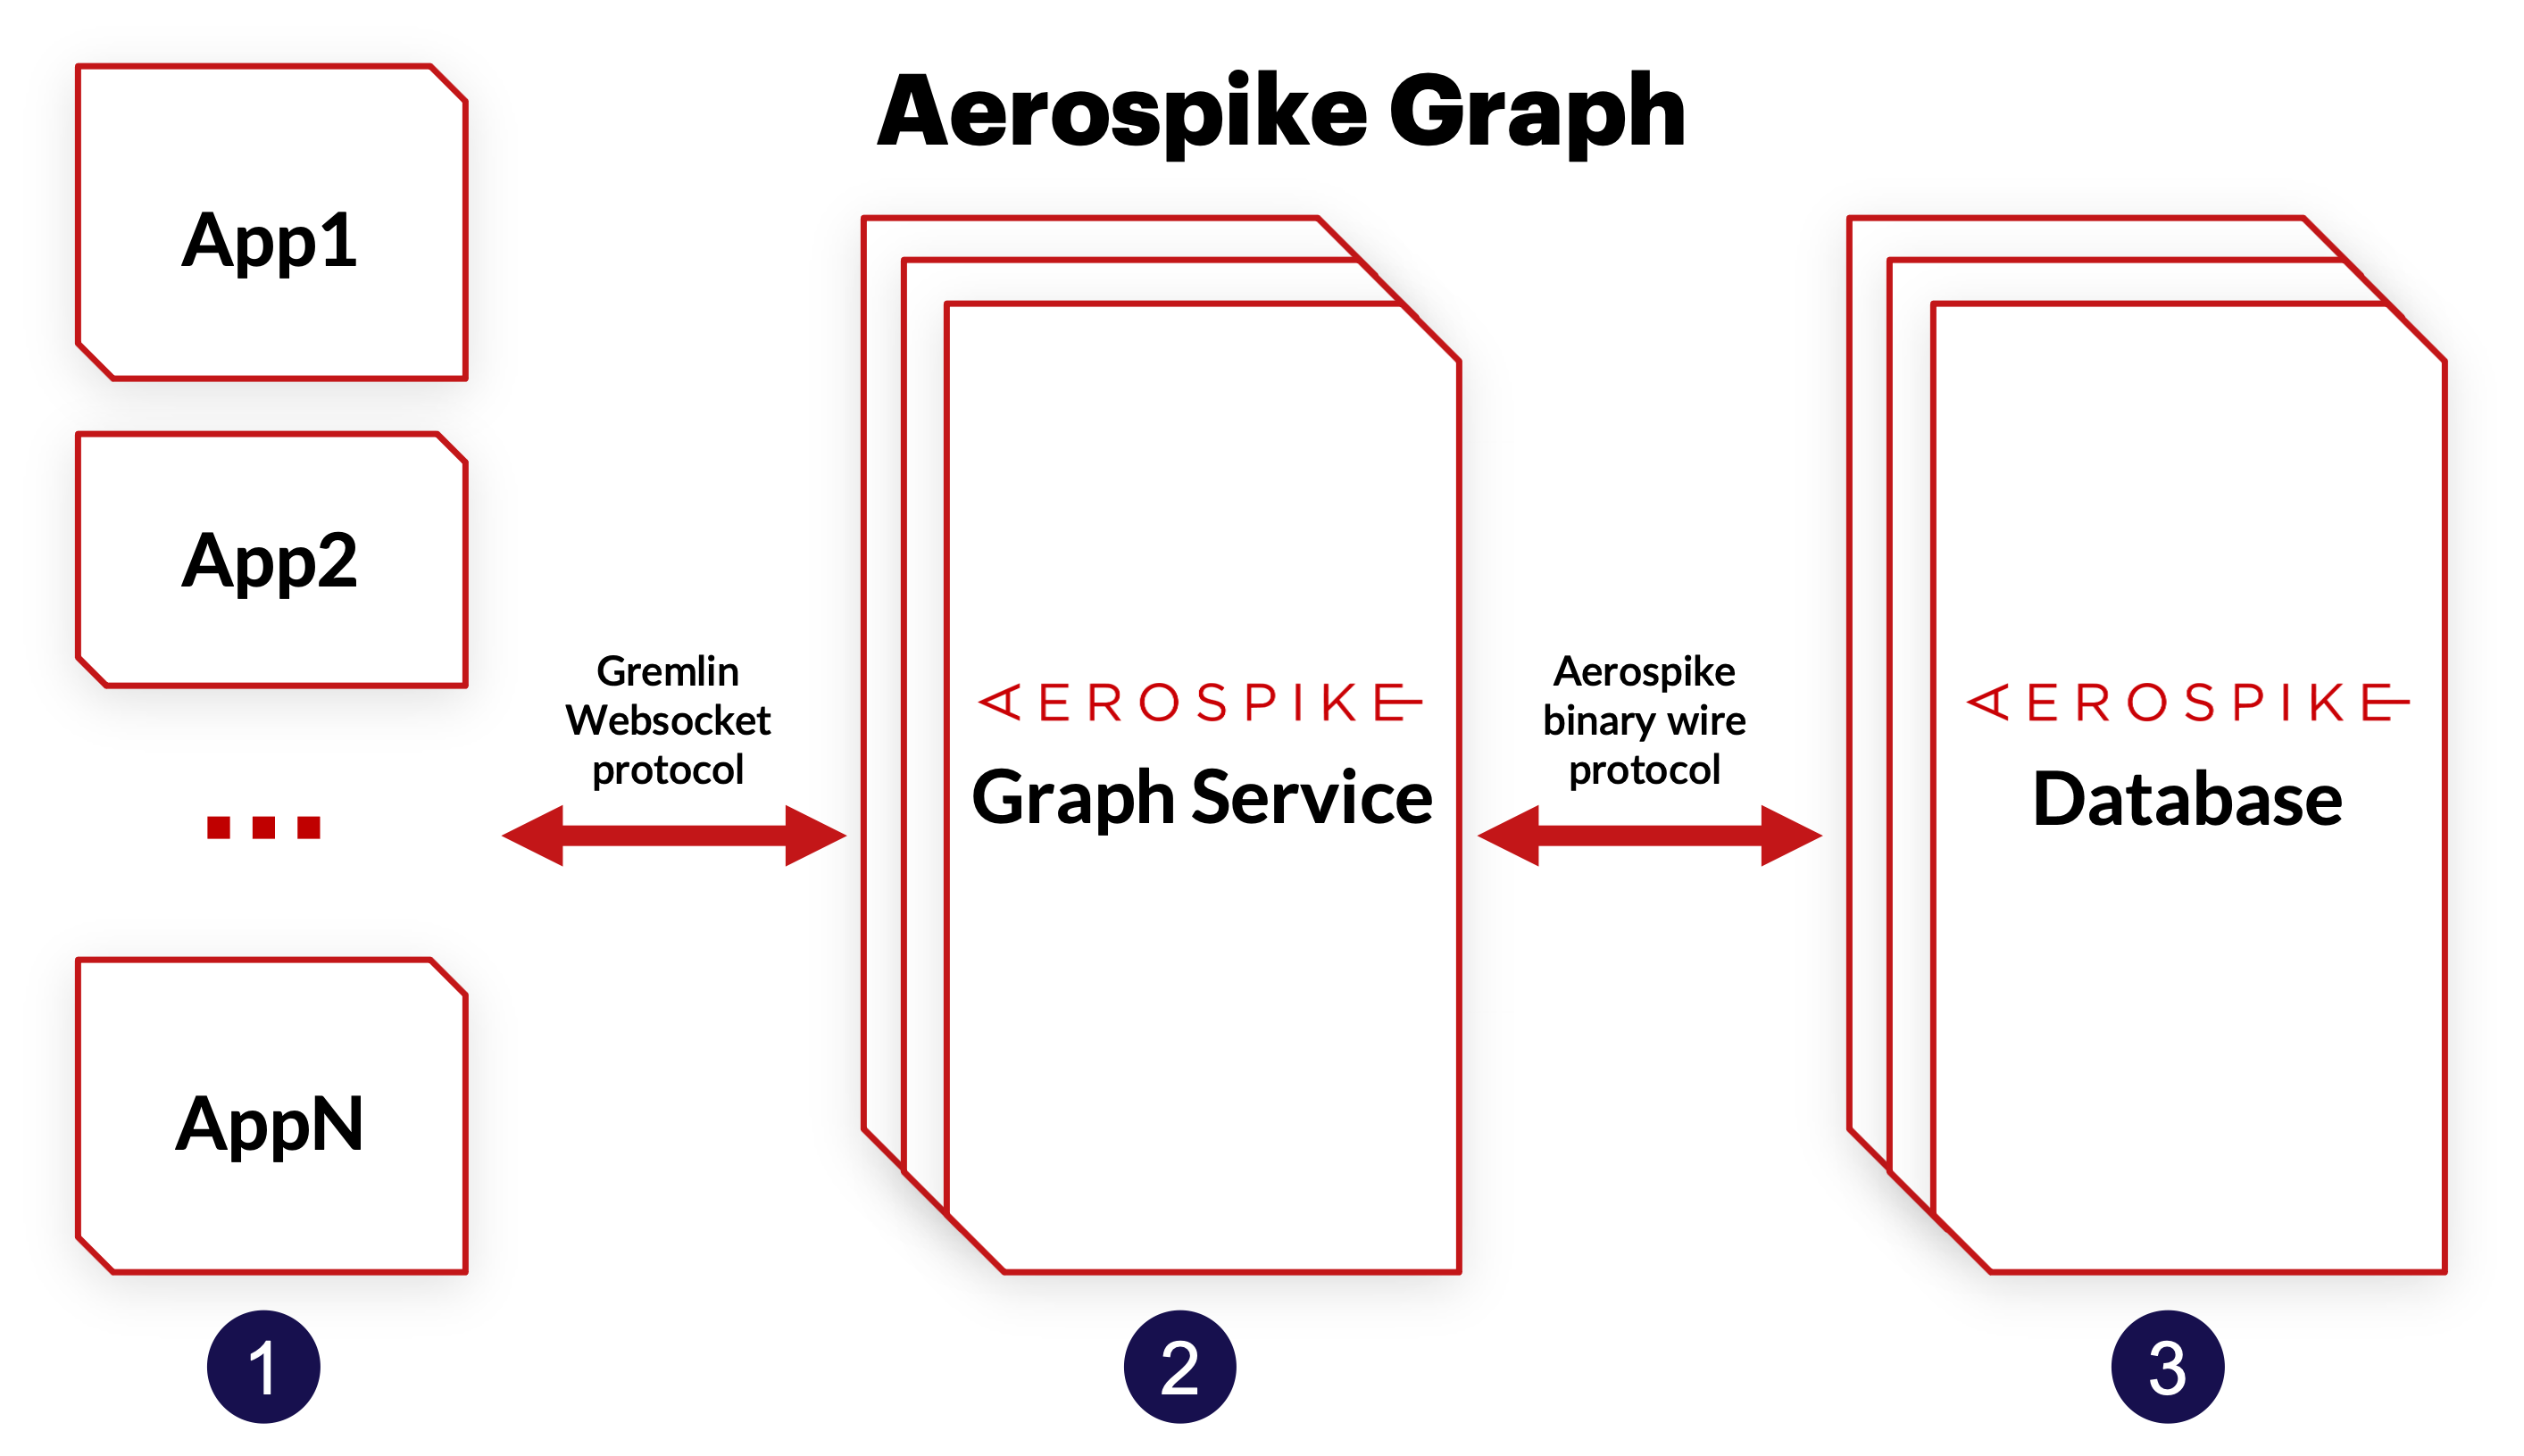
AerospikeのGraphデータベースは、独自のインタフェースを提供するのではなく、Apache TinkerPop™を使用しており、Gremlinのインタフェースで利用できます。

したがって、Gremlin-ConsoleやGremlin-Pythonなどで、Aerospike Graphデータベースにアクセスできます。
Aerospike Graphデータベースの構成は、以下の2つの層になります。
- データストア(Aerospike Enterprise Server)
- データストアとGremlinとを接続するためのコネクター(Aerospike Graph Service)
そして、このAerospike Graphデータベースには、Gremlinを使用してアクセスします。
環境構築
それでは、実際に環境を作ります。
一つ、残念なことに、Aerospike Graph ServiceとGremlin-Consoleはamd64の環境のみとなります。
Appleシリコン搭載のMacを使用の場合、aerospike-graph-serviceおよびgremlin-consoleについては、Rosetta 2をインストールし、--platform linux/amd64を追加して実行してください。
% sudo softwareupdate --install-rosetta
Aerospike Enterprise Serverの起動
まず、Aerospike Enterprise ServerをDockerで起動します。
もし、すでに環境がある場合はこのDockerでの起動は不要ですが、その環境のfeatures.confに、以下の行があることを確認して下さい。
graph-service true
記載がない場合は、以下のDockerで試していただくか、評価ライセンスをご利用ください。(上記を追記しても動作しません。)
では、Dockerで以下のように起動します。
sudo docker run -d --name aerospike_ee -p 3000-3002:3000-3002 aerospike:ee-6.4.0.7
今回は、現在の最新バージョンを指定しています。
Aerospike Graph Serviceの起動
Aerospike Enterprise ServerとGremlinを接続するためのAerospike Graph ServiceをDockerで起動します。
この時、後でテストデータをロードするために、ローカルのフォルダをコンテナで利用できるように設定しておきます。
そのフォルダを、ローカルでは"/home/graph/data/"とし、コンテナでは"/opt/graph/data/"とします。ローカルなフォルダはご自身の都合の良いフォルダを使用してください。
以下でAerospike Graph Serviceが起動します。
[Aerospike Enterprise ServerのIPアドレス]の箇所は、Aerospike Enterprise ServerのIPアドレスに変更してください。
sudo docker run -p 8182:8182 --name aerospike_gs \
-e aerospike.client.namespace="test" \
-e aerospike.client.host="[Aerospike Enterprise ServerのIPアドレス]:3000" \
-v /home/graph/data/:/opt/graph/data/ \
aerospike/aerospike-graph-service
Aerospike Enterprise Serverを同じサーバのDockerで動かしているのであれば、以下の記載で動作します。
sudo docker run -p 8182:8182 --name aerospike_gs \
-e aerospike.client.namespace="test" \
-e aerospike.client.host="$(sudo docker inspect -f '{{.NetworkSettings.IPAddress }}' aerospike_ee):3000" \
-v /home/graph/data/:/opt/graph/data/ \
aerospike/aerospike-graph-service
無事に稼働すると、最後の以下が表示されます。
[INFO] o.a.t.g.s.GremlinServer$1 - Channel started at port 8182.
Gremlin-Consoleの起動
以上で、AerospikeのGraphデータベースを使用する環境は整いました。
次に、このGraphデータベースにアクセスするGermlin-Consoleを起動します。
Linux環境でコードをダウンロードして起動する場合は、以下を参考にしてください。
https://docs.aerospike.com/graph/getting-started/basic-usage#examples
Dockerでの起動については、以下に説明します。
ますは、Aerospike Graph Serviceに接続するため、Aerospike Graph ServiceのIPアドレスを調べます。以下を実行すると、IPアドレスが表示されます。
sudo docker inspect -f '{{.NetworkSettings.IPAddress }}' aerospike_gs
次に、以下のコマンドで、Gremlin-Consoleを実行します。
sudo docker run -it tinkerpop/gremlin-console
起動されると、以下のプロンプトが表示されますので、そのプロンプトにGremliのコマンドを入力します。
         \,,,/
         (o o)
-----oOOo-(3)-oOOo-----
plugin activated: tinkerpop.server
plugin activated: tinkerpop.utilities
plugin activated: tinkerpop.tinkergraph
gremlin>
ます、以下で入力し、Aerospike Graph Serviceに接続します。
g = traversal().withRemote(DriverRemoteConnection.using("[aerospike_gsのIPアドレス]", 8182, "g"));
成功すると、以下が表示されます。
graphtraversalsource[emptygraph[empty], standard]
以上で、Gremlin-Consoleで、Aerospike Graph Serviceにアクセスできるようになりましたので、実際に、vertex(ノード)の追加と情報の取得をしてみます。
以下で、vertexの追加ができます。
g.addV('foo').property('company','aerospike').property('scale','unlimited')
以下がアウトプットされます。
v[-1]
次にvertexのIDを表示します。
g.V().has('company','aerospike')
以下がアウトプットされます。
v[-1]
これで、無事、AerospikeがGraphデータベースとして稼働しているのが確認できました。
air-routesのデータを使って試してみる
Gremlinのサンプルデータとして、air-routesのデータが提供されています。
Kelvin Lawrenceのgithubにアクセスしてください。
今回は、air-routes-small-latest.graphmlを使用します。
ダウンロードし、名称をair-routes-small.graphmlに変更し、上記のaerospike_gsで指定したフォルダ(ここでは/home/graph/data/)に保存してくさい。
このデータを、Gremlin-Consoleからロードします。
g.with("evaluationTimeout", 24L * 60L * 60L * 1000L).io("/opt/graph/data/air-routes-small.graphml").with(IO.reader, IO.graphml).read()
それでは、以下、このデータを使って試してみましょう。
1. codeがDFWのairportを検索します。
g.V().has('code','DFW')
2. このGraphに含まれるairportの数を調べます。
g.V().hasLabel('airport').count()
3. codeがSFOのairportから出発するフライトの数を調べます。
g.V().has('code','SFO').outE().count()
4. 400マイルを超えるフライトがあるcityをすべて表示します。
g.E().has("dist", P.gt(4000L)).inV().values("city").dedup()
5. Puerto Rico, Luis Munoz International Airport(SJU)からフライトできるUSAのairportをすべて表示します。
g.V().has('code','SJU').out('route').has('country','US').values('code')
6. SFOから1回の乗り換えで行ける世界およびUSA内のairportの数を調べます。
g.V().has("code", "SFO").out().out().dedup().fold().project("totalAirportCountFromSFO", "USAirportCountFromSFO").by(__.unfold().count()).by(__.unfold().has("country", "US").count())
以上のようにGremlinを使って、Graphデータベースを試すことができました。
また、それぞれに、.profile()をつけるとパフォーマンスの情報を表示することができます。
例えば、以下は最後のコマンドに.profile()をつけた結果です。
gremlin> g.V().has("code", "SFO").out().out().dedup().fold().project("totalAirportCountFromSFO",    "USAirportCountFromSFO").by(__.unfold().count()).by(__.unfold().has("country", "US").count())
==>[totalAirportCountFromSFO:46,USAirportCountFromSFO:45]
gremlin> g.V().has("code", "SFO").out().out().dedup().fold().project("totalAirportCountFromSFO",    "USAirportCountFromSFO").by(__.unfold().count()).by(__.unfold().has("country", "US").count()).profile()
==>Traversal Metrics
Step                                                               Count  Traversers       Time (ms)    % Dur
=============================================================================================================
FireflyGraphStep(vertex,[code.eq(SFO)])                                1           1          26.196    66.32
FireflyCompositeIdStep(1000)                                          35          35           2.177     5.51
FireflyCompositeIdStep(1000)                                        1173          46           6.787    17.18
DedupGlobalStep(null,null)                                            46          46           0.340     0.86
FoldStep                                                               1           1           0.359     0.91
ProjectStep([totalAirportCountFromSFO, USAirpor...                     1           1           1.482     3.75
  UnfoldStep                                                          46          46           0.213
  CountGlobalStep                                                      1           1           0.185
  UnfoldStep                                                          46          46           0.105
  HasStep([country.eq(US)])                                           45          45           0.524
  CountGlobalStep                                                      1           1           0.243
FireflyCacheGCStep:FireflyCache(d3df5208-e448-4...                     1           1           0.856     2.17
FireflyProfileStep                                                     1           1           1.298     3.29
  FireflyScanTime                                                                             25.802
    \_ [key: code], scan count=1
    \_ 7fad628e : code = 25.803 ms
                                            >TOTAL                     -           -          39.498        -
Gremlin-Consoleについては以上です。
他にも、Gremlin-Pythonを使った情報が、以下に記載されています。
https://docs.aerospike.com/graph/getting-started/basic-usage#python
Javaでのアクセスについても以下に記載があります。
https://docs.aerospike.com/graph/getting-started/basic-usage#java
まとめ
以上のように、Aerospike Enterprise Serverをデータストアとして利用するAerospike Graphデータベースを、Gremlinをインタフェースとして使用できます。
最初にも記載しましたが、以下に、さらに詳しい情報がありますので、ぜひ御覧ください。
https://docs.aerospike.com/graph
上記のDockerコンテナは、すべて同じPCやサーバ上で動作できますので、ぜひ、気軽に試してみてください。
大量データのローディングと視覚化について以下に投稿しました。ぜひ、ご覧ください。
https://qiita.com/aerospike_nakadai/items/98bca358d6493724108a