はじめに
Aerospikeの利用を考えている方にDokcerで気軽に動かう方法を、今まで書いてきました。
Aerospikeを使ってみる:Windows11環境のDockerを使って起動
Aerospikeを使ってみる:Dockerを使ってCRUDのテストと管理
しかし、Aerospikeを実際に使用するクライアントについては、Aerospikeのアーキテクチャに記載したように、Java/C#/C/Go/Python等の言語向けに提供されているクライアントライブラリ(Aerospike Clinet Library)を使用します。
このAerospike Client Libraryについては、こちらのページに詳しく記載されています。
これらの記事やページを見て、Aerospikeのクライアントアプリをちょっと試してみたいと思うと、環境をそろえるのが少し面倒だったり難しかったりします。
そこで、この記事ではInteractiveにPythonやJavaのプログラムをWebブラウザ上で実行できる、Jupyter NotebookでのAerospikeのクライアントアプリの使用方法を説明します。
Jupyter Notebookとは
前述した通り、Jupyter Notebookは、Webブラウザ上でPythonやJavaのプログラムを実行できるWebアプリケーションです。
Jupyter Notebookの公式サイトはこちらで、QiitaでJupyterのタグ付けされた記事はこちらです。
インストール方法や使用方法が記載されていますが、今回はAerospikeが提供するDockerのイメージを使ったJupyter Notebookを使用します。
Jupyter NotebookでAerospikeを使う準備
情報は、AerospikeのInteractive Tutorialに記載されていますが、ここでは必要な情報だけにまとめて説明します。
まず、この環境は、Dockerが使えるのが前提になっていますので、Dockerが使える環境を準備してください。Windows、Mac、そしてLinuxのどれでも大丈夫です。
また、この環境はAerospikeサーバも一緒に提供していますので、別途、Aerospikeサーバを準備する必要はありません。
では、まずは環境を準備する手順です。
- Docker imageを取得します。
docker pull aerospike/intro-notebooks
2. 8888ポートを使ってimageを実行します。
docker run --name aero-nb -p 8888:8888 aerospike/intro-notebooks
以下のように表示されます。
link eth0 state up
link eth0 state up in 0
 * Restarting aerospike aerospike
 * Stopping aerospike aerospike
 *
 * Starting aerospike aerospike
 * 0
Executing the command: jupyter notebook
[I 09:19:31.957 NotebookApp] Writing notebook server cookie secret to /home/jovyan/.local/share/jupyter/runtime/notebook_cookie_secret
[I 09:19:32.405 NotebookApp] [jupyter_nbextensions_configurator] enabled 0.6.3
[W 2024-01-04 09:19:33.148 LabApp] 'ip' has moved from NotebookApp to ServerApp. This config will be passed to ServerApp. Be sure to update your config before our next release.
[W 2024-01-04 09:19:33.148 LabApp] 'port' has moved from NotebookApp to ServerApp. This config will be passed to ServerApp. Be sure to update your config before our next release.
[W 2024-01-04 09:19:33.148 LabApp] 'port' has moved from NotebookApp to ServerApp. This config will be passed to ServerApp. Be sure to update your config before our next release.
[W 2024-01-04 09:19:33.148 LabApp] 'port' has moved from NotebookApp to ServerApp. This config will be passed to ServerApp. Be sure to update your config before our next release.
[I 2024-01-04 09:19:33.158 LabApp] JupyterLab extension loaded from /opt/conda/lib/python3.8/site-packages/jupyterlab
[I 2024-01-04 09:19:33.159 LabApp] JupyterLab application directory is /opt/conda/share/jupyter/lab
[I 09:19:33.164 NotebookApp] Serving notebooks from local directory: /home/jovyan/notebooks
[I 09:19:33.164 NotebookApp] Jupyter Notebook 6.2.0 is running at:
[I 09:19:33.164 NotebookApp] http://bdb072b0eefe:8888/?token=c02c1a41483260be5e0dc673140c1f9fb84dfaac1a9cab59
[I 09:19:33.164 NotebookApp]  or http://127.0.0.1:8888/?token=c02c1a41483260be5e0dc673140c1f9fb84dfaac1a9cab59
[I 09:19:33.164 NotebookApp] Use Control-C to stop this server and shut down all kernels (twice to skip confirmation).
[C 09:19:33.168 NotebookApp]

    To access the notebook, open this file in a browser:
        file:///home/jovyan/.local/share/jupyter/runtime/nbserver-7-open.html
    Or copy and paste one of these URLs:
        http://bdb072b0eefe:8888/?token=c02c1a41483260be5e0dc673140c1f9fb84dfaac1a9cab59
     or http://127.0.0.1:8888/?token=c02c1a41483260be5e0dc673140c1f9fb84dfaac1a9cab59
3. ブラウザから表示されたURLにアクセスする。
上記であれば、http://127.0.0.1:8888/?token=c02c1a41483260be5e0dc673140c1f9fb84dfaac1a9cab59
にアクセスしてください。
これで、環境はできました。
次に、Aerospikeサーバを実行し、サーバの情報を確認します。
詳細は、こちらに記載がありますが、必要な操作を記載します。
1. 実行するための画面を開く
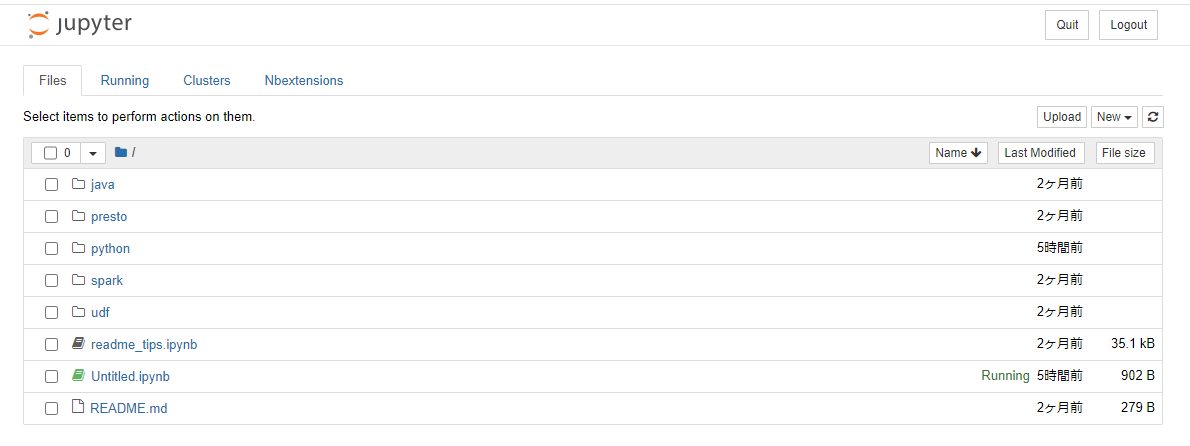
以下の画面の右の[New]をクリックし表示されたメニューから、[Python 3]を選択します。

3. Aerospikeサーバの実行
以下を、画面の In[ ]: の右の欄に入力します。
# Accessing shell commands
!ps
!whoami
# Start the Aerospike database.
!asd >& /dev/null
そして、上のメニューの  をクリックします。
正常であれば、以下のように表示されます。
    PID TTY          TIME CMD
    508 pts/0    00:00:00 ps
jovyan
実際の画面ではこのようになります。
4. Aerospikeサーバの実行の確認
以下を、画面の In[ ]: の右の欄に入力し、上記と同様、Runのボタンをクリックします。
%%bash
# bash cell
# Check if the Aerospike database is running.
pgrep -x asd >/dev/null && echo "Aerospike database is running" || echo "**Aerospike database is not running!**"
ps -axu | grep asd
正常であれば、以下のように表示されます。
Aerospike database is running
jovyan        42  1.1  0.1 3581124 81956 ?       Ssl  01:18   0:05 asd
jovyan       520  0.0  0.0   6308   724 ?        S    01:27   0:00 grep asd
5. Aerospikeサーバの情報の取得
この環境では、他の記事で説明したasadmを使用してAerospikeサーバの情報を取得できます。
以下を、画面の In[ ]: の右の欄に入力し、上記と同様、Runのボタンをクリックします。
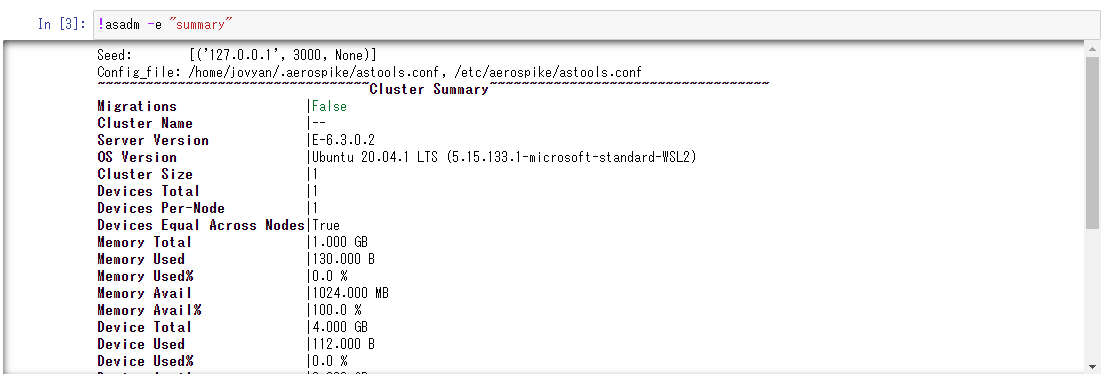
!asadm -e "summary"
正常であれば、以下のように表示されます。
Seed:        [('127.0.0.1', 3000, None)]
Config_file: /home/jovyan/.aerospike/astools.conf, /etc/aerospike/astools.conf
~~~~~~~~~~~~~~~~~~~~~~~~~~~~~~~~~~Cluster Summary~~~~~~~~~~~~~~~~~~~~~~~~~~~~~~~~~~~
Migrations                |False
Cluster Name              |--
Server Version            |E-6.3.0.2
OS Version                |Ubuntu 20.04.1 LTS (5.15.133.1-microsoft-standard-WSL2)
Cluster Size              |1
Devices Total             |1
Devices Per-Node          |1
Devices Equal Across Nodes|True
Memory Total              |1.000 GB
Memory Used               |130.000 B
Memory Used%              |0.0 %
Memory Avail              |1024.000 MB
Memory Avail%             |100.0 %
Device Total              |4.000 GB
Device Used               |112.000 B
Device Used%              |0.0 %
Device Avail              |3.960 GB
Device Avail%             |99.0 %
License Usage Latest      |73.000 B
Namespaces Active         |1
Namespaces Total          |1
Active Features           |KVS
Number of rows: 22

~~~~~~~~~~~~~~~~~~~~~~~~~~~~~~~~~~~~~~~~~Namespace Summary~~~~~~~~~~~~~~~~~~~~~~~~~~~~~~~~~~~~~~~~~
Namespace|~~~~Drives~~~~|~~~~~~~~Memory~~~~~~~~|~~~~~~~~Device~~~~~~~|Replication| Master|~License~
         |Total|Per-Node|   Total|Used%| Avail%|   Total|Used%|Avail%|    Factors|Objects|~~Usage~~
         |     |        |        |     |       |        |     |      |           |       |   Latest
test     |    1|       1|1.000 GB|0.0 %|100.0 %|4.000 GB|0.0 %|99.0 %|          2|1.000  |73.000 B
Number of rows: 1
他にも、こちらには、aqlなどの使用方法も記載されていますので、参考にしてください。
AerospikeのTutorialを実行する
AerospikeのTutorialのページにアクセスすると、以下のメニューが表示されます。
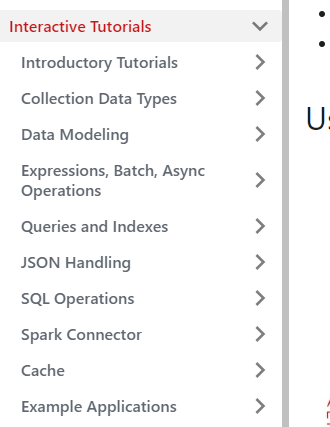
それぞれのメニューを開くと、様々なTutorialが表示されますので、試してみたいTutorialを探してください。
今回は、サンプルとして、Hello, World! (Java)を実行してみます。
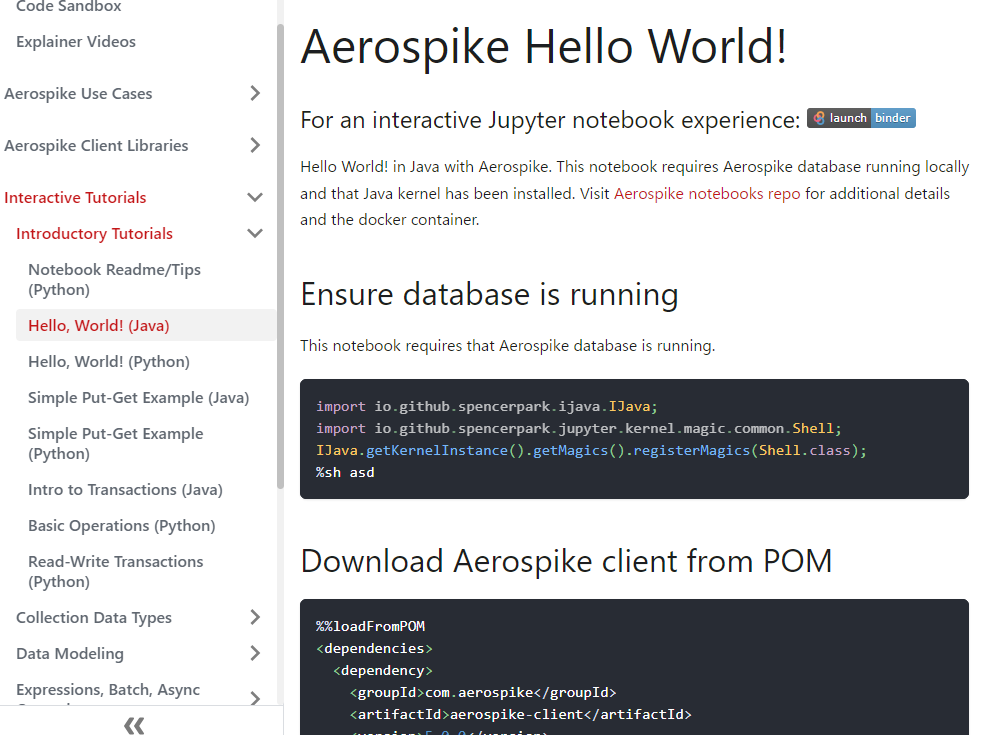
このサンプルは、Javaですので右上のNewからJavaを選択し、それぞれを入力してRunすることもできます。
しかし、これらのTutorialは実行するための情報のファイルが提供されていますので、そちらを使用します。
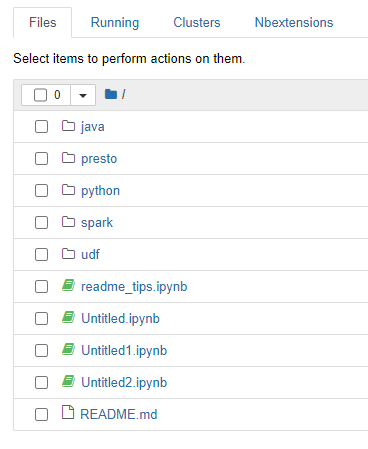
まず、Webで開いた最初の画面からJavaのフォルダを選択します。
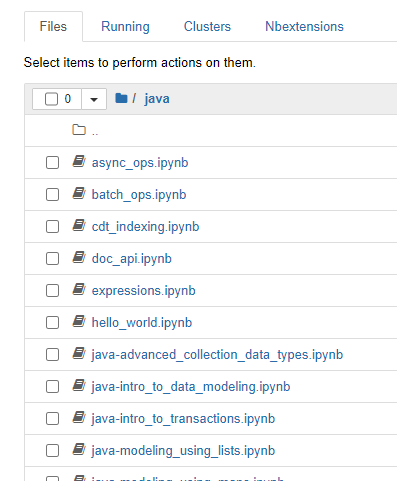
次に、TutorialのURLからファイル名を確認します。
今回のURLは、https://aerospike.com/developer/tutorials/java/hello_worldですので、このURLの最後のパスと同じ名称のhello_world.ipynbを選択します。
以下の画面が表示されます。
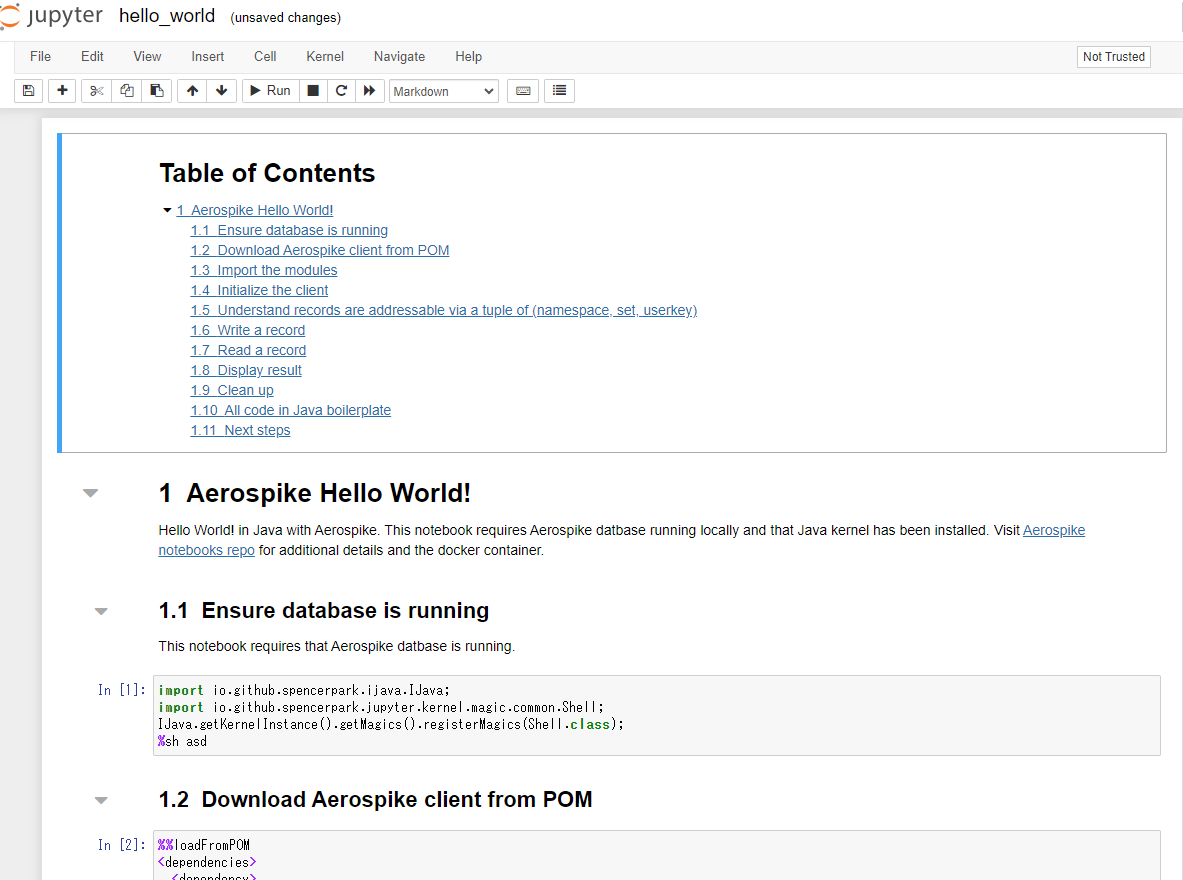
後は、In [N]:を順番に選択し、Runを実行していくとサンプルが実行できます。
最後に
様々なTutorialがありますので、コードを確認しながらAerospikeのプログラミングを知ってもらえると嬉しいです。
また、前述のようにNewからJavaやPython 3を選択し、自身のプログラムを実行してみてください。
最後に、上記も面倒だという方は、以下のURLにアクセスし、
https://aerospike.com/developer/tutorials/python/readme_tips
右の「launch binder」のアイコンをクリックすることで、Aerospikeが提供するJupyter Notebookも使用できますので、ご確認ください。

今後、これらのTutoriaから面白そうなものを選んで説明していきますので、まずは、この記事を試してみてください。
