やりたいこと
Google Cloud Text-to-SpeechにはUnity用のSDKが用意されていません。
そこで、.NET用のクイックスタートをUnityで実行します。
ソースコードは以下にアップロードしてあります。
https://github.com/AzetaTakuya/GoogleCloudText-to-SpeechForUnity
結果
分かりづらいですが、sample.mp3を保存することができました。
sample.mp3を再生するとHello, World!と再生されます。

実装
環境
- Windows10 Home
- Unity 2019.4.8f1
- Visual Studio 2017 (Community)
Google.Cloud.TextToSpeech.V1 -Version 2.0.0- Google.Cloud.TextToSpeech.V1 -Version 1.0.0
※2020/08/30現在 ver2.0.0を使用すると2度目の実行からフリーズしてしまったのでver1.0.0を使用します。
原因/対策が分かる方いましたら教えてください。
Unity2019.4は.NET4.6相当で、Google.Cloud.TextToSpeech.V1 -Version 2.0.0は.NET4.7なのが原因でした。
https://docs.unity3d.com/ja/2019.4/Manual/CSharpCompiler.html
手順
- 認証ファイルの作成
- .NET用ライブラリ(Nuget Package)をインストール
- ライブラリをUnityにインポート
- QuickStartをUnity用に修正
- 実行
※手順は基本的に公式ドキュメント:クイックスタートに従います。
①認証ファイルの作成
公式ドキュメント:クイックスタートの①~④までを完了すると、JSONファイルが生成されます。
今回、環境変数の設定はスクリプトから行うので省略して構いません。
②.NET用ライブラリ(Nuget Package)をインストール
NugetPackageをUnityにインストールする方法として、NuGetForUnityが有名ですが宗教上の理由で使用しません。
VisualStudioのパッケージマネージャーコンソールからインストールします。
VisualStudioプロジェクト作成
VisualStudioを開いて、【ファイル -> 新規作成 -> プロジェクト】からコンソールアプリ(.NET Framework)を作成します。
今回は、プロジェクト名は[TextToSpeechV1]とし、.NET Framework 4.7.1を使用しました。

プロジェクトの作成ができたら、【ツール -> Nuget パッケージマネージャー -> パッケージマネージャーコンソール】から、パッケージマネージャーコンソールを開きます。

パッケージマネージャーコンソールが開いたら以下を実行します。
PM> Install-Package Google.Cloud.TextToSpeech.V1 -Version 1.0.0
実行が終了したら、【TextToSpeechV1(※作成したプロジェクト)/Packages】を確認します。

③ライブラリをUnityにインポート
先ほどのフォルダの中にはDLLが入っているので、Unityにインポートできる様に修正します。
作業内容としては、
① Grpc.Core.1.22.0以外のフォルダ内にある【lib/net45/】内のファイルを全てpacakes直下に移動し、Grpc.Core.1.22.0以外のフォルダを全て削除
② 【Grpc.Core.1.22.0/lib/netstandard2.0】と【Grpc.Core.1.22.0/lib/netstandard1.5】を削除
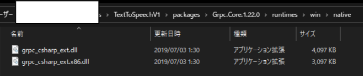
③ 【Grpc.Core.1.22.0/runtimes/win/native】内のgrpc_csharp_ext.x64.dllかgrpc_csharp_ext.x84.dllのどちらかをgrpc_csharp_ext.dllに名前を変更


以上が完了したら、Unityプロジェクトを作成します。
Unityプロジェクトを作成したら、先程修正したpakegesフォルダの名前をPluginsに変更し、Unityにインポートします。
これでUnityにライブラリのインポートが完了しました。
④QuickStartをUnity用に修正
.NET用のクイックスタートにあるスクリプトをUnity用に修正・環境変数の追加をしたものが以下となります。
using System.IO;
using UnityEngine;
using System;
using Google.Cloud.TextToSpeech.V1;

public class QuickStart : MonoBehaviour
{
    public string credentialsPath;
    public string saveFile;

    void Start()
    {
        #region Environment Variable
        if (!File.Exists(credentialsPath))
        {
            Debug.LogError("failure" + credentialsPath);
            return;
        }
        else
        {
            Debug.Log("success: " + credentialsPath);
        }
        Environment.SetEnvironmentVariable("GOOGLE_APPLICATION_CREDENTIALS", credentialsPath);
        #endregion

        #region QuickStart
        // Instantiate a client
        TextToSpeechClient client = TextToSpeechClient.Create();

        // Set the text input to be synthesized.
        SynthesisInput input = new SynthesisInput
        {
            Text = "Hello, World!"
        };

        // Build the voice request, select the language code ("en-US"),
        // and the SSML voice gender ("neutral").
        VoiceSelectionParams voice = new VoiceSelectionParams
        {
            LanguageCode = "en-US",
            SsmlGender = SsmlVoiceGender.Neutral
        };

        // Select the type of audio file you want returned.
        AudioConfig config = new AudioConfig
        {
            AudioEncoding = AudioEncoding.Mp3
        };

        // Perform the Text-to-Speech request, passing the text input
        // with the selected voice parameters and audio file type
        var response = client.SynthesizeSpeech(new SynthesizeSpeechRequest
        {
            Input = input,
            Voice = voice,
            AudioConfig = config
        });

        // Write the binary AudioContent of the response to an MP3 file.
        using (Stream output = File.Create(saveFile))
        {
            response.AudioContent.WriteTo(output);
            Debug.Log($"Audio content written to file " + saveFile);
        }
        #endregion

    }

}
⑤実行
credentialsPathに認証ファイルのパスを、saveFileに保存ファイルパス(.mp3)を入れ実行すると音声ファイルが保存されます。
まとめ
GoogleCloutPlatform自体の使い方については結構雑な感じなので要望があれば書こうと思います。
なんでGoogle.Cloud.TextToSpeech.V1 -Version 2.0.0では安定動作しないんだ...?
気が向いたらWindows以外も対応します。
参考
なし
追記
2020/09/09