NumpyでCannyエッジ検出を実装してみます。
画像読み込み
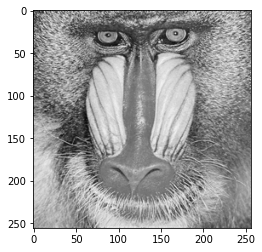
画像を読み込み、カラー画像をグレースケール画像に変換します。
original_image = plt.imread(image_name)
if np.issubdtype(original_image.dtype, np.integer):
  original_image = original_image / np.iinfo(original_image.dtype).max
gray_image = 0.2116 * original_image[:,:,0] + 0.7152 * original_image[:,:,1] + 0.0722 * original_image[:,:,2]
plt.imshow(gray_image, cmap='gray')
畳み込み関数
畳み込みを行う関数convolve2dを定義しておきます。詳細は以下の記事を参照してください。
【画像処理】Numpyで空間フィルタリング(畳み込み演算) - Qiita
def _convolve2d(image, kernel):
  shape = (image.shape[0] - kernel.shape[0] + 1, image.shape[1] - kernel.shape[1] + 1) + kernel.shape
  strides = image.strides * 2
  strided_image = np.lib.stride_tricks.as_strided(image, shape, strides)
  return np.einsum('kl,ijkl->ij', kernel, strided_image)

def _convolve2d_multichannel(image, kernel):
  convolved_image = np.empty((image.shape[0] - kernel.shape[0] + 1, image.shape[1] - kernel.shape[1] + 1, image.shape[2]))
  for i in range(image.shape[2]):
    convolved_image[:,:,i] = _convolve2d(image[:,:,i], kernel)
  return convolved_image

def _pad_singlechannel_image(image, kernel_shape, boundary):
  return np.pad(image, ((int(kernel_shape[0] / 2),), (int(kernel_shape[1] / 2),)), boundary)

def _pad_multichannel_image(image, kernel_shape, boundary):
  return  np.pad(image, ((int(kernel_shape[0] / 2),), (int(kernel_shape[1] / 2),), (0,)), boundary)

def convolve2d(image, kernel, boundary='edge'):
  if image.ndim == 2:
    pad_image = _pad_singlechannel_image(image, kernel.shape, boundary) if boundary is not None else image
    return _convolve2d(pad_image, kernel)
  elif image.ndim == 3:
    pad_image = _pad_multichannel_image(image, kernel.shape, boundary) if boundary is not None else image
    return _convolve2d_multichannel(pad_image, kernel)
画像の平滑化(ノイズ除去)
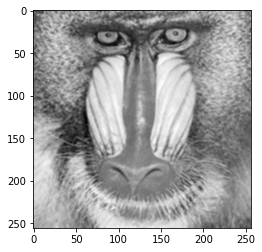
ガウシアンフィルターで画像を平滑化して、ノイズを除去します。
def create_gaussian_kernel(size=(3, 3), sigma=1):
  center = ((size[0] - 1) / 2, (size[1] - 1) / 2)
  sigma2 = 2 * sigma * sigma
  kernel = np.fromfunction(lambda y, x: np.exp(-((x - center[1]) ** 2 + (y - center[0]) ** 2) / sigma2), size)
  kernel = kernel / np.sum(kernel)
  return kernel

gaussian_kernel = create_gaussian_kernel()
gaussian_image = convolve2d(gray_image, gaussian_kernel)
plt.imshow(gaussian_image, cmap='gray')
画像の微分
Sobelフィルターで画像の微分を行い、勾配を求めます。
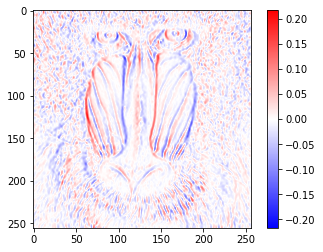
まず横方向の微分です。
sobel_x_kernel = np.array([[-1, 0, 1],
                           [-2, 0, 2],
                           [-1, 0, 1]])
sobel_x_image = convolve2d(gaussian_image, sobel_x_kernel) / 8
value_range = max(abs(sobel_x_image.min()), abs(sobel_x_image.max()))
plt.imshow(sobel_x_image, cmap='bwr', vmin=-value_range, vmax=value_range)
plt.colorbar()
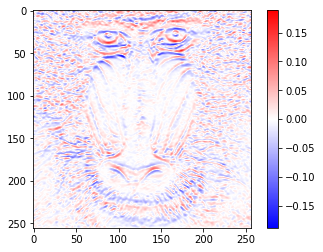
次に縦方向の微分です。
sobel_y_kernel = np.array(([[1, 2, 1],
                            [0, 0, 0],
                            [-1, -2, -1]]))
sobel_y_image = convolve2d(gaussian_image, sobel_y_kernel) / 8
value_range = max(abs(sobel_y_image.min()), abs(sobel_y_image.max()))
plt.imshow(sobel_y_image, cmap='bwr', vmin=-value_range, vmax=value_range)
plt.colorbar()
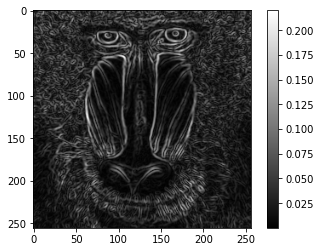
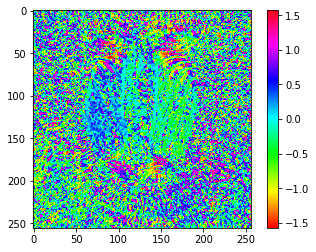
各方向の微分から勾配の強度と方向を求めます。
sobel_intensity_image = np.sqrt(sobel_x_image ** 2 + sobel_y_image ** 2)
plt.imshow(sobel_intensity_image, cmap='gray')
plt.colorbar()
sobel_direction_image = np.arctan(np.divide(sobel_y_image, sobel_x_image, out=np.zeros_like(sobel_y_image), where=sobel_x_image!=0))
plt.imshow(sobel_direction_image, cmap='hsv')
plt.colorbar()
勾配方向の非極値抑制
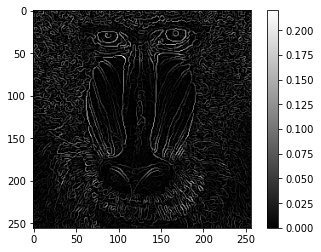
細線化のために、先ほど求めた勾配強度のうち勾配方向で最大値となるものだけを残します。
def _suppress_nonmaximum(array):
  direction = array[9]
  if direction < 0:
    direction += np.pi
  if direction < 0.125 * np.pi:
    v0, v1, v2 = (array[3], array[4], array[5])
  elif direction < 0.375 * np.pi:
    v0, v1, v2 = (array[2], array[4], array[6])
  elif direction < 0.625 * np.pi:
    v0, v1, v2 = (array[1], array[4], array[7])
  elif direction < 0.875 * np.pi:
    v0, v1, v2 = (array[0], array[4], array[8])
  else:
    v0, v1, v2 = (array[3], array[4], array[5])
  return v1 if v1 >= v0 and v1 >= v2 else 0

def suppress_nonmaximum(intensity_image, direction_image):
  pad_image = np.pad(intensity_image, 1, 'edge')
  shape = intensity_image.shape + (3, 3)
  strides = pad_image.strides * 2
  strided_image = np.lib.stride_tricks.as_strided(pad_image, shape, strides).reshape(shape[0], shape[1], 9)
  return np.apply_along_axis(_suppress_nonmaximum, 2, np.dstack((strided_image, direction_image)))

nonmaximum_suppression_image = suppress_nonmaximum(sobel_intensity_image, sobel_direction_image)
plt.imshow(nonmaximum_suppression_image, cmap='gray')
plt.colorbar()
ヒステリシス閾値処理
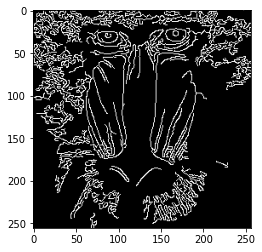
非極値抑制した画像からエッジ画像を作成します。まず、値が閾値$T_{high}$よりも大きい画素をエッジとみなします。さらに値が閾値$T_{low}$よりも大きく、かつエッジが隣接している画素もエッジとみなすことで連結したエッジを検出します。
def histeresis_thresholding(image, threshold):
  edge_image = np.where(image >= threshold[1], 1.0, 0.0)

  while True:
    pad_edge_image = np.pad(edge_image, 1, 'edge')
    shape = image.shape + (3, 3)
    strides = pad_edge_image.strides * 2
    neighbour_edge_image = np.lib.stride_tricks.as_strided(pad_edge_image, shape, strides)
    edge_candidate_index = np.where((image >= threshold[0]) & (edge_image != 1.0))

    changed = False
    for index in list(zip(*edge_candidate_index)):
      if np.any(neighbour_edge_image[index] == 1.0):
        edge_image[index] = 1.0
        changed = True
    if not changed:
      break;

  return edge_image

canny_image = histeresis_thresholding(nonmaximum_suppression_image, (0.03, 0.1))
plt.imshow(canny_image, cmap='gray')
まとめ
以上の処理をまとめて、Cannyエッジ検出を行う関数を作成すると次のようになります。
def canny(image, gaussian_size=(3, 3), gaussian_sigma=1, threshold=(0.02, 0.05)):
  # Noise reduction by gaussian filter
  gaussian_kernel = create_gaussian_kernel(size=gaussian_size, sigma=gaussian_sigma)
  gaussian_image = convolve2d(gray_image, gaussian_kernel)

  # Gradient by sobel filter
  sobel_x_kernel = np.array([[-1, 0, 1], [-2, 0, 2], [-1, 0, 1]])
  sobel_x_image = convolve2d(gaussian_image, sobel_x_kernel) / 8
  sobel_y_kernel = np.array(([[1, 2, 1], [0, 0, 0], [-1, -2, -1]]))
  sobel_y_image = convolve2d(gaussian_image, sobel_y_kernel) / 8
  sobel_intensity_image = np.sqrt(sobel_x_image ** 2 + sobel_y_image ** 2)
  sobel_direction_image = np.arctan(np.divide(sobel_y_image, sobel_x_image, out=np.zeros_like(sobel_y_image), where=sobel_x_image!=0))

  # Non-maximum suppression
  nonmaximum_suppression_image = suppress_nonmaximum(sobel_intensity_image, sobel_direction_image)

  # Histresis thresholding
  return histeresis_thresholding(nonmaximum_suppression_image, threshold)
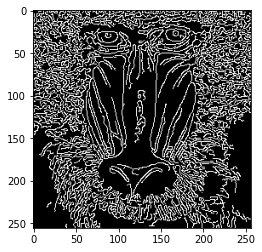
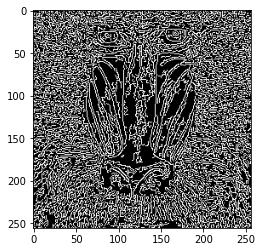
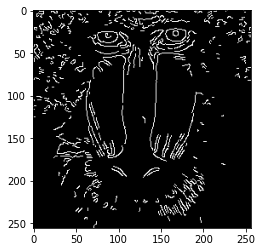
パラメータを変えてCannyエッジ検出を試してみます。
canny_image1 = canny(gray_image)
plt.imshow(canny_image1, cmap='gray')
canny_image2 = canny(gray_image, gaussian_size=(5, 5), gaussian_sigma=0.2, threshold=(0.01, 0.04))
plt.imshow(canny_image2, cmap='gray')
canny_image3 = canny(gray_image, gaussian_size=(3, 3), gaussian_sigma=1.2, threshold=(0.06, 0.08))
plt.imshow(canny_image3, cmap='gray')
今回実装したコードはGoogle Colaboratoryに置いてあります。
