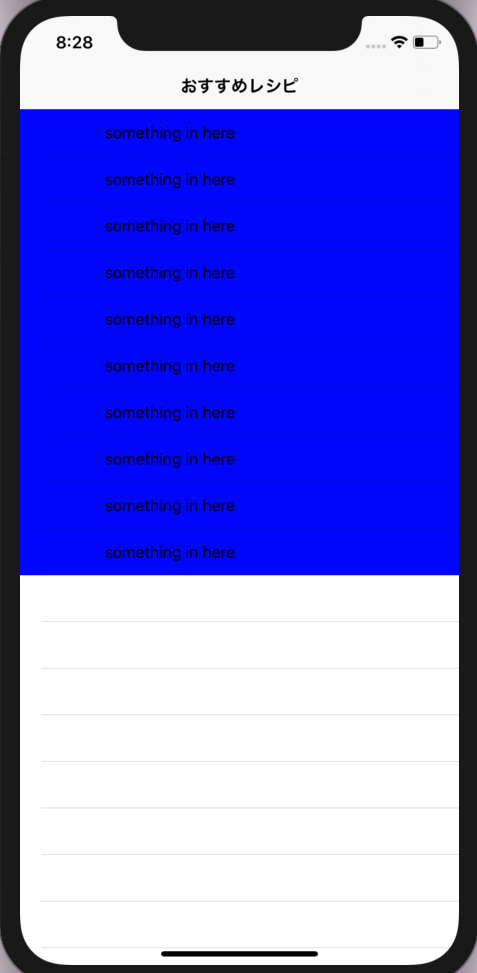
やること
前回の続き
TableviewCellのクラスを作る
TableviewCellのクラスを作る
①class RTableViewCell: UITableViewCell {とTableviewcellのクラスを作る。
②UILabelを作成
   let bodyTextLabel: UILabel = {
       let label = UILabel()
       label.text = "something in here"                     //テキストに表示する文字
       label.font = .systemFont(ofSize: 15)              //文字のフォントを指定
       label.translatesAutoresizingMaskIntoConstraints = false  //下記のメモ①参照
       return label
   }()
③ UIImageViewを作成
let userImageView: UIImageView = {
       let iv = UIImageView()
        iv.contentMode = .scaleAspectFill              // 画像の大きさを指定
        iv.translatesAutoresizingMaskIntoConstraints = false  //下記のメモ①参照
        iv.clipsToBounds = true                   //描画がUIImageViewの領域内に限定される(メモ②)
        return iv
    }()
メモ①
translatesAutoresizingMaskIntoConstraintsは、AutoresizingMaskの設定値をAuto Layoutの制約に変換するかどうかを決めるもの。
参考記事
メモ②
④bodyTextLabelにAPIで取ってきたrecipeTitleを入れてあげる。
    var recip: ResultList.User? {
        didSet {
            bodyTextLabel.text = recip?.recipeTitle
⑤userImageViewにAPIで取ってきたfoodImageUrlを入れてあげる。
UIimageでURL(foodImageUrl)で画像を取得 参考記事
            let url = URL(string: recip?.foodImageUrl ?? "")
            do {
                let data = try Data(contentsOf: url!)
                let image = UIImage(data: data)
                userImageView.image = image            //userImageViewにfoodImageUrlを入れてあげるコード

            }catch let err {
                print("Error : \(err.localizedDescription)")
            }
        }
    }
⑥ ④や⑤で作ったuserImageViewとbodyTextLabelをカスタマイズする
参考記事
    override init(style: UITableViewCell.CellStyle, reuseIdentifier: String?) {
        super.init(style: style, reuseIdentifier: reuseIdentifier)

        addSubview(userImageView)
        addSubview(bodyTextLabel)
        [  //ビューの左端を指定
            userImageView.leadingAnchor.constraint(equalTo: leadingAnchor, constant: 10),
       //ビューの縦方向中心を指定
            userImageView.centerYAnchor.constraint(equalTo: centerYAnchor),
       //ビューの幅を指定
            userImageView.widthAnchor.constraint(equalToConstant: 50),
       //ビューの高さを指定
            userImageView.heightAnchor.constraint(equalToConstant: 50),

       //テキストの左端を指定
            bodyTextLabel.leadingAnchor.constraint(equalTo: userImageView.trailingAnchor, constant: 20),
       //テキストの縦方向中心を指定
            bodyTextLabel.centerYAnchor.constraint(equalTo: centerYAnchor),

            ].forEach{ $0.isActive = true }   //メモ参照

        //ビューを丸くする
        userImageView.layer.cornerRadius = 50 / 2
    }

    required init?(coder: NSCoder) {
        fatalError("init(coder:) has not been implemented")
    }
}
メモ(for each)
for eachはfor inと同じように処理の繰り返しに使う。
ただfor each文はreturnやbreakなどで処理を抜けることがない。
for in文ではreturnで処理を抜けることができる。
参考記事
RTableViewCellを反映させる
tableView.register(UITableViewCell.self,
のUITableViewCellを先ほど作ったクラスのRTableViewCellに変えてあげる。
tableView.register(RTableViewCell.self, forCellReuseIdentifier: cellId)
シミュレーター

これでcellの準備も整いました。
自分なりに調べて解説しているので間違いなどあればご教示していただけると有り難いです。
次こそcellにAPIの情報を反映したいと思います!!
今までの全体コード
struct ResultList: Codable {

    let result: [User]

struct User: Codable {
    let foodImageUrl :String
    let recipeTitle  :String
}
}

class ViewController: UIViewController {

    private let cellId = "cellId"
    //tableviewを作っていく
    let tableView: UITableView = {
        let tv = UITableView()
        return tv
    }()

    override func viewDidLoad() {
        super.viewDidLoad()

        view.addSubview(tableView)
        tableView.frame.size = view.frame.size


        tableView.delegate = self
        tableView.dataSource = self
        tableView.register(RTableViewCell.self, forCellReuseIdentifier: cellId)
        navigationItem.title = "おすすめレシピ"

      getRApi()
    }

     private func getRApi(){
            guard let url = URL(string: "楽天api") else {return}

            let task = URLSession.shared.dataTask(with: url) { (data, response, err)in
                if let err = err {
                    print("情報の取得に失敗しました。:", err)
                    return
                }
                if let data = data{
                    do{
                        let resultList = try JSONDecoder().decode(ResultList.self, from: data)

                        print("json: ", resultList)
                    }catch(let err){
                         print("情報の取得に失敗しました。:", err)

                    }
                }
            }
            task.resume()
        }
    }
extension ViewController: UITableViewDelegate,UITableViewDataSource{

        func tableView(_ tableView: UITableView, numberOfRowsInSection section: Int) -> Int {


            return 10
            }

    func tableView(_ tableView: UITableView, cellForRowAt indexPath: IndexPath) -> UITableViewCell {
        let cell = tableView.dequeueReusableCell(withIdentifier: cellId, for: indexPath)
        cell.backgroundColor = .blue   //確認のため

        return cell
    }

}

class RTableViewCell: UITableViewCell {

    let bodyTextLabel: UILabel = {
        let label = UILabel()
        label.text = "something in here"
        label.font = .systemFont(ofSize: 15)
        label.translatesAutoresizingMaskIntoConstraints = false
        return label
    }()

    let userImageView: UIImageView = {
       let iv = UIImageView()
        iv.contentMode = .scaleAspectFill
        iv.translatesAutoresizingMaskIntoConstraints = false
        iv.clipsToBounds = true
        return iv
    }()

    var recip: ResultList.User? {
        didSet {
            bodyTextLabel.text = recip?.recipeTitle
            let url = URL(string: recip?.foodImageUrl ?? "")
            do {
                let data = try Data(contentsOf: url!)
                let image = UIImage(data: data)
                userImageView.image = image
            }catch let err {
                print("Error : \(err.localizedDescription)")
            }
        }
    }


    override init(style: UITableViewCell.CellStyle, reuseIdentifier: String?) {
        super.init(style: style, reuseIdentifier: reuseIdentifier)

        addSubview(userImageView)
        addSubview(bodyTextLabel)
        [
            userImageView.leadingAnchor.constraint(equalTo: leadingAnchor, constant: 10),
            userImageView.centerYAnchor.constraint(equalTo: centerYAnchor),
            userImageView.widthAnchor.constraint(equalToConstant: 50),
            userImageView.heightAnchor.constraint(equalToConstant: 50),

            bodyTextLabel.leadingAnchor.constraint(equalTo: userImageView.trailingAnchor, constant: 20),
            bodyTextLabel.centerYAnchor.constraint(equalTo: centerYAnchor),

            ].forEach{ $0.isActive = true }

        userImageView.layer.cornerRadius = 50 / 2
    }

    required init?(coder: NSCoder) {
        fatalError("init(coder:) has not been implemented")
    }
}