はじめに
Lambda Web Adapterという、HTTPで動くコンテナに対して仲介してLambdaで動くようにしてくれるツールがあります。
これを使って、Rのplumberをコンテナにして動かしてみました。
以前Lambdaで、plumberのようなRのREST APIを作りましたが、Lambda Web Adapterを使えば、plumberを使えるのでかなり楽です。
概要
- Lambda非サポートのRを、Lambda Web Adapterを用いて実行
- Webアプリを対象としているので、plumberを使用
参考
やってみた
環境はCloud9のm5.largeを使いました。t3.smallでもできますが、docker buildの時間が(m5.largeであれば)6分程度ですが、(t3.smallだと)10分以上かかります。
ECRへのPUSHまで
過去の記事を参考に、ECRへのPUSHまでやります。
まずはプロジェクトのディレクトリとファイルを作ります。
# プロジェクトのディレクトリ作成
mkdir test-plumber && cd test-plumber

# イメージプル
docker pull r-base

# 必要なファイルを作成
touch Dockerfile
touch plumber.R
touch sample.R
Dockerファイルは以下になります。以前との違いは以下の点です。
- Lambda Adapterを追加
-
base64encをインストール- 画像をbase64にエンコードしてimageタグで表示します
- ポートは8080を指定
- デフォルトで使用するポートです
- Lambdaの環境変数で指定可能です
FROM r-base

COPY --from=public.ecr.aws/awsguru/aws-lambda-adapter:0.5.0 /lambda-adapter /opt/extensions/lambda-adapter

COPY  sample.R /usr/local/src/
COPY  plumber.R /usr/local/src/

WORKDIR /usr/local/src/

# install the linux libraries needed for plumber
RUN apt-get update -qq && apt-get install -y \
  libsodium-dev \
  libcurl4-gnutls-dev

RUN R -e 'install.packages("base64enc")'
RUN R -e 'install.packages("plumber")'

EXPOSE 8080

ENTRYPOINT ["Rscript", "plumber.R"]
plumber.Rでも8080ポートを指定します。
library(plumber)
api <- plumber::plumb("sample.R")
api$run(host = "0.0.0.0", port=8080)
Rのスクリプトでは、以下の2点を変更しています。
- "/healthz"の処理を追加
- Lambda Web Adapterでは、ヘルスチェックを行っています
- デフォルトではルートパスをチェックしていますが、今回は
/healthzを使います- Lambdaの環境変数で、ヘルスチェックのパスを指定します
- 画像を返す場合はbase64にエンコードしてimageタグを使用
#* @get /healthz
hw <- function() {
return("Healthy")
}
#* @get /hello
hw <- function() {
return("Hello, world!")
}
#* @get /hello/<name>/<age:int>
hw <- function(name, age) {
return(paste("Hello", name, "You're", age, "years old", seq=" "))
}
#* @get /fn
hw <- function(x) {
x <- as.numeric(x)
y <- 2 * x + 1
return(y)
}
#irisを読み込み
df <- iris
#* @get /plot
#* @serializer html
hw <- function() {
png("/tmp/iris_plot.png")
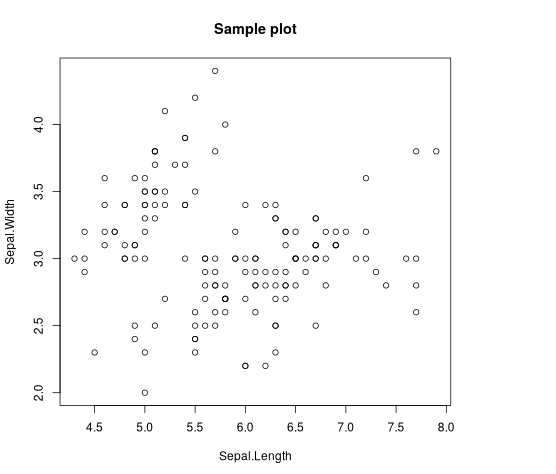
plot(df$Sepal.Length, df$Sepal.Width, main="Sample plot", xlab="Sepal.Length", ylab="Sepal.Width")
dev.off()
library(base64enc)
image_data <- readBin("/tmp/iris_plot.png", "raw", file.info("/tmp/iris_plot.png")$size)
image_base64 <- base64enc::base64encode(image_data)
unlink("/tmp/iris_plot.png")
paste0("<img src='data:image/png;base64,", image_base64, "' />")
}
コンテナをBuildします。
# よく使う文字列を環境変数にセット
REGION="ap-northeast-1"
ACCOUNTID=$(aws sts get-caller-identity --output text --query Account)
IMAGENAME="test-plumber"

# build 6分
docker build -t ${IMAGENAME} .

# テストで起動
docker run --rm -p 8080:8080 ${IMAGENAME}

# 別コンソールから
curl localhost:8080/hello
curl localhost:8080/hello/jiro/22
コンテナをECRにPUSHします。
まずはECRをCloudFormationで作成します。
# ECRリポジトリ作成CFn
touch createECRRepository.yaml
AWSTemplateFormatVersion: "2010-09-09"

Resources:
  ########################################################
  ### ECR Repository
  ########################################################
  TestEcrPoc:
    Type: AWS::ECR::Repository
    Properties:
      RepositoryName: test-plumber-ecs
Outputs:
  RepositoryUri:
    Value: !GetAtt TestEcrPoc.RepositoryUri
ECRを作成して、PUSHします。
# ECRにレポジトリ作成
STACKNAME="create-ecrrepo"
aws cloudformation create-stack --stack-name ${STACKNAME} --template-body file://createECRRepository.yaml --region ${REGION}

# イメージにタグ付与
TAGNAME=`aws cloudformation describe-stacks --stack-name ${STACKNAME} --query "Stacks[].Outputs[?OutputKey=='RepositoryUri'].[OutputValue]"  --output text`:latest
docker tag ${IMAGENAME}:latest ${TAGNAME}

# 認証
aws ecr get-login-password --region ${REGION} | docker login --username AWS --password-stdin ${ACCOUNTID}.dkr.ecr.${REGION}.amazonaws.com

# 作ったイメージをPUSH
docker push ${TAGNAME}
Lambda作成
次にLambdaもCloudFormationで作ります。
touch createLambda.yaml
中身は以下になります。Function URLを使います。
ヘルスチェックパス/healthzを、環境変数READINESS_CHECK_PATHで指定します。
またタイムアウトの値を最大の900秒にしました。
AWSTemplateFormatVersion: 2010-09-09

Parameters:
  EcrRepUri:
    Type: String
  LambdaFunctionName:
    Type: String
    Default: function-https

Resources:
  FunctionLogGroup:
    Type: AWS::Logs::LogGroup
    Properties:
      LogGroupName: !Sub "/aws/lambda/${LambdaFunctionName}"
      RetentionInDays: 3653   # 未指定時は「失効しない」

  FunctionRole:
    Type: AWS::IAM::Role
    Properties:
      RoleName: !Sub "for-lambdafunction-${LambdaFunctionName}"
      AssumeRolePolicyDocument:
        Version: 2012-10-17
        Statement:
          - Effect: Allow
            Principal:
              Service:
                - lambda.amazonaws.com
            Action:
              - 'sts:AssumeRole'
      Path: '/service-role/'
      Policies:
        # CloudWatch
        - PolicyName: write-cloudwatchlogs
          PolicyDocument:
            Version: 2012-10-17
            Statement:
              - Effect: Allow
                Action:
                  - 'logs:CreateLogStream'
                  - 'logs:PutLogEvents'
                Resource: !Sub "arn:aws:logs:${AWS::Region}:${AWS::AccountId}:log-group:/aws/lambda/${LambdaFunctionName}:*"

  TargetFunction:
    Type: AWS::Lambda::Function
    Properties:
      PackageType: Image
      FunctionName: !Ref LambdaFunctionName
      Role: !GetAtt FunctionRole.Arn
      Timeout: 900
      Environment:
        Variables:
          READINESS_CHECK_PATH: /healthz
      Code:
        ImageUri: !Ref EcrRepUri

  ##################################################
  # 以下、URLと許可
  ##################################################
  TargetFunctionUrl:
    Type: AWS::Lambda::Url
    Properties:
      AuthType: NONE
      TargetFunctionArn: !GetAtt TargetFunction.Arn

  TargetFunctionUrlPermission:
    Type: AWS::Lambda::Permission
    Properties:
      Action: lambda:InvokeFunctionUrl
      FunctionName: !GetAtt TargetFunction.Arn
      FunctionUrlAuthType: NONE
      Principal: "*"

Outputs:
  FunctionUrl:
    Value: !GetAtt TargetFunctionUrl.FunctionUrl
    Export:
      Name: TargetFunctionUrl
CloudFormationを実行して、Lambdaを作ります。
FUNCTIONSTACKNAME="create-lambda"
ECRURI=`aws cloudformation describe-stacks --stack-name ${STACKNAME} --query "Stacks[].Outputs[?OutputKey=='RepositoryUri'].[OutputValue]"  --output text`:latest

aws cloudformation create-stack \
    --stack-name ${FUNCTIONSTACKNAME} \
    --capabilities CAPABILITY_NAMED_IAM \
    --template-body file://createLambda.yaml \
    --parameters ParameterKey=EcrRepUri,ParameterValue=${ECRURI} \
    --region ${REGION}
実行
正常に作成出来たら、以下のコマンドでOutputさせたURLにパスを付与して確認します。
FUNCTIONURL=`aws cloudformation describe-stacks --stack-name ${FUNCTIONSTACKNAME} --query "Stacks[0].Outputs[?OutputKey=='FunctionUrl'].OutputValue" --output text`

curl ${FUNCTIONURL}hello
curl ${FUNCTIONURL}hello/jiro/21
curl ${FUNCTIONURL}fn?x=2
curl ${FUNCTIONURL}plot
/plotはブラウザで表示することで、画像を確認できます。
おわりに
RのWebアプリをplumberで作成しコンテナにして、Lambda Web Adapterで動かしてみました。
Lambdaでサポートしていない言語でもLambda Web Adapterを使えば実行できました。使用の幅が広がるのではないでしょうか。
この記事がどなたかのお役に立てれば幸いです。