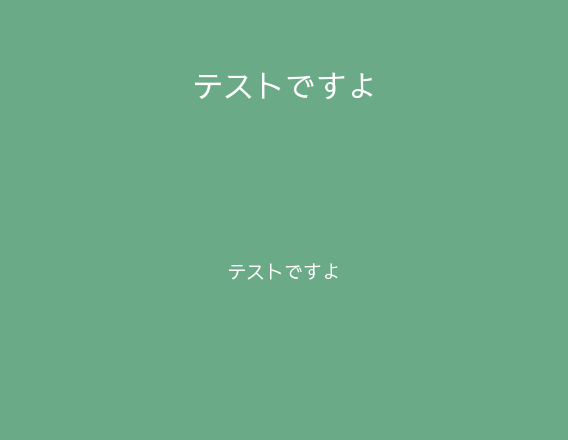
やりたいこと
もともと用意してある画像に、ユーザーが入力したテキストを入れ込む。
(元画像)

(加工後)

参考サイト
https://qiita.com/bohebohechan/items/fadfe0558910985b1cce
https://www.laracasts.com/discuss/channels/laravel/how-to-type-long-text-in-intervention-image
インストールする
公式サイトはこちらをご覧ください
http://image.intervention.io/getting_started/installation
公式通りにコマンドを叩いても導入できなかったんですが、下記を叩いたら行けた。
これで良いのだろうか。。。
composer require intervention/image
app.phpに組み込む
これはお決まりですね。やらないと使えないですからねー
app.php
'providers' => [

        /*
         * Laravel Framework Service Providers...
         */
        Illuminate\Auth\AuthServiceProvider::class,
        Illuminate\Broadcasting\BroadcastServiceProvider::class,
        Illuminate\Bus\BusServiceProvider::class,
        Illuminate\Cache\CacheServiceProvider::class,
        ...中略
        Illuminate\View\ViewServiceProvider::class,

        /*
         * Package Service Providers...
         */
        Intervention\Image\ImageServiceProvider::class,
        /*
         * Application Service Providers...
         */
        App\Providers\AppServiceProvider::class,
        App\Providers\AuthServiceProvider::class,
        // App\Providers\BroadcastServiceProvider::class,
        App\Providers\EventServiceProvider::class,
        App\Providers\RouteServiceProvider::class,

    ],

    /*
    |--------------------------------------------------------------------------
    | Class Aliases
    |--------------------------------------------------------------------------
    |
    | This array of class aliases will be registered when this application
    | is started. However, feel free to register as many as you wish as
    | the aliases are "lazy" loaded so they don't hinder performance.
    |
    */

    'aliases' => [

        'App' => Illuminate\Support\Facades\App::class,
        'Artisan' => Illuminate\Support\Facades\Artisan::class,
        'Auth' => Illuminate\Support\Facades\Auth::class,
        'Blade' => Illuminate\Support\Facades\Blade::class,
        'Broadcast' => Illuminate\Support\Facades\Broadcast::class,
        'Bus' => Illuminate\Support\Facades\Bus::class,
        'Cache' => Illuminate\Support\Facades\Cache::class,
        'Config' => Illuminate\Support\Facades\Config::class,
        'Cookie' => Illuminate\Support\Facades\Cookie::class,
        'Crypt' => Illuminate\Support\Facades\Crypt::class,
        'DB' => Illuminate\Support\Facades\DB::class,
        'Eloquent' => Illuminate\Database\Eloquent\Model::class,
        'Event' => Illuminate\Support\Facades\Event::class,
        ...中略
        'View' => Illuminate\Support\Facades\View::class,
        'Image' => Intervention\Image\Facades\Image::class,
    ],
画像の加工を行う
処理の流れとしては、①元画像を取得する、②画像の加工を行う、③加工した画像を適宜保存する。文字のフォントGoogle fontから拝借しました。
また、文字を分割する際に、日本語対応のメソッドがないらしく、この記事を参照しました。
    function card_create($title,$description){
        //publicディレクトリにある元画像を取得し、指定の大きさに切り取る
        $card_img = Image::make(public_path('images/original.png'))->crop(568, 440); //①

        //タイトルを画像に表示させる
        //表示させる文字、表示場所をx/yで指定する
        $card_img ->text($title, 284, 100, function($font) {
            $font->file('fonts/SawarabiGothic-Regular.ttf');
            $font->size(30);
            $font->align('center');
            $font->color('#ffffff');
        }); //②

        //長めの文章を指定文字数で分割する
        $max_len = 26;
        $lines = self::mb_wordwrap($description, $max_len);

        //ディスクリプションを画像に表示させる
        $card_img ->text($lines, 284, 280, function($font) {
            $font->file('fonts/SawarabiGothic-Regular.ttf');
            $font->size(18);
            $font->align('center');
            $font->color('#ffffff');
        }); //②

        //storageに保存する(適宜書き換えてください)
        $card_img->save(public_path('images/test.png')); //③
    }

   function mb_wordwrap($str, $width, $break=PHP_EOL )
    {
        $c = mb_strlen($str);
        $arr = [];
        for ($i=0; $i<=$c; $i+=$width) {
            $arr[] = mb_substr($str, $i, $width);
        }
        return implode($break, $arr);
    }