前提
Javaを利用してTwitterで呟くためには、twiiter4jを利用する記事を多く拝見しました。しかし、2021年12月にtwitterAPIがバージョンアップした為、twitter4jを利用した投稿は上手く行きませんでした。(twitter4j-v2というTwitter API v2向きのtwitter4jが存在しますが、自分の環境では依存関係を上手く読み込むことができませんでした。)2022年1月現在ではJavaでのTwitter API V2向きに対応している記事が少なかった為、記事録的に残しておきます。初学者な為至らない点があるかもしれません。
Twitter Developer 開発者申請(事前準備)
-
Twitter Developerにアクセスし、開発者申請を行います。
-
以下リンクなどを参照し、申請を完了させます。
- https://auto-worker.com/blog/?p=3157
- 自分の場合は長文で答えるような質問はありませんでした。バージョンアップで質問内容が少し異なっているようです。
-
ログイン後に以下の様に移動します。
- Developer Portal → Projects&Apps → Projects → 自分で作成したプロジェクト名
-
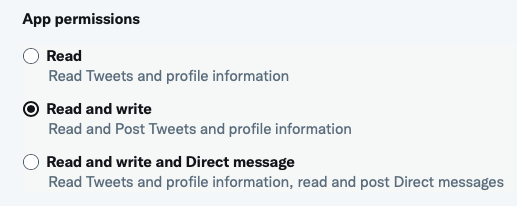
App permissionsからRead and writeを選択します。こちらを選択することでTwitter APIを利用し、ツイートすることができる様になります。

-
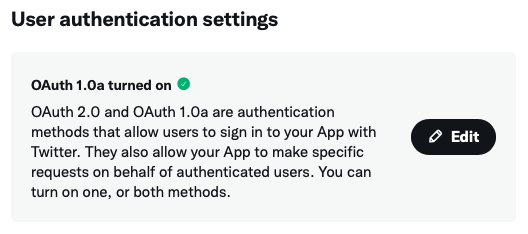
GENERAL AUTHENTICATION SETTINGSのCallbak URI / Redirect URLとWebsiter URLに自分のツイッターURLを入力します。(自分はそうしました。。)
-
一番下にあるSaveをクリックして、保存します。
-
ここで以下2点を発行し、保存します。(発行した値をメモしておいてください。)
- API Key and Secret
- Access Token and Secret
twittered
今回はtwitteredを利用して、ツイートすることにしました。
Java開発者向けのTwitterAPIクライアントになります。
pom.xmlの設定
- mavenの場合pom.xmlに対して、以下を設定します。(gradleの場合は公式ドキュメント を参照していただければと思いますmm)
- VERSIONにリリースされているバージョンを指定します。(2022年1月現在では以下の様になります。)
<dependency>
  <groupId>io.github.redouane59.twitter</groupId>
  <artifactId>twittered</artifactId>
  <version>2.14</version>
</dependency>
ログを見る為に、以下の導入も推奨されている様です。
<dependency>
  <groupId>org.slf4j</groupId>
  <artifactId>slf4j-api</artifactId>
  <version>1.7.30</version>
</dependency>
<dependency>
  <groupId>org.slf4j</groupId>
  <artifactId>slf4j-simple</artifactId>
  <version>1.7.30</version>
</dependency>
jsonファイルの作成
以下の様にjsonファイルを作成します。
メモした値をxxx箇所に設定します。
{
  "apiKey": "xxx",
  "apiSecretKey": "xxx",
  "accessToken": "xxx",
  "accessTokenSecret": "xxx"
}
ツイート
ではいよいよ、本文を作成していきたいと思います。
公式ドキュメントのCode Samplesを参考に、作成しました。
ファイルパスは先ほど作成した、jsonファイルのパスを指定します。
以下の様にposteTweet内に文字列を指定することでツイートすることができます。
TwitterClient twitterClient = new TwitterClient(TwitterClient.OBJECT_MAPPER
                .readValue(new File("sample/key.json"), TwitterCredentials.class));
Tweet  resultPost = twitterClient.postTweet("test");
最後に
ここではtwitterdを利用した、Javaでのツイート方法を記録しました。知識が浅い為至らない部分があったと思いますが、ここまでお読みいただきありがとうございました。


