2
0

Delete article

Deleted articles cannot be recovered.

Draft of this article would be also deleted.

Are you sure you want to delete this article?

More than 5 years have passed since last update.

Cloud9でHelloWorld確認までの流れをキャプチャ付きで詳しく紹介

Posted at

#はじめに
前回、Cloud9アカウントを作成したので、ありきたりですがHelloWorldを確認するまでの流れを紹介したいと思います。

実際の手順

  1. Cloud9のログイン画面にアクセスし、メアドとパスワードを入力し、Sign inをクリック 
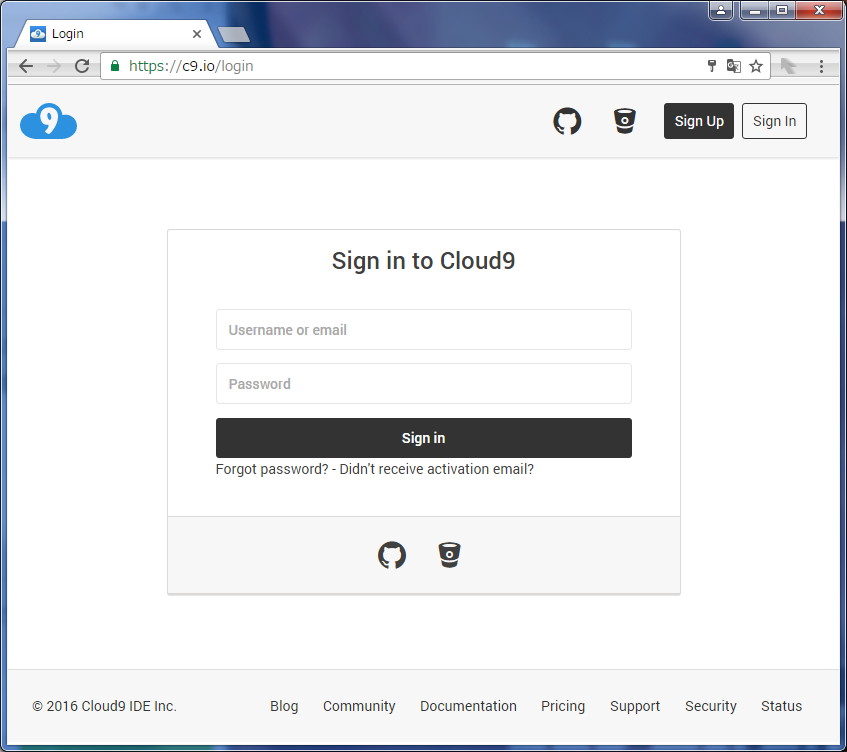
    a.png

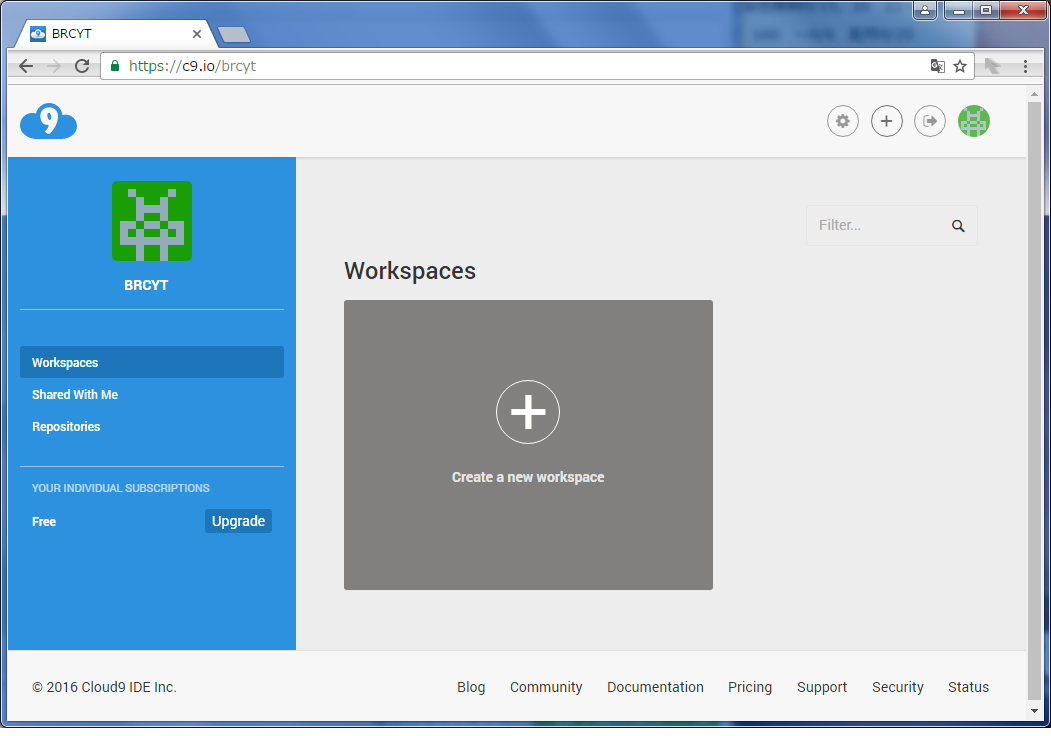
  2. ワークスペース画面が表示されるので、画面中央のCreate a new workspaceをクリック
    g.png

  3. ワークスペース名の入力と公開設定をPrivateにする以外はデフォルトのままで、Create workspaceをクリック
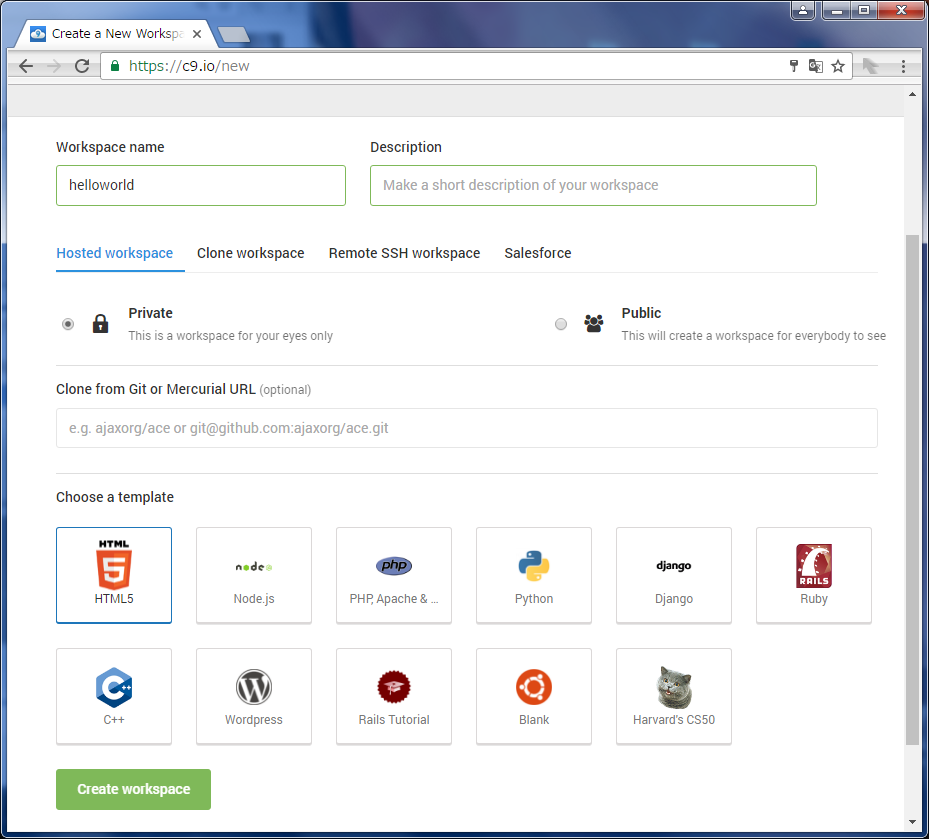
    b.png

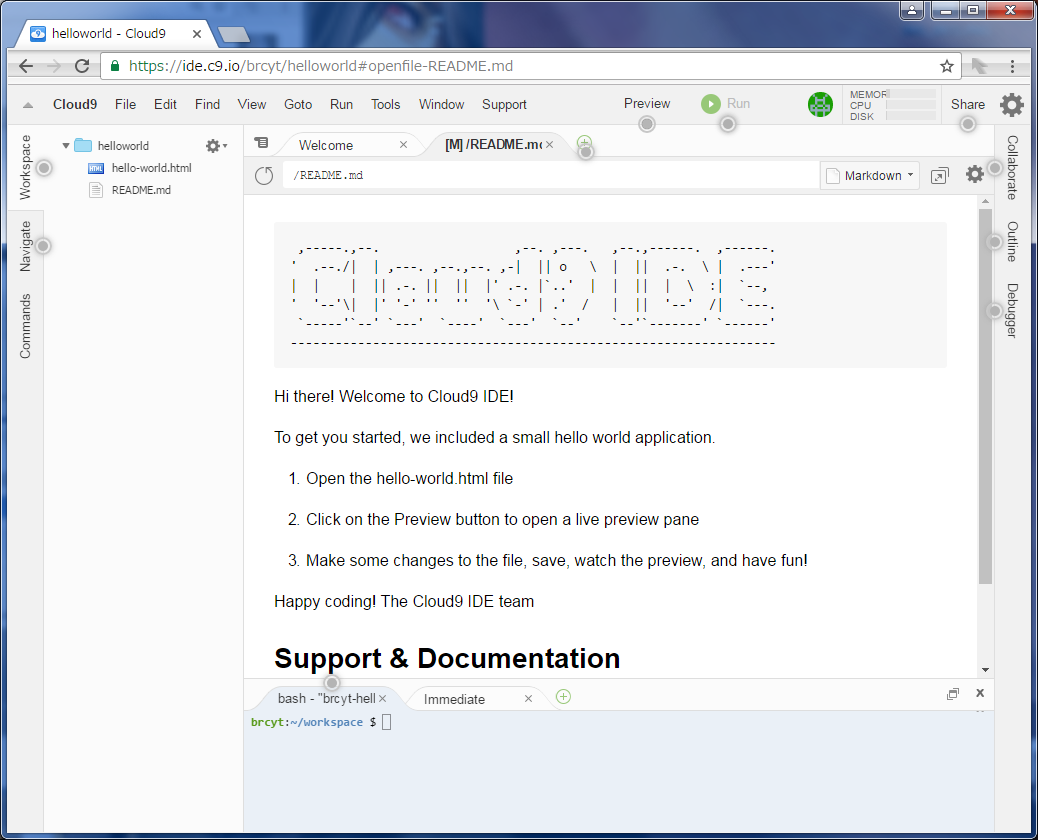
  4. 少し待つと、作成されたワークスペースの画面が表示される。よくあるIDEっぽい画面になっている。
    c.png

  5. 左にあるhello-world.htmlをダブルクリックしてみると既に、「hello-world!」と表示するjavascriptが書かれていたので「こんにちわ、世界」に変えてみて、上にあるPreview>Live Preview Fileをクリック
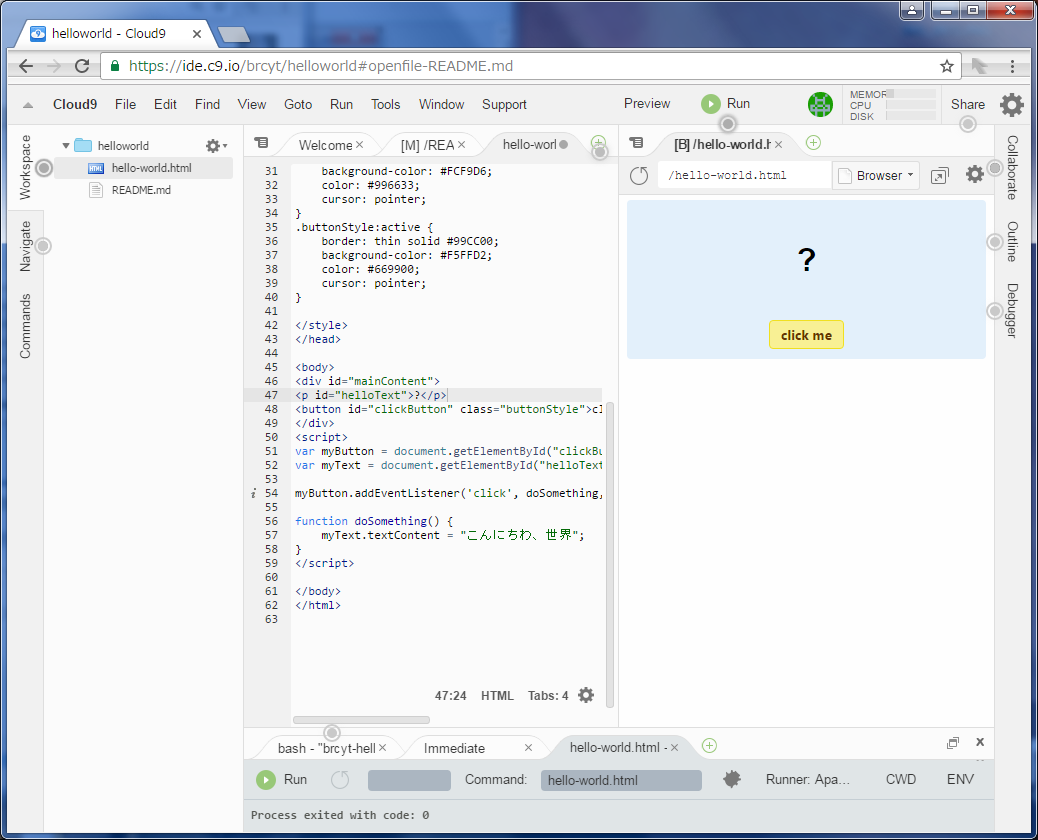
    d.png

  6. 右側にPreview画面が出てきたのでclick meをクリックすると「?」のところが「hello-world!」と表示されてしまったのでhello-world.html上のどこかで適当に右クリック>Run This Fileを実行し、PreviewのRefreshボタンをクリックしてから改めてclick meをクリックで無事「こんにちわ、世界」が表示された。
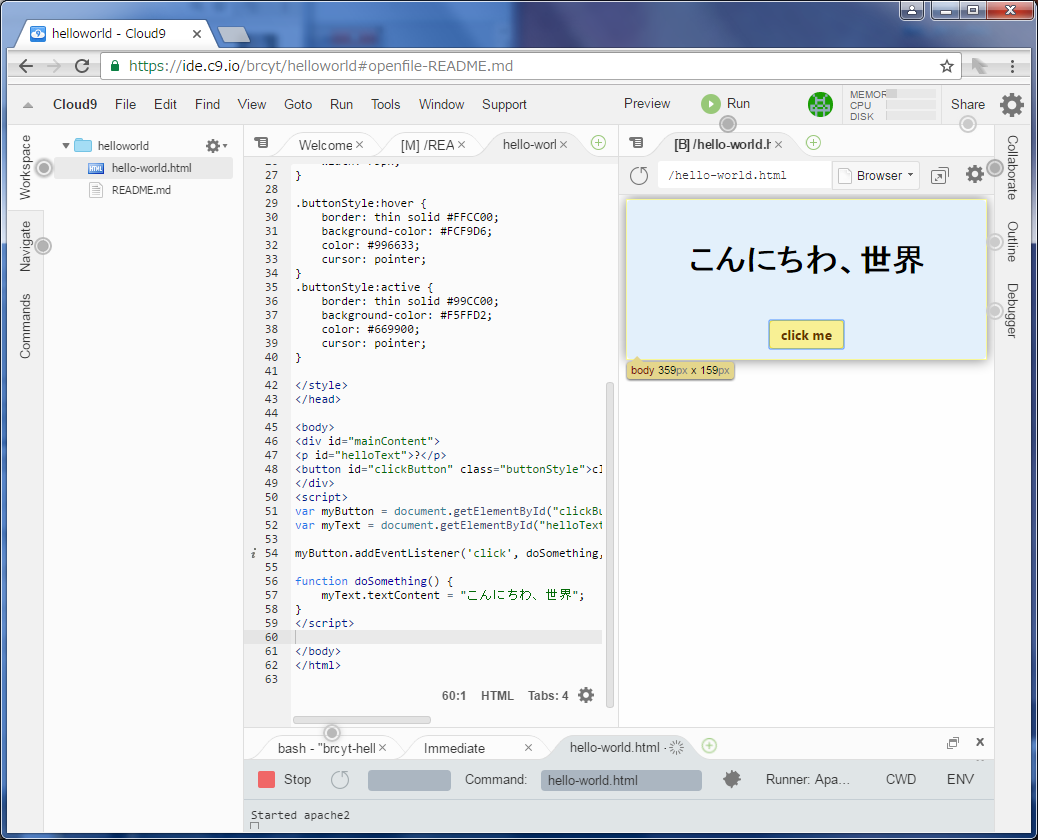
    e.png

以上。

補足とか

Previewの隣にあるRunをクリックすると
https://helloworld-brcyt.c9users.io/hello-world.html
といったURLでアプリケーションが動いてくれました。
Stopすると「No application seems to be running here!」と、そんなアプリケーション見つかりませんよという画面が表示されます。
ほんとすごく簡単にアプリケーションが作れるしWeb上で開発までできるなんてCloud9は素晴らしいですね!!(チラッ)
2
0
0

Register as a new user and use Qiita more conveniently

  1. You get articles that match your needs
  2. You can efficiently read back useful information
  3. You can use dark theme
What you can do with signing up
2
0

Delete article

Deleted articles cannot be recovered.

Draft of this article would be also deleted.

Are you sure you want to delete this article?