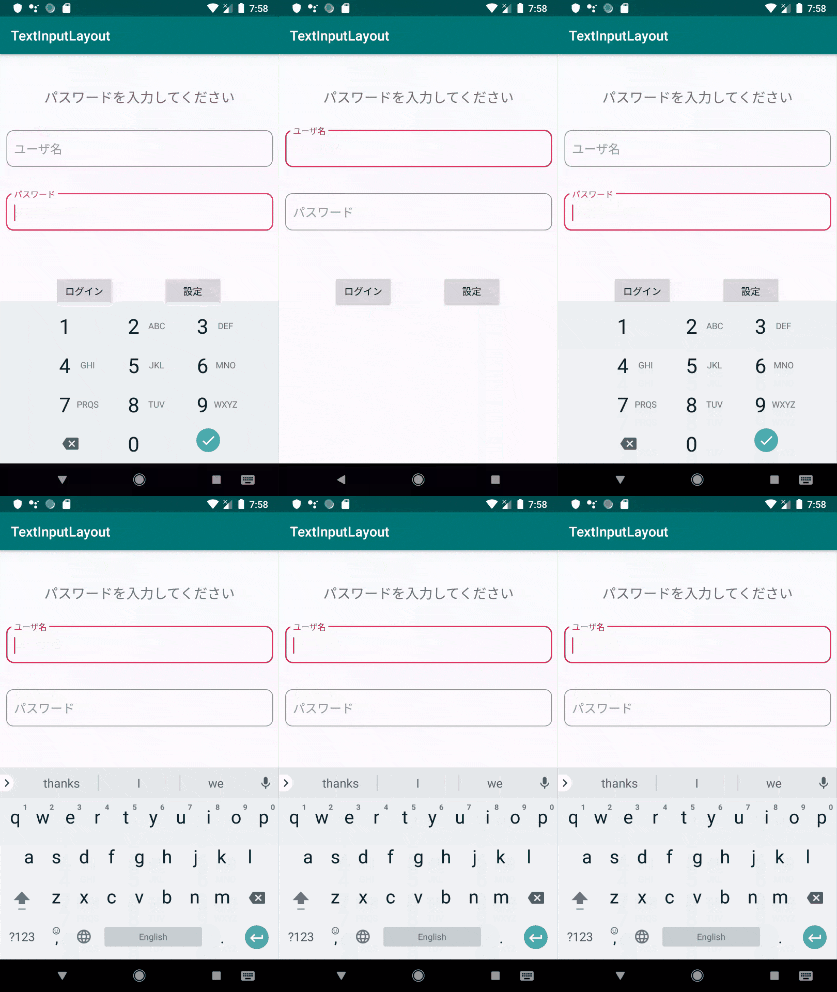
はじめに
TextInputLayoutとは、Android Design Support Libraryに含まれているテキスト入力機能を提供するViewです。MaterialDesignのTextFieldsを実現するために用いられます。今回はこのTextInputLayoutについて勉強したので、ぜひ参考にしていただければ幸いです。

導入
レイアウトのxmlを作成
<com.google.android.material.textfield.TextInputLayout
            style="@style/Widget.MaterialComponents.TextInputLayout.OutlinedBox"
            android:layout_width="match_parent"
            android:layout_height="wrap_content"
            app:counterEnabled="true"
            app:counterMaxLength="20"
            app:errorEnabled="true">

        <com.google.android.material.textfield.TextInputEditText
                android:layout_width="match_parent"
                android:layout_height="wrap_content"
                android:hint="hint"
                android:inputType="numberPassword"/>

    </com.google.android.material.textfield.TextInputLayout>
親ViewにTextInputLayout、子ViewにTextInputEditTextを用いることで、カッコいいデザインを実装することができます。style="@style/Widget.MaterialComponents.TextInputLayout.OutlinedBox"によりテキストフィールドへの枠線表示が可能になっています。
親View(TextInputLayout)
app:counterEnabledをtrue、app:counterMaxLengthに文字数を設定することで、入力できる文字数の上限を決めることができます。
app:errorEnabledをtrueにすると、エラーメッセージの表示を行うことができます。
子View(TextInputEditText)
android:hintで入力のヒントを表示したり、android:inputTypeで入力の文字列のタイプを変更することができます。
ソースコード
今回作成したxmlの全体になります。アプリを立ち上げた際に表示されるようなログイン画面を意識して作成しました。
<?xml version="1.0" encoding="utf-8"?>
<androidx.constraintlayout.widget.ConstraintLayout
        xmlns:android="http://schemas.android.com/apk/res/android"
        xmlns:tools="http://schemas.android.com/tools"
        xmlns:app="http://schemas.android.com/apk/res-auto"
        android:layout_width="match_parent"
        android:layout_height="match_parent"
        tools:context=".MainActivity">

    <com.google.android.material.textfield.TextInputLayout
            android:id="@+id/username"
            style="@style/Widget.MaterialComponents.TextInputLayout.OutlinedBox"
            android:layout_width="395dp"
            android:layout_height="wrap_content"
            android:layout_marginTop="30dp"
            app:boxCornerRadiusBottomEnd="10dp"
            app:boxCornerRadiusBottomStart="10dp"
            app:boxCornerRadiusTopEnd="10dp"
            app:boxCornerRadiusTopStart="10dp"
            app:layout_constraintEnd_toEndOf="parent"
            app:layout_constraintStart_toStartOf="parent"
            app:layout_constraintTop_toBottomOf="@+id/passView">

        <com.google.android.material.textfield.TextInputEditText
                android:id="@+id/usernameEdit"
                android:layout_width="match_parent"
                android:layout_height="wrap_content"
                android:hint="ユーザ名" />
    </com.google.android.material.textfield.TextInputLayout>

    <com.google.android.material.textfield.TextInputLayout
            android:id="@+id/pass"
            style="@style/Widget.MaterialComponents.TextInputLayout.OutlinedBox"
            android:layout_width="395dp"
            android:layout_height="wrap_content"
            android:layout_marginTop="32dp"
            app:boxCornerRadiusBottomEnd="10dp"
            app:boxCornerRadiusBottomStart="10dp"
            app:boxCornerRadiusTopEnd="10dp"
            app:boxCornerRadiusTopStart="10dp"
            app:layout_constraintEnd_toEndOf="parent"
            app:layout_constraintStart_toStartOf="parent"
            app:layout_constraintTop_toBottomOf="@+id/username">

        <com.google.android.material.textfield.TextInputEditText
                android:id="@+id/passEdit"
                android:layout_width="match_parent"
                android:layout_height="wrap_content"
                android:inputType="numberPassword"
                android:hint="パスワード" />
    </com.google.android.material.textfield.TextInputLayout>

    <Button
            android:id="@+id/login"
            android:layout_width="wrap_content"
            android:layout_height="wrap_content"
            android:layout_marginStart="72dp"
            android:layout_marginTop="64dp"
            android:text="ログイン"
            app:layout_constraintStart_toStartOf="@+id/pass"
            app:layout_constraintTop_toBottomOf="@+id/pass" />

    <Button
            android:id="@+id/setting"
            android:layout_width="wrap_content"
            android:layout_height="wrap_content"
            android:layout_marginStart="72dp"
            android:text="設定"
            app:layout_constraintStart_toEndOf="@+id/login"
            app:layout_constraintTop_toTopOf="@+id/login" />

    <TextView
            android:id="@+id/passView"
            android:layout_width="wrap_content"
            android:layout_height="wrap_content"
            android:layout_marginTop="50dp"
            android:textSize="20sp"
            app:layout_constraintEnd_toEndOf="parent"
            app:layout_constraintStart_toStartOf="parent"
            app:layout_constraintTop_toTopOf="parent" />

</androidx.constraintlayout.widget.ConstraintLayout>
最後に
今回は主に導入方法をメインに説明しました。TextInputLayoutは通常のEditTextに比べ、アニメーションがあったりとレイアウトやデザインが非常に良くなると思います。また今回は軽い説明でしたが、エラーメッセージを表示させたりできる点も強みだと感じます。簡単に実装できると思うので、皆さんもぜひ試してみてください。