はじめに
この記事は、CentOSのサポート終了(EOL)に伴い、OSをUbuntu 24.04 LTSへ移行した際のセットアップ手順をまとめたものです。
2021年の初出から更新を重ねていますが、ここで紹介している構成は現在も本番サーバーで安定稼働しており、実用的なオペレーションマニュアルとして活用しています。
かつてのCentOS環境からのスムーズな移行と、現代的なPython 3.12 + Django 4環境の構築を目指しています。
2026年版からは、この記事を Git
で管理し、AIアシスタントをベースに執筆する運用に切り替えました。誤字脱字はもちろん、これまでの勘違いの是正や重複箇所のMECE化にも大いに助けられています。今後の細かな修正も容易になるため、おすすめです。
Ubuntu 24.04LTS
OSインストール(さくらのVPS)
さくらのVPSで Ubuntu 24.04 amd64 を選択してインストールします。

ユーザー設定とセキュリティ
Ubuntuでは、デフォルトの一般ユーザー(さくらのVPSでは ubuntu)でログインし、必要に応じて sudo -s
でroot権限に切り替えて操作するのが基本です。
なぜ直接rootでログインしないのか?
rootユーザーは何でもできてしまう強力な権限を持っているため、万が一パスワードが漏洩したり操作ミスをしたりした際のリスクが非常に大きいです。一般ユーザーでログインし、必要なときだけ
sudoを使うことで、不用意な破壊操作を防ぎ、セキュリティを向上させられます。
-
管理ユーザーのパスワード: 「自分で入力したパスワードを使う」を選択し、任意のパスワード(例:
YOUR-COOL-PASSWORD
)を入力します。入力フォームの下に「パスワードの強さ:強力」と表示されるような、複雑なものを設定してください。 -
SSHキー登録:
ここでは「追加済みの公開鍵を使ってインストールする」を選択し、事前にVPS側の管理画面で登録しておいた公開鍵(例:main pc
)をセットしています。あらかじめ鍵をVPSに保存しておく必要があるため、初めての方や別の方法を取りたい方は、各自の環境に合わせて公開鍵をインストールしてください。 -
スタートアップスクリプト:
Setup and updateを選択。OSセットアップ時にパッケージの更新などを自動で行ってくれる便利なプリセットです。

-
補足:
Setup and updateの設定には「(RedHat系のみ)SELinux
を有効化する。」という項目があります。初期値は「有効化しない」なので、そのままになっていることを確認してください。(CentOS 8
時代に SELinux 有効化で大きくハマった教訓)
注意(さくらのVPS固有の制約)
Ubuntu 24.04 を安定してインストール・運用するには、メモリ1GB以上のプランを選択してください。512MBプランではパッケージのインストール失敗やOut
of Memory(メモリ不足)によるサービス停止が発生しやすく、実運用には不向きです。根拠: さくらのVPS マニュアル「OSの注意事項」
https://manual.sakura.ad.jp/vps/support/technical/os-attention.html
パケットフィルタの設定
サーバーの安全のため、必要なポートのみを開放します。
- SSH: TCP 22(リモートログイン用)
- Web: TCP 80/443(HTTP/HTTPS用)
- FTP: TCP 20/21(ファイル転送用)
SSH(Windows/PowerShellからの接続)
SSH(Secure Shell)とは、暗号化された通信でリモートのUNIX/Linuxマシンに安全に接続するための仕組みです。ID/パスワードや公開鍵で認証し、コマンド実行やファイル転送(SFTP/scp)を安全に行えます。本手順では
Windows の PowerShell(OpenSSH クライアント)からサーバへ接続します。
※Linuxの記号の意味
Linux初心者は、コンソール上の「$」とか「#」がよくわかんなかったりする
| 記号 | 意味 |
|---|---|
| $ | 一般ユーザ権限で操作中 |
| # | root権限権限で操作中 |
ログインチェック(パスワード認証)
以後は Windows の PowerShell(PyCharm のターミナル等)から CUI ベースでログインします。
- 現時点では SSH のみ開放(TCP 22)。HTTP/HTTPS へのリダイレクトやUFW設定はこの後に行います。
- 将来ポートを変更したら
ssh -p <port> ubuntu@<IP>のように-pで指定できます(初期は22)。
さくらのVPSのWebインターフェースで「登録済み公開鍵を使ってインストール」している場合、このセクション(パスワード認証チェック)はスキップ可能です。公開鍵でそのまま接続してください(例:
ssh ubuntu@<IP>)。
手順(PowerShell)
# (Windows)PowerShell から実行
# 初回接続(既定ポート22でSSH)
# ホスト名またはIPを指定(例ではさくらVPSのグローバルIP)
PS C:\Users\yoshi> ssh ubuntu@153.127.13.226
The authenticity of host '153.127.13.226 (153.127.13.226)' can't be established.
ED25519 key fingerprint is SHA256:xxxxxxxxxxxxxxxxxxxxxxxxxxxxxxxxxxxxxxx.
Are you sure you want to continue connecting (yes/no/[fingerprint])? yes
Warning: Permanently added '153.127.13.226' (ED25519) to the list of known hosts.
ubuntu@153.127.13.226's password:  # さくらVPSの初期設定で指定した ubuntu のパスワードを入力
既知鍵の衝突(known_hosts)
OS を入れ直した直後など、サーバのホスト鍵が変わると次のような強烈な警告が出ます。これは“以前と異なるサーバ鍵になった”ことを示す安全装置です。
(venv) PS C:\Users\yoshi\OneDrive\dev\portfolio> ssh henojiya
@@@@@@@@@@@@@@@@@@@@@@@@@@@@@@@@@@@@@@@@@@@@@@@@@@@@@@@@@@@
@    WARNING: REMOTE HOST IDENTIFICATION HAS CHANGED!     @
@@@@@@@@@@@@@@@@@@@@@@@@@@@@@@@@@@@@@@@@@@@@@@@@@@@@@@@@@@@
IT IS POSSIBLE THAT SOMEONE IS DOING SOMETHING NASTY!
Someone could be eavesdropping on you right now (man-in-the-middle attack)!
It is also possible that a host key has just been changed.
The fingerprint for the ED25519 key sent by the remote host is
SHA256:s0c1XEu0wLLE40iYbYgLo37pNlsBOajTwirE6h9IJ4Q.
Please contact your system administrator.
Add correct host key in C:\\Users\\yoshi/.ssh/known_hosts to get rid of this message.
Offending ECDSA key in C:\\Users\\yoshi/.ssh/known_hosts:6
Host key for 153.126.200.229 has changed and you have requested strict checking.
Host key verification failed.
対処(どちらか一方)
# 1) 既存のホストキーを削除(推奨・自動)
PS C:\Users\yoshi> ssh-keygen -R 153.126.200.229

# 2) known_hosts を手動で開いて該当行(例: 6行目)を削除
PS C:\Users\yoshi> notepad $env:USERPROFILE\.ssh\known_hosts
その後、改めて接続すると新しいホスト鍵が保存されます。
Note: 警告文の中に「Offending ... known_hosts:6」のように“該当行番号”も表示されます。手動で編集する場合は、その行を削除すれば解消します。
$ whoami
ubuntu
$ hostname -I
153.127.13.226
$ pwd
/home/ubuntu
これで「一般ユーザー ubuntu でログインできた」ことを PowerShell から機械的に確認できます。
スーパーユーザーへの切り替え(参考)
基本的には sudo を使ってコマンドを実行しますが、root権限に切り替えて作業したい場合は以下のコマンドを使います(すぐに
exit で戻ることを推奨します)。
# root権限に切り替え
$ sudo -s
[sudo] password for ubuntu:

# 一般ユーザーに戻る
# exit
公開鍵でログインできるようにする
PCにある公開鍵(例:id_rsa_henojiya.pub
)をサーバーにアップロードし、以下のコマンドで登録します(まずはパスワード認証で一度ログイン→公開鍵方式へ切り替える流れ)。さくらのVPSのWebインターフェースで鍵を事前登録する運用が基本ですが、手動で設定する場合の“要点だけ”を以下にまとめます。
# 最初の配置(例:Tera Term で /home/ubuntu にドラッグ&ドロップでも可)
$ pwd
/home/ubuntu
$ ls
id_rsa_henojiya.pub

# 許可鍵の登録(.ssh は700、authorized_keys は600 必須)
$ mkdir ~/.ssh
$ chmod 700 ~/.ssh
$ mv id_rsa_henojiya.pub ~/.ssh/authorized_keys
$ chmod 600 ~/.ssh/authorized_keys
Note:
- Windows からの単発転送は PowerShell の
scp(OpenSSH)でも可。- 以後は
ssh ubuntu@<IP>でパスワードなし接続(鍵パスフレーズがあればその入力のみ)。
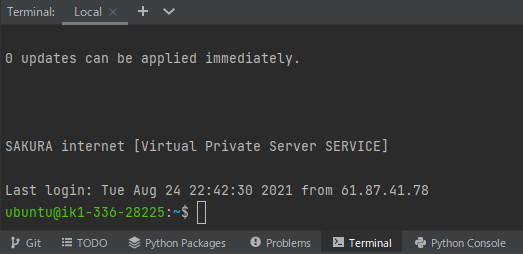
ターミナルからログインできました!
ファイル転送の選択肢(Windows)
Note: 単発・少量の転送なら
scpが最短です。GUIでまとめて行う場合は FileZilla(SFTP)が便利です。
また、さくらのVPSの初期セットアップで「追加済みの公開鍵を使ってインストール」を選択している場合、すでに公開鍵認証でログインできるため、ここでの鍵ファイル転送(.pub
のアップロード)は不要なことが多いです(そのままSSH接続へ進んで問題ありません)。
-
CUI(最短手):PowerShell の
scpconsole# Windows(PowerShell)から実行(鍵ファイル指定の例) PS C:\Users\yoshi> scp -i ~/.ssh/<your_private_key> C:\path\to\localfile ubuntu@153.127.13.226:/home/ubuntu/ # ディレクトリごと転送する場合(-r) PS C:\Users\yoshi> scp -r -i ~/.ssh/<your_private_key> C:\path\to\localdir\ ubuntu@153.127.13.226:/home/ubuntu/localdir/ -
GUI:FileZilla(SFTP)
- 設定例(サイトマネージャー)
- ホスト:
153.126.200.229(例) - プロトコル: SFTP – SSH File Transfer Protocol
- ログオンの種類: 鍵ファイル
- ユーザー:
ubuntu - ポート:
22
- ホスト:
- 鍵の登録(初回のみ)
- メニューバー: 編集 → 設定 → SFTP を開く
- 「鍵ファイルの追加(A)」をクリックし、秘密鍵(例:
C:\Users\yoshi\.ssh\id_rsaなど)を選択 - 「FileZilla用に変換して ppk にしますか?」と聞かれたら OK を選択し、例:
id_rsa_filezilla.ppkのように保存
- サイトマネージャーで上記 ppk を指定して接続し、
/home/ubuntuなど転送先へドラッグ&ドロップで配置 - 参考: もとの記事の FileZilla 手順(鍵の変換含む): https://qiita.com/YoshitakaOkada/items/a75f664846c8c8bbb1e1#ftp
- 設定例(サイトマネージャー)
よくあるエラーと対処(SSH)
- Permission denied (publickey,password): 鍵が未登録、
authorized_keysの権限が不正(600以外)や~/.ssh
の権限が不正(700以外)。上記権限を確認。 - 接続がタイムアウト: UFW やVPS側パケットフィルタで 22/TCP が閉じていないかを確認(
sudo ufw status)。 - ホスト鍵警告(REMOTE HOST IDENTIFICATION HAS CHANGED!): OS入れ直し等で鍵が変わった。
ssh-keygen -R <IP>
で該当エントリを削除して再接続。
Swap 増設
Warning:
Ubuntu
24.04の標準設定ではスワップ(Swap)が0MBになっています(参照:さくらのVPSマニュアル
)。このままだとメモリ不足でMySQLのインストールに失敗したり、運用中に突然サービスが落ちたりすることがあります。特にメモリが少ないプランでは、スワップの作成は必須です。
補足: さくらのVPSのスタートアップスクリプト「Setup and
update」でも、スワップファイルを自動作成できる場合があります。すでにスワップが作成済みであれば、以下の手順はスキップ可能です。まず
sudo swapon --showを実行し、/swapfile
などのエントリが表示されるか確認してください。サイズの調整が必要な場合のみ、本セクションの手順で作り直してください(プランやスクリプト内容により作成サイズは異なることがあります)。
ステップ1 – システムのスワップ情報を確認
まず、現在スワップが設定されていないことを確認します。
$ sudo swapon --show
(何も出力されなければスワップ領域はありません)

$ free -h
                total        used        free      shared  buff/cache   available
  Mem:           961Mi       889Mi        78Mi       1.5Mi       135Mi        71Mi
  Swap:             0B          0B          0B
Swap: 0B となっていることがわかります。
ステップ2 – ディスクの空き容量を確認
スワップファイル(今回は5GB)を作成するための空き容量があるか確認します。
$ df -h
  Filesystem      Size  Used Avail Use% Mounted on
  /dev/vda2        50G  6.0G   41G  13% /
Mounted on 列が / になっている行に注目します。これがルートディレクトリ(システム全体)の空き容量を示しています。Avail
(空き容量)が5GB以上あることを確認してください。
ステップ3 – スワップファイルの作成と有効化
今回は5GBのスワップファイルを作成します。
# 5GBのファイルを作成
$ sudo fallocate -l 5G /swapfile

# 権限をrootのみに制限
$ sudo chmod 600 /swapfile

# スワップ領域としてセットアップ
$ sudo mkswap /swapfile

# スワップを有効化
$ sudo swapon /swapfile

# 設定が反映されたか確認
$ sudo swapon --show
NAME      TYPE  SIZE USED PRIO
/swapfile file    5G   0B   -2
Apache2
インストール
# パッケージの更新を確認
$ sudo apt update

# Apache2と開発用パッケージのインストール
$ sudo apt -y install apache2 apache2-dev

# 動作ステータスを確認
$ sudo systemctl status apache2
設定
security 設定ファイルを編集
$ sudo vi /etc/apache2/conf-enabled/security.conf
編集位置(行番号の目安)
-
:set number前提 - 12行目: ServerTokens の値を変更(例では12行目)
# サーバーの情報(バージョン、OSなど)を表示しないように(security.conf の12行目を編集)
- ServerTokens OS
+ ServerTokens Prod
dir 設定ファイルを編集
$ sudo vi /etc/apache2/mods-enabled/dir.conf
編集位置(行番号の目安)
-
:set number前提 - 1行目: DirectoryIndex を単一指定に変更
# ディレクトリ名のみでアクセスできるファイル名を設定(dir.conf の2行目を編集)
- DirectoryIndex index.html index.cgi index.pl index.php index.xhtml index.htm
+ DirectoryIndex index.html
000-default 設定ファイルの編集
$ sudo vi /etc/apache2/sites-enabled/000-default.conf
編集位置(行番号の目安)
-
:set number前提 - 9行目前後: コメントアウトされている ServerName 行を実値で追記
- 9行目直後(ServerName の直下)に HTTPS へ恒久リダイレクトの行をコメントのまま配置(HTTPS 設定が完了するまで)
# サーバー名を追記(000-default.conf の9行目前後)
- #ServerName www.example.com
+ ServerName www.henojiya.net

+ # httpsの設定が済むまではコメントアウトしておく
+ # Redirect permanent / https://www.henojiya.net
# 設定を反映
$ sudo systemctl restart apache2
確認
HTTP での応答をコマンドで確認します(スクショではなく機械的に判定できる方法に統一)。
# ヘッダのみ取得してステータスを確認(200 OK を期待)
$ curl -I http://www.henojiya.net
HTTP/1.1 200 OK
Server: Apache/2.x
Content-Type: text/html; charset=iso-8859-1
# 本文の先頭を確認(デフォルトの It works! ページなどが返ってくる想定)
$ curl -s http://www.henojiya.net | head -n 10
<!DOCTYPE HTML PUBLIC "-//IETF//DTD HTML 2.0//EN">
<html>
<head>
<title>Apache2 Ubuntu Default Page: It works</title>
うまくいかない場合の切り分け(参考)
-
sudo systemctl status apache2で Apache が起動しているか -
sudo ufw statusで 80/TCP(Apache)が許可されているか -
/etc/apache2/sites-enabled/000-default.confにServerName www.henojiya.netが入っているか
ロケールの変更
WSGI アプリを Apache 配下で動かす場合、www-data ユーザーのロケールが C(ASCII)になっていると、
ZIP 展開やファイルアップロード時に日本語ファイル名で UnicodeEncodeError が発生することがあります。
そのため、Apache の環境変数で UTF-8(C.UTF-8)を明示しておくと安全です。
C.UTF-8 は locale の生成が不要で、システムを汚さず簡潔に設定できます。
確認(任意): www-data 視点で UTF-8 になっているか
sudo -u www-data -H bash -lc 'locale'
LANG=C.UTF-8 と表示されれば OK。
これで日本語を含む ZIP 展開やファイルアップロードでも UnicodeEncodeError は発生しません。
バーチャルホスト
いったんパス もとの記事
$ sudo vi /etc/apache2/sites-available/virtual.host.conf
<VirtualHost *:80>
    ServerName www.henojiya.net
    DocumentRoot /var/www/html
</VirtualHost>
Note:
自分メモ(エントリポイントを増やすときはこう書く)<VirtualHost *:80> ServerName www.henojiya.net DocumentRoot /var/www/html/portfolio </VirtualHost> <VirtualHost *:80> ServerName app.henojiya.net DocumentRoot /var/www/html/soil_analysis </VirtualHost>
$ sudo a2ensite virtual.host
$ sudo systemctl restart apache2
ネームサーバーを設定
いったんパス もとの記事
HTTPS の準備(443番ポート開放と Apache の SSL 有効化)
このセクションでは、HTTPS 提供に必要な前提作業として UFW で 443/TCP を許可し、Apache 側で SSL
サイトとモジュールを有効化します(証明書の取得は後述の「SSL」セクションで実施)。
ポートをあける
ubuntuの443ポートを開け、ファイアウォールを起動する
$ sudo ufw allow in "Apache Full"
$ sudo ufw allow in "OpenSSH"
$ sudo ufw enable
  Command may disrupt existing ssh connections. Proceed with operation (y|n)? y
$ sudo ufw status
  Status: active
  To                         Action      From
  --                         ------      ----
  Apache Full                ALLOW       Anywhere
  OpenSSH                    ALLOW       Anywhere
  Apache Full (v6)           ALLOW       Anywhere (v6)
  OpenSSH (v6)               ALLOW       Anywhere (v6)
サイト設定を有効化する
$ sudo a2ensite default-ssl
  Enabling site default-ssl. // 設定を読み込む
$ sudo a2enmod ssl
  Module setenvif already enabled // apache に SSL モジュールを読み込む
$ sudo systemctl restart apache2 // Apache2 を再起動
SSL
Let’s Encryptについて
- Let’s Encrypt は、できるだけ多くの人がフェアにサービスを利用できるように、レート制限を設けています
- もしあなたが Let’s Encrypt クライアントの開発やテストを活発に行なっている場合には、本番 API
を使用する代わりに、私たちが用意したステージング環境を利用するようにしてください - 主なレート制限としては、登録ドメインごとの証明書数 (1週間に50個まで) があります
- 登録ドメインとは、一般に言うと、あなたがドメイン名レジストラから購入したドメインの一部のことです。たとえば、
www.example.comの場合、登録ドメインはexample.comです。new.blog.example.co.ukの場合、登録ドメインは
example.co.ukです。 - 証明書ごとのドメイン名はできるだけ少ない方がよいです。
certbot のインストール
# インストール
$ sudo apt -y install certbot python3-certbot-apache
証明書を取得
# メールアドレスの入力(例)
$ sudo certbot --apache -d www.henojiya.net
Enter email address (used for urgent renewal and security notices)
 (Enter 'c' to cancel): your.name@example.com

# 規約同意(Y の入力例)
Please read the Terms of Service at
https://letsencrypt.org/documents/LE-SA-v1.6-August-18-2025.pdf. You must agree
in order to register with the ACME server. Do you agree?
- - - - - - - - - - - - - - - - - - - - - - - - - - - - - - - - - - - - - - - -
(Y)es/(N)o: Y

# 任意のアンケート。不要なら N(証明書発行には無関係)
Would you be willing to share your email address with the Electronic Frontier Foundation
so they can send you EFF news, campaigns, and ways to support digital freedom?
- - - - - - - - - - - - - - - - - - - - - - - - - - - - - - - - - - - - - - - -
(Y)es/(N)o: N

# 以降は発行〜デプロイの要約(典型的な出力例)
Account registered.
Requesting a certificate for www.henojiya.net

Successfully received certificate.
Certificate is saved at: /etc/letsencrypt/live/www.henojiya.net/fullchain.pem
Key is saved at:         /etc/letsencrypt/live/www.henojiya.net/privkey.pem
This certificate expires on 2026-05-13.
These files will be updated when the certificate renews.
Certbot has set up a scheduled task to automatically renew this certificate in the background.

Deploying certificate
Successfully deployed certificate for www.henojiya.net to /etc/apache2/sites-available/000-default-le-ssl.conf
Congratulations! You have successfully enabled HTTPS on https://www.henojiya.net
Note:
- 入力したメールアドレスは証明書更新や重要なお知らせに使われます。後から変更する場合は
sudo certbot register --update-registration --email <new@example.com>。- 非対話で実行したい場合の例(自動化向け):
>sudo certbot --apache -d www.henojiya.net -m your.name@example.com --agree-tos -n- 事前検証はドライランで:
sudo certbot certonly --apache --dry-run
# 証明書の確認
$ sudo certbot certificates
# 証明書の取得テスト(ドライラン)
$ sudo certbot certonly --apache -d www.henojiya.net --dry-run
FQDN をメモ
/etc/letsencrypt/live/www.henojiya.net をメモする(このパスは certbot
実行時に自動作成され、以後の更新でも同じ場所が使われる)。あわせて次のファイルの役割も把握しておく:
-
cert.pem: サーバ証明書(ドメイン用) -
privkey.pem: 秘密鍵(権限は厳格。配布・編集しない) -
chain.pem: 中間CA証明書 -
fullchain.pem:cert.pem + chain.pemの連結版(多くのクライアント/設定で推奨)
補足:
-
live配下は実体(/etc/letsencrypt/archive/...)へのシンボリックリンクで、Certbot が管理する。手動で置換・編集しない。 -
--apacheで自動設定した場合も、certonlyで証明書だけ取得した場合も、保存先は同じlive/<FQDN>/。 - Apache 設定は、例のように
SSLCertificateFile cert.pemとSSLCertificateChainFile chain.pemを分けてもよいし、
SSLCertificateFile fullchain.pemとしてChainFile行を省略する方法でも可。
$ sudo ls /etc/letsencrypt/live/
  README  www.henojiya.net
$ sudo ls /etc/letsencrypt/live/www.henojiya.net
  README  cert.pem  chain.pem  fullchain.pem  privkey.pem
$ sudo openssl x509 -in /etc/letsencrypt/live/www.henojiya.net/fullchain.pem -noout -dates
  notBefore=Aug 29 03:05:54 2021 GMT
  notAfter=Nov 27 03:05:53 2021 GMT
エディタ のデフォルトをviに
$ export EDITOR=vi
Note:
$ sudo vi /etc/environment/etc/environmentVISUAL=/usr/bin/vim EDITOR=/usr/bin/vim反映についての補足:
/etc/environmentはシステム全体の環境ファイルで、書式はKEY=VALUE(export は不要)。既存のPATH="..."の次の行に追記すれば
OK
反映は新しいログインセッションから有効になります。設定後は一度ログアウトして再ログイン、または新しいターミナルを開いて確認してください(例:
echo $EDITOR $VISUAL)。
sudo実行時に環境を引き継ぐかはsudoersの設定に依存します。必要ならsudo -Eを使うか、visudoで
env_keep += "EDITOR VISUAL"を検討してください。
HTTPS 化(Let’s Encrypt 証明書の適用と Apache の設定)
# 設定ファイルの編集
$ sudo vi /etc/apache2/sites-available/default-ssl.conf
編集位置(行番号の目安)
-
:set number前提
31,32行目:取得した証明書に変更
- SSLCertificateFile /etc/ssl/certs/ssl-cert-snakeoil.pem
+ SSLCertificateFile /etc/letsencrypt/live/www.henojiya.net/cert.pem
- SSLCertificateKeyFile /etc/ssl/private/ssl-cert-snakeoil.key
+ SSLCertificateKeyFile /etc/letsencrypt/live/www.henojiya.net/privkey.pem
41行目:
- #SSLCertificateChainFile /etc/apache2/ssl.crt/server-ca.crt
+ SSLCertificateChainFile /etc/letsencrypt/live/www.henojiya.net/chain.pem
$ sudo systemctl restart apache2
確認
# その時点で更新が必要かどうかを確認(必要なら実際に更新される)
$ sudo certbot renew
想定される出力の例:
- 更新が不要な場合:
Certificate not yet due for renewal - 更新が実行された場合:
Congratulations, all renewals succeededなどのメッセージ
注意: --dry-run は常にテスト用のステージングCAを使った模擬更新で、実際の証明書は更新されません。このセクションでは実際に更新の要否を判定したいので、
--dry-run は付けません。
確認
HTTPS での応答をコマンドで確認します。
# ヘッダのみ取得してステータスを確認(実行例)
$ curl -I https://www.henojiya.net
HTTP/1.1 200 OK
Server: Apache
# 本文の先頭を確認(実行例)
$ curl -s https://www.henojiya.net | head -n 10
<title>Apache2 Ubuntu Default Page: It works</title>
※httpsの設定をしたらApacheが止まる?(結論:Let’s Encrypt のレート制限)
要点だけ:短時間に証明書の取り直しを何度も行うと、Let’s Encrypt のレート制限に達して certbot が失敗します。その結果、SSL
設定が中途半端な状態になり、Apache が起動できない/止まったように見えることがあります。
- 代表的なエラー(抜粋)
-
too many certificates already issued for exact set of domainsなど。 - 公式ドキュメント: https://letsencrypt.org/ja/docs/rate-limits/
-
どうする?(シンプルな対処)
- まずは待つ(週単位の制限。即時リセットは不可)。
- 検証は本番 API で乱発せず、
--dry-runによる模擬発行で確認する(実ファイルは変更されず、本番のレート制限にも影響しない)。- 例:
$ sudo certbot certonly --apache -d www.henojiya.net --dry-run
- 例:
- 既存の証明書を再利用する(重複発行を避ける)。
-
sudo certbot certificatesで確認 → 可能ならsudo certbot renew。
-
- Apache を一時的に HTTP のみで運用しておく(SSL サイトを無効化)。
sudo a2dissite default-ssl; sudo systemctl restart apache2
- ログで原因確認:
/var/log/letsencrypt/letsencrypt.log
ポイント:同じ FQDN セットでの短期間の再発行は特に制限にかかりやすいです。手戻り時は「ステージングで検証 → 本番で1回」の順にしましょう。
http から https へリダイレクト(段階的に有効化)
まずは HTTP の表示確認・Let’s Encrypt の証明書取得・HTTPS
の動作確認が終わるまで、リダイレクト行はコメントアウトのままにしておきます。準備が整ったら、次の1行だけをコメント解除(有効化)します。
# 設定ファイルを編集
$ sudo vi /etc/apache2/sites-enabled/000-default.conf
- # Redirect permanent / https://www.henojiya.net
// (HTTPS 動作確認後にコメントを外す)
+ Redirect permanent / https://www.henojiya.net
# 設定を反映
$ sudo systemctl restart apache2
以後は HTTP へのアクセスがすべて HTTPS に恒久的に転送されます。
Let’s Encrypt の証明書更新を自動化するためのスクリプト作成
このセクションでは、Let’s Encrypt の証明書更新用スクリプトを root のホームディレクトリに作成するところまでを行います。定期実行(cron
への登録)は後述の「Cron(タスクスケジューラ)」で設定します。
スクリプトファイル新規作成
# スクリプトを root のホームに直接作成
$ sudo vi /root/certbot.sh            # ここでスクリプトの内容を書いて保存
証明書の更新スクリプト(そのまま転記)
以下は root が実行する前提のスクリプト本文(cron で root 実行)。スクリプト内コマンドに sudo は記述しない。
#!/bin/bash
certbot renew

# 更新ログの記録
today=$(date "+%Y/%m/%d %H:%M:%S")
echo "${today} certbot renew" >> /root/certbot_result.log
実行権限を付与
$ sudo chmod 755 /root/certbot.sh
Note:
定期実行(cron への登録)は、下記の「Cron(タスクスケジューラ)」セクションで設定します。
HSTS の設定(必ず HTTPS でアクセスさせる)
なぜ必要か(背景)
- 外部診断サービス「ネットde診断」の指摘により、HTTPS 運用をより強固にする必要が判明。本手順でサーバを補強する(初回アクセスやダウングレード攻撃に対し、ブラウザ側で恒久的に
HTTPS を強制させる HSTS を導入)(参照: GitHub Issue #537)。
目的(適用前/適用後の違い)
- 適用前: ユーザーが http:// でアクセスしたり、中間者攻撃で HTTP にダウングレードされると、平文通信が成立しうる。初回 HTTP
アクセス時はブラウザ側に「今後もHTTPSを使う」記憶は残らない。 - 適用後: 一度でも HTTPS 応答で HSTS を受け取ったブラウザは、以後そのドメイン(
includeSubDomains指定時はサブドメインも)へのアクセスを強制的に
HTTPS 化。HTTP ダウングレード攻撃やクッキー漏洩のリスクを大幅に低減できる。
前提: Let’s Encrypt を --apache で導入済み。HTTPS 応答は /etc/apache2/sites-available/000-default-le-ssl.conf の
vhost が担う想定。
0. headers モジュールを有効化(Header ディレクティブでHTTPヘッダを注入・変更するためのApache拡張)
mod_headers は、Apache がやり取りする HTTP
ヘッダをサーバ側で「注入(injection)/書き換え」できる仕組みです。たとえば、ブラウザにセキュリティ方針を伝える各種ヘッダ(HSTS/Content-Security-Policy/Referrer-Policy
など)をサーバが付け足すのに使います。本手順では HSTS ヘッダ(Strict-Transport-Security)をレスポンスに付与するために必要です。無効のままだと
Header ... 行が効きません。
$ sudo a2enmod headers
$ sudo systemctl reload apache2
Let’s Encrypt を --apache で導入している環境では、/etc/apache2/sites-available/000-default-le-ssl.conf が作成・有効化され、実際の
HTTPS 応答はこの vhost が担う構成になっていることが多いです。default-ssl.conf に追記しても効かない場合は、こちらに HSTS
を追加します。
1. まず、対象ファイルが存在し有効化されているか確認
$ ls -l /etc/apache2/sites-enabled/
$ sudo test -f /etc/apache2/sites-available/000-default-le-ssl.conf && echo OK || echo NG
2. 000-default-le-ssl.conf を開き、<VirtualHost *:443> ブロック内に HSTS を追加
$ sudo vi /etc/apache2/sites-available/000-default-le-ssl.conf
追記位置の例(Let’s Encrypt の推奨設定 Include /etc/letsencrypt/options-ssl-apache.conf の直後に入れると分かりやすい):
 <IfModule mod_ssl.c>
 <VirtualHost *:443>
   ServerName www.henojiya.net
   DocumentRoot /var/www/html
   ...
   SSLCertificateFile /etc/letsencrypt/live/www.henojiya.net/fullchain.pem
   SSLCertificateKeyFile /etc/letsencrypt/live/www.henojiya.net/privkey.pem
   Include /etc/letsencrypt/options-ssl-apache.conf

 + Header always set Strict-Transport-Security "max-age=31536000; includeSubDomains; preload"
 </VirtualHost>
 </IfModule>
3. 構文チェックと反映
$ sudo apachectl -t
$ sudo systemctl reload apache2
4. 動作確認(SNI を固定してローカルの 443 を直接叩く)
$ curl -I --resolve www.henojiya.net:443:127.0.0.1 https://www.henojiya.net/ \
  | GREP_COLORS='ms=01;31' grep -i --color=always strict-transport-security || echo NG
- “Strict-Transport-Security” の文字列が赤字でハイライト表示されたらOK(ヘッダ付与を検出)。
- 文字色は環境により異なる場合がありますが、色付きでハイライトされれば検出されています。
メモ
- すでに
X-Frame-Optionsなど他のセキュリティヘッダが出ているのに HSTS だけ出ない場合、実応答している vhost が
000-default-le-ssl.confで、他のSSL設定ファイル(例: default-ssl.conf)は使われていない可能性が高いです。- preload を当面外す場合は
; preloadを省いてください(max-age=31536000; includeSubDomainsまで)。
セキュリティヘッダ "X-Content-Type-Options" の設定(MIME スニッフィング無効化)
なぜ必要か(背景)
- 外部診断サービス「ネットde診断」の指摘により、ブラウザによる MIME スニッフィング(レスポンスの MIME
タイプ推測)を無効化する必要が判明。本手順でサーバを補強する(参照: GitHub Issue #538)。
目的(適用前/適用後の違い)
- 適用前: ブラウザが
Content-Typeを無視して内容からファイル種別を推測し、スクリプトとして実行するなど意図しない動作が起きうる。 - 適用後:
X-Content-Type-Options: nosniffを受け取ったブラウザは MIME スニッフィングを行わず、宣言されたContent-Type
のみに従ってコンテンツを処理する。
前提: Let's Encrypt を --apache で導入済み。HTTPS 応答は /etc/apache2/sites-available/000-default-le-ssl.conf の
vhost が担う想定。
0. headers モジュールを有効化(Header ディレクティブでHTTPヘッダを注入・変更するためのApache拡張)
$ sudo a2enmod headers
$ sudo systemctl reload apache2
1. まず、対象ファイルが存在し有効化されているか確認
$ ls -l /etc/apache2/sites-enabled/
$ sudo test -f /etc/apache2/sites-available/000-default-le-ssl.conf && echo OK || echo NG
2. <VirtualHost *:443> に X-Content-Type-Options を 1 行追加
$ sudo vi /etc/apache2/sites-available/000-default-le-ssl.conf
 <IfModule mod_ssl.c>
 <VirtualHost *:443>
   ServerName www.henojiya.net
   DocumentRoot /var/www/html
   ...
   SSLCertificateFile /etc/letsencrypt/live/www.henojiya.net/fullchain.pem
   SSLCertificateKeyFile /etc/letsencrypt/live/www.henojiya.net/privkey.pem
   Include /etc/letsencrypt/options-ssl-apache.conf

   Header always set Strict-Transport-Security "max-age=31536000; includeSubDomains; preload"
 + Header always set X-Content-Type-Options "nosniff"
 </VirtualHost>
 </IfModule>
3. 構文チェックと反映
$ sudo apachectl -t
$ sudo systemctl reload apache2
4. 動作確認(SNI 固定 + 色付きハイライト)
$ curl -I --resolve www.henojiya.net:443:127.0.0.1 https://www.henojiya.net/ \
  | GREP_COLORS='ms=01;31' grep -i --color=always x-content-type-options || echo NG
- “X-Content-Type-Options” がハイライトされて表示されれば OK。
備考
/etc/apache2/conf-available/security.confにデフォルトで#Header set X-Content-Type-Options: "nosniff"
がコメントアウト状態で存在するが、有効化されていないため診断ツールには「未設定」と判定される。本手順で
000-default-le-ssl.confに明示的に追加することで初めて有効になる。
MySQL8
不要なパッケージの削除
MariaDBなどがインストールされている場合は、事前に削除しておきます。
$ sudo apt purge mariadb-* mysql-*
インストール
# MySQLサーバーのインストール
$ sudo apt -y install mysql-server-8.0

# バージョンの確認
$ mysql --version

# 動作ステータスの確認
$ sudo systemctl status mysql
初期設定
# セキュリティ設定ウィザードの実行
$ sudo mysql_secure_installation
ウィザードでは以下の設定を行います。
-
VALIDATE PASSWORD COMPONENT:
y(有効にする) -
Password Strength:
2(STRONG を選択) -
Remove anonymous users?:
y(匿名ユーザーを削除) -
Disallow root login remotely?:
y(rootのリモートログインを禁止) -
Remove test database?:
y(テストDBを削除) -
Reload privilege tables?:
y(設定を即時反映)
確認
Ubuntuのデフォルト設定では、rootユーザーは sudo を経由してのみログイン可能です。
$ sudo mysql -u root
MySQL内での確認:
-- 文字コードが utf8mb4 になっていることを確認
mysql> status;
データベースとユーザーの作成
-- データベース作成
CREATE DATABASE portfolio_db DEFAULT CHARACTER SET utf8mb4;

-- ユーザー作成(127.0.0.1 に一本化:サーバ自身/ローカル自身/SSHトンネル経由で統一運用)
-- 補足: Password Strength=STRONG を選んだ場合、単純な例は通りません。十分に強いパスワードを指定してください。
CREATE USER IF NOT EXISTS 'python'@'127.0.0.1' IDENTIFIED BY 'python123';

-- 権限の付与(シンプルにすべて)
GRANT ALL PRIVILEGES ON portfolio_db.* TO 'python'@'127.0.0.1';

-- 設定の反映と終了
FLUSH PRIVILEGES;
EXIT;
Note: クライアントからの運用メモ
- VPS上のDjango/ローカル開発のDjangoはいずれも
HOST=127.0.0.1に統一。- DBeaverなど外部クライアントは「SSHタブでトンネル接続」し、一般タブは
Host=localhost,Port=3306
のままでOK(DBeaverが内部でVPSの127.0.0.1:3306へフォワード)。- OSコマンドで手動トンネルを張る場合は、ローカル側の任意の空きポート(例:3307)を使い、一般タブを
localhost:3307
にする運用でも可。
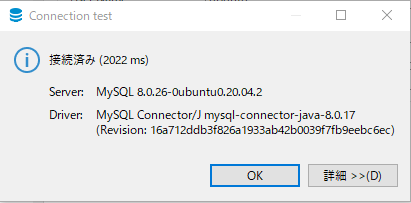
DBeaver
MySQL Workbench より DBeaver が好きな理由は「GUI で外部キー(FK)を逆追いできる」からです。関連テーブルの参照関係を辿る作業が直感的にできて便利。
「クライアント」は“何かのサービスやサーバに接続して利用する側”の総称です。身近な例:
- Webブラウザ(Chrome/Edge など): Webサーバのクライアント
- メールアプリ(Outlook/Thunderbird など): メールサーバのクライアント
- PowerShell や SSH クライアント(ssh.exe): リモートホスト/SSHサーバのクライアント
- Git クライアント(git コマンドやGUIツール): Gitサーバ(GitHub/GitLab など)のクライアント
- そして DBeaver は「データベースサーバのクライアント」(= DBクライアント)です。
接続に失敗する場合は、ポートの競合が起きていないかをまず確認してください。
MySQLのPORTを変える理由
SSHタブ の設定
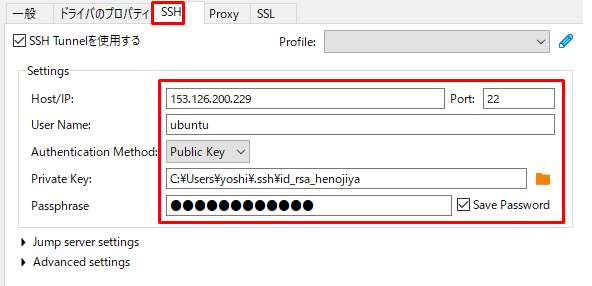
| 入力箇所 | 入力値 |
|---|---|
| Host/IP | 153.126.200.229 |
| Port | 22 |
| User Name | ubuntu |
| Authentication Method | Public Key |
| Private Key | (VPSでのログイン時に指定する rsa 秘密鍵) |
| Passphrase | (ubuntu ユーザーのパスワード) |
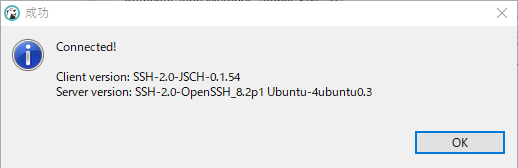
Test tunnel configuration を押して、サーバにつながったことを確認する
一般タブの設定
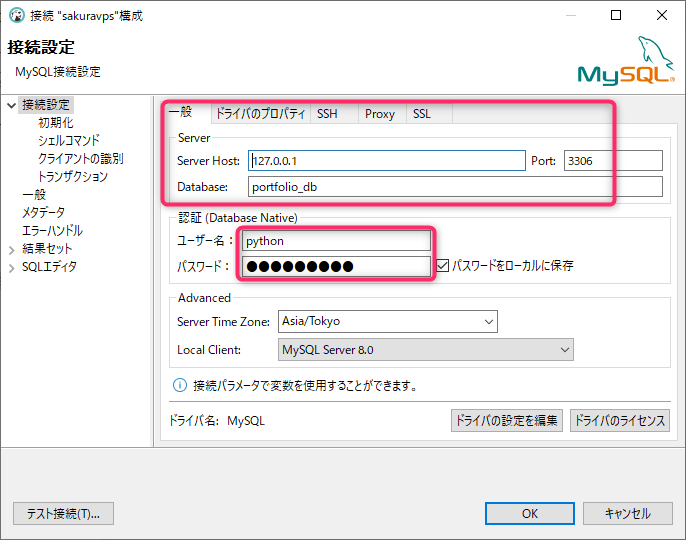
| 入力箇所 | 入力値 |
|---|---|
| Server Host | 127.0.0.1 |
| Port | 3306 |
| Database | portfolio_db |
| ユーザー名 | python |
| パスワード | (MySQLのrootユーザーのパスワード) |
テスト接続を押して、サーバにつながったことを確認する
※Public Key Retrieval is not allowedのエラーが出力される
DBeaver からローカルのMySQLに接続できない問題への対処法
デフォルトページの場所を確認して中身を見てみる
ここまでで「OS のインストール」「Web サーバ(Apache2)のセットアップ」「データベース(MySQL)のセットアップ」が一通り完了しました。Ubuntu
では、デフォルトのインデックスページがすでに配置されています。まずはその場所を確認し、ついでに HTML の中身を目視で確認します。
デフォルトの「ドキュメントルート」は /var/www/html/ です(/etc/apache2/sites-available/000-default.conf などで確認できます)。
$ sudo vi /var/www/html/index.html
index.html を開くと、Ubuntu のスタートページ(既定の案内ページ)の HTML が確認できます(CentOS では新規作成でしたが、Ubuntu
では最初から用意されています)。
<!DOCTYPE html PUBLIC "-//W3C//DTD XHTML 1.0 Transitional//EN" "http://www.w3.org/TR/xhtml1/DTD/xhtml1
-transitional.dtd">
<html xmlns="http://www.w3.org/1999/xhtml">
Note: vi から保存せずに抜けるときは
Shift + ZQ、保存して抜けるときはShift + ZZ。編集を反映させたくない場合は
Shift + ZQで終了しておきましょう。
Python
起動確認
Ubuntu 24.04では標準で Python 3.12 がインストールされています。
# バージョンの確認
$ python3 -V
Python 3.12.3
Git
バージョン確認
$ git --version
git version 2.43.0
GitHub 連携用の鍵作成
VPS(= 自分のサーバ。ここでは便宜上「me」)が GitHub に安全に接続するには、VPS 側でSSH鍵(秘密鍵/公開鍵ペア)を作成し、その「公開鍵」を
GitHub に登録する必要があります。すると、VPS(me)は自分の「秘密鍵」で署名し、GitHub
は事前登録された「公開鍵」で検証して、なりすましでないことを確認できます。これにより、パスワードを都度送らずに git clone/
git pull が行えるようになります。
# ユーザー情報を設定(初回のみ)
$ git config --global user.name "<your-name>"
$ git config --global user.email "<your-email@example.com>"

# SSHキー(Ed25519)の作成
$ ssh-keygen -t ed25519 -C "<your-email@example.com>"
# ※保存場所やパスフレーズを聞かれますが、基本はEnter連打(パスフレーズなし)でOKです。

# 公開鍵の中身を表示してコピーする
$ cat ~/.ssh/id_ed25519.pub
コピーした内容を GitHub の Settings > SSH and GPG keys > New SSH key に登録します。
接続確認
$ ssh -T git@github.com
# 「Hi username! You've successfully authenticated...」と出れば成功です。
Note:
- このコマンドは「SSH鍵でGitHubに認証できるか」をテストする疎通確認です。必須手順ではありませんが、SSH方式(例:
git@github.com:owner/repo.git)でgit clone/pull/pushを行う予定なら、事前に一度実行しておくと原因切り分けが容易になります。- 失敗する典型例と対処:
>
- 公開鍵がGitHubに未登録 → GitHubの Settings > SSH and GPG keys に
~/.ssh/id_ed25519.pub等を登録
- 別名の鍵を使っている →
~/.ssh/configにHost github.comIdentityFile ~/.ssh/<your_key>を設定
- パーミッション不備 →
chmod 700 ~/.ssh; chmod 600 ~/.ssh/*- 22番ポートが閉じている →
~/.ssh/configでHostname ssh.github.comPort 443を指定
プロジェクトの Clone
既存のプロジェクトを GitHub から Clone して構築する場合の手順です。
# ディレクトリの所有権を変更(ubuntuユーザーで操作可能にする)
$ sudo chown -R ubuntu:ubuntu /var/www/html

# Cloneの実行
$ cd /var/www/html
$ git clone git@github.com:<your-username>/portfolio.git
venv(仮想環境)の準備
# venvパッケージのインストール
$ sudo apt -y install python3.12-venv

# クローンしたプロジェクトのルートへ移動
$ cd /var/www/html/portfolio

# 仮想環境の作成
$ python3 -m venv venv

# 仮想環境の有効化
$ source venv/bin/activate

# 仮想環境内での確認
(venv) $ python -V
Python 3.12.3

# 仮想環境の無効化(必要に応じて)
(venv) $ deactivate
依存パッケージのインストール
# MySQLクライアントのビルドに必要なライブラリをインストール
$ sudo apt update
$ sudo apt install -y libmysqlclient-dev pkg-config python3-dev

# 仮想環境の有効化とパッケージインストール
$ source venv/bin/activate
(venv) $ pip install -r requirements.txt
環境ファイル(.env)の配置を確認
/var/www/html/portfolio 配下には、アプリごとに複数の .env が必要になる場合があります。どこに何を置くべきかを把握するため、ひな型の
*.env.example を全検索して一覧表示します(このリストに基づいて、同じ場所へ .env をFTP/SCPで配置)。
$ cd /var/www/html/portfolio

# 相対パスの一覧(配置先の把握用)
$ find . -type f -name "*.env.example" | sort
Note:
- 表示された
./<path>/.env.exampleごとに、同ディレクトリに.envを用意します(中身は.env.exampleを参考に必要な値へ編集)。.envは Git 管理外が前提のため、FTP/SCP でサーバへ配置してください。- 機微情報(パスワード・APIキー)は必ず安全な手段で共有・保管します。
Note:
.envなどの環境設定ファイルは Git 管理外にしている場合が多いため、FTP 等で個別にアップロードするのを忘れないようにしてください。
mod_wsgi
Apache と Python を連携させるためのモジュール mod_wsgi を設定します。
インストール
# 仮想環境内でインストール
(venv) $ pip install mod_wsgi
設定情報の確認
後の手順で Apache の設定ファイルに記述するためのパスを確認します。
# 前提:プロジェクトのルートへ移動(例)
$ cd /var/www/html/portfolio

# mod_wsgi本体のパスを確認
$ find venv -name "mod_wsgi*.so"
# 期待値例: venv/lib/python3.12/site-packages/mod_wsgi/server/mod_wsgi-py312.cpython-312-x86_64-linux-gnu.so

# Python Home (仮想環境) のパスを確認(WSGIDaemonProcess の python-home に指定する値)
# 方法A: find でプロジェクト配下から venv を特定(推奨)
$ find /var/www/html/portfolio -maxdepth 2 -type d -name 'venv'
# 期待値例: /var/www/html/portfolio/venv

# 方法B: 仮想環境を有効化して Python 側で prefix を確認
$ source venv/bin/activate
(venv) $ python -c 'import sys; print(sys.prefix)'
# 期待値例: /var/www/html/portfolio/venv
(venv) $ deactivate
Apache 設定ファイルの編集(APT 方式に統一)
方針の明確化(LoadModule 方式からの移行)
- かつては VirtualHost(サイト設定)内に
LoadModule wsgi_module ...を直書きする「LoadModule 方式」で運用していたが、以後は
Ubuntu/Debian 標準のパッケージ管理である APT を用いた「APT 方式」に統一する。- 「APT 方式」とは、Apache および mod_wsgi を OS 公式パッケージ(例:
libapache2-mod-wsgi-py3)で導入し、a2enmod/
a2dismodと/etc/apache2/mods-available/* → mods-enabled/*による標準のモジュール管理に従う運用を指す。- 対比:
pip install mod_wsgiで仮想環境(venv)内に導入し、LoadModuleをサイト設定に直書きして独自の.so
を読み込む方法は、本ドキュメントでは「ソース/venv 方式」または「LoadModule 方式」と呼ぶ。- なぜ移行するか(利点): 依存関係と更新を APT に一元化できる/ディレクトリや設定レイアウトが標準に揃う/
LoadModule
の二重読み込み事故を避けやすい。- 注意点: Apache や Python のバージョンは基本的に配布パッケージ提供版に合わせる前提(必要に応じてバックポートや PPA
を検討)。
# まず APT 版 mod_wsgi を導入・有効化し、読み込みを確認する
$ sudo apt update
$ sudo apt install -y libapache2-mod-wsgi-py3
$ sudo a2enmod wsgi
$ apache2ctl -M | grep -i wsgi   # 期待: wsgi_module (shared)
$ sudo apache2ctl configtest     # 期待: Syntax OK

# つづいて設定ファイルを編集
$ sudo vi /etc/apache2/sites-available/000-default.conf
開いたら、ファイルの最後に、以下の設定ブロック(WSGIScriptAlias〜最後の まで)をそのまま追記してください。
すでに同等設定がある場合は重複しないように調整します(順序や値は既存を優先)。
# 方針: APT 方式(`libapache2-mod-wsgi-py3` + `a2enmod wsgi`)に従う。
# LoadModule は mods-enabled/wsgi.load に任せ、このファイルには書かない。

WSGIScriptAlias / /var/www/html/portfolio/config/wsgi.py
WSGIDaemonProcess wsgi_app python-home=/var/www/html/portfolio/venv python-path=/var/www/html/portfolio
WSGIProcessGroup wsgi_app
WSGISocketPrefix /var/run/wsgi
WSGIApplicationGroup %{GLOBAL}

# 静的ファイル(CSS/JS/画像)の設定
Alias /static/ /var/www/html/portfolio/static/
<Directory /var/www/html/portfolio/static>
    Require all granted
    Options -Indexes
</Directory>

# メディアファイル(画像・チャート等)の設定
Alias /media/ /var/www/html/portfolio/media/
<Directory /var/www/html/portfolio/media>
    Require all granted
    Options -Indexes
</Directory>

# プロジェクトディレクトリへのアクセス許可
<Directory /var/www/html/portfolio/config>
    <Files wsgi.py>
        Require all granted
    </Files>
</Directory>
# 設定を反映
$ sudo systemctl restart apache2
各項目の意味:
- WSGIScriptAlias: URL と
wsgi.pyの紐付け設定。- WSGIDaemonProcess: Python 仮想環境のパスを指定し、デーモンモードで実行します(ここでは APT 版 mod_wsgi と venv
を組み合わせています)。- WSGIProcessGroup: デーモンプロセスをグループ化します。
- WSGIApplicationGroup %{GLOBAL}: numpy の
Interpreter change detected回避、拡張モジュールとの相性対策。
Note:
numpy等で「Interpreter change detected」が出るケースの対策は、上記の
WSGIApplicationGroup %{GLOBAL}です。本ブロックに既に含めていますが、
既存環境にこの行が無い場合のみ、同一行を1カ所だけ追記してください(重複不要)。
※numpy: Interpreter change detected への対応(補足)
Django で numpy を使う場合、mod_wsgi 経由で Interpreter change detected が発生することがあります。
対策は「WSGIApplicationGroup %{GLOBAL} を有効にする」ことです。本対応は上の設定ブロック
(上位セクション「Apache 設定ファイルの編集(APT 方式に統一)」の設定ブロック)に既に統合済みです。未導入の既存環境のみ、同一行を1カ所だけ追記してください。
エラーが発生した場合は
Apacheのエラーログを確認することで、原因を特定できます。
$ sudo tail -f /var/log/apache2/error.log
Cron(タスクスケジューラ)
CronはWindowsでいうタスクスケジューラだ。決まった時間に決まったコマンドを実行してくれる。CentOSとの操作の差はないみたい。
Cronの設定
定期実行するプログラムの作成
# 作業用ディレクトリに移動
$ cd /var/www/html

# テスト用スクリプトの作成
$ vi hello-cron.py
import codecs
from datetime import datetime

log_file_path = '/var/www/html/hello-cron.log'
txt = datetime.now().strftime("%Y/%m/%d %H:%M:%S") + ' hello-cron.py'
with codecs.open(log_file_path, 'a', 'utf-8') as f:
    f.writelines('\n' + txt)
# 実行テスト
$ python3 hello-cron.py

# ログの確認
$ cat hello-cron.log
Cron の設定
$ crontab -e
設定例:
10分ごとに実行する場合は */10 * * * * と記述します。仮想環境のPythonをフルパスで指定するのがポイントです。
# 10分ごとに実行
*/10 * * * * /var/www/html/portfolio/venv/bin/python /var/www/html/hello-cron.py

# 毎月1日の0:00に証明書を更新
0 0 1 * * /root/certbot.sh

# バッチ処理の例(自分用メモ)
0 0 1 * * /root/certbot.sh
0 18 * * * /var/www/html/portfolio/venv/bin/python /var/www/html/portfolio/manage.py daily_import_from_vietkabu
5 18 * * * /var/www/html/portfolio/venv/bin/python /var/www/html/portfolio/manage.py daily_import_from_sbi
6 18 * * * /var/www/html/portfolio/venv/bin/python /var/www/html/portfolio/manage.py daily_import_market_data
15 18 * * * /var/www/html/portfolio/venv/bin/python /var/www/html/portfolio/manage.py daily_industry_chart_and_uptrend
20 18 * * * /var/www/html/portfolio/venv/bin/python /var/www/html/portfolio/manage.py daily_industry_stacked_bar_chart
25 18 * * * /var/www/html/portfolio/venv/bin/python /var/www/html/portfolio/manage.py daily_download_edinet
30 18 * * * /var/www/html/portfolio/venv/bin/python /var/www/html/portfolio/manage.py weather_fetch_forecast
35 18 * * * /var/www/html/portfolio/venv/bin/python /var/www/html/portfolio/manage.py weather_fetch_warning
40 18 * * * /var/www/html/portfolio/venv/bin/python /var/www/html/portfolio/manage.py collectstatic --noinput
45 18 * * * /var/www/html/portfolio/venv/bin/python /var/www/html/portfolio/manage.py update_sector_rotation
50 18 * * * /var/www/html/portfolio/venv/bin/python /var/www/html/portfolio/manage.py fetch_usa_rss
51 18 * * * /var/www/html/portfolio/venv/bin/python /var/www/html/portfolio/manage.py update_macro_indicators
15 18 1 * * /var/www/html/portfolio/venv/bin/python /var/www/html/portfolio/manage.py monthly_fao_food_balance_chart
15 19 1 * * /var/www/html/portfolio/venv/bin/python /var/www/html/portfolio/manage.py monthly_cleanup_linebot_engine
20 19 * * * /var/www/html/portfolio/venv/bin/python /var/www/html/portfolio/manage.py daily_update_msci_weights
25 19 1 * * /var/www/html/portfolio/venv/bin/python /var/www/html/portfolio/manage.py monthly_update_historical_assets
30 19 1 * * /var/www/html/portfolio/venv/bin/python /var/www/html/portfolio/manage.py monthly_update_nasdaq100_list

# ※相手先サーバ(ベトナム)の証明書がうまくなくて実行できない
20 18 1 * * /var/www/html/portfolio/venv/bin/python /var/www/html/portfolio/manage.py monthly_vietnam_statistics
その他
ここから下は、必要に応じて参照してください。
Warning:
実行権限(chmod)は「シェルスクリプト(.sh)を直接実行する場合」に付与します。Django の管理コマンドは
venv/bin/python manage.py ...で呼び出す想定のため、各management/commands/*.pyに実行権限は不要です。
- 直接実行(本書の基本方針): crontab では以下のように Python で呼びます(chmod 不要)
>bash:console > */10 * * * * /var/www/html/portfolio/venv/bin/python /var/www/html/hello-cron.py > 0 18 * * * /var/www/html/portfolio/venv/bin/python /var/www/html/portfolio/manage.py daily_import_from_vietkabu >- シェル化(任意・まとめたい場合): 複数ジョブを1つの .sh にまとめ、
.shにだけ実行権限を付与します
>bash:console > $ sudo mkdir -p /var/www/html/portfolio/bin > $ sudo vi /var/www/html/portfolio/bin/daily_jobs.sh >
> ```bash:/var/www/html/portfolio/bin/daily_jobs.sh
#!/bin/bash
/var/www/html/portfolio/venv/bin/python /var/www/html/portfolio/manage.py daily_import_from_vietkabu
/var/www/html/portfolio/venv/bin/python /var/www/html/portfolio/manage.py daily_import_from_sbiほかのジョブもここに追記
> ```bash:console
$ sudo chmod 755 /var/www/html/portfolio/bin/daily_jobs.sh
crontab では .sh を呼ぶだけ
*/10 * * * * /var/www/html/portfolio/bin/daily_jobs.sh
$ sudo chown -R ubuntu:ubuntu /var/www/html
Warning:
- cron 失敗の典型例:
collectstatic実行時に、出力先の所有者/権限が root のままで書き込みに失敗するケース。- 対策: 所有者は運用ユーザー(例: ubuntu)に統一し、Apache 実行ユーザー(www-data)が少なくとも読み取れる権限に整える。
- チェック(読める/書けるか):
>bash:console > $ sudo -u www-data test -r /var/www/html/portfolio/static || echo "www-data が static を読めません" > $ sudo -u www-data test -w /var/www/html/portfolio/static || echo "www-data が static に書けません(collectstatic で書込が必要)" >- 例(所有者/権限の整備。上の
$ sudo chown -R ubuntu:ubuntu /var/www/htmlでも可):
>bash:console > $ sudo chown -R ubuntu:ubuntu /var/www/html/portfolio/static > $ sudo chmod -R u+rwX,go+rX /var/www/html/portfolio/static >
Django(DB リセットの整理)
このセクションでは、Django のデータベースをリセットする代表的な2通りの手順をまとめます。運用状況に応じて使い分けます。
1) 大リセット(全体を作り直す)
- 目的: 既存の履歴や不要なマイグレーションをすべて捨て、クリーンな状態に戻す。
- 手順の概要:
- 各アプリの
migrationsディレクトリを一旦削除 - 実データベースを削除(例:
DROP DATABASE portfolio_db;など) - 空のデータベースを作成
- マイグレーション適用のみ実行(
makemigrationsは不要)
- 各アプリの
$ cd /var/www/html/portfolio
# DB は MySQL クライアントや DBeaver で Drop → Create(事前にバックアップ推奨)
$ source venv/bin/activate
(venv) $ python manage.py migrate
2) 小リセット(特定アプリだけ履歴を整理)
- 目的: 一部アプリのマイグレーション履歴が肥大・錯綜したときに、そのアプリだけをスリム化。
- 手順の概要:
- 対象アプリの
app_name/migrations/を削除 - そのアプリの現行モデル定義をもとに
makemigrations app_nameを実行(新しい初期マイグレーションを生成) -
migrateを実行
- 対象アプリの
$ cd /var/www/html/portfolio
$ source venv/bin/activate
(venv) $ python manage.py makemigrations <app_name>
(venv) $ python manage.py migrate
Note:
- プロダクションDBで履歴の入れ替えを行う場合は、必ず事前にバックアップを取得してください。
- 既存データとの整合性(データ喪失/制約変更)に注意。安全な環境での検証を推奨します。
管理ユーザーの作成(続き)
$ cd /var/www/html/portfolio
$ source venv/bin/activate
(venv) $ python manage.py createsuperuser
  Email address:
  Password:
  Password (again):
  Superuser created successfully.
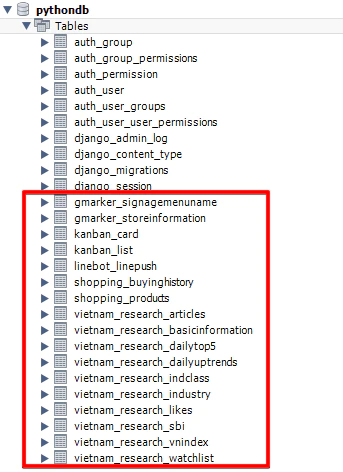
確認
djangoがシステム的に作ったテーブルと、アプリケーションを作っていればアプリケーション名が先頭についたテーブルが作成される(赤枠)
Matplotlib のキャッシュ権限設定
本番環境で Matplotlib を使用する場合、既定のキャッシュディレクトリが Web サーバーの実行ユーザー(Ubuntu では通常
www-data)に書き込み不可だと、/tmp/matplotlib-... に一時的なキャッシュが毎回作られ、読み込み遅延やプロセス間での非共有が起こり得ます。
本プロジェクトでは config/settings.py で MPLCONFIGDIR を MEDIA_ROOT/matplotlib_cache
に固定しています。したがって、以下の「権限整備」を行ってください。
補足(目的と位置づけ)
- リポジトリ内に
media/matplotlib_cache/.gitkeepを配置しており、デプロイ直後から対象ディレクトリは存在します(手動での作成は不要)。 - 以下のコマンドは「サーバ初期設定の一般論」ではなく、「アプリ設定(Djangoの
MPLCONFIGDIR)に由来するサーバ側の権限調整」です。 - つまり “作成” ではなく “書き込み権限を正す” のが主目的です。
手順(Apache 上の Django サイト)
# 所有者を Apache の実行ユーザーに(Ubuntu 既定: www-data)
sudo chown -R www-data:www-data /var/www/html/portfolio/media/matplotlib_cache

# グループ書き込みを許可(運用に応じて 750/770 などでも可)
sudo chmod 775 /var/www/html/portfolio/media/matplotlib_cache

# 設定反映(必要に応じて)
sudo systemctl reload apache2

# 検証(警告が出ていないことを確認)
sudo tail -n 200 /var/log/apache2/error.log | grep -i matplotlib || echo OK
参考: ログに次のようなメッセージが出ていた場合、この手順で解消されます。
/var/www/html/portfolio/media/matplotlib_cache is not a writable directory
Matplotlib created a temporary cache directory at /tmp/matplotlib-...
MySQLデータ のインポート(最小手順)
Note: 当時の事故メモ(本番とローカルの差異での失敗談)はノイズになるため省略します。ここでは“標準ケース”のみに絞ります。
前提
- すでに
portfolio_dbが存在し、スキーマは Django のマイグレーションで作成済み(python manage.py migrate済み) - インポートしたいダンプは、必要に応じて
CREATE DATABASEやDROP DATABASE、不要なCREATE TABLE/DROP TABLE
を取り除いたものを用意(テーブル定義を上書きしないように調整)
手順
$ cd <dumpを置いたディレクトリ>
$ mysql -u <user> -p -h 127.0.0.1 portfolio_db < mysql_dump.sql
ポイント
- dump は「SQL をそのまま実行」するだけです。開発環境に新しいテーブルがあっても、そのテーブルはそのまま残り、dump 側の
INSERT/UPDATE が適用されます。 - スキーマを壊したくない場合は、dump 側の
CREATE TABLE/DROP TABLEを外した“データのみ”のファイルを用意してください(MySQL
Workbench やmysqldump --no-create-infoなど)。 - 必要なら事前にバックアップを取得してから適用してください。
参考リンク
Apache/WSGI の実行権限と ACL の設定
mod_wsgi(Apache の wsgi モジュール)がアプリを読み込めるよう、またバッチ実行ユーザー(ubuntu)と Web サーバー実行ユーザー(
www-data)が共存できるよう、適切な権限を設定します。
1. 所有権と基本権限の初期化
所有者は ubuntu にし、グループを www-data とします。これにより、ubuntu での Git 操作やバッチ実行をスムーズにしつつ、Apache
からの読み書きも許可します。
# 1. 所有権・権限の初期化
$ sudo chown -R ubuntu:www-data /var/www/html/portfolio
$ sudo find /var/www/html/portfolio -type d -exec chmod 775 {} +
$ sudo find /var/www/html/portfolio -type f -exec chmod 664 {} +
2. ACL (Access Control List) による権限継承
chmod だけでは、その瞬間のファイルは直りますが、新しく作られたファイルには適用されません。
setfacl を使用して、今後 media/ 以下に作られるすべてのファイルに自動的に ubuntu と www-data 両方の権限を継承させます。
# ACL ツールのインストール
$ sudo apt update && sudo apt install acl -y

# media/ ディレクトリに対して、新規ファイルが ubuntu と www-data 両方の読み書きを継承するように設定
$ sudo setfacl -R -d -m u:ubuntu:rwx /var/www/html/portfolio/media
$ sudo setfacl -R -d -m g:www-data:rwx /var/www/html/portfolio/media
$ sudo setfacl -R -d -m o::rx /var/www/html/portfolio/media
3. 権限チェック
設定後、www-data 視点で必要なファイルにアクセスできるか確認します。
# www-data 視点で要点チェック(OK/NG が出る)
$ sudo -u www-data test -x /var/www/html/portfolio/config && echo OK_dir || echo NG_dir
$ sudo -u www-data test -r /var/www/html/portfolio/config/wsgi.py && echo OK_wsgi || echo NG_wsgi
$ sudo -u www-data test -w /var/www/html/portfolio/media && echo OK_media_w || echo NG_media_w
root のままディレクトリとか作りまくってると access denied や permission error になっていることがあるので注意。特に
/var/www/html/portfolio/config/wsgi.py と、その親ディレクトリに x 権限が無いと mod_wsgi がアプリを読み込めず 500 になる。
次のステップ
- ここまで完了したら、README の「2. 初期データ投入 → データのインポート手順」に従ってデータをセットアップし、Web
ページが正常に表示されることを確認してください(curl/ブラウザで 200 応答を確認)。これで clone ベースのセットアップは完了です。
FTP
いったんパス もとの記事
代替ルート: Django プロジェクトを新規作成する場合(クローンしない運用)
Note: ここは「/var/www/html/portfolio を git clone せず、空の Django プロジェクトから始める」ための対になる手順です。重要度は低めの補足として最小構成のみ記載します。
1) venv を有効化し、Django を導入
$ cd /var/www/html/portfolio
$ source venv/bin/activate
(venv) $ pip install --upgrade pip
(venv) $ pip install django
(venv) $ django-admin --version   # 例: 4.x
2) 雛形を作成(config を設定ディレクトリに)
(venv) $ mkdir -p mypage
(venv) $ cd mypage
(venv) $ django-admin startproject config .
(venv) $ python manage.py startapp hoge
開発サーバの起動確認(ローカル確認用)
(venv) $ python manage.py runserver 0.0.0.0:8000
3) settings.py の最小編集
- ALLOWED_HOSTS(必要に応じて本番ドメインや 127.0.0.1 を追加)
- ログをコンソールへ出す設定(任意)
# 例: 許可ホストを追加
ALLOWED_HOSTS = ['127.0.0.1', 'localhost']  # 本番はドメインを追加
LOGGING = {
    "version": 1,
    "disable_existing_loggers": False,
    "handlers": {"console": {"class": "logging.StreamHandler"}},
    "root": {"handlers": ["console"], "level": "INFO"},
}
4) MySQL を使う場合(任意)
- 依存ライブラリの apt 導入は、上位セクション「依存パッケージのインストール」を参照(
libmysqlclient-devなど)。 - venv で
mysqlclientを導入。
(venv) $ pip install mysqlclient
DATABASES を MySQL 用に変更(例)
DATABASES = {
    'default': {
        'ENGINE': 'django.db.backends.sqlite3',
        'NAME': BASE_DIR / 'db.sqlite3',
    }
}
DATABASES = {
    'default': {
-       'ENGINE': 'django.db.backends.sqlite3',
-       'NAME': BASE_DIR / 'db.sqlite3',
+       'ENGINE': 'django.db.backends.mysql',
+       'NAME': 'portfolio_db',
+       'USER': 'python',
+       'PASSWORD': os.getenv('DJANGO_DB_PASSWORD', ''),
+       'HOST': '127.0.0.1',
+       'PORT': '3306',
    }
}
Note: DB パスワードは
.envから読む運用が安全です(.env.exampleのDJANGO_DB_PASSWORDを参照)。
5) Apache 連携(本番運用時)
- 上位セクション「Apache 設定ファイルの編集(APT 方式に統一)」の設定ブロック(
WSGIScriptAlias
ほか)に従い、対象パスを新規プロジェクトに合わせて置換して適用してください。 - 設定後は
sudo apache2ctl configtest→sudo systemctl restart apache2。
補足(任意):PdfMiner
- SBI topics で使用。旧 pdfminer ではなく
pdfminer.sixを使用。
(venv) $ pip install pdfminer.six
Django
ログイン機能
セットアップのタイミング的にここに書いておくけどアプリケーション作るのに慣れてからやること。ログイン機能は、ログイン機能としてのアプリケーションを別個につくるのがベスト・プラクティスだ。
Reset(※必要に応じて)
- まず各appディレクトリの
migrationsディレクトリを消してまわります - dbを消します(=portfolio_db)
- db を作ります
startapp
# cd /var/www/html/portfolio
# python3 manage.py startapp register
from django.db import models
from django.core.mail import send_mail
from django.contrib.auth.models import PermissionsMixin, UserManager
from django.contrib.auth.base_user import AbstractBaseUser
from django.utils.translation import ugettext_lazy as _
from django.utils import timezone


class CustomUserManager(UserManager):
    """ユーザーマネージャー"""
    use_in_migrations = True

    def _create_user(self, email, password, **extra_fields):
        if not email:
            raise ValueError('The given email must be set')
        email = self.normalize_email(email)
        user = self.model(email=email, **extra_fields)
        user.set_password(password)
        user.save(using=self._db)
        return user

    def create_user(self, email, password=None, **extra_fields):
        extra_fields.setdefault('is_staff', False)
        extra_fields.setdefault('is_superuser', False)
        return self._create_user(email, password, **extra_fields)

    def create_superuser(self, email, password, **extra_fields):
        extra_fields.setdefault('is_staff', True)
        extra_fields.setdefault('is_superuser', True)
        if extra_fields.get('is_staff') is not True:
            raise ValueError('Superuser must have is_staff=True.')
        if extra_fields.get('is_superuser') is not True:
            raise ValueError('Superuser must have is_superuser=True.')
        return self._create_user(email, password, **extra_fields)


class User(AbstractBaseUser, PermissionsMixin):
    """カスタムユーザーモデル."""

    email = models.EmailField(_('email address'), unique=True)
    first_name = models.CharField(_('first name'), max_length=30, blank=True)
    last_name = models.CharField(_('last name'), max_length=150, blank=True)

    is_staff = models.BooleanField(
        _('staff status'),
        default=False,
        help_text=_(
            'Designates whether the user can log into this admin site.'),
    )
    is_active = models.BooleanField(
        _('active'),
        default=True,
        help_text=_(
            'Designates whether this user should be treated as active. '
            'Unselect this instead of deleting accounts.'
        ),
    )
    date_joined = models.DateTimeField(_('date joined'), default=timezone.now)

    objects = CustomUserManager()

    EMAIL_FIELD = 'email'
    USERNAME_FIELD = 'email'
    REQUIRED_FIELDS = []

    class Meta:
        verbose_name = _('user')
        verbose_name_plural = _('users')

    def get_full_name(self):
        """Return the first_name plus the last_name, with a space in
        between."""
        full_name = '%s %s' % (self.first_name, self.last_name)
        return full_name.strip()

    def get_short_name(self):
        """Return the short name for the user."""
        return self.first_name

    def email_user(self, subject, message, from_email=None, **kwargs):
        """Send an email to this user."""
        send_mail(subject, message, from_email, [self.email], **kwargs)

    @property
    def username(self):
        """username属性のゲッター

        他アプリケーションが、username属性にアクセスした場合に備えて定義
        メールアドレスを返す
        """
        return self.email
INSTALLED_APPS = [
    'django.contrib.admin',
    'django.contrib.auth',
    'django.contrib.contenttypes',
    'django.contrib.sessions',
    'django.contrib.messages',
    'django.contrib.staticfiles',
+    'register.apps.RegisterConfig',
]
+ # login
+ LOGIN_URL = 'register:login'
+ LOGIN_REDIRECT_URL = 'vnm:index'  #ログイン後にリダイレクトしたい先
+ LOGOUT_REDIRECT_URL = "vnm:index" #ログアウト後にリダイレクトしたい先
+ AUTH_USER_MODEL = 'register.User'
# mkdir -p templates/register
# vi templates/register/base.html
{% load static %}
<!DOCTYPE html>
<html lang="ja">
<head>
    <!-- Global site tag (gtag.js) - Google Analytics -->
    <script async src="https://www.googletagmanager.com/gtag/js?id=UA-43097095-9"></script>
    <script>
        window.dataLayer = window.dataLayer || [];
        function gtag(){dataLayer.push(arguments);}
        gtag('js', new Date());
        gtag('config', 'UA-43097095-9');
    </script>

    <meta charset="UTF-8">
    <meta name="viewport" content="width=device-width, initial-scale=1.0">
    <meta http-equiv="X-UA-Compatible" content="ie=edge">
    <title>VNMビューア</title>

    <!-- css -->
    <link rel="stylesheet" href="{% static 'register/css/reset.css' %}">
    <link rel="stylesheet" href="{% static 'register/css/index.css' %}">

    <!-- font -->
    <link href="https://fonts.googleapis.com/css?family=Sawarabi+Gothic" rel="stylesheet">
    <!-- fontawesome -->
    <link href="https://use.fontawesome.com/releases/v5.6.1/css/all.css" rel="stylesheet">

    <!-- favicon -->
    <link rel="shortcut icon" href="{% static 'register/images/c_r.ico' %}">

</head>
<body>
    <!-- nav -->
    <h1></h1>

    <div id="main">
        {% block content %}{% endblock %}
    </div>

    <footer>
        <p>© 2019 henojiya. / <a href="https://github.com/duri0214" target="_blank">github portfolio</a></p>
    </footer>

</body>
</html>
"""views.py"""
from django.conf import settings
from django.contrib.auth import get_user_model
from django.contrib.auth.views import LoginView, LogoutView
from django.contrib.sites.shortcuts import get_current_site
from django.core.signing import BadSignature, SignatureExpired, loads, dumps
from django.http import HttpResponseBadRequest
from django.shortcuts import redirect
from django.template.loader import render_to_string
from django.views import generic
from .forms import UserCreateForm

# signup
class UserCreate(generic.CreateView):
    """ユーザー仮登録"""
    template_name = 'register/user_create.html'
    form_class = UserCreateForm

    def form_valid(self, form):
        """仮登録と本登録用メールの発行."""
        # 仮登録と本登録の切り替えは、is_active属性を使うと簡単です。
        # 退会処理も、is_activeをFalseにするだけにしておくと捗ります。
        user = form.save(commit=False)
        user.is_active = False
        user.save()

        # アクティベーションURLの送付
        current_site = get_current_site(self.request)
        domain = current_site.domain
        context = {
            'protocol': self.request.scheme,
            'domain': domain,
            'token': dumps(user.pk),
            'user': user,
        }
        folder = settings.BASE_DIR + '/register/templates/register/mail_template/'
        subject = render_to_string(folder + 'subject.txt', context)
        message = render_to_string(folder + 'message.txt', context)

        user.email_user(subject, message)
        return redirect('register:user_create_done')


class UserCreateDone(generic.TemplateView):
    """ユーザー仮登録したよ"""
    template_name = 'register/user_create_done.html'


class UserCreateComplete(generic.TemplateView):
    """メール内URLアクセス後のユーザー本登録"""
    template_name = 'register/user_create_complete.html'
    timeout_seconds = getattr(settings, 'ACTIVATION_TIMEOUT_SECONDS', 60*60*24)  # デフォルトでは1日以内

    def get(self, request, *args, **kwargs):
        """tokenが正しければ本登録."""
        token = kwargs.get('token')
        try:
            user_pk = loads(token, max_age=self.timeout_seconds)

        # 期限切れ
        except SignatureExpired:
            return HttpResponseBadRequest()

        # tokenが間違っている
        except BadSignature:
            return HttpResponseBadRequest()

        # tokenは問題なし
        else:
            try:
                user = get_user_model().objects.get(pk=user_pk)
            except get_user_model().DoesNotExist:
                return HttpResponseBadRequest()
            else:
                if not user.is_active:
                    # 問題なければ本登録とする
                    user.is_active = True
                    user.save()
                    return super().get(request, **kwargs)

        return HttpResponseBadRequest()


class Login(LoginView):
    """ログインページ"""
    template_name = 'register/login.html'
"""forms.py"""
from django.contrib.auth.forms import UserCreationForm
from django.contrib.auth import get_user_model

class UserCreateForm(UserCreationForm):
    """ユーザー登録用フォーム"""

    class Meta:
        model = get_user_model()
        fields = ('email',)

    def clean_email(self):
        """clean_email"""
        email = self.cleaned_data['email']
        get_user_model().objects.filter(email=email, is_active=False).delete()
        return email
{% extends "register/base.html" %}
{% block content %}
<div class="card col-md-6">
    <div class="card-body">
        <form action="{% url 'register:login' %}" method="POST">
            {{ form.non_field_errors }}
            {% for field in form %}
                {{ field }}
                {{ field.errors }}
                <hr>
            {% endfor %}
            <button type="submit" class="btn btn-success btn-lg btn-block" >ログイン</button>
            <input type="hidden" name="next" value="{{ next }}" />
            {% csrf_token %}
        </form>
    </div>
</div>
<div class="">
    <div class="card-body">
        <a href="{% url 'register:user_create' %}" class="" >会員登録</a>
    </div>
</div>
{% endblock %}
"""urls.py"""
from django.urls import path
from . import views
from django.contrib.auth.views import LoginView, LogoutView

app_name = 'register'

urlpatterns = [
    path('login/', LoginView.as_view(template_name='register/login.html'), name='login'),
    path('logout/', LogoutView.as_view(), name='logout'),
    path('user_create/', views.UserCreate.as_view(), name='user_create'),
    path('user_create/done', views.UserCreateDone.as_view(), name='user_create_done'),
    path('user_create/complete/<str:token>/', views.UserCreateComplete.as_view(), name='user_create_complete'),
]
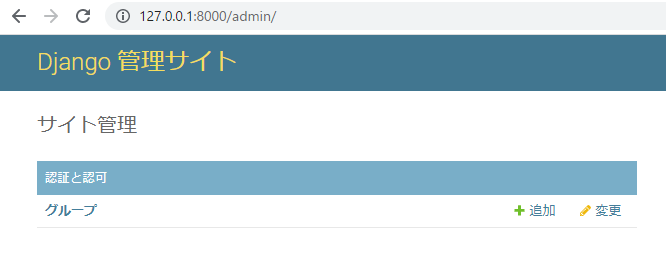
admin管理画面 にテーブルを追加表示する
実体としてどれだけテーブルがあろうと、管理画面には表示されないので設定する必要がある。
from django.contrib import admin
+ from .models import Staff, Store, Products, BuyingHistory

# Register your models here.
+ admin.site.register(Staff)
+ admin.site.register(Store)
+ admin.site.register(Products)
+ admin.site.register(BuyingHistory)
表示された!アプリケーションごとにやる必要があるね

Django アプリケーションの新規作成
# cd /var/www/html/portfolio
# python3 manage.py startapp vietnam_research
非公開情報を.envに移す(GitGuardian対策)
view 作成
# vi vietnam_research/views.py
from django.http import HttpResponse

def index(request):
    return HttpResponse("Hello, world.")
settings.py
# vi config/settings.py
INSTALLED_APPS = [
    ...,
    'vietnam_research.apps.VietnamResearchConfig'
]
httpd.conf(wsgi.conf)
staticディレクトリ配下は開放。
※あくまで DEBUG = True のときの設定です。慣れてきて DEBUG = False
にするときは こっち
を参照
Note: 上位セクション「Apache 設定ファイルの編集(APT 方式に統一)」の設定ブロックで
Alias /static/ ...は既に設定済みです。以下は
DEBUG=False 運用時の意味付けのみで、追加入力は不要です(重複設定は行わない)。
vietnam_research/urls.py を編集
URLの紐づけをロケットアニメのHelloWorldから変えるために、urls.py
を新規作成する(作る場所は「vietnam_research」フォルダ)。便宜上「子供のurls.py」と呼ぶことがある。「urls.py」には「s」をつけろよデコ助野郎。
from django.urls import path

# 現在のフォルダの「views.py」を import する!さっき "Hello, world." したやつ!
from . import views

# views.py には「index」という関数を作りましたね!それを呼んでます
urlpatterns = [
    path('', views.index, name='index'),
]
urls.py(共通Configのほう)
NTTの配電盤みたいなイメージね。便宜上「親のurls.py」と呼ぶことがある。(※この英語部分もよく読むと実はさっき子供のurls.pyに書いたようなことをやれって書いてあったりする)
"""portfolio URL Configuration

The `urlpatterns` list routes URLs to views. For more information please see:
    https://docs.djangoproject.com/en/2.2/topics/http/urls/
Examples:
Function views
    1. Add an import:  from my_app import views
    2. Add a URL to urlpatterns:  path('', views.home, name='home')
Class-based views
    1. Add an import:  from other_app.views import Home
    2. Add a URL to urlpatterns:  path('', Home.as_view(), name='home')
Including another URLconf
    1. Import the include() function: from django.urls import include, path
    2. Add a URL to urlpatterns:  path('blog/', include('blog.urls'))
"""
from django.contrib import admin
from django.urls import include, path

urlpatterns = [
    path('vietnam_research/', include('vietnam_research.urls')),
    path('admin/', admin.site.urls),
]
# systemctl restart apache2
HelloWorld!


model.py
ここはデータベースとテーブルの話だからね。好きにやってちょうだい
"""このファイル内に、必要なテーブルがすべて定義されます"""
from django.db import models

class Industry(models.Model):
    """
    viet-kabuで取得できる業種つき個社情報
    closing_price: 終値(千ドン)
    volume: 出来高(株)
    trade_price_of_a_day: 売買代金(千ドン)
    marketcap: 時価総額(億円)
    """
    market_code = models.CharField(max_length=4)
    symbol = models.CharField(max_length=10)
    company_name = models.CharField(max_length=50)
    industry1 = models.CharField(max_length=10)
    industry2 = models.CharField(max_length=20)
    open_price = models.DecimalField(max_digits=10, decimal_places=2, default=0.00)
    high_price = models.DecimalField(max_digits=10, decimal_places=2, default=0.00)
    low_price = models.DecimalField(max_digits=10, decimal_places=2, default=0.00)
    closing_price = models.DecimalField(max_digits=10, decimal_places=2, default=0.00)
    volume = models.DecimalField(max_digits=10, decimal_places=2, default=0.00)
    trade_price_of_a_day = models.DecimalField(max_digits=20, decimal_places=2, default=0.00)
    marketcap = models.DecimalField(max_digits=10, decimal_places=2, default=0.00)
    per = models.DecimalField(max_digits=10, decimal_places=2, default=0.00)
    pub_date = models.DateField()
migrations
makemigrations は台帳登録みたいなイメージ
# python3 manage.py makemigrations vietnam_research
migrate
migrateは「実効」みたいなイメージ
# python3 manage.py migrate
  Operations to perform:
    Apply all migrations: admin, auth, contenttypes, sessions
  Running migrations:
    Applying contenttypes.0001_initial... OK
    Applying auth.0001_initial... OK
    Applying admin.0001_initial... OK
    Applying admin.0002_logentry_remove_auto_add... OK
    Applying admin.0003_logentry_add_action_flag_choices... OK
    Applying contenttypes.0002_remove_content_type_name... OK
    Applying auth.0002_alter_permission_name_max_length... OK
    Applying auth.0003_alter_user_email_max_length... OK
    Applying auth.0004_alter_user_username_opts... OK
    Applying auth.0005_alter_user_last_login_null... OK
    Applying auth.0006_require_contenttypes_0002... OK
    Applying auth.0007_alter_validators_add_error_messages... OK
    Applying auth.0008_alter_user_username_max_length... OK
    Applying auth.0009_alter_user_last_name_max_length... OK
    Applying auth.0010_alter_group_name_max_length... OK
    Applying auth.0011_update_proxy_permissions... OK
    Applying sessions.0001_initial... OK
アプリケーションとして認識させる
(このステップ忘れるべからず)
このsettingでアプリケーションとして認識させることで、index.htmlを開きにいったときの「templates/{アプリケーション名}/index.html」を自動的に識別して読みにいってくれる。
DjangoでTemplateDoesNotExistと言われたら
「各アプリケーションの配下にあるtemplatesディレクトリ」を探索するということは、アプリケーションと認識されていなければ探索されないということだ。
今回はそもそもここに原因があった。settings.pyのINSTALLED_APPSにmyappを登録するのを忘れていた。
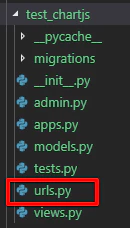
INSTALLED_APPS に設定を追加するんだが、、え?VietnamResearchConfigに覚えがないって?
そうなんだよ、アプリケーションフォルダ(test_chartjs)配下にある、「apps.py」を開いてみると書いてあるんだよね。わかりにくいなぁこれ。
INSTALLED_APPS = [
    'django.contrib.admin',
    'django.contrib.auth',
    'django.contrib.contenttypes',
    'django.contrib.sessions',
    'django.contrib.messages',
    'django.contrib.staticfiles',
+   'test_chartjs.apps.VietnamResearchConfig',
]
templates ディレクトリを作成
最初に、アプリケーションフォルダの中に「templates」フォルダを作成。さらにその中に、(Djangoのテンプレート読み込みルールに則り)アプリケーションフォルダと同じ名前のフォルダを作成してから
index.html というファイルを作成する。
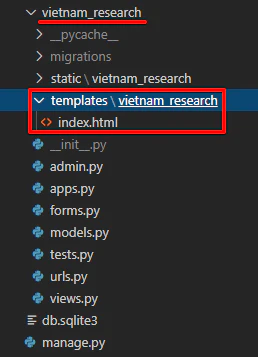
つまり、テンプレートは「vietnam_research/templates/vietnam_research
/index.html」に書く必要がある。「テンプレートフォルダのなかにアプリケーション名がある」というの自体はほかのWeb言語にもあったような気がする?:
thinking:
これは文化的なもので「名前空間」という意味合いに過ぎない。
「templates」には「s」をつけろよデコ助野郎。
テンプレートを編集
vscodeのhtmlファイル上で「!」って入力すると、vscodeのちょっとした機能でこのテンプレートが出てくる. すごい
<!DOCTYPE html>
<html lang="ja">
<head>
    <meta charset="UTF-8">
    <meta name="viewport" content="width=device-width, initial-scale=1.0">
    <title>vietnam_research</title>
</head>
<body>
    <h1>vietnam_research</h1>
</body>
</html>
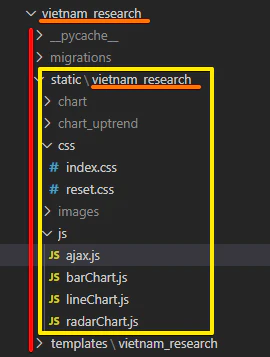
static ディレクトリを作成
- static(黄色の四角)
- static/vietnam_research(オレンジ)
- static/vietnam_research/js
などのフォルダやファイルは、手で作る必要があります。
(templateと同じ階層にstaticをつくります)
- htmlの最初に {% load static %} を忘れるな!
- javascript を読み込むときのパスは {% static 'vietnam_research/js/script.js' %} だ
- このフォルダの「指定方法」と「そしてどうなる」を脳筋になるまで繰り返して感覚をつかめ!
Google Analytics
<head> タグの一番最初に取り付ける
<!-- Global site tag (gtag.js) - Google Analytics -->
<script async src="https://www.googletagmanager.com/gtag/js?id=UA-43097095-9"></script>
<script>
    window.dataLayer = window.dataLayer || [];
    function gtag(){dataLayer.push(arguments);}
    gtag('js', new Date());
    gtag('config', 'UA-43097095-9');
</script>
index.html
{% load static %}
<!DOCTYPE html>
<html lang="ja">
    <head>
        <!-- Global site tag (gtag.js) - Google Analytics -->
        <script async src="https://www.googletagmanager.com/gtag/js?id=UA-43097095-9"></script>
        <script>
            window.dataLayer = window.dataLayer || [];
            function gtag(){dataLayer.push(arguments);}
            gtag('js', new Date());
            gtag('config', 'UA-43097095-9');
        </script>

        <meta charset="UTF-8">
        <meta name="viewport" content="width=device-width, initial-scale=1.0">
        <title>shopping</title>

        <!-- css -->
        <link rel="stylesheet" href="{% static 'vietnam_research/css/reset.css' %}">
        <link rel="stylesheet" href="{% static 'vietnam_research/css/index.css' %}">
        <!-- favicon -->
        <link rel="icon" href="{% static 'vietnam_research/c_v.ico' %}">

        <!-- javascript -->
        <script src="{% static 'vietnam_research/js/script.js' %}"></script>

        <!-- font -->
        <link href="https://fonts.googleapis.com/css?family=Sawarabi+Gothic" rel="stylesheet">
        <!-- fontawesome -->
        <link href="https://use.fontawesome.com/releases/v5.6.1/css/all.css" rel="stylesheet">

        <!-- for ajax -->
        <script>let myurl = {"base": "{% url 'vnm:index' %}"}</script>

    </head>

    <body>
        <h1>vietnam_research</h1>
    </body>
</html>
views.pyがテンプレートへ向けて置換をかけて返却する流れを作る
"""views.py"""
from django.shortcuts import render

def index(request):
    """いわばhtmlのページ単位の構成物です"""
    # htmlとして返却します
    return render(request, 'vietnam_research/index.html')
ローカル環境でのテスト


フォームでのファイルアップロードを実装する
いやー stackoverflowで質問しても
回答つかなくて困った困った。settings.pyの MEDIA の役割がわかってなかったんだよね。
# これの追記で permissionerror 回避を確認ok
MEDIA_ROOT = os.path.join(BASE_DIR, 'media')
MEDIA_URL = '/media/'

# ファイル・ディレクトリの書き込み権限設定
# Apache(www-data)が生成したメディアファイルをubuntuユーザーが削除・上書き(バッチ実行等)できるように
# グループ書き込み権限(664/775)を明示的に付与します。
FILE_UPLOAD_PERMISSIONS = 0o664
FILE_UPLOAD_DIRECTORY_PERMISSIONS = 0o775
上記の settings.py の追記に加えて、下記のように models.py で upload_to='shopping/ にすると、[example.com]
/media/shopping/xxx.jpg と保存されるようになる
class Products(models.Model):
    """商品"""
    code = models.CharField('商品コード', max_length=200)
    name = models.CharField('商品名', max_length=200)
    price = models.IntegerField('金額', default=0)
    description = models.TextField('説明')
    picture = models.ImageField('商品写真', upload_to='shopping/')
class UploadSingleView(FormView):
    """UploadSingleView"""
    form_class = SingleRegistrationForm
    success_url = reverse_lazy('shp:index')

    def form_valid(self, form):
        # prepare
        code = form.cleaned_data.get('code')
        Products.objects.filter(code=code).delete()
        # save
        form.save()
        # delete if file is exists as same.
        orgname, ext = os.path.splitext(form.cleaned_data["picture"].name)
        mvfilepath = settings.BASE_DIR + '/shopping/static/shopping/img/' + code + ext.lower()
        if os.path.exists(mvfilepath):
            os.remove(mvfilepath)
        # move file as rename
        uploadfilepath = settings.BASE_DIR + '/media/shopping/' + orgname + ext.lower()
        os.rename(uploadfilepath, mvfilepath)
        return super().form_valid(form)
DEBUGをFalseにしてみて?
公式:本番環境における静的ファイルの配信
DEBUGをTrueにしているあいだは気にすることはないが、本番環境にしようとしてDEBUGをFalseにすると /static/ (
settings.pyのSTATIC_URL)は各アプリケーション内のstaticディレクトリを読みにいきません。
(非効率であったり、セキュリティ上の理由らしい)
DEBUG = False
パス参考:/var/www/html/portfolio/static/
STATIC_ROOT = os.path.join(BASE_DIR, "static")
# python3 manage.py collectstatic
# chown -R ubuntu:ubuntu /var/www/html
# systemctl restart apache2