4
1

Delete article

Deleted articles cannot be recovered.

Draft of this article would be also deleted.

Are you sure you want to delete this article?

More than 5 years have passed since last update.

EC-CUBEAdvent Calendar 2018

Day 19

EC-CUBE 3系/4系のレイアウト管理機能の違い&活用例

Posted at

EC-CUBE Advent Calendar 2018 の記事です。

EC-CUBE 4では、メニューに「レイアウト管理」が新たに追加されております。
3系でもメニューにはないものの、レイアウト管理機能はあり、
同様の機能と混同しそうなため、
ここでは、3系/4系のレイアウト管理機能の違いと、具体的な活用方法をお伝えします。

3系と4系の違い

3系

  • ページ毎に、レイアウトの設定が可能
  • 全ページまとめて、レイアウト設定が可能

4系

[初期状態]

  • Topページ単体でのレイアウト設定が可能
  • Topページ以外の全ページのレイアウト設定が可能
    [独自設定]
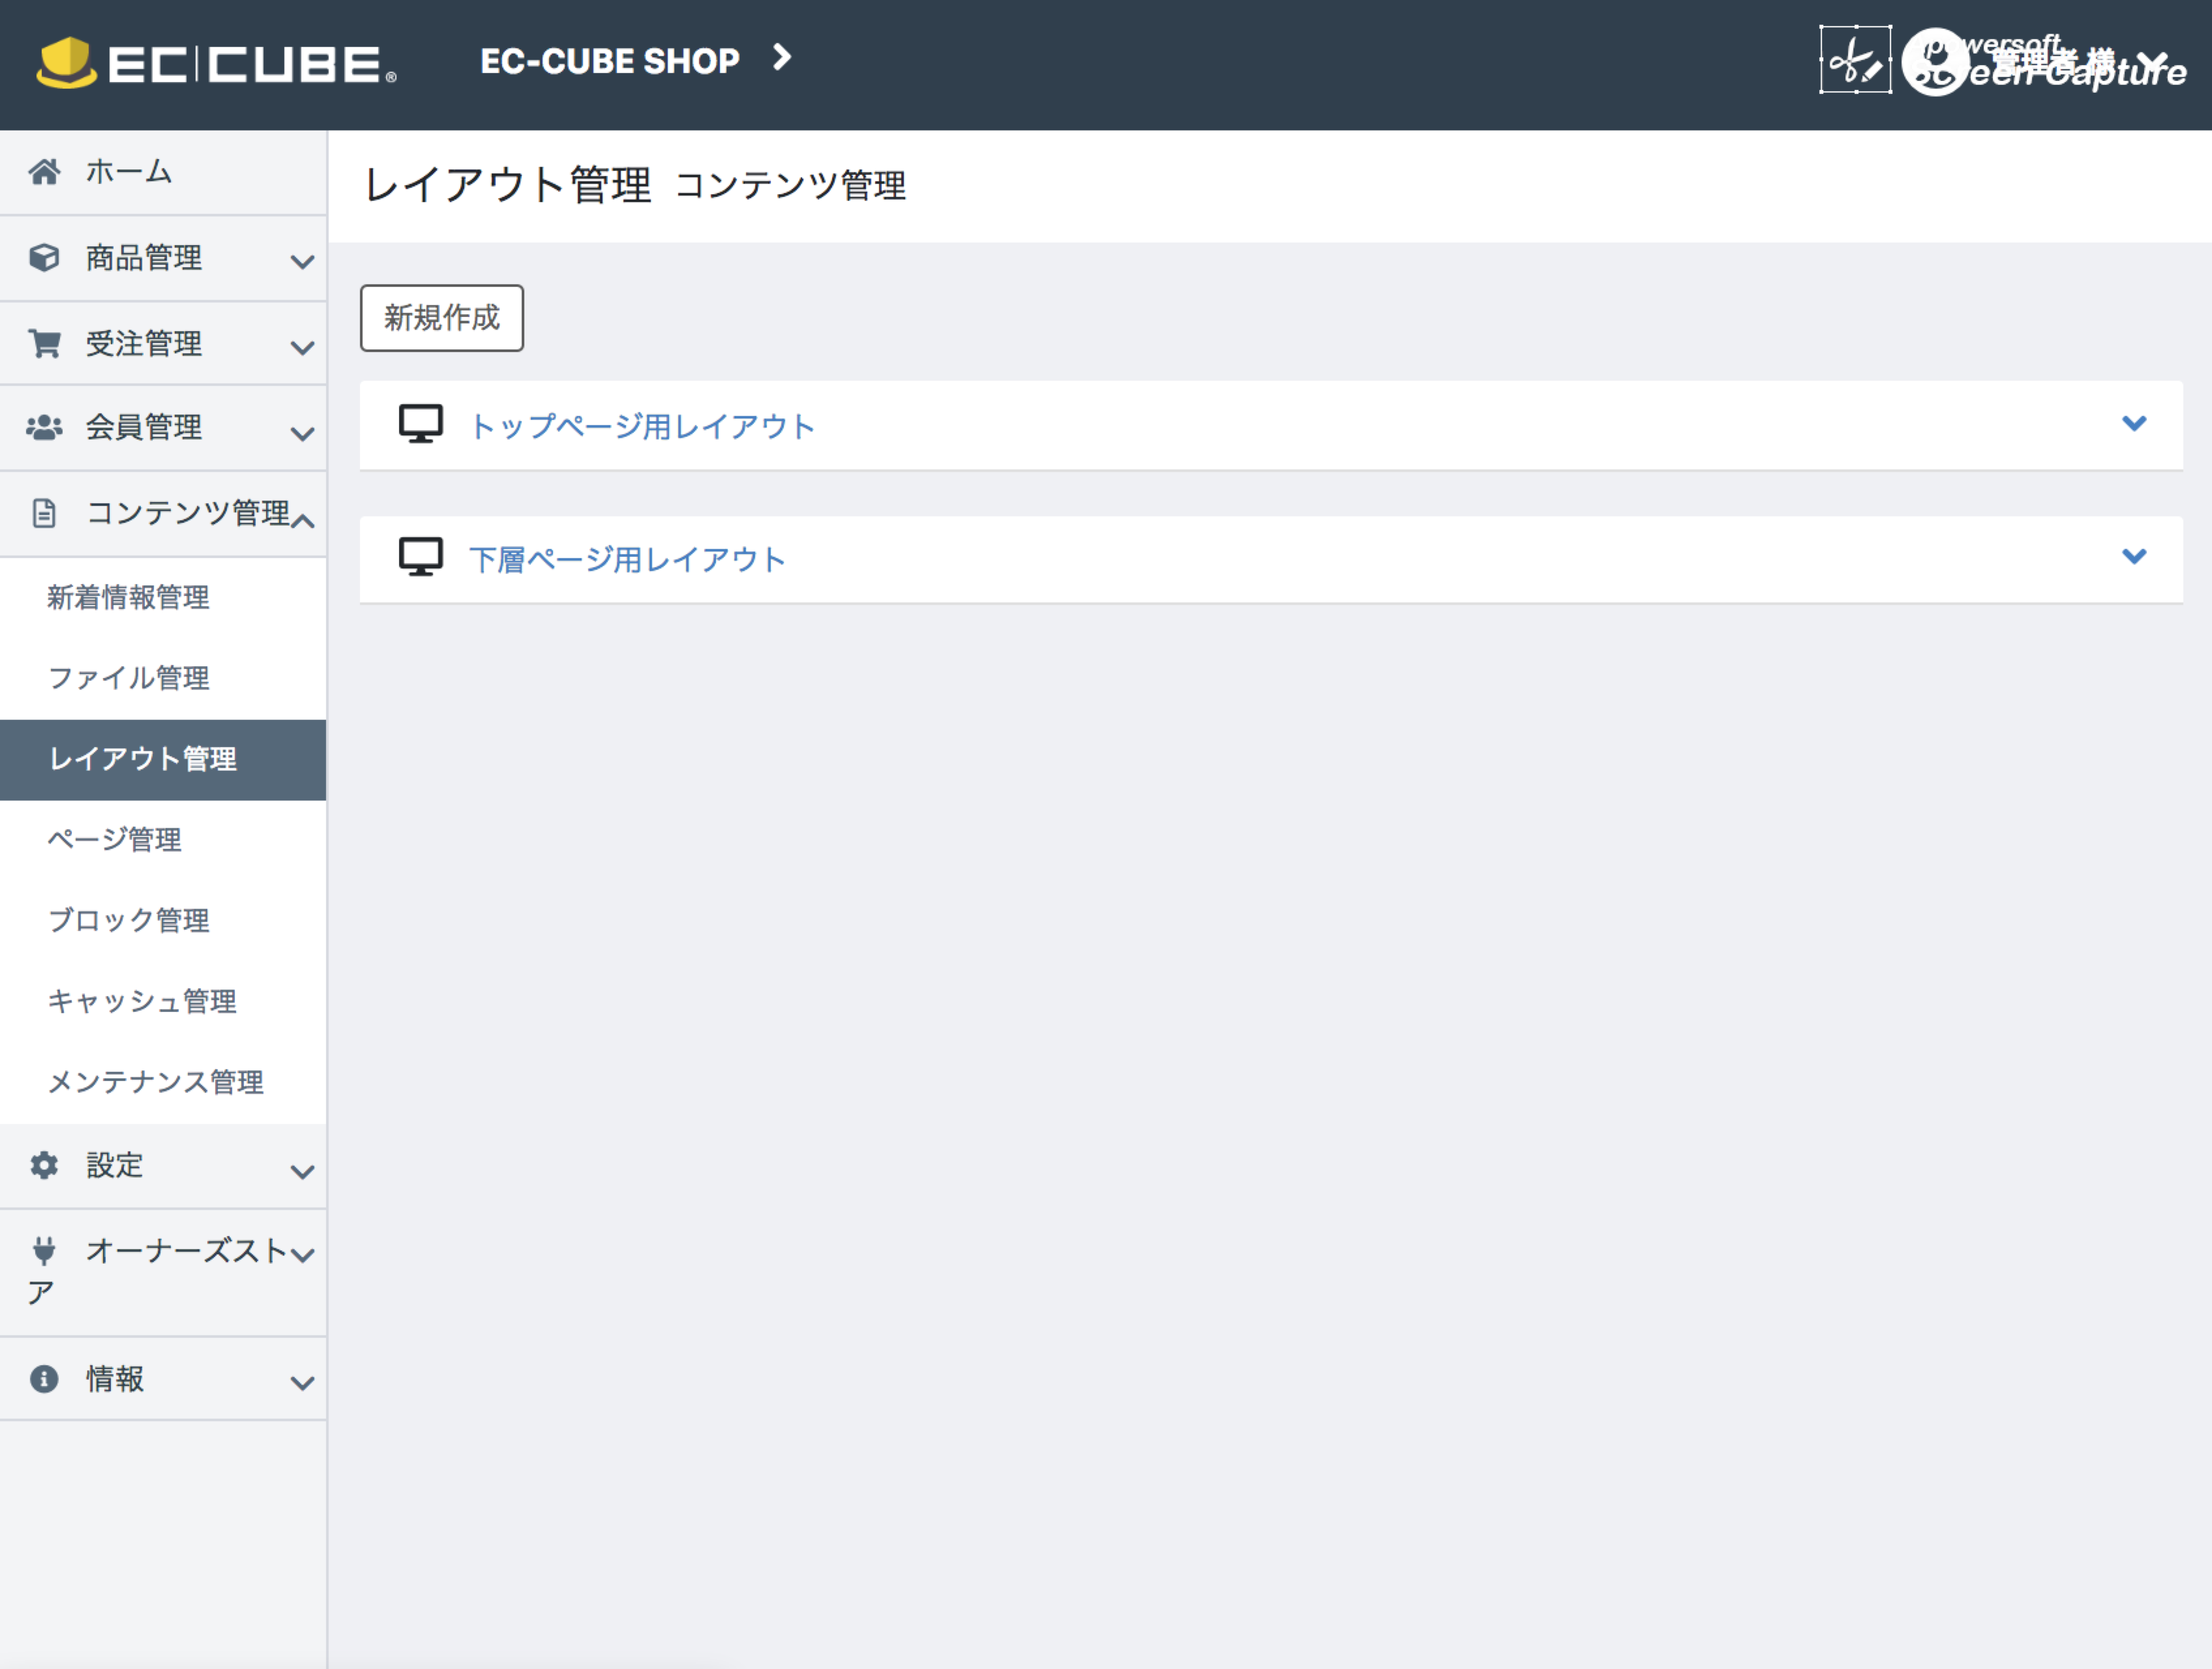
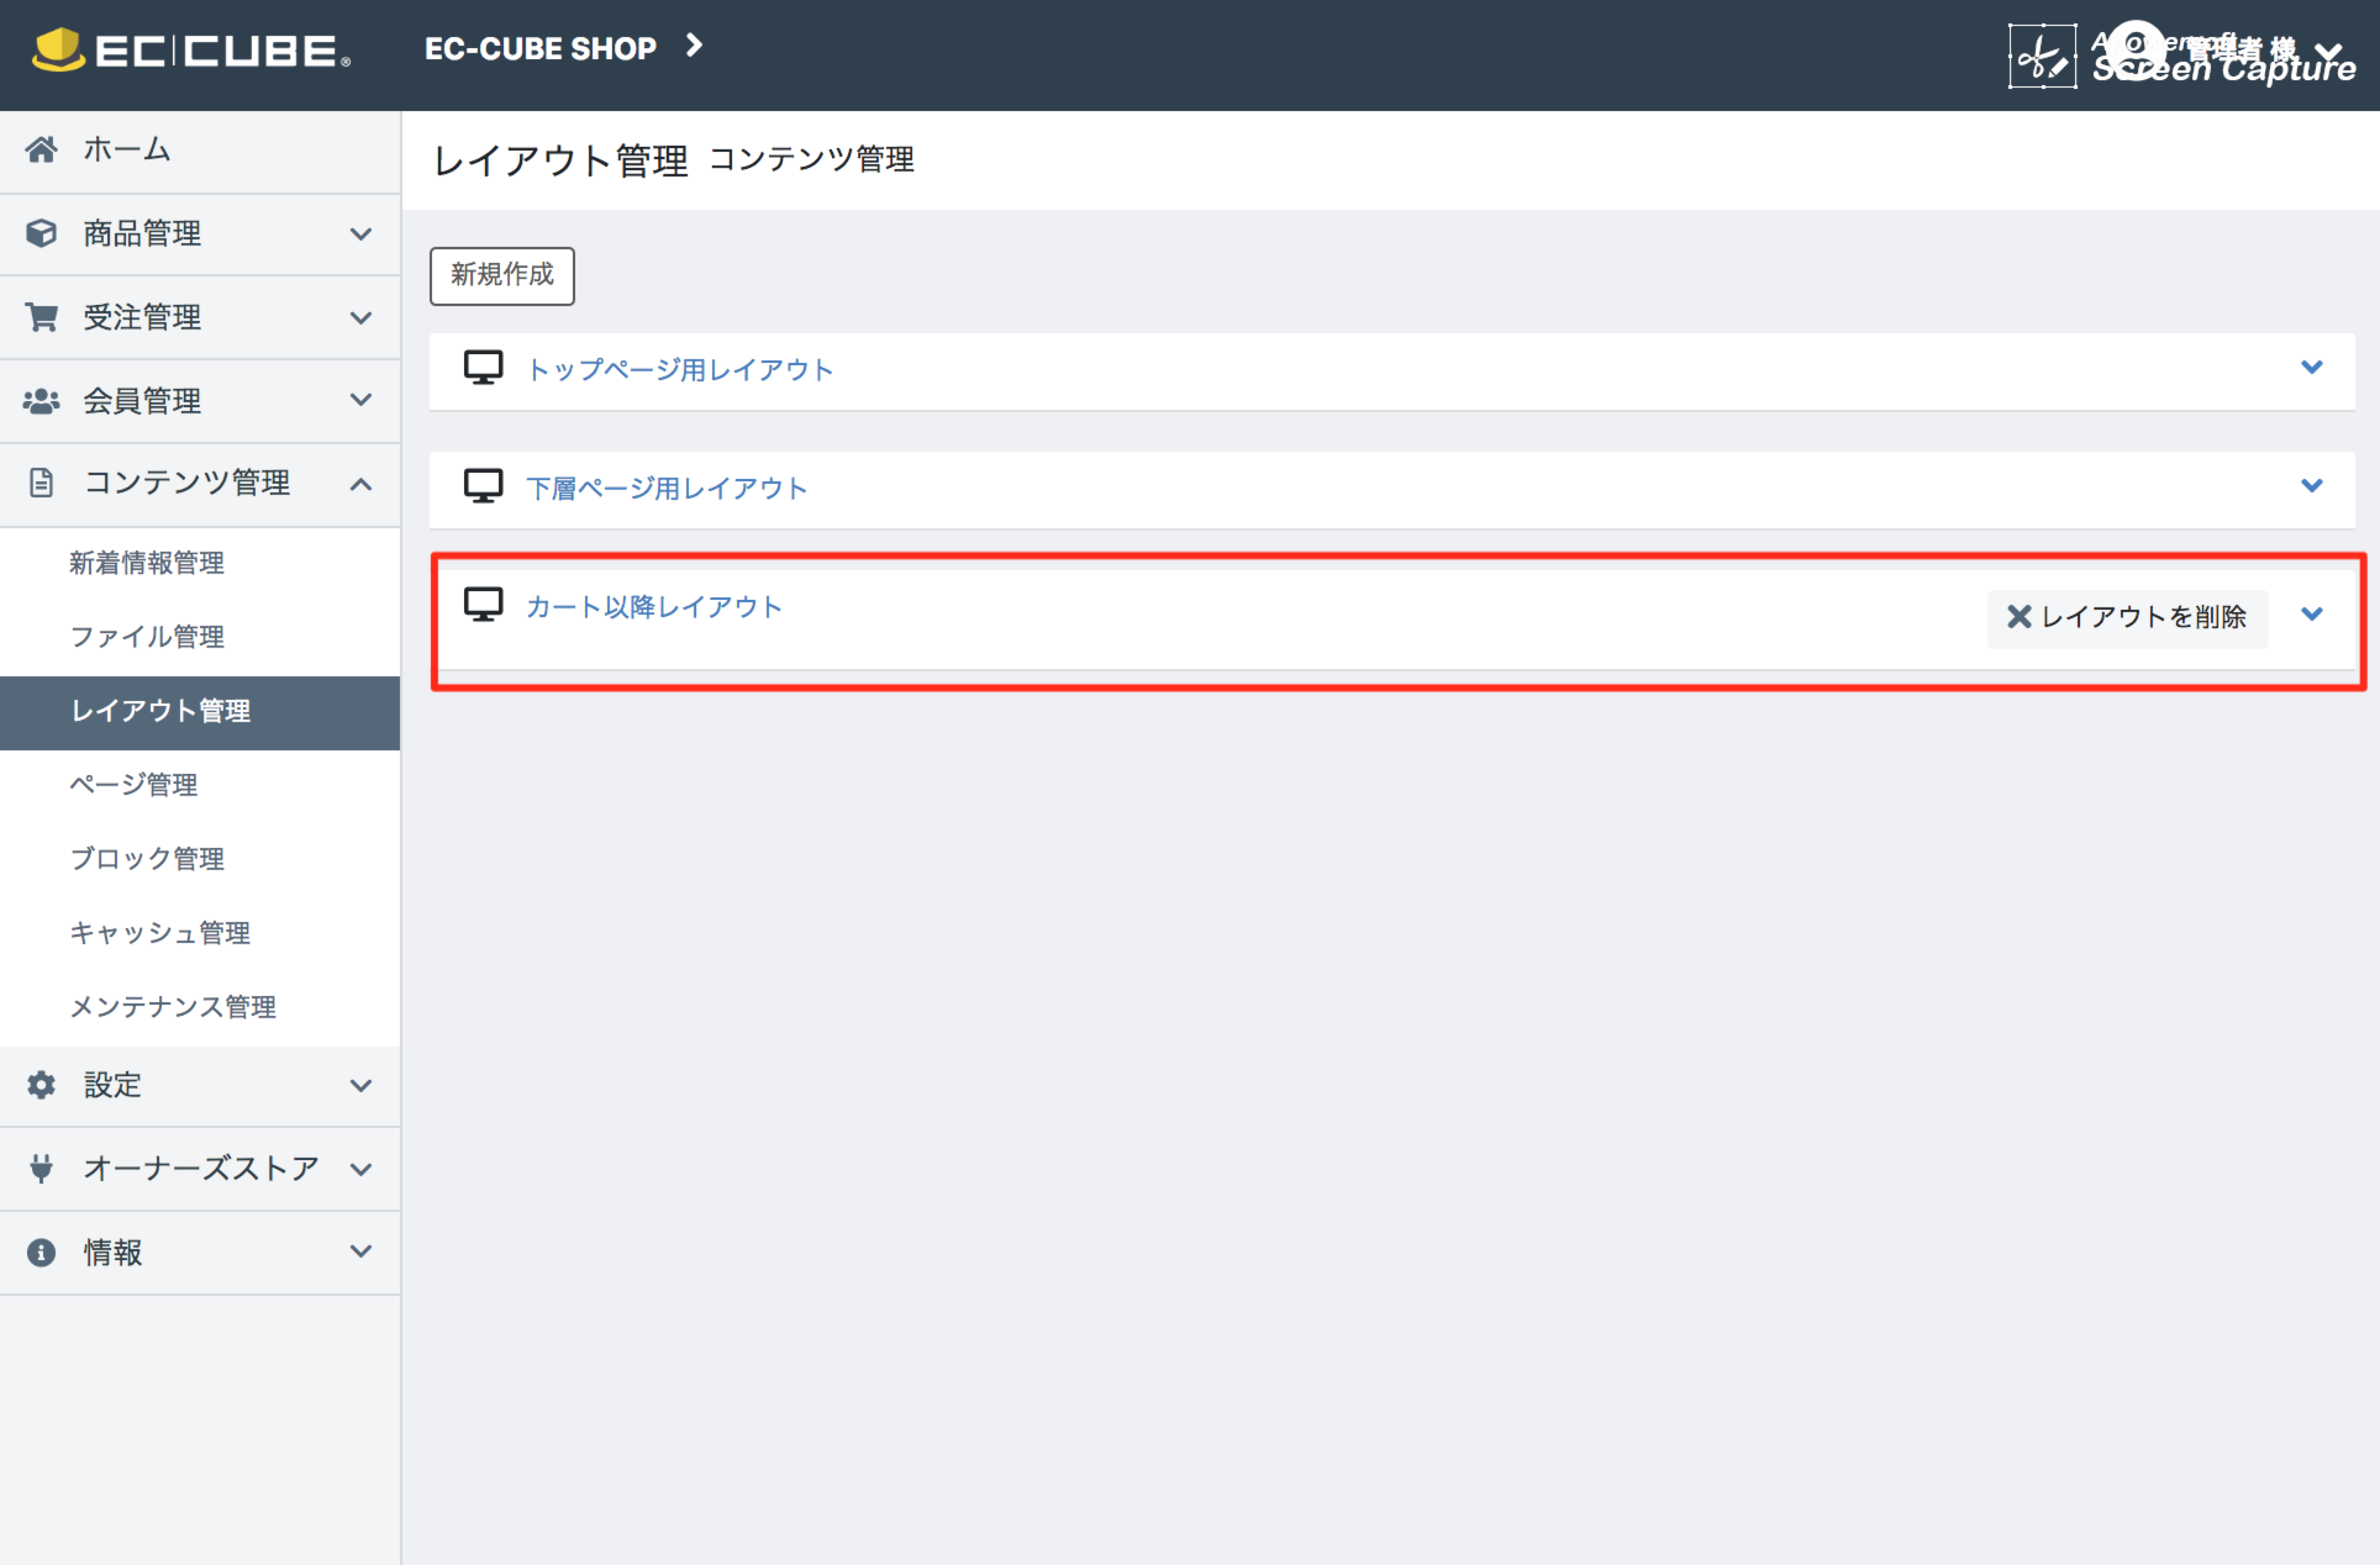
    4系では、レイアウトのグループのようなものを作ることができます。

[初期状態]
image.png

[独自設定]
image.png

活用例

ネットショップでは、「いかにカート落ちを防ぐか?」が重要になってきます。

そのため、カート以降のページにおいては、
商品検索やカテゴリ等余分なものを表示せずページをシンプルにすることがベターとされております。

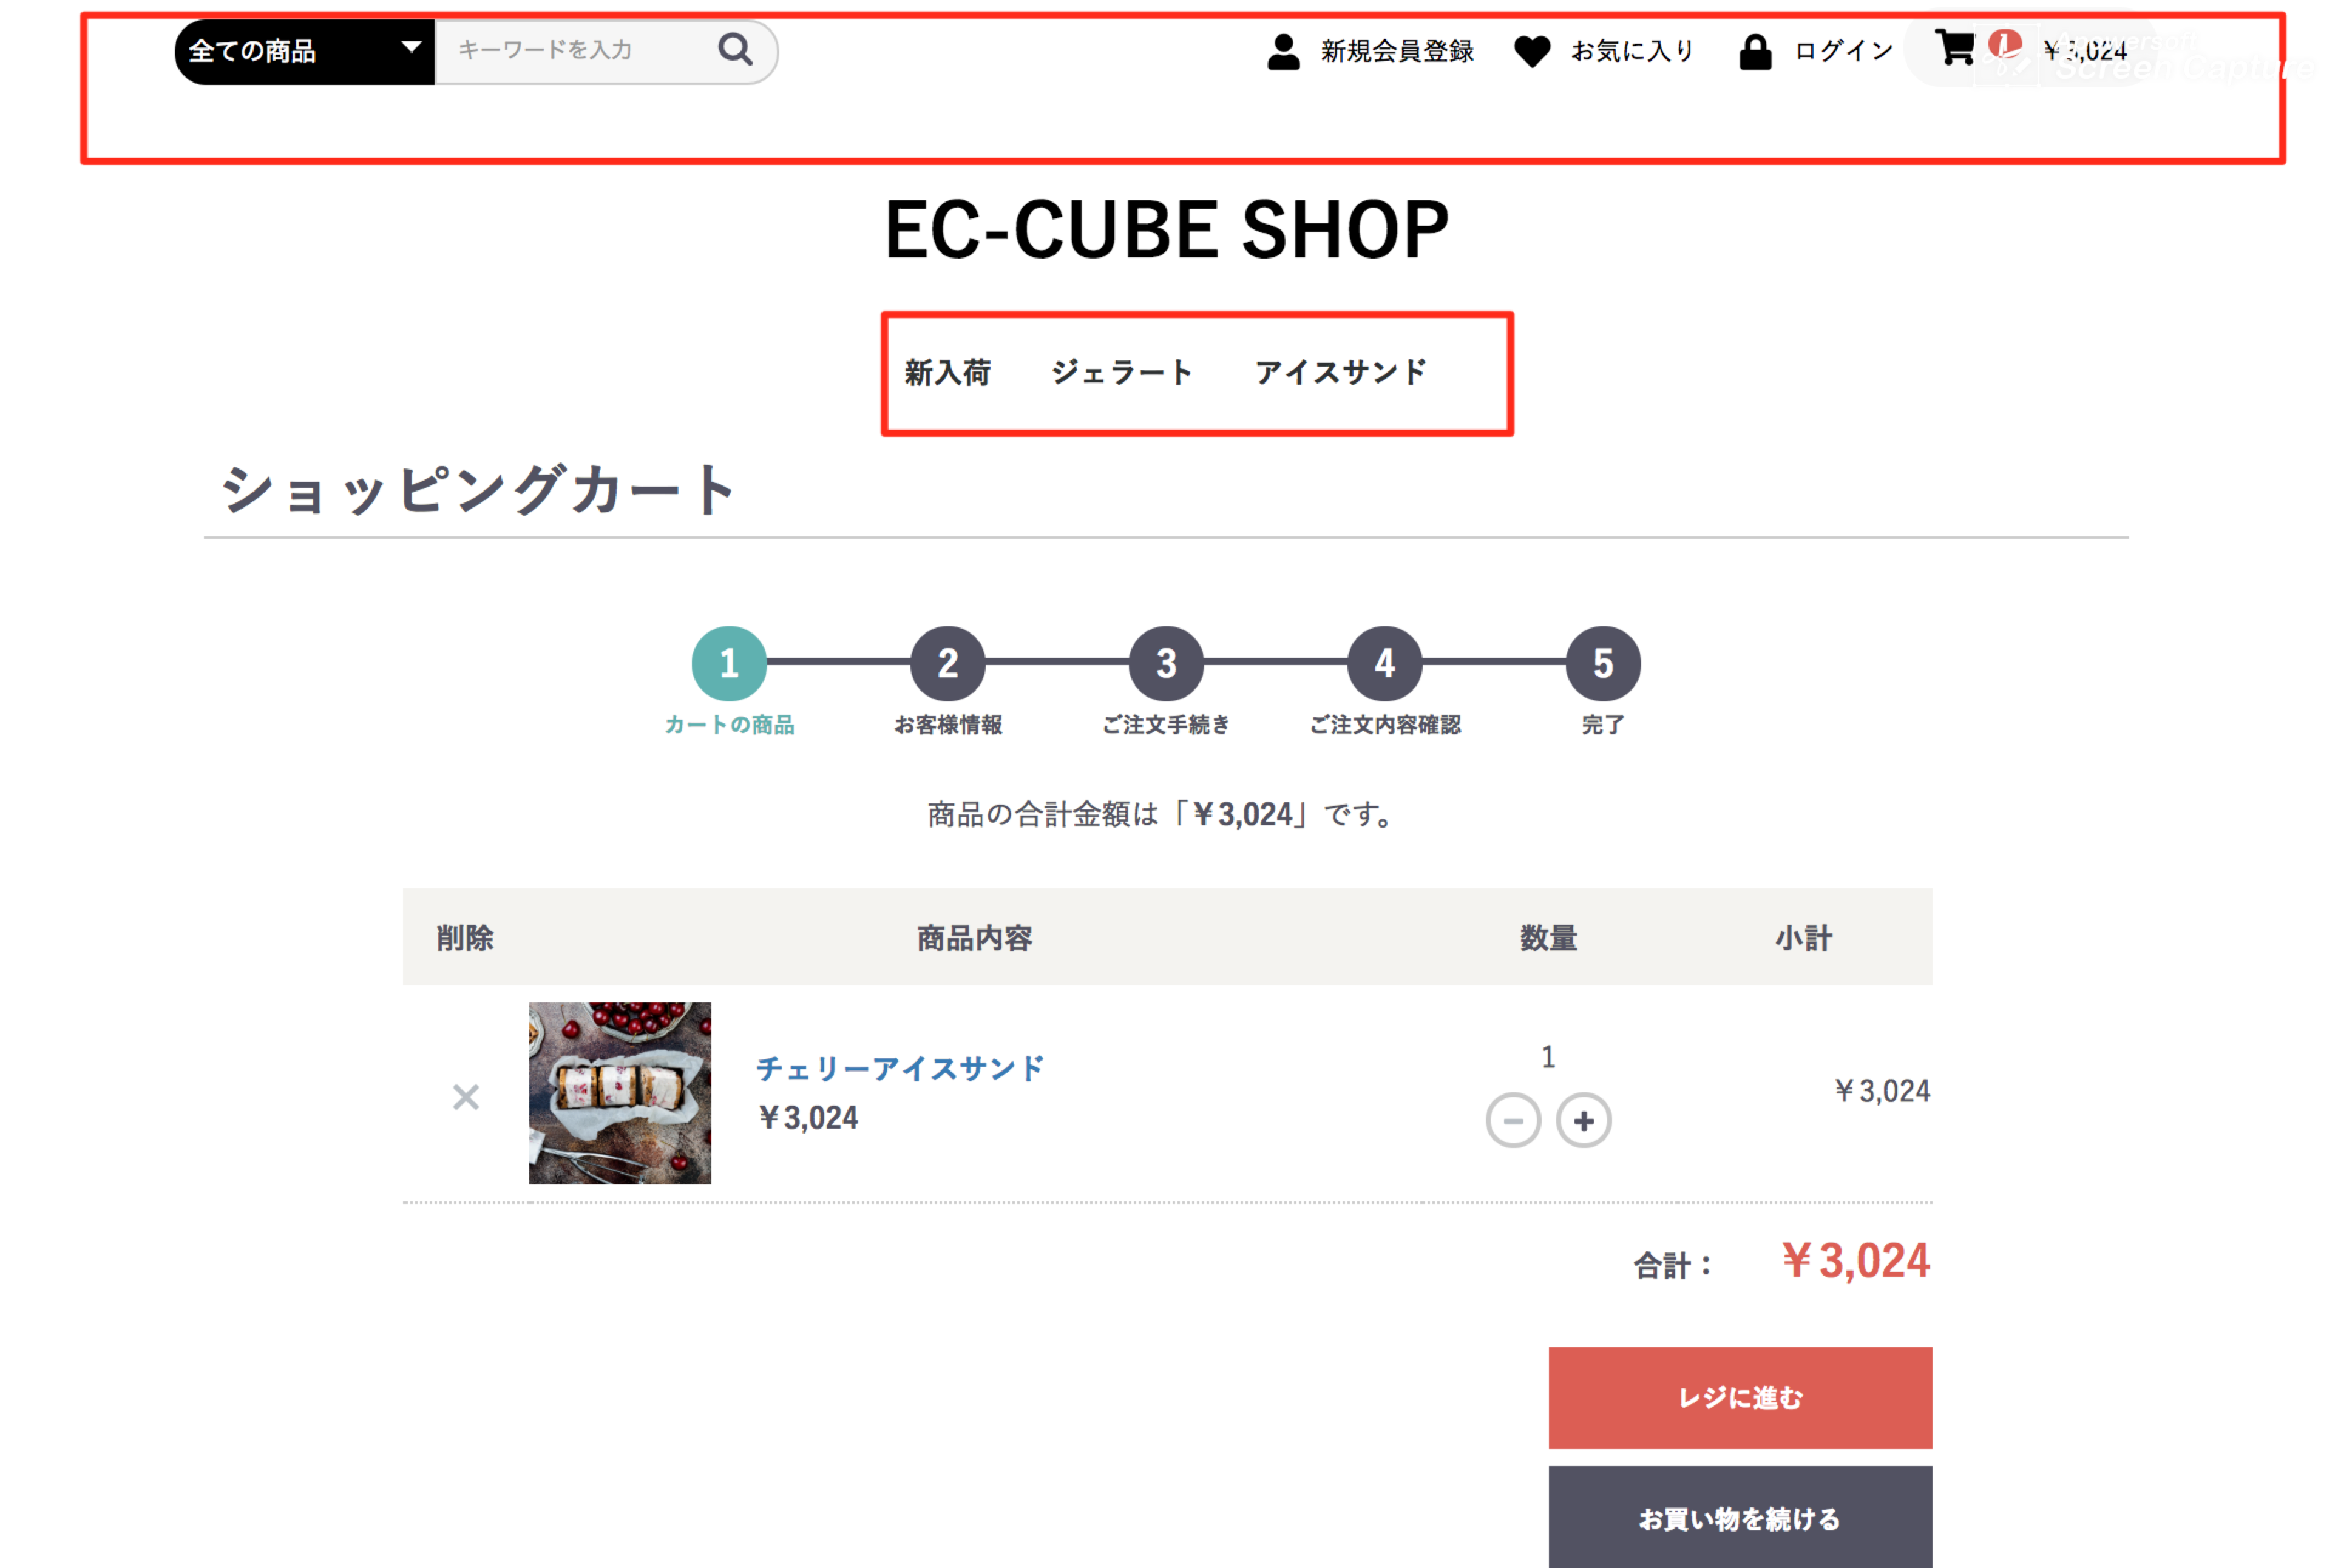
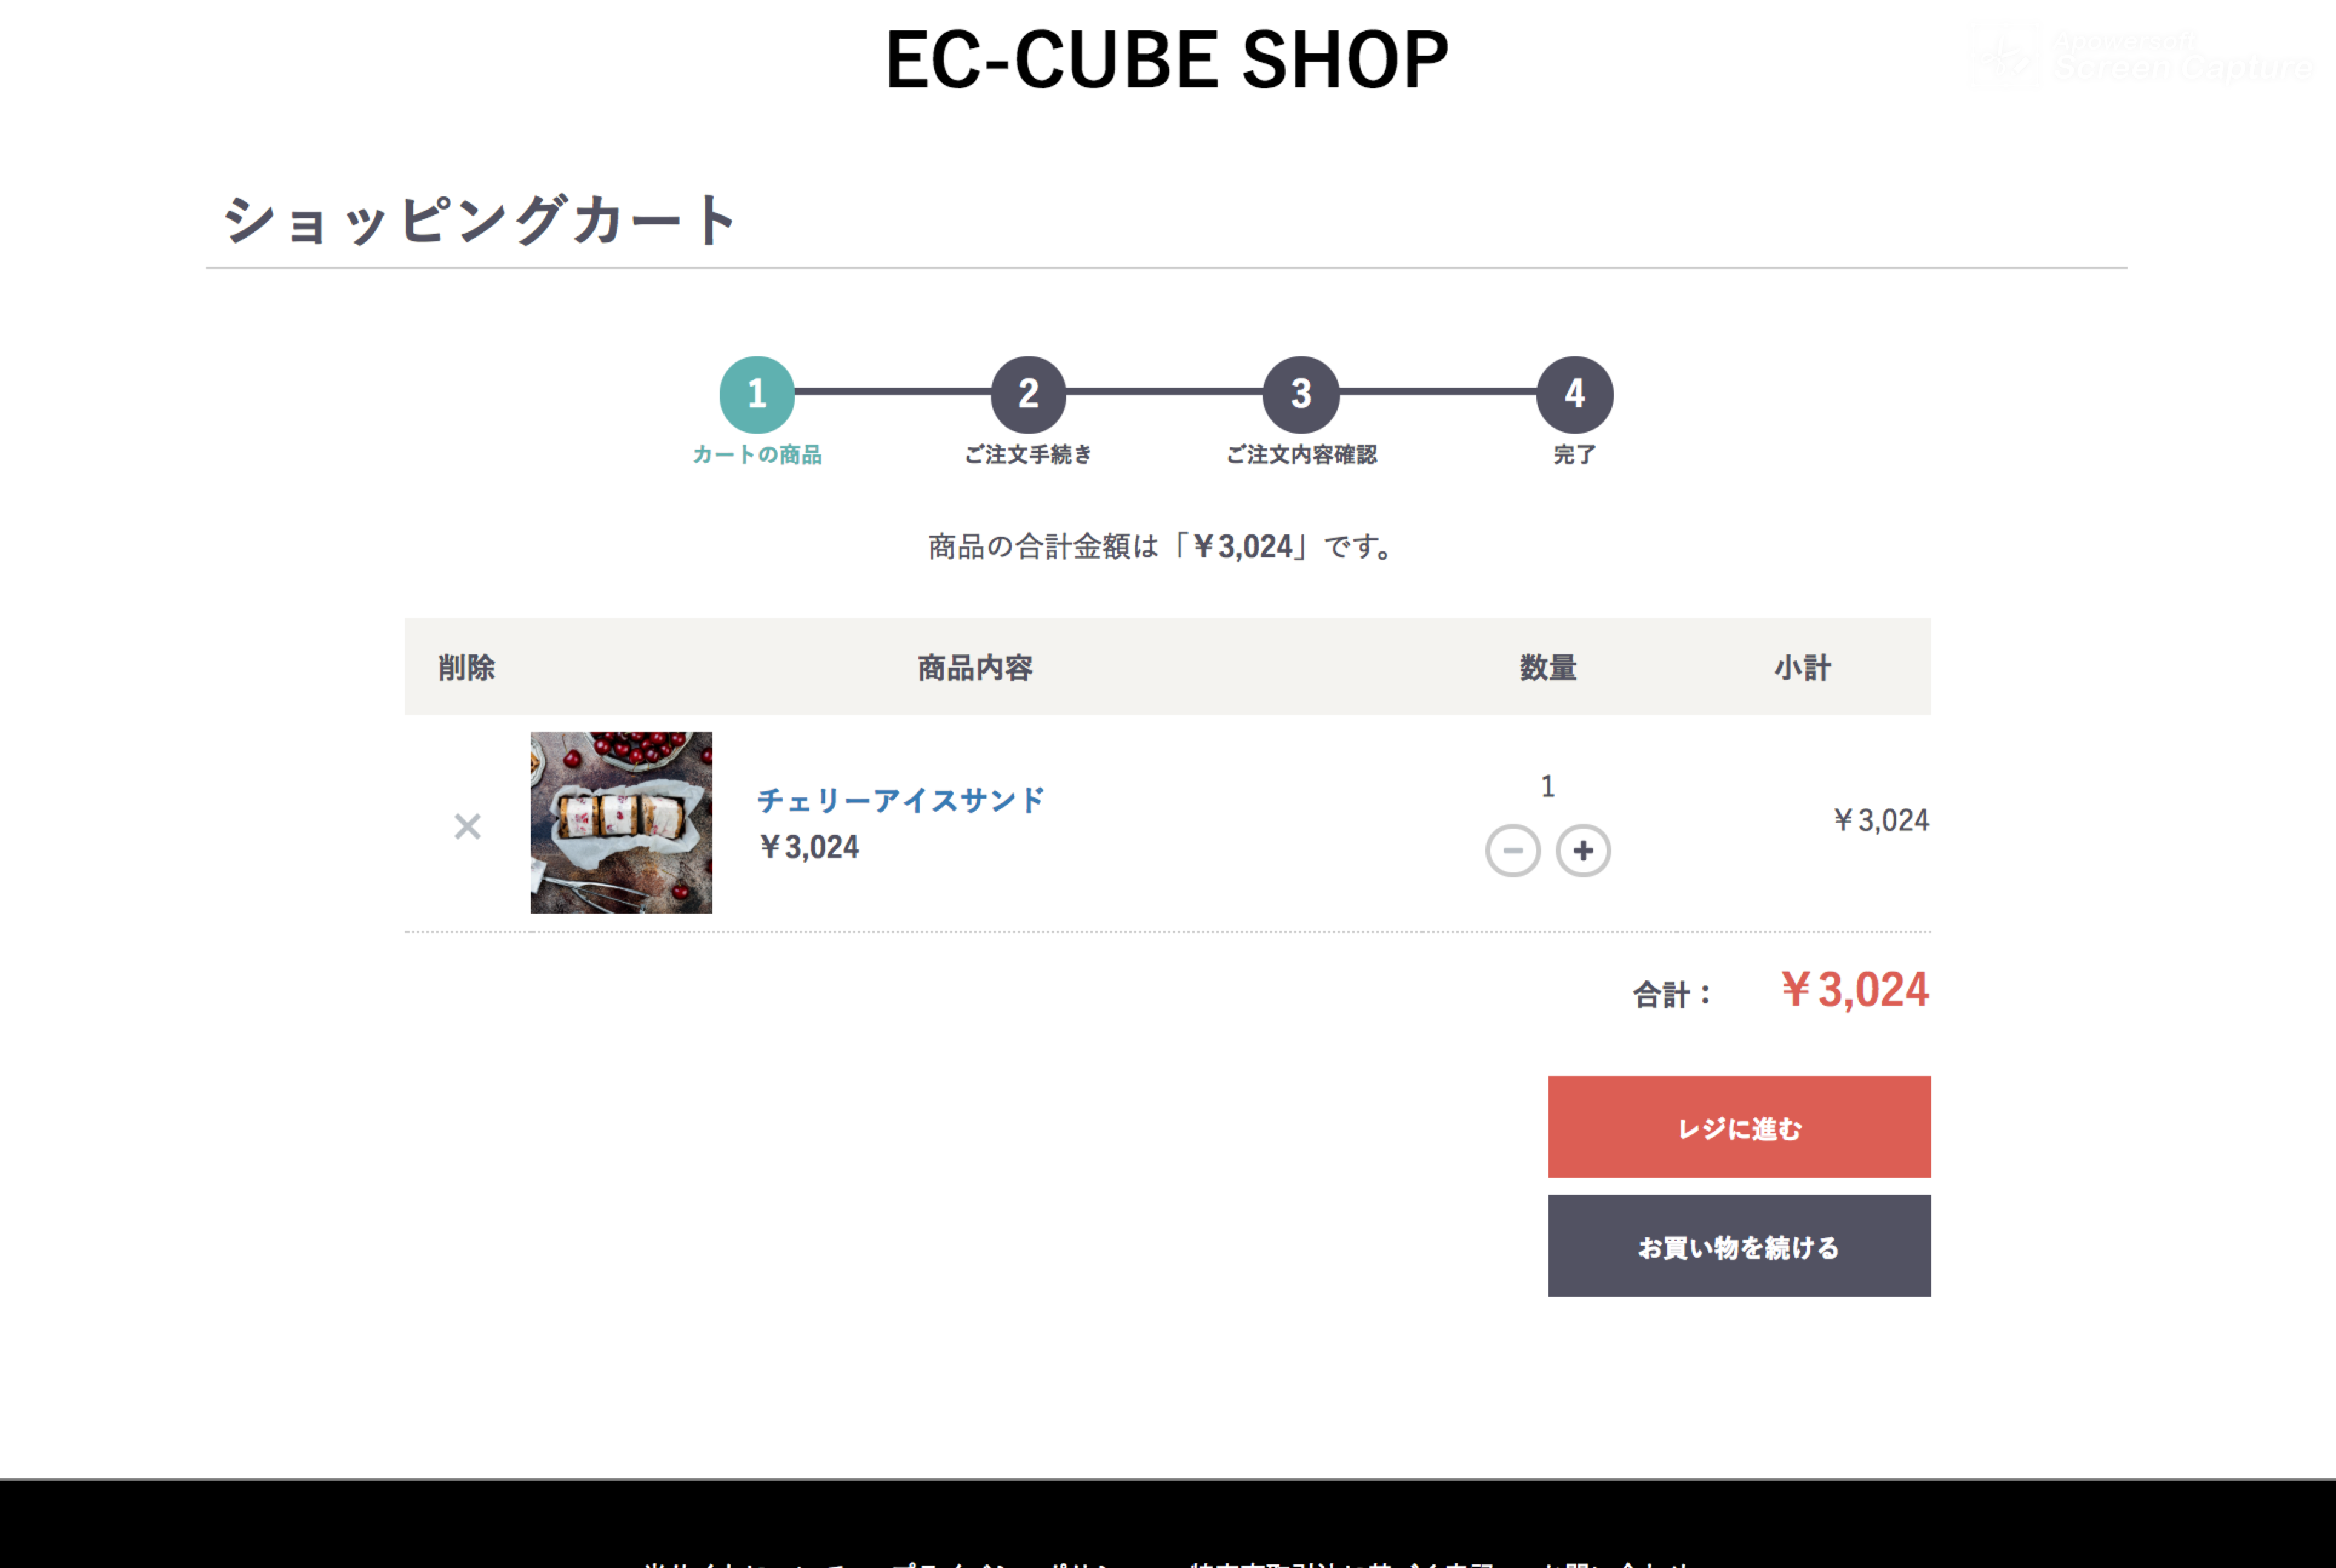
そこで、今回は「カート以降用レイアウト」というグループを作成し、
カート画面以降をシンプルな画面にしたいと思います。

Before->After

[Before]
image.png

[After]
image.png

設定方法

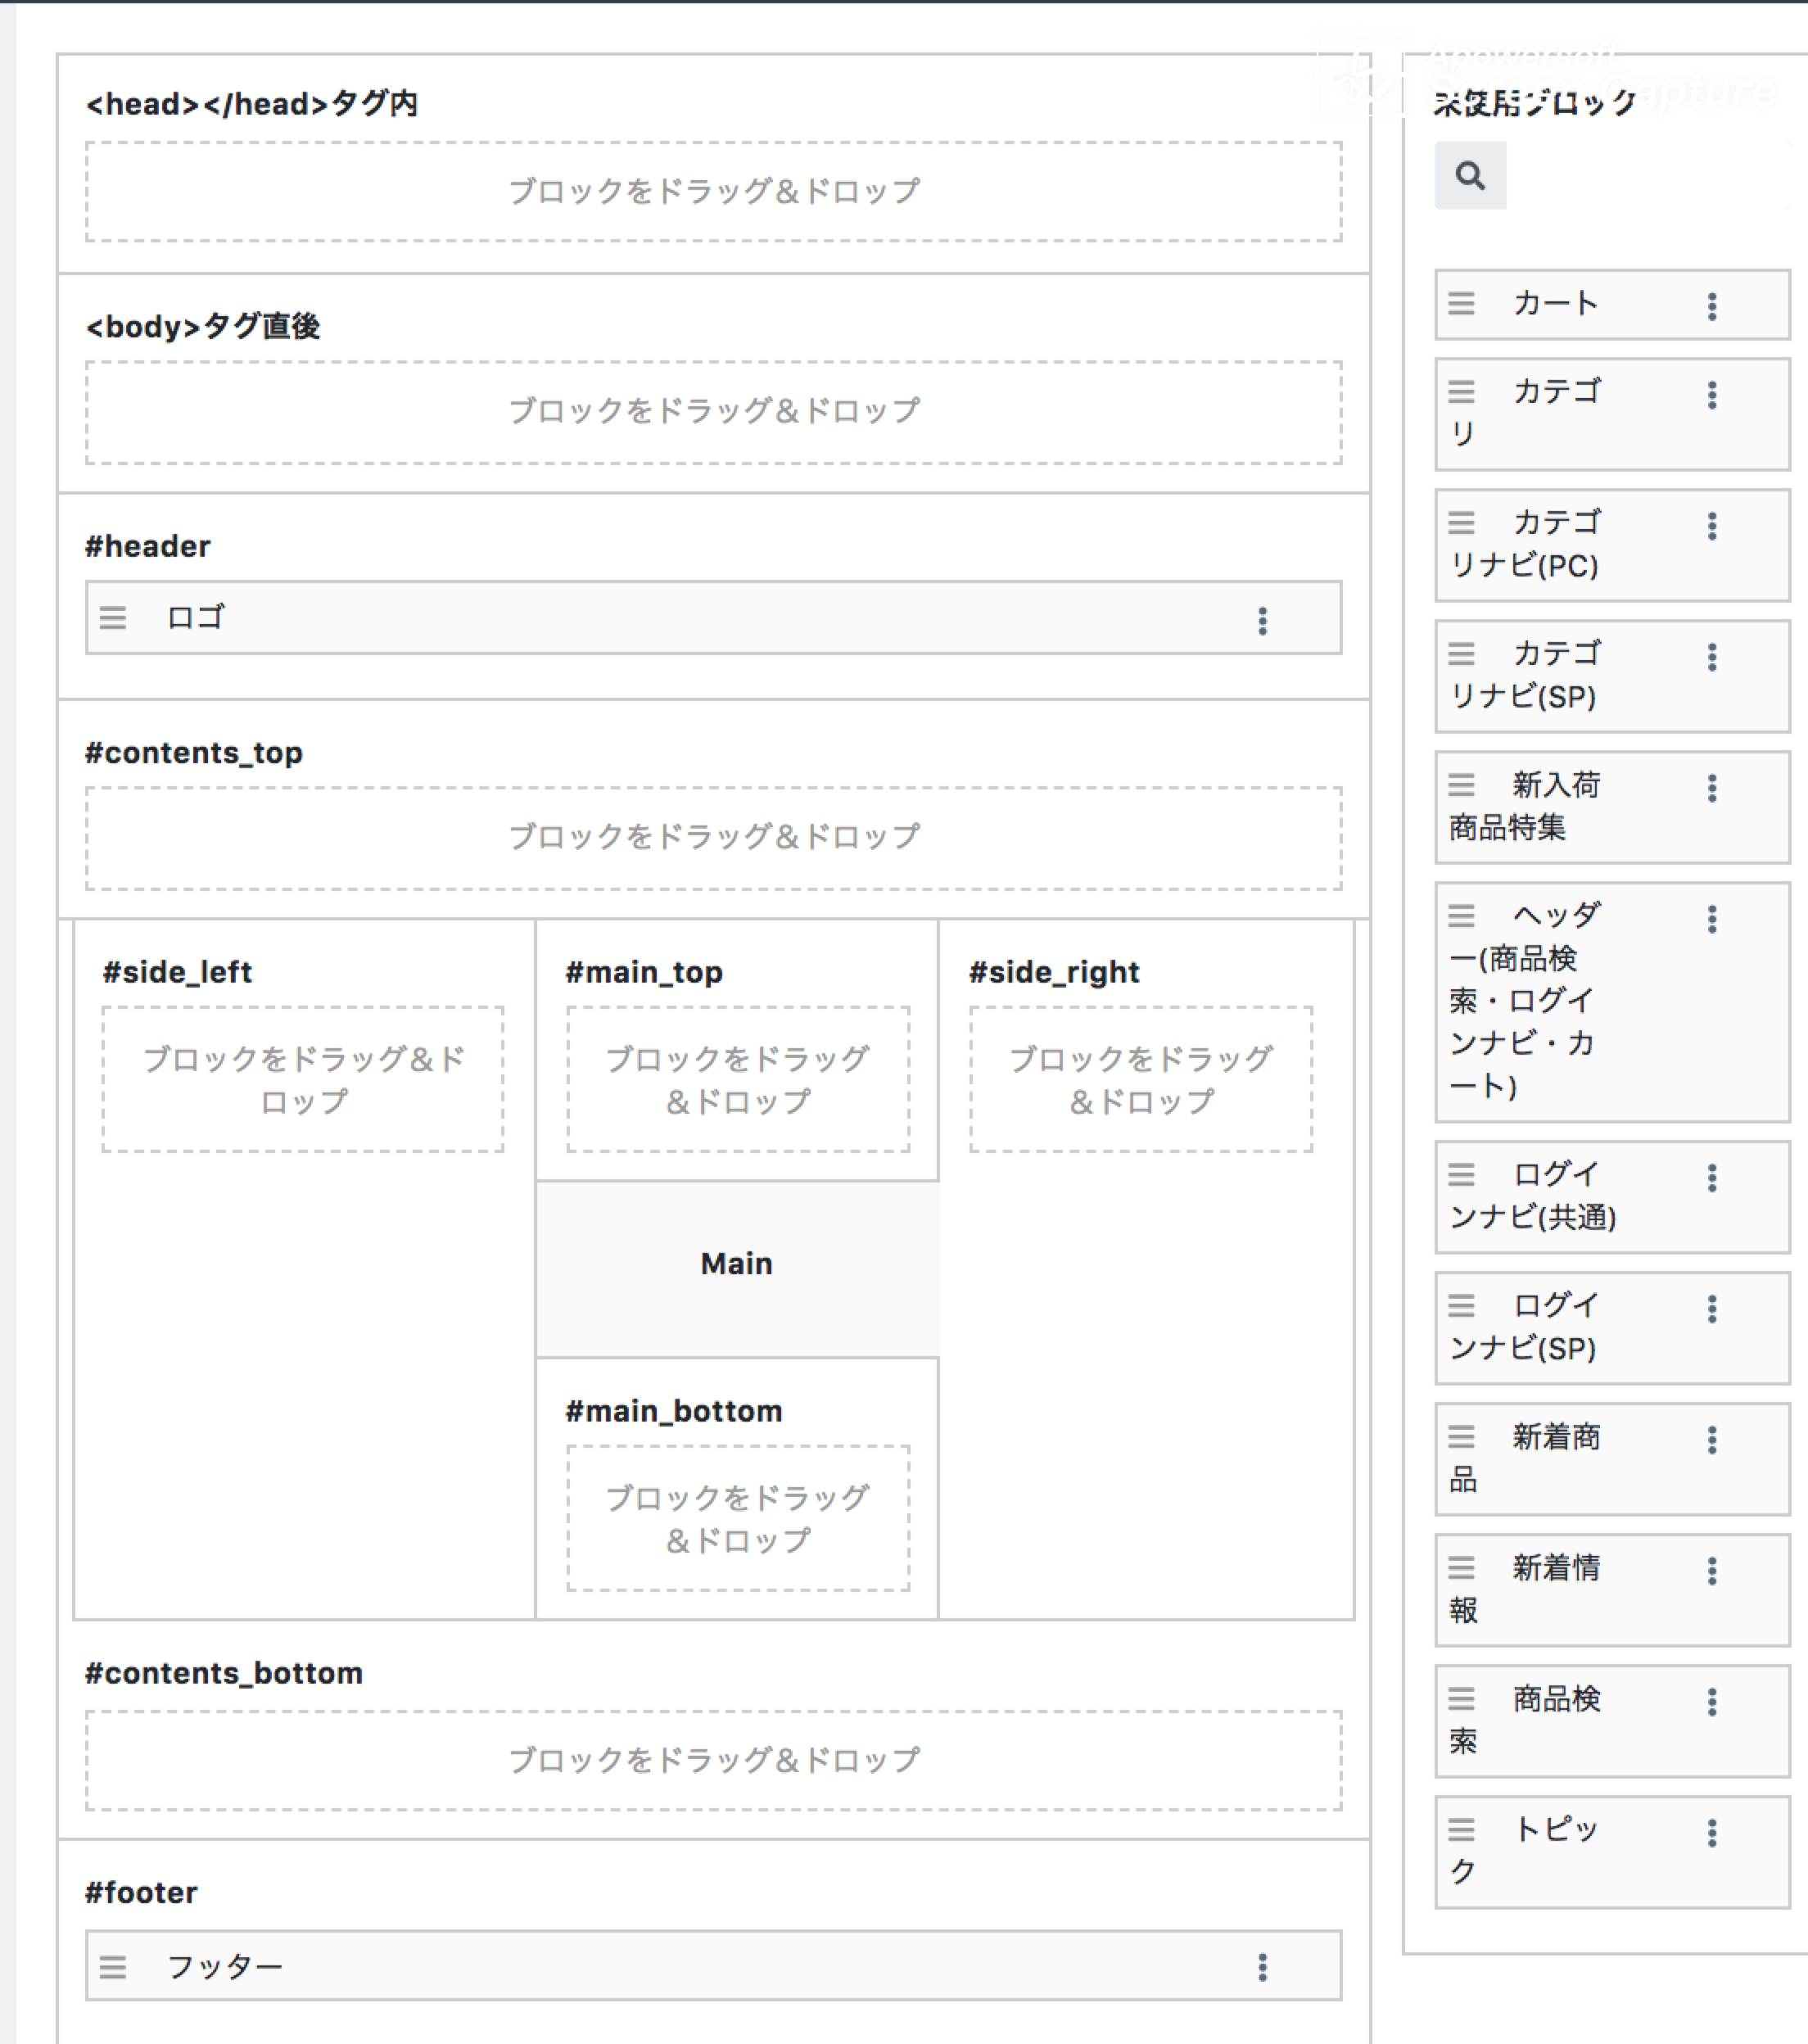
レイアウトグループの作成

以下のように、表示したいブロックのみを設定します。
image.png

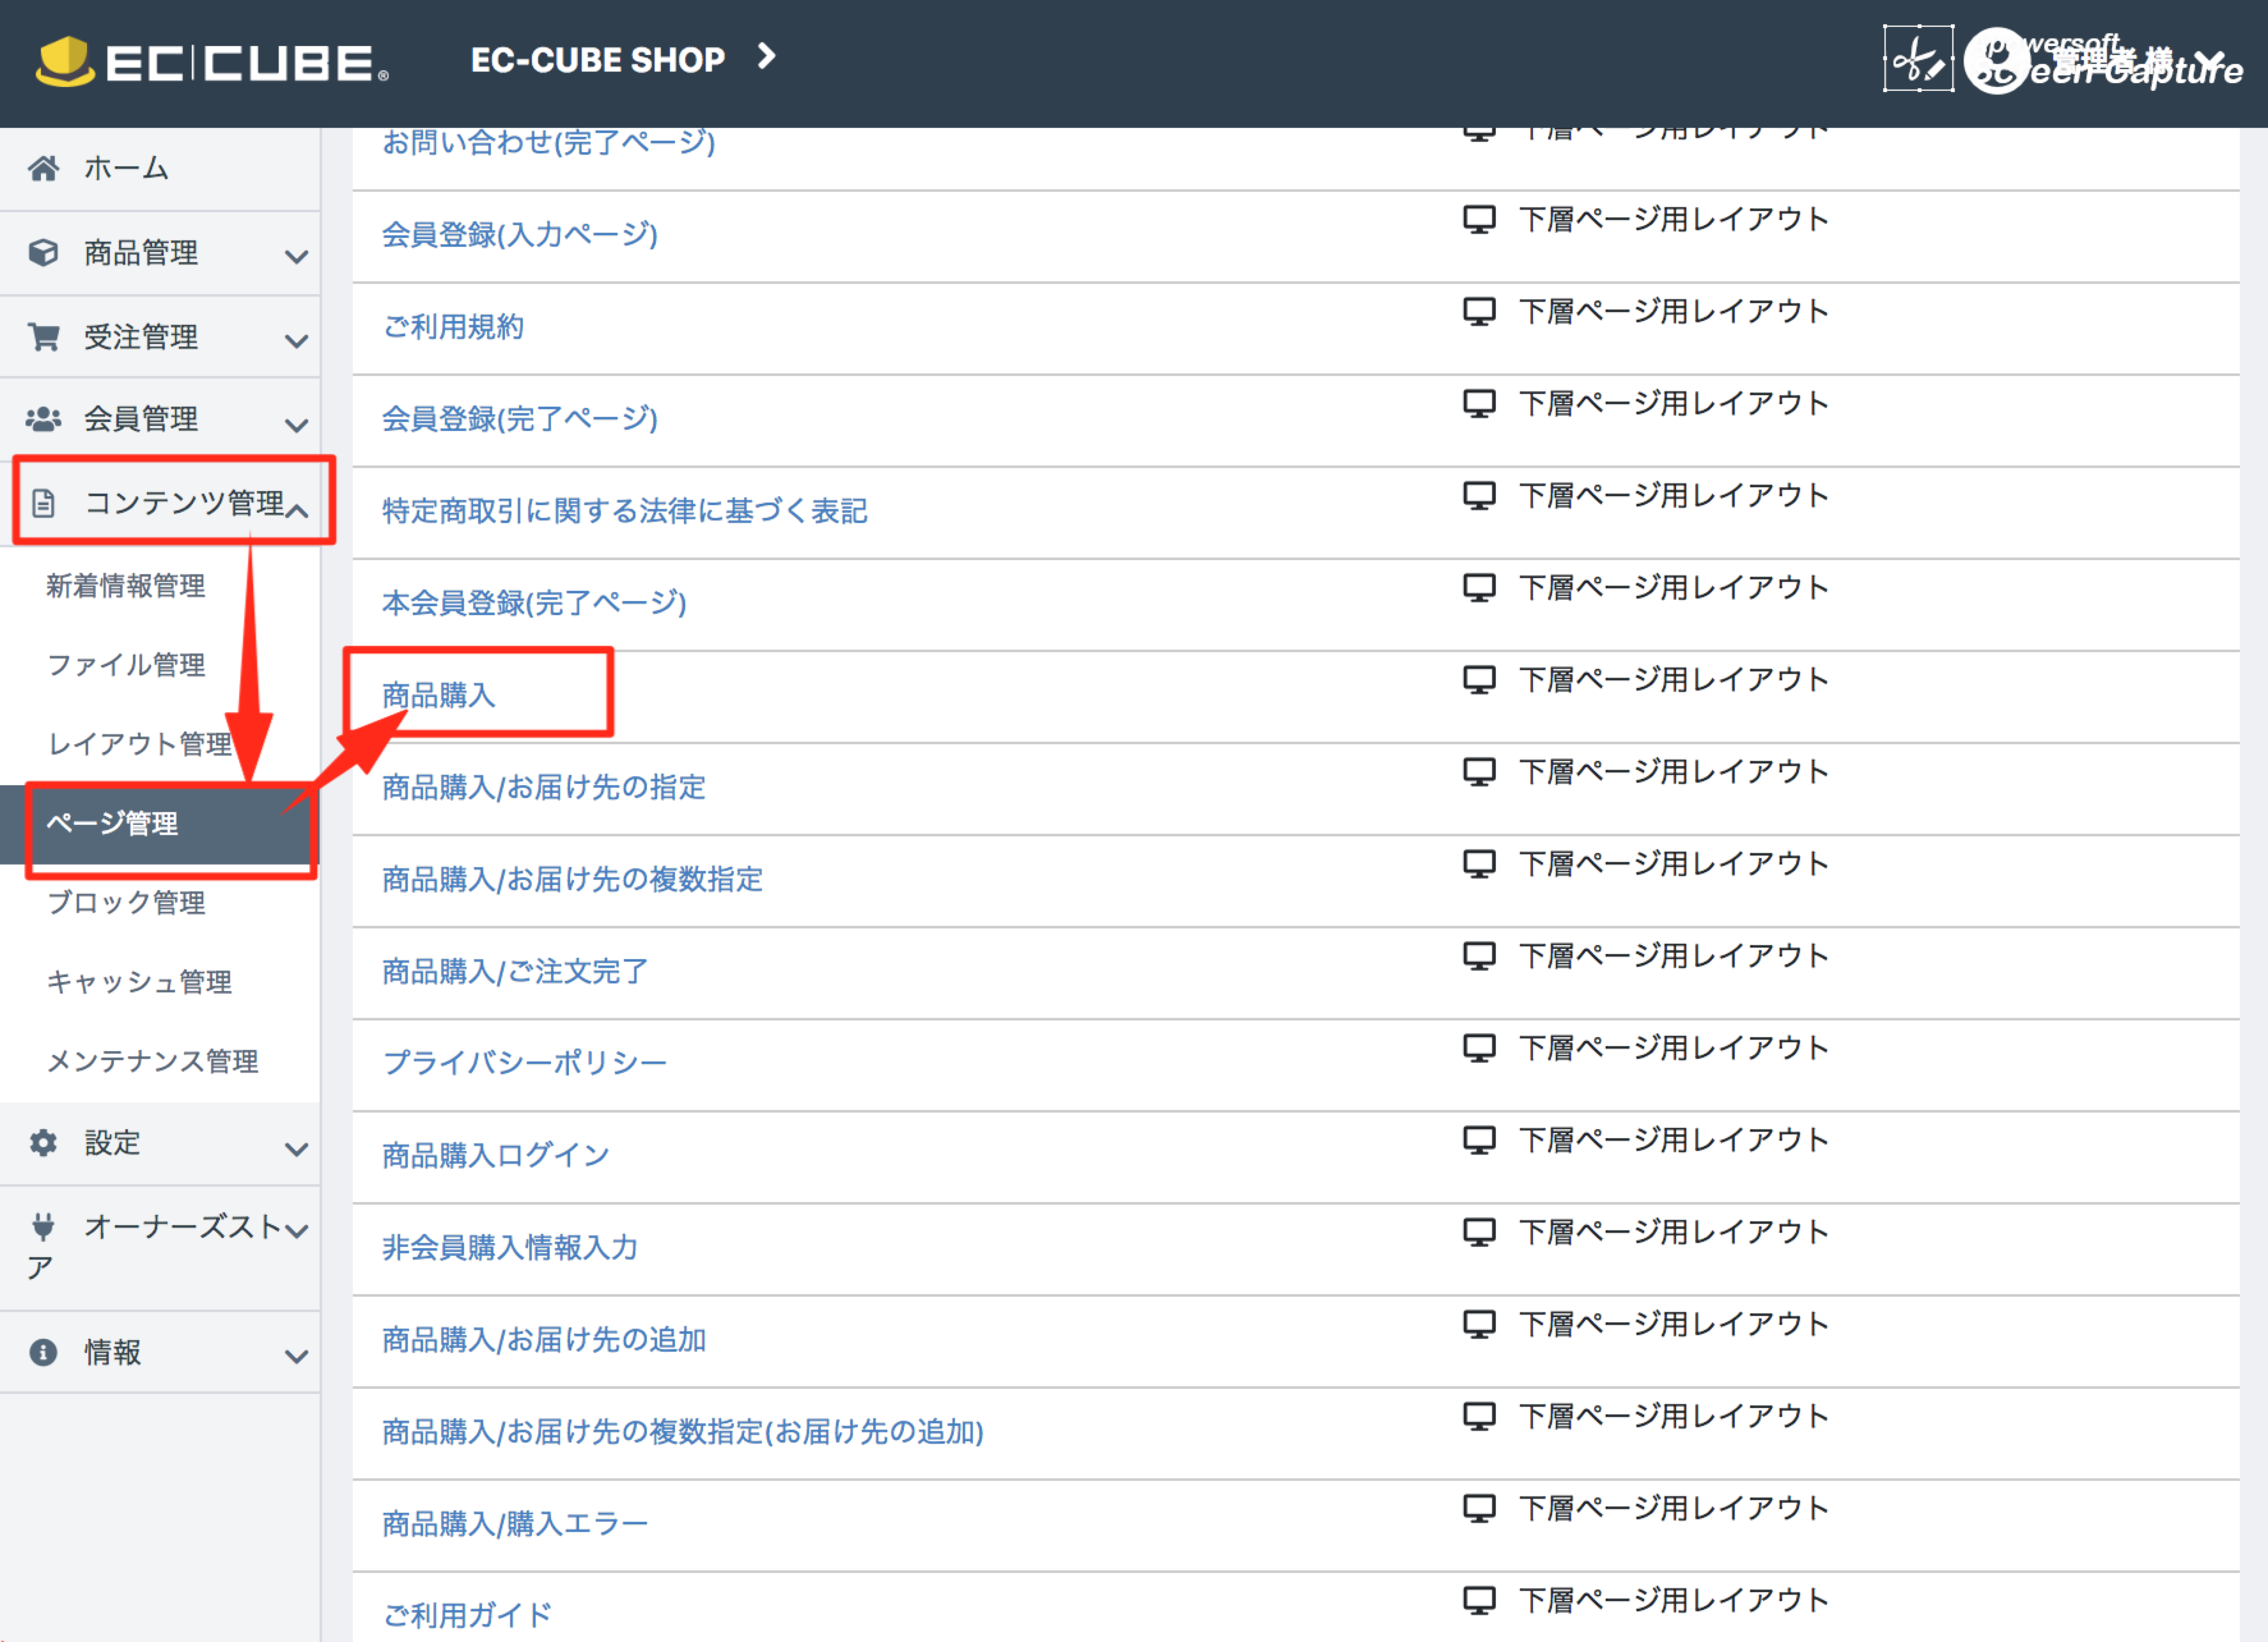
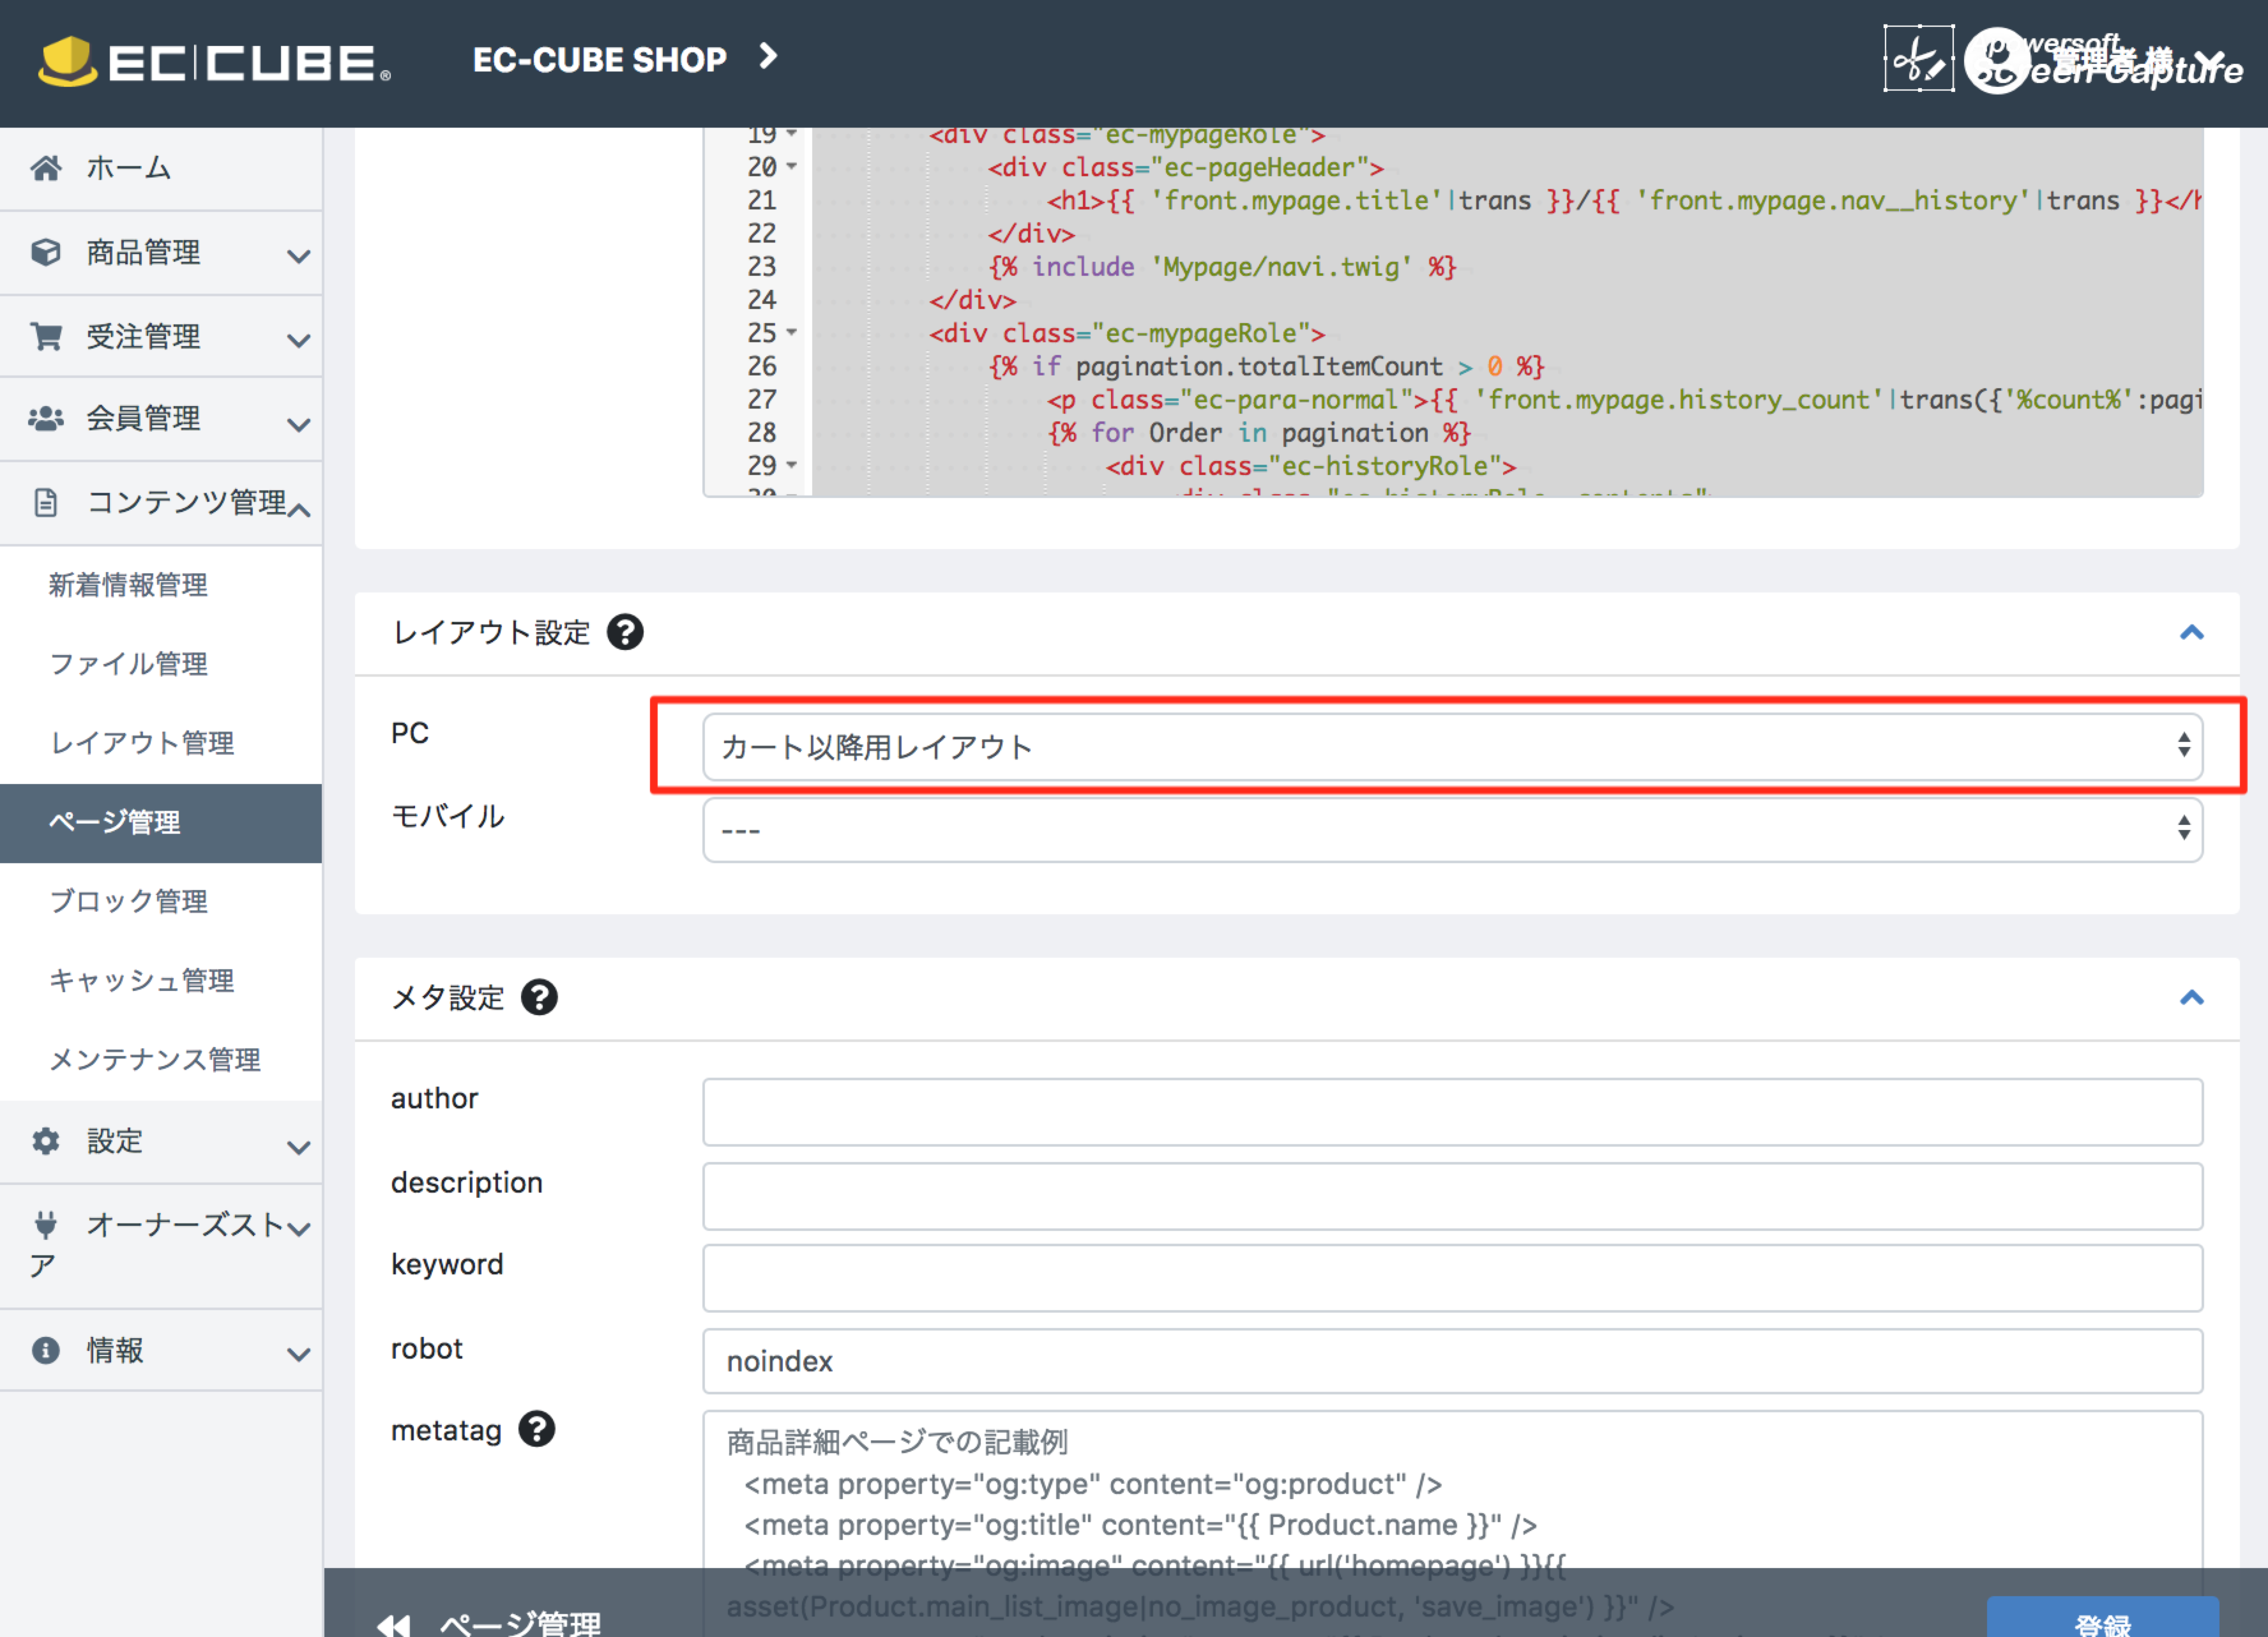
カート以降のページのレイアウト設定

コンテンツ管理 -> ページ管理
-> グループに設定したいページ名のリンクを押下
-> レイアウト設定を「カート以降用レイアウト」に変更する。

image.png

image.png

参考情報

http://doc4.ec-cube.net/design_layout
https://github.com/EC-CUBE/ec-cube/issues/2289#issuecomment-296136541
4
1
0

Register as a new user and use Qiita more conveniently

  1. You get articles that match your needs
  2. You can efficiently read back useful information
  3. You can use dark theme
What you can do with signing up
4
1

Delete article

Deleted articles cannot be recovered.

Draft of this article would be also deleted.

Are you sure you want to delete this article?