目標
- ローカルPC上でDockerを用いたpostgresqlのコンテナを作成する
- 作成したpostgresqlにCLIでログインする
- 構築したdockerdbで他の場所で運用中の既存dbを複製する
- adminerで作成したDBを操作する
- ER図を生成する
環境
- Windows10 wsl2 Ubuntu
- Docker version 20.10.17, build 100c701
前提
本記事はDockerの環境構築の手順は割愛します。
作業
ローカルPC上でDockerを用いたpostgresqlのコンテナを作成する
-
YMLファイルを作成
docker-compose.ymlversion: '3.1' services: db: image: postgres:14 restart: always environment: POSTGRES_PASSWORD: test volumes: - ./postgres14:/var/lib/postgresql/data ports: - 5432:5432 adminer: image: adminer restart: always ports: - 8080:8080参考:
-
イメージ構築
1で作成したdocker-compose.ymlのあるディレクトリで実行docker-compose build -
コンテナ構築
docker-compose up -d
作成したpostgresqlにCLIでログインする
- 実行中のpostgresのコンテナIDを確認
docker ps - コンテナに入る
docker exec -it [コンテナID] bash - postgresへログイン
psql -U postgres
構築したdockerdbで他の場所で運用中の既存dbを複製する
-
下記サイトを参考に複製に必要なファイルを用意 (dump)
※dump作業は時にサーバーに過剰な負荷をかけるので、事前に容量を確認した方が良い。
確認方法は、本記下部の「利用するかもしれないpostgresテクニック」に記載。
PostgreSQLのbackup, restore方法まとめpg_dump -Ft database名 > backup_file名 -
用意した(dump)ファイルをローカルからdockerコンテナ内に移動
dockerコンテナにファイルを転送するdocker cp [dumpしたファイルパス] [コンテナid or コンテナ名]: [コンテナ内のファイル名を含めたフルパス] -
dockerコンテナ内で下記コマンドを実行して、複製(リストア)する。複製先のDBが存在していない場合は、作成してから実行してください。
psql -d [複製先DB名] -f [dumpで作成したバックアップファイル] -U postgres
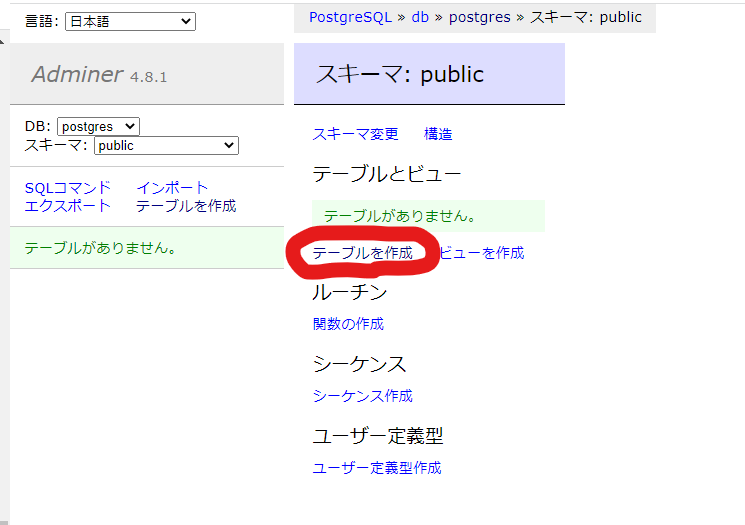
adminerで作成したDBを操作する
-
ブラウザで下記URLにアクセス
http://localhost:8080/ -
下記の内容で作製したDBへログイン
- データベース種類: postgres
- サーバ : db
- ユーザ名: postgres
- パスワード: test
- データベース: postgres
-
adminerより適当なテーブルを作成
-
postgresへログインし、作製できている確認
- postgres上で下記コマンドを実行
postgres=# \dt
        List of relations
 Schema | Name | Type  |  Owner
--------+------+-------+----------
 public | user | table | postgres
(1 row)
- postgres上で下記コマンドを実行
ER図を生成する(後日追記)
- schemaspy.propertiesをホームディレクトリ直下に作成
# type of dtabase. Run with -dbhelp for details schemaspy.t=pgsql # optional path to alternative jdbc drivers. schemaspy.dp=path/to/drivers # database properties: host, port number, name user, password schemaspy.host=host.docker.internal schemaspy.port=5432 schemaspy.db=db_name schemaspy.u=postgres schemaspy.p=test # output dir to save generated files schemaspy.o=output - 下記作成コマンドを実行
docker run -v "$PWD/output:/output" -v "$PWD/schemaspy.properties:/schemaspy.properties" schemaspy/schemaspy:latest -debug
- エラー事例
- schemaspy.hostを最初
schemaspy.host=localhostでやったが失敗したので注意。
https://qiita.com/skobaken/items/03a8b9d0e443745862ac - 下記のように指定したフォルダが作成できなかった
上記のときは下記を実行
ERROR - IOException java.io.IOException: Unable to create directory /output/tables- rootに変更
sudo su - 対象のフォルダの権限を変更
chmod 777 - 再度作成コマンドを実行
- rootに変更
- schemaspy.hostを最初
利用するかもしれないpostgresテクニック
DB容量の確認の仕方
下記SQLをDBで実施することで、DBごとの使用容量を確認できる。
~=#SELECT datname, pg_size_pretty(pg_database_size(datname)) FROM pg_database;
コンテナ内でDBを複製する場合、下記をサーバーで実行
root@[コンテナid]:/tmp# pg_dump -Ft [複製元db名] -U postgres | pg_restore -d [複製先db名] -U postgres
※rootではpg_dumpが実行できないので、必ずpostgresアカウントを利用