前回の続きです。
4、ログイン画面の実装。
・今回はログイン画面と実装します。ただ認証機能は実装しないので、ログイン画面からボタンを押せばフォームの内容に限らず画面を遷移させます。
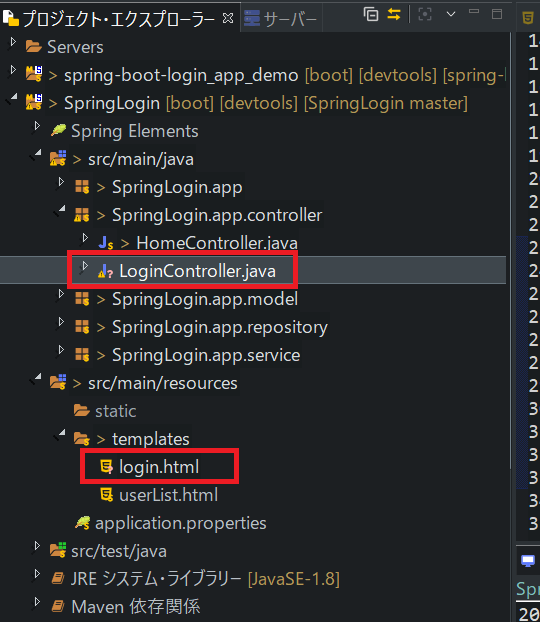
・ファイルの構成イメージは以下になります。コメントをズラーと書いてしまったので不要な場合は消して下さい。
・コードは以下になります。
SpringLogin.app.controller/LoginController.java
package SpringLogin.app.controller;

import org.springframework.beans.factory.annotation.Autowired;
import org.springframework.stereotype.Controller;
import org.springframework.ui.Model;
import org.springframework.web.bind.annotation.GetMapping;
import org.springframework.web.bind.annotation.ModelAttribute;
import org.springframework.web.bind.annotation.PostMapping;

//import SpringLogin.app.service.UserService;

@Controller
public class LoginController {

//    @Autowired
//    UserService userService;

    @GetMapping("/login")
    public String getSignUp(Model model) {
        return "login";
    }

    //FormのSubmitを押すとPostメソッドがリクエストされます。()に書かれたURLのリクエストを受け取るとこのメソッドが発動します。
    @PostMapping("/login")
    public String postSignUp(Model model) {
    	/*
    	今回はリダイレクトを使います。画面遷移などファイル間をまたぐ場合はリダイレクト使います。
    	イメージ的にはGetメソッドを呼び出していると考えていいでしょう。
    	試しにリダイレクトせず通常のフォワード(return "xxx";)とすると画面自体は表示されますがURLが変わりません。
    	こうすると、遷移先で受け取りたいデータなどが受け取れないことがあるので、リダイレクトを使用したほうが良いでしょう。
    	*/
        return "redirect:/userList";
    }

}
:templates/login.html

<!DOCTYPE html>
<html xmlns:th="http://www.thymeleaf.org">
<head>
    <meta charset="UTF-8"></meta>
</head>
<body>
    <!-- コンテンツ部分 -->
    <div>
    	<!-- method="post"にすることでpostリクエストを発行することができます。th:actionでPostを処理するメソッドをURLで指定します。 -->
        <form method="post" th:action="@{/login}">
	        <div>
	        	<label>Username:</label>
	        	<!-- 今回の実装では使いませんがname属性を指定してあります。後で認証の時に使います。 -->
	        	<input type="text" name="username" />
	        </div>
	        <div>
	        	<label>Password:</label>
	        	<input type="password" name="password" />
	        </div>

    		<button type="submit">login</button>
        </form>
    </div>
</body>
</html>
・コードが書けたら、ブラウザでアプリを確認しましょう。
URLが変わります→http://localhost:8080/login
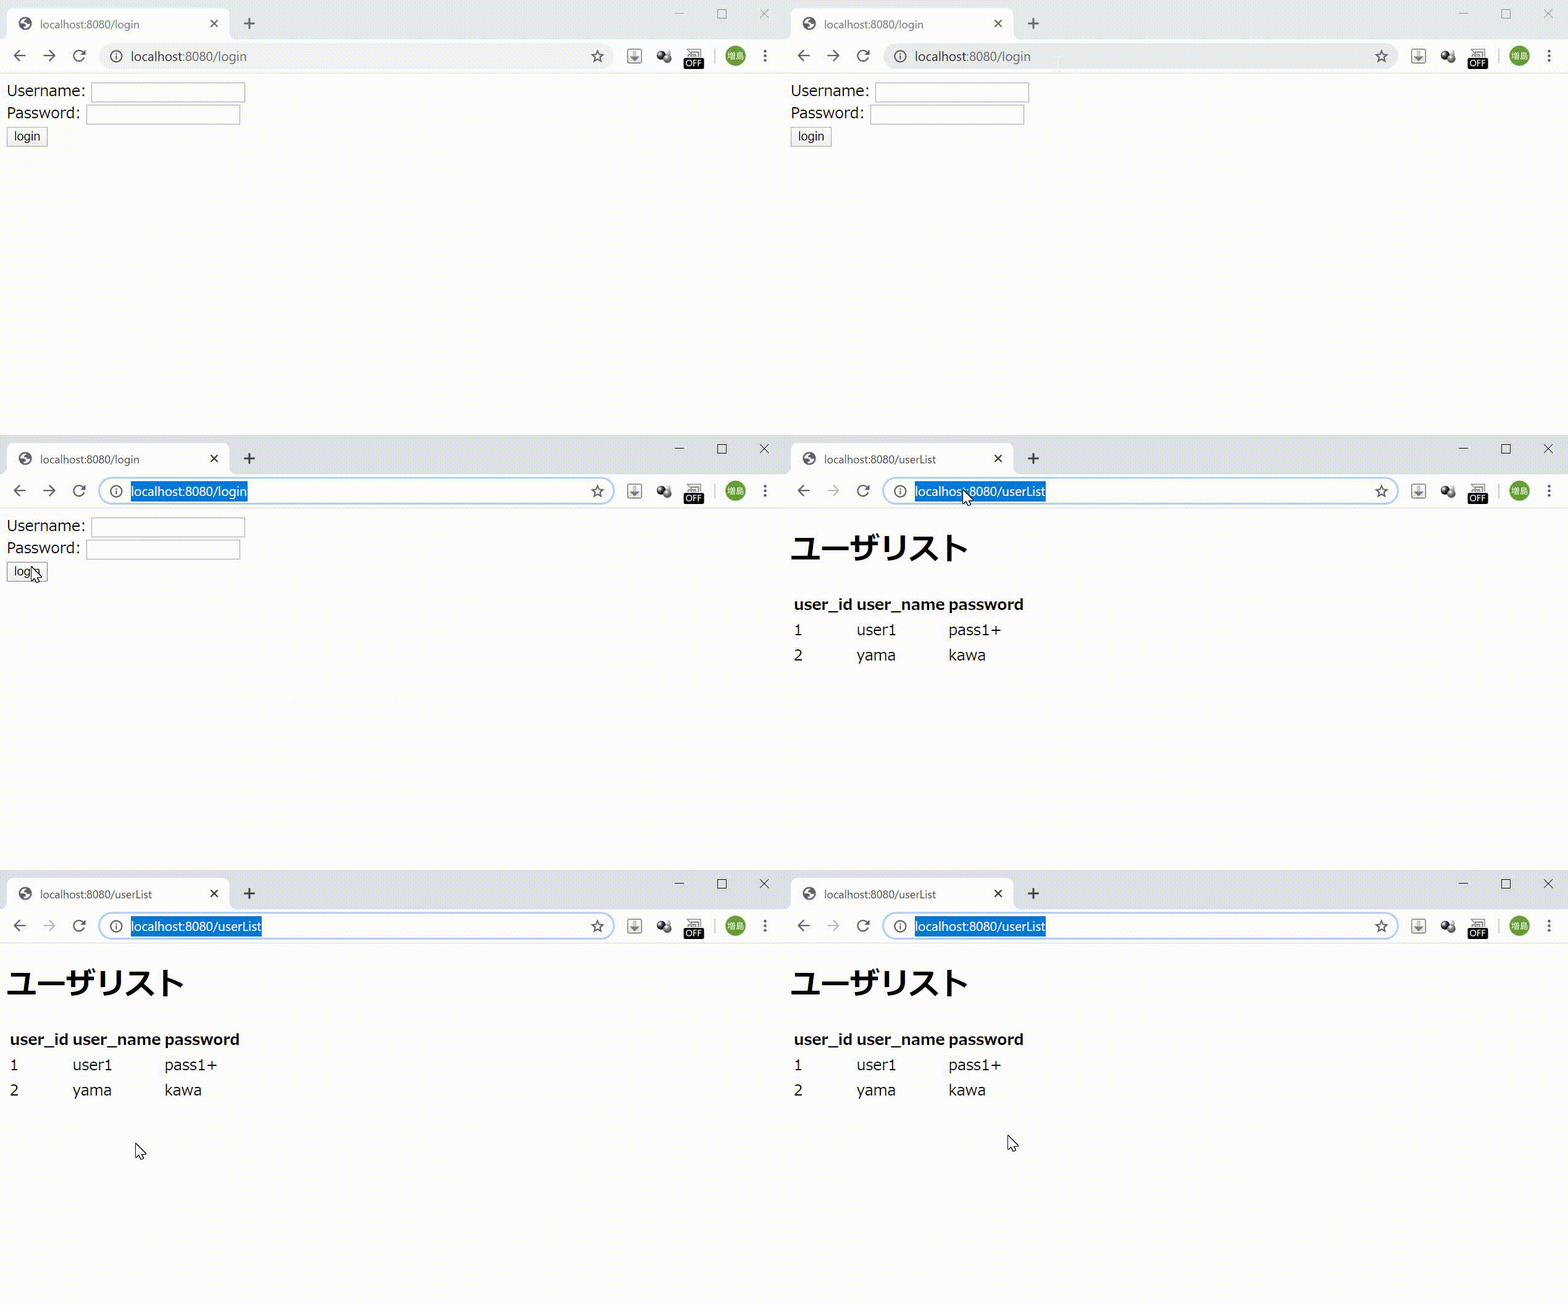
ページが表示されたら、Loginボタンを押下してuserListに遷移することを確認します。この時URLが変わっていることを確認しましょう。
・動画の様に遷移できていればOKです!
次からはこの記事のメインになります。ここもボリュームが大きくなりそうなのでいったん切ります。続きはこちら。

