BigQuery と Cloud DataFlow でデータ分析基盤を作る練習(準備編) のつづき
3. Cloud Dataflow を使って加工
前回 Java と Python 使わずに Scio 使うと書きましたが
まずは練習のために Java と Python を使ってみました。
今回は Scio まで行きませんでした。
やりたいことは
素のデータが入っている BigQuery から、加工したデータを BigQuery にいれる
です。
環境は
Python 2.7.13 + Apache Beam 2.5.0
Java 1.8.0_25 + Apache Beam 2.4.0
ググっていると Cloud Dataflow 1系の記事が大量に引っかかるのでかなり苦労しました。
公式ドキュメントすら 1系がかなり引っかかってきます。
Apache Beam を頑張って読むのが一番よかった気がします。
また GCP の公式ドキュメントも日本語と英語でバージョンが違い、日本語が古いことが多いので
以下のChrome拡張いれると幸せになれると思います。
GCP outdated docs checker
python でデータ加工
公式ドキュメント
まずは公式ドキュメントのサンプル wordcount をやることで、流れがわかると思います。
前回 BigQuery に入れた素のツイートデータから
ユーザー情報を分解して、ユーザーID、ユーザー名、スクリーンネームを出力します。
以下が実行プログラムです。
tweet.SiroTalk テーブルが入力、tweet.SiroTalkPython3 テーブルが出力になります。
from __future__ import absolute_import

import argparse
import logging
import re

from past.builtins import unicode

import apache_beam as beam
from apache_beam.io import ReadFromText
from apache_beam.io import WriteToText
from apache_beam.options.pipeline_options import PipelineOptions
from apache_beam.options.pipeline_options import SetupOptions

import json
from datetime import datetime


def parse_user(element):
  tweet_id = element['tweet_id']
  ct = element['ct']
  full_text = element['full_text']
  user = element['user']

  user_json = json.loads(user)
  user_id = user_json['id']
  user_screen_name = user_json['screen_name']
  user_name = user_json['name']

  create_time = datetime.fromtimestamp(ct).strftime('%Y-%m-%d %H:%M:%S')

  return {
    'tweet_id': tweet_id,
    'create_time': create_time,
    'full_text': full_text,
    'user_id': user_id,
    'user_screen_name': user_screen_name,
    'user_name': user_name
  }


def run(argv=None):
  parser = argparse.ArgumentParser()
  known_args, pipeline_args = parser.parse_known_args(argv)
  pipeline_args.extend([
      # '--runner=DataflowRunner',
      '--runner=DirectRunner',
      '--project=<project-id>',
      '--staging_location=<bucket_path>/staging',
      '--temp_location=<bucket_path>/temp',
      '--job_name=<job_name>',
  ])

  pipeline_options = PipelineOptions(pipeline_args)
  pipeline_options.view_as(SetupOptions).save_main_session = True
  with beam.Pipeline(options=pipeline_options) as p:
    query = 'SELECT tweet_id, ct, full_text, user FROM tweet.SiroTalk'
    (p | 'read' >> beam.io.Read(beam.io.BigQuerySource(project='<project_name>', use_standard_sql=False, query=query))
        | 'modify' >> beam.Map(parse_user)
        | 'write' >> beam.io.Write(beam.io.BigQuerySink(
        'tweet.SiroTalkPython',
        schema='tweet_id:INTEGER, create_time:DATETIME, full_text:STRING, user_id:INTEGER, user_screen_name:STRING, user_name:STRING',
        create_disposition=beam.io.BigQueryDisposition.CREATE_IF_NEEDED,
        write_disposition=beam.io.BigQueryDisposition.WRITE_TRUNCATE))
    )


if __name__ == '__main__':
  logging.getLogger().setLevel(logging.INFO)
  run()
$ python parseuser.py
本当はパラメータつけて実行させたほうが汎用的になりますが、今回は練習のためハードコーディングしました。
データの加工をしているのが parse_user(element): で
element には、テーブルの1行が入ってきます。
ここで出力したい形を構成し、返します。
python の場合、BigQuery 出力で partitioned table の設定方法が見つからずわかりませんでした。
これができないとクエリ実行時のお金のかかり方が結構変わってしまうので困りますね。
あと、python2 しか対応してないのも。
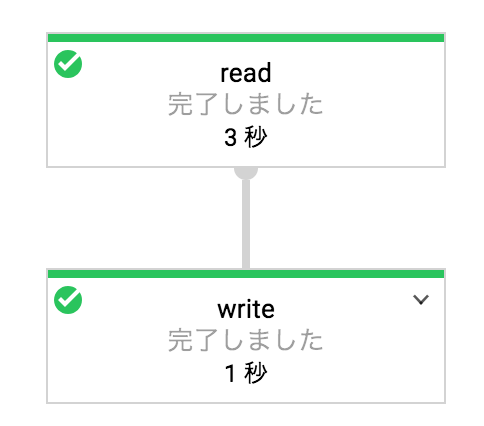
加工後のテーブル

Java でデータ加工
Java も同じように、サンプルからやるのがわかりやすいです。
特に Java は、python みたいに 1ファイルだけでできたりしないので
サンプルの first-dataflow をベースに作り始めるのがやりやすいかもしれません。
サンプルの WordCount.java に手を加えて作っていきました。
package com.example;

import org.apache.beam.sdk.Pipeline;
import org.apache.beam.sdk.options.PipelineOptionsFactory;

import org.apache.beam.sdk.transforms.DoFn;
import org.apache.beam.sdk.transforms.ParDo;
import org.apache.beam.sdk.values.PCollection;

import com.fasterxml.jackson.core.type.TypeReference;
import com.fasterxml.jackson.databind.ObjectMapper;
import com.google.api.services.bigquery.model.*;
import org.apache.beam.sdk.extensions.gcp.options.GcpOptions;
import org.apache.beam.sdk.io.gcp.bigquery.BigQueryIO;

import java.io.IOException;
import java.nio.charset.Charset;
import java.nio.file.Files;
import java.nio.file.Paths;
import java.time.Instant;
import java.time.LocalDateTime;
import java.time.ZoneId;
import java.time.format.DateTimeFormatter;
import java.util.List;

import com.google.api.services.bigquery.model.TableSchema;
import org.apache.beam.sdk.options.Default;
import org.apache.beam.sdk.options.Description;
import org.json.JSONObject;

public class ParseUser {
    public interface ParseUserPipelineOptions extends GcpOptions {
//        @Description("BigQuery dataset name")
//        @Default.String("tweet")
//        String getDataset();
//        void setDataset(String dataset);
//
//        @Description("BigQuery input table name")
//        @Default.String("SiroTalkTest2")
//        String getInputTable();
//        void setInputTable(String table);

        @Description("BigQuery table schema file")
        @Default.String("schema.json")
        String getSchemaFile();
        void setSchemaFile(String schemaFile);

//        @Description("BigQuery output table name")
//        @Default.String("SiroTalkJava")
//        String getOutputTable();
//        void setOutputTable(String outputTable);
    }

    public static class ParseUserFn extends DoFn<TableRow, TableRow> {
        @ProcessElement
        public void processElement(ProcessContext c) {
            TableRow tweet = c.element();
            Long tweetId = Long.parseLong(tweet.get("tweet_id").toString());
            Long ct = Long.parseLong(tweet.get("ct").toString());
            String fullText = tweet.get("full_text").toString();
            String user = tweet.get("user").toString();

            Instant instant = Instant.ofEpochSecond(ct);
            String tweetDateString = DateTimeFormatter.ofPattern("yyyy-MM-dd HH:mm:ss").format(LocalDateTime.ofInstant(instant, ZoneId.of("Asia/Tokyo")));

            JSONObject userJson = new JSONObject(user);
            Long userId = Long.parseLong(userJson.get("id").toString());
            String screenName = userJson.get("screen_name").toString();
            String name = userJson.get("name").toString();

            TableRow outputRow = new TableRow()
                    .set("tweet_id", tweetId)
                    .set("ct", ct)
                    .set("create_time", tweetDateString)
                    .set("full_text", fullText)
                    .set("user_id", userId)
                    .set("user_screen_name", screenName)
                    .set("user_name", name);
            c.output(outputRow);
        }
    }

    public static void main(String[] args) throws IOException {
        final ParseUserPipelineOptions options = PipelineOptionsFactory.fromArgs(args).withValidation().as(ParseUserPipelineOptions.class);

        final String tableSchemaJson = new String(Files.readAllBytes(Paths.get(options.getSchemaFile())), Charset.forName("UTF-8"));
        final TableSchema tableSchema = new TableSchema().setFields(new ObjectMapper().reader().forType(new TypeReference<List<TableFieldSchema>>() {}).readValue(tableSchemaJson));

        final Pipeline p = Pipeline.create(options);
        PCollection<TableRow> inputRows = p.apply("ReadFromBQ", BigQueryIO.readTableRows()
                .fromQuery("SELECT tweet_id, ct, full_text, user FROM [<project_name>:tweet.SiroTalk]"));
        PCollection<TableRow> outputRows = inputRows.apply(ParDo.of(new ParseUserFn()));

        outputRows.apply("WriteToBQ", BigQueryIO.writeTableRows()
                .to("<project_name>:tweet.SiroTalkJava")
                .withSchema(tableSchema)
                .withTimePartitioning(new TimePartitioning().setField("ct"))
                .withCreateDisposition(BigQueryIO.Write.CreateDisposition.CREATE_IF_NEEDED)
                .withWriteDisposition(BigQueryIO.Write.WriteDisposition.WRITE_EMPTY));
        p.run().waitUntilFinish();
    }
}
[
  {
    "name": "tweet_id",
    "type": "INTEGER"
  },
  {
    "name": "ct",
    "type": "TIMESTAMP"
  },
  {
    "name": "create_time",
    "type": "DATETIME"
  },
  {
    "name": "full_text",
    "type": "STRING"
  },
  {
    "name": "user_id",
    "type": "INTEGER"
  },
  {
    "name": "user_screen_name",
    "type": "STRING"
  },
  {
    "name": "user_name",
    "type": "STRING"
  }
]
mvn compile exec:java \
      -Dexec.mainClass=com.example.ParseUser \
      -Dexec.args="--project=<project-id> \
      --stagingLocation=<bucket_path>/staging/ \
      --runner=DataflowRunner"
出力するテーブルのスキーマを schema.json に書いています。
実行するディレクトリ直下に置いてます。
こちらも ParseUserPipelineOptions をちゃんと使えば、実行時の引数を利用できますが、とりあえずハードコーディング。
python と同様のクエリを引っ張ってきて、それを ParseUserFn で加工しています。
ここらへんの書き方が独特でほとんど見よう見まねでやっています。

加工後のテーブル

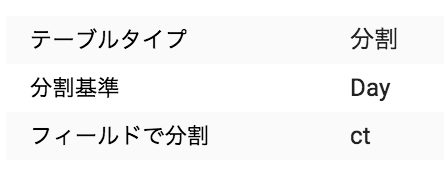
BigQuery の出力のパーティションですが、Java の場合は
.withTimePartitioning オプションを利用して指定します。
これは、TIMESTAMP型かDATE型しか指定できないので
今回は Long で入れていた ct を TIMESTAMP として入れ、パーティションカラムとしました。
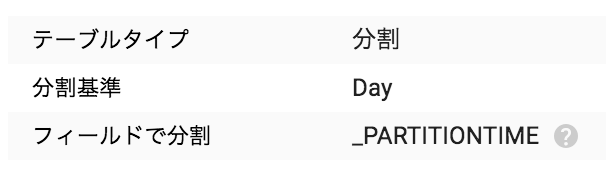
素の BigQuery を入れたときは これは分割テーブルです。 というポップが出てたのですが
今回の入れ方では出ませんでした。
でも、WHERE ct したときの処理容量がちゃんと減っていたので大丈夫なはず…
_PARTITIONTIME か カラムかの違いなのだろうか。
元テーブル
加工後テーブル
Apache Beam のバージョン 2.4.0 でやりましたが、これを最新の 2.5.0 に上げたら動かなくなりました。
詳しく調べてないですが、なにか関数がないとか言われてました。
4. 加工したテーブルをダッシュボードで見れるようにしたり…
次で…すぐにはできないかも
今回はシンプルなデータ加工をまずはやってみました。
他にもパイプラインの使い方があるのでいろいろできることはありそうです。
なかなか情報がなく難しかったですが…
まだ複雑なことをやっていないので、python か Java どっちがいいかと言われてもなんともいえません。
python の方が手軽にできたくらい。
とりあえず今回はここまで。