
Introduction
In a previous article, Getting Started with 360° Image Gaussian Splatting (Basic Workflow), I introduced the workflow for generating 3D Gaussian Splatting (3DGS) from 360° video using 360° Gaussian.
Since then, the developer of that tool has released a Pro version that generates 3DGS more easily and much faster than the original.
This article is a quick-start guide to using 360° Gaussian Pro.
Environment
PC Specs
| Item | Spec |
|---|---|
| OS | Windows 11 |
| GPU | NVIDIA GeForce RTX 4070 SUPER |
| CPU | AMD Ryzen7 8700G |
| RAM | 32 GB |
360° Camera
-
Insta360 X4 Air
※ Other manufacturers' cameras such as THETA are also supported. 8K or higher is recommended.
Software
| Software | Purpose |
|---|---|
| LichtFeld Studio v0.5.3 | GUI tool for 3D Gaussian Splatting ※ |
| 360° Gaussian Pro v1.0.1 | Tool that automates frame extraction, masking, and SfM |
※ About obtaining LichtFeld Studio
Free distribution of pre-built binaries for LichtFeld Studio v0.5.x has ended. v0.4.0 remains available for free download. To use v0.5.3, you must either purchase a paid license or build it from source.
If you want to try the latest features available on GitHub, or try it before purchasing a license, please refer to the notes below and try building it yourself.Notes for building from source
Click to expand
To build it yourself, follow the build instructions here.
Tip 1
Although not mentioned in the official build instructions, Perl may be required. Install it from Strawberry Perl.
Be aware that the cmake bundled with Perl may take precedence over your system cmake, so first temporarily renameC:\Strawberry\c\bin\cmake.exe, and delete it only if it turns out to be unnecessary. To be safe, restart your PC afterward.
Tip 2
In the official documentation's Clone repository section, the following command did not always download all required files correctly in the author's environment:
git clone https://github.com/MrNeRF/LichtFeld-Studio
Instead, to avoid missing submodule downloads, it is recommended to add the--recursiveflag, or use a client tool such as Fork or GitHub Desktop:
git clone --recursive https://github.com/MrNeRF/LichtFeld-Studio
Tip 3
Note: skip thegit checkout v0.4.0command in the Checkout stable version step.
Tip 4
The build may fail while buildinglibplacebobecauseclang-clcannot be found. In that case, open Visual Studio Installer → "Modify" on VS 2022 Community → the Individual components tab → typeclangin the search box → check C++ Clang Compiler for Windows → click "Modify" to install it.
The "MSBuild support for LLVM (clang-cl) toolset" component is not required.
The build process takes a long time, so plan to run it when you have plenty of time available.
Differences from the Previous Version
The most notable differences are as follows:
- Camera alignment now uses the latest COLMAP / GLOMAP
- Wider range of input formats: in addition to equirectangular images, you can now feed in dual-fisheye images and even ordinary (non-360°) video shot on a smartphone
- Masking powered by SAM3
- Support for adding detail photos taken with a smartphone or digital camera
- Significant speedup of every processing step
Who Is It For?
- Those who want a simple workflow: after adding your video, if you are happy with the default settings, you can go all the way to 3DGS generation with a single button
- Those who want to tune parameters themselves: the COLMAP alignment parameters are exposed in the UI. This suits anyone who needs to state not just "I aligned it with a tool" but exactly which parameters were used — for example, when writing a paper
Overall Workflow
Gaussian Splatting generally involves the following four steps.
| # | Step | Description |
|---|---|---|
| 1 | Capture | Record the scene with a 360° camera |
| 2 | SfM (Structure from Motion) | Estimate the position from which each image was taken |
| 3 | Point Cloud Generation | Generate a point cloud based on the camera positions obtained from SfM |
| 4 | Gaussian Splatting | Generate a 3D Gaussian Splatting model from the point cloud |
Step 1. Capturing & Exporting the Video
Record your scene with a 360° camera. Since processing can take a long time, I recommend testing with a short clip under one minute until you get used to the workflow.
As mentioned above, equirectangular images still work just as they did in the previous version, but since we have the option, let's use dual-fisheye this time.
If you would rather try equirectangular, see Step 1 of the previous article (Basic Workflow) for the Insta360 Studio export procedure and the stabilization settings.
If you are using an Insta360 camera:
1. Connect the Insta360 to your PC with a USB cable
2. Copy the .insv file you want to process to your PC
That's it. Not having to convert to equirectangular makes this nice and simple.
Step 2. SfM and Point Cloud Generation
This is where 360° Gaussian Pro comes in.
In the previous version you had to choose your own SfM tool, such as SphereSfM or Metashape. This tool standardizes on COLMAP, so no additional applications need to be installed.
The steps are also covered in detail in the following video:
2.1 Image Extraction
1. Launch 360° Gaussian Pro
2. Drag and drop your .insv file onto Add footage to start
※ If you are testing with equirectangular or ordinary video files, drag and drop an .mp4 instead
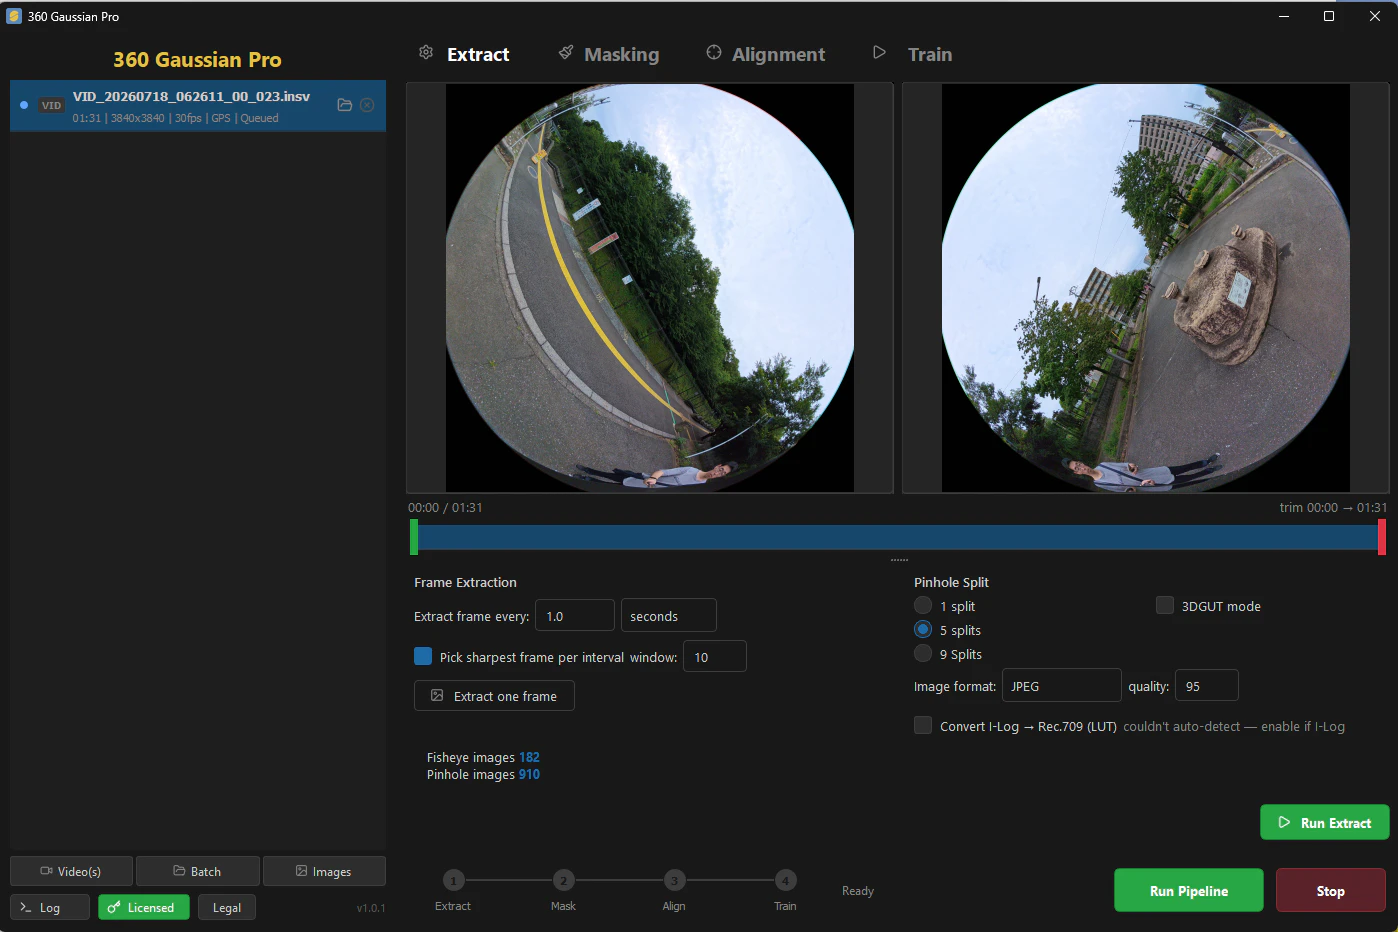
3. Configure the extraction settings
The defaults are fine to start with, but Frame Extraction offers the following options:
| Parameter | Description |
|---|---|
| Extract frame every | Extracts images at the specified interval, in seconds (or frames) |
| Pick sharpest frame per interval / window | Toggles whether to prefer the least blurry image by comparing neighboring frames, and sets the comparison range. With 10, for example, it compares 5 frames on either side and picks the sharpest one |
| Pinhole Split | How many pinhole tiles the fisheye image is reprojected into. 1 split is the fastest but covers only about half of the fisheye, 5 splits (default) covers the full sphere with overlapping tiles, and 9 Splits gives the most overlap between tiles for complex scenes |
For details, see the official documentation.
ℹ️ For equirectangular input
Equirectangular input does not use Pinhole Split; it is always converted into 6 cube-map faces.
4. (Optional) These steps make the masking setup in the next section easier
4.1 Click on the video timeline to select the frame you want to use for previewing the mask
4.2 Click Extract one frame
2.2 Image Masking
This feature automatically masks out regions that are not needed for Gaussian Splatting.
1. Click the Masking tab
2. If you clicked Extract one frame in the previous section, the image will be displayed
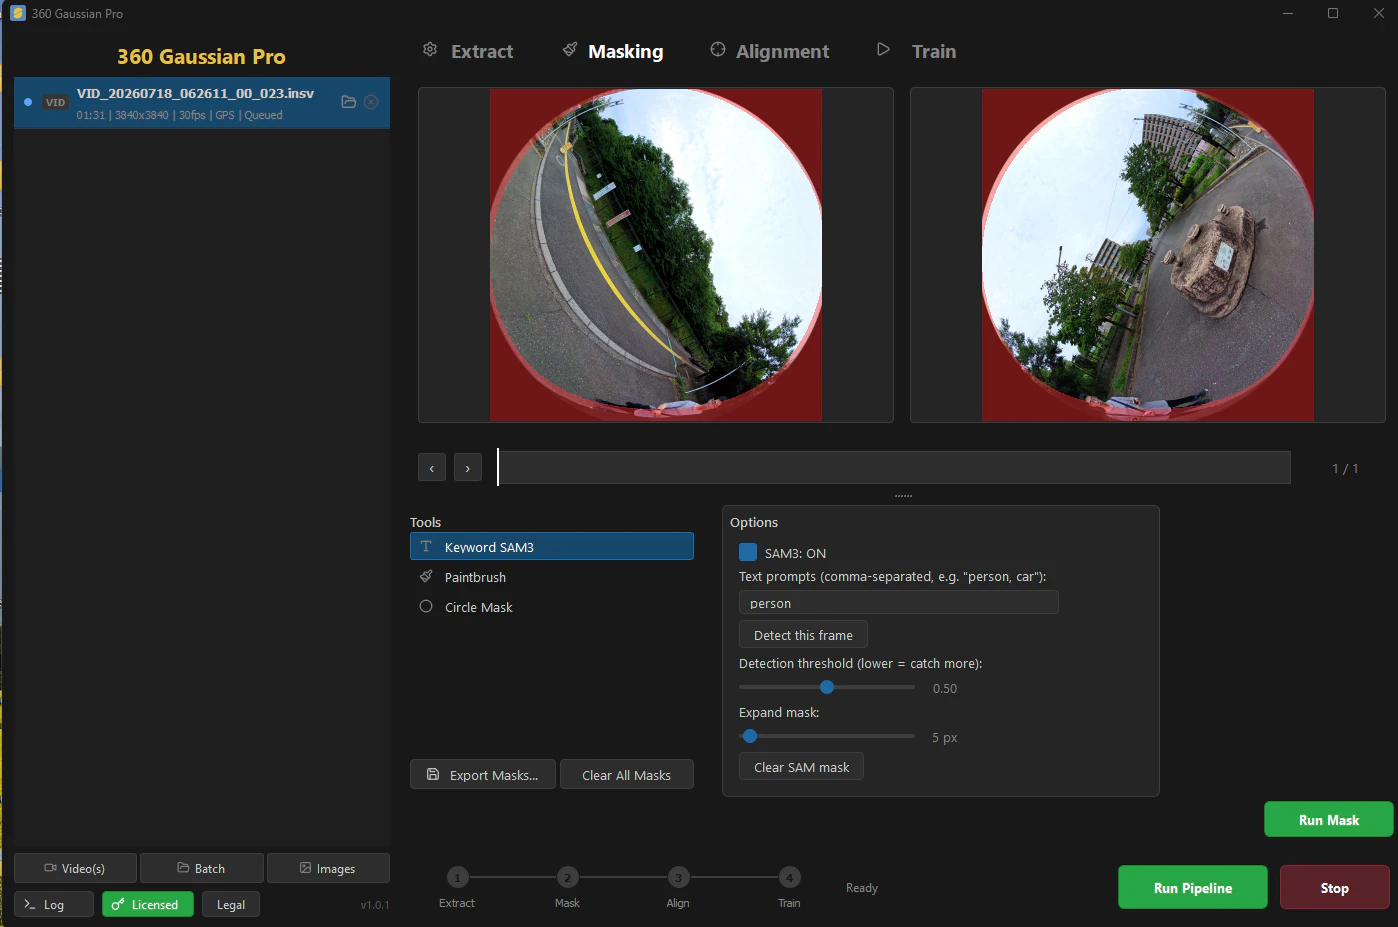
ℹ️ If you did not click Extract one frame
No image will be shown, but masking itself still works correctly.
3. Keyword SAM3 lets you mask by keyword (specify multiple keywords separated by commas)
4. Click Detect this frame to preview the result after a few seconds (feel free to skip this if you don't need a preview)
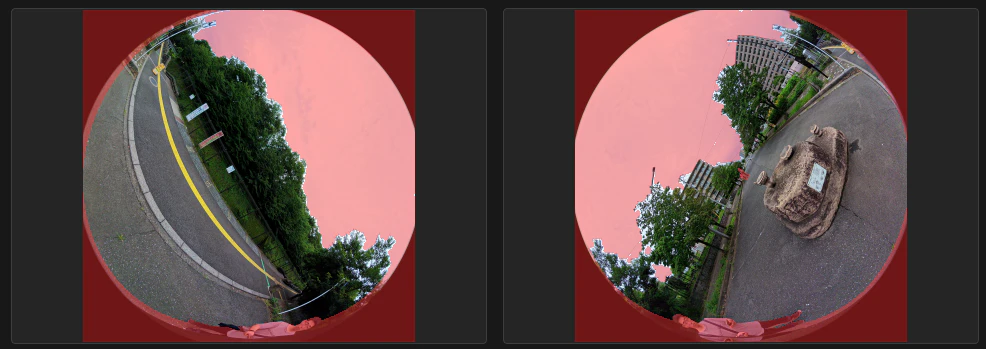
Below is the result when specifying person,sky. You can see that people and the sky are masked (shown in pink).
5. Paintbrush lets you trace over objects you want to exclude with the mouse (OK to skip)
6. Circle Mask (dual-fisheye only) masks the area outside the camera's image circle. You can also reduce the radius to narrow down the region used for processing
💡 Two reasons masking matters
First, moving subjects such as people and cars, and low-texture objects with few feature points, tend to become noise for SfM and reduce the accuracy of camera pose estimation. Since SfM accuracy directly affects the quality of the resulting Gaussian Splatting, excluding these with masks is important.
Second, the same noise degrades quality during training as well. When the same subject appears differently depending on where it was shot, the Gaussians struggle to converge on the correct shape and color. Masking protects quality in both stages.
2.3 SfM Configuration
Here too, the defaults are fine to start with.
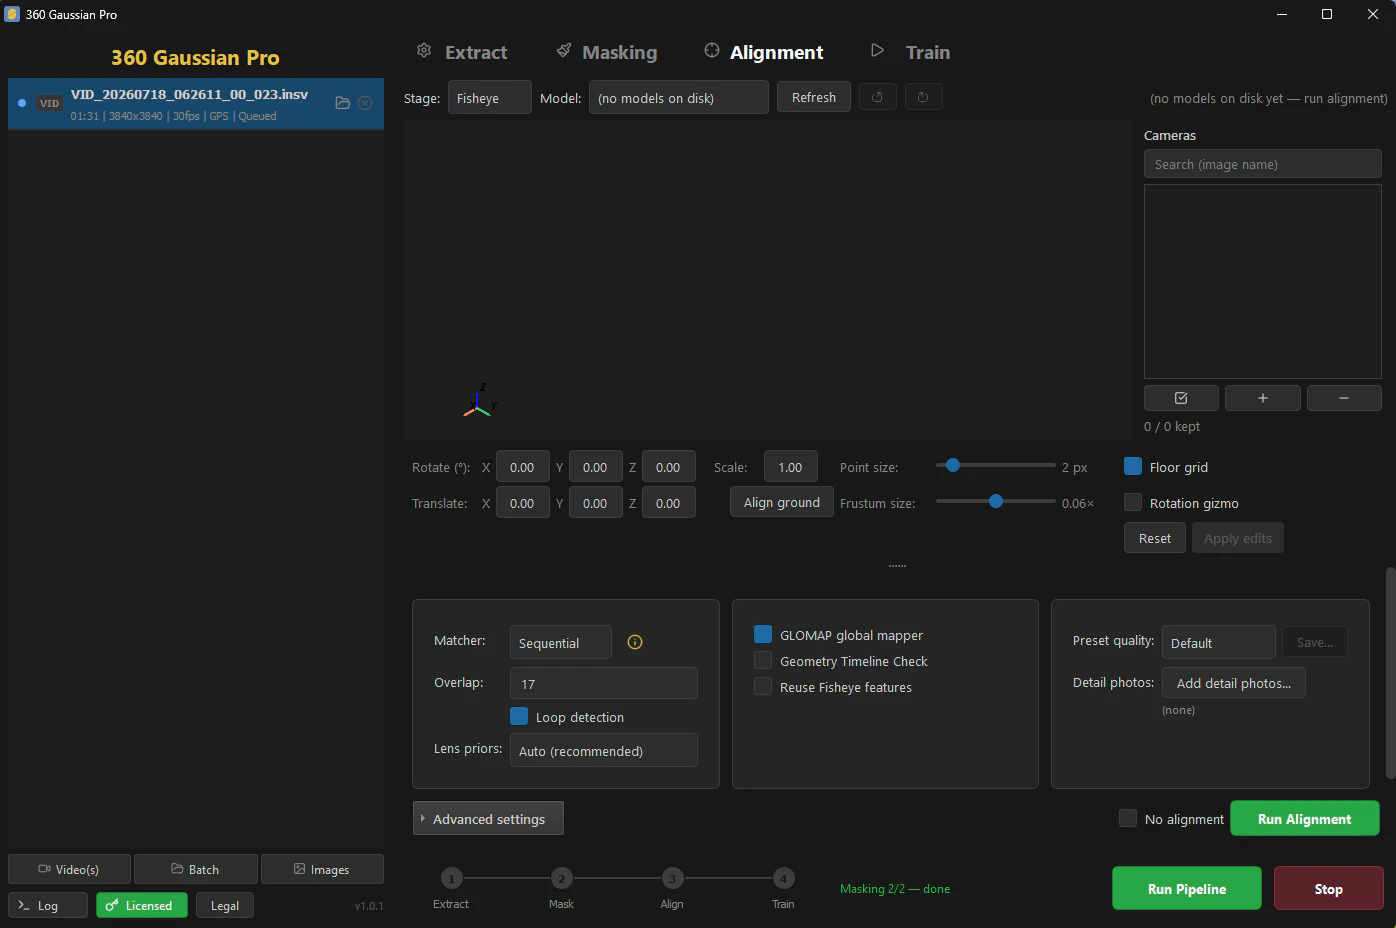
For reference, Matcher lets you choose the matching method.
| Matcher | Description |
|---|---|
| Sequential | Compares each frame only with its neighbors in capture order. Fast, and usually the best choice for video input where consecutive frames overlap |
| Exhaustive | Compares every image against every other. The most robust and highest quality for unordered photo sets, but the slowest, since the pair count grows with the square of the image count |
| Spatial | Uses GPS to compare only images that were physically close. Fast and high quality when the footage has reliable GPS, and it also scales the result to real-world size (still experimental with .osv files) |
The remaining options are as follows:
| Setting | Description and benefit |
|---|---|
| GLOMAP global mapper | Instead of registering frames one at a time, it solves all camera positions at once. 10–100× faster, and enabled by default. |
| Geometry Timeline Check | Experimental. Detects and auto-repairs cases where similar-looking but different locations (identical room interiors, a stairwell walked up and back down, etc.) are mistaken for the same place, causing the model to fold onto itself. It applies the rule that frames far apart in time should not be at the same location. Processing time increases by a few minutes only when a fold is actually detected |
| Reuse Fisheye features | Reuses the features detected in Stage 1 instead of detecting new ones on the pinhole tiles. The pinhole stage becomes faster and needs only about 1 GB of VRAM (versus the usual 4–8 GB). However, fine details come out slightly softer and some may be missing |
Here is a quick note on the other items visible in the screenshot:
- Overlap: for Sequential, how many neighboring frames on either side to compare
- Loop detection: toggles the processing that detects returning to the same place and closes the loop
-
Lens priors: initial lens parameters.
Auto (recommended)is fine -
Preset quality: quality preset. Use
Save...to store your own settings under a name
Opening Advanced settings exposes a wide range of COLMAP options as well (for example, the maximum number of SIFT features defaults to 32,768 for fisheye and 8,192 for pinhole tiles).
For details, see the official documentation.
2.4 Adding Detail Photos (Optional)
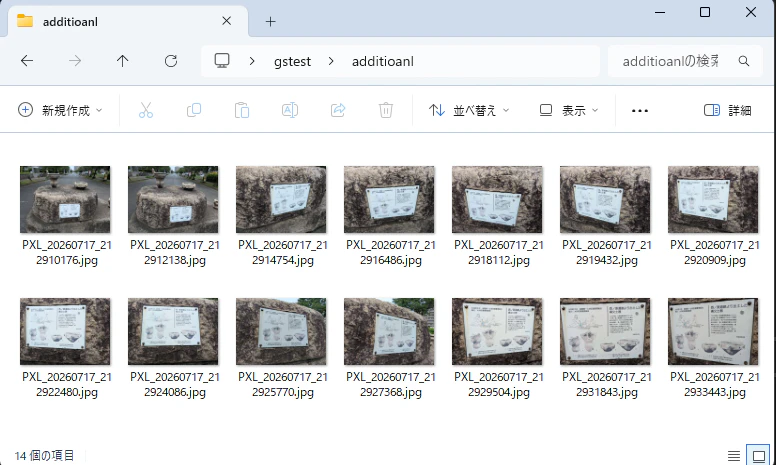
The Pro version lets you mix in high-resolution photos taken with a smartphone or DSLR, not just 360° images.
This makes it possible to reproduce text and illustrations in the scene, details that 360° photos tend to lose.
To add them, just use Detail photos → Add detail photos... on the right side of the screen and select the folder containing your detail images.
⚠️ Note
The detail images go through SfM as well, so provide photos from multiple viewpoints to make estimation easier. In the example above, the information board was shot 14 times, changing the angle slightly each time.
2.5 Choosing the 3D Gaussian Splatting Training Tool
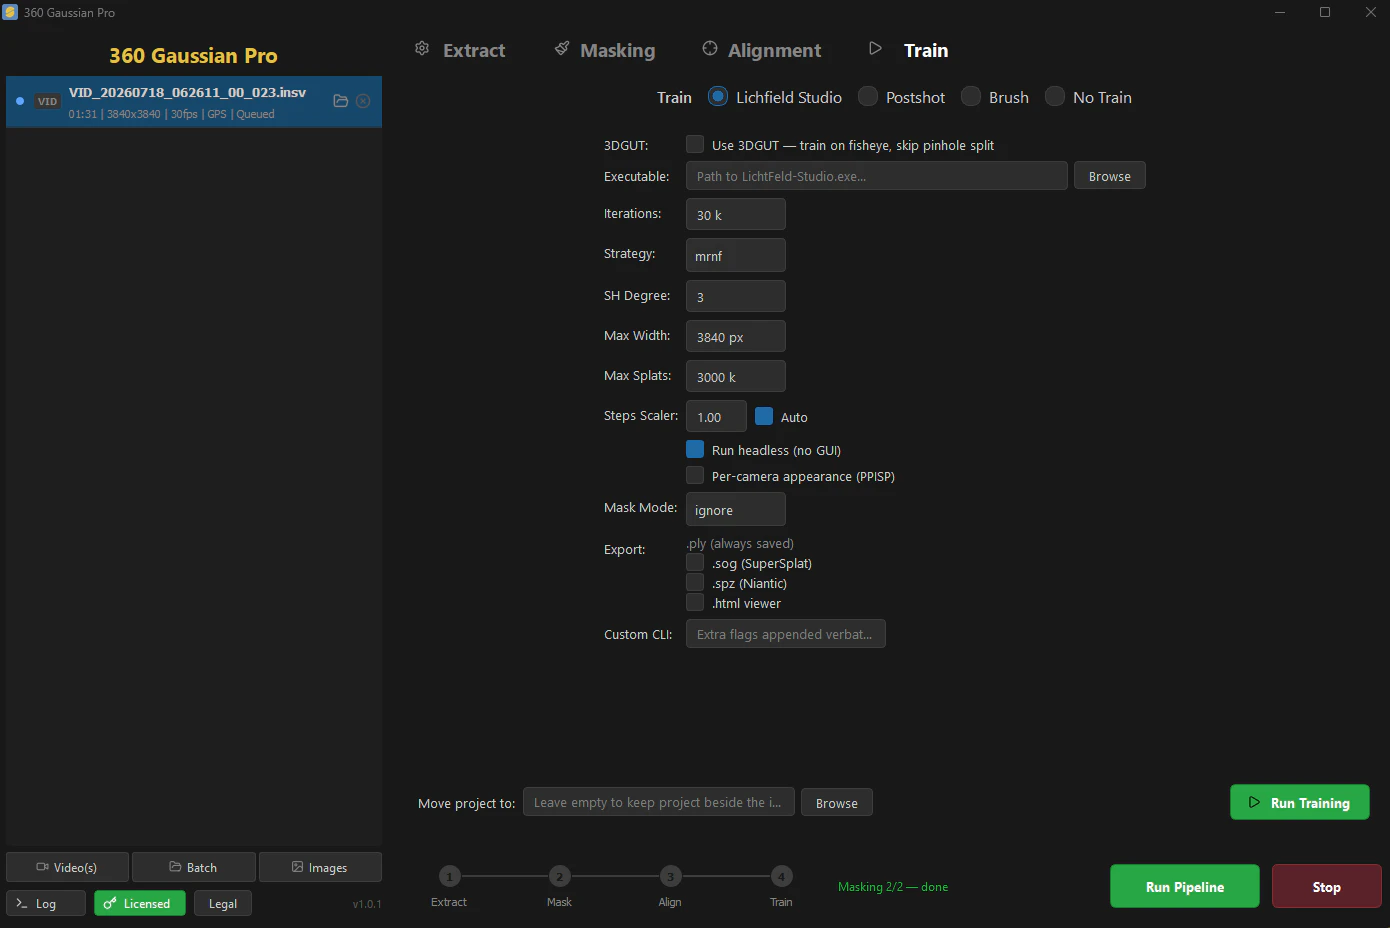
Click the Train tab.
The Pro version supports LichtFeld Studio, Postshot, and Brush.
If you want training automated as well, install one of them and configure it accordingly. The executable path, Iterations, Strategy, Max Splats, and other options can all be set from this screen.
I usually want to watch the 3DGS training process, so I select No Train.
2.6 Running the Pipeline
Once everything is set up, click Run Pipeline at the bottom of the screen.
Progress is displayed at the bottom as well, so just wait until it finishes.

⚠️ If processing appears stuck for a long time
Click the Log button at the bottom left of the screen to check the log.
When it finishes, open the Alignment tab to review the result. The output is saved to 0_train_data.
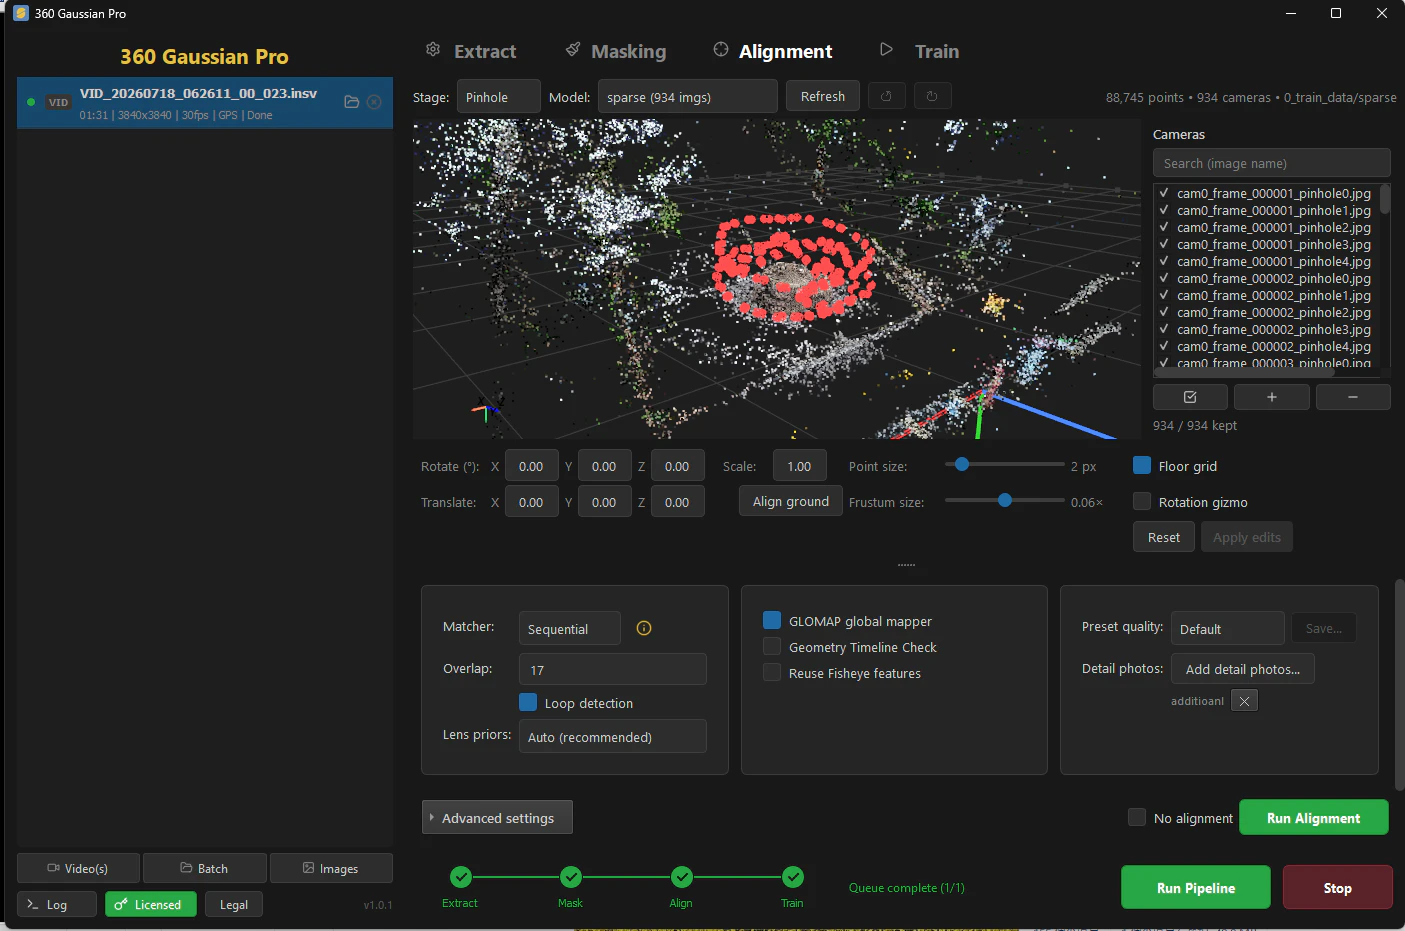
If the result isn't what you expected at this point, you can change the settings and run alignment again.
If the result is tilted or offset, you can adjust it by dragging the Rotate / Translate parameters (X, Y, Z) with the mouse (Align ground can also snap it to the ground plane).
Finally, click Apply edits to write the changes into the output files.
ℹ️ Either tool can adjust position and orientation
LichtFeld Studio can also change position and orientation, so use whichever you find more convenient.
Note that the cameras shown in red in the screenshot above are the detail photos added in 2.4. You can see them clustered around the information board.
Step 3. Gaussian Splatting
3.1 Loading Data
1. Launch LichtFeld Studio
2. Drag and drop the 0_train_data folder generated above onto the window
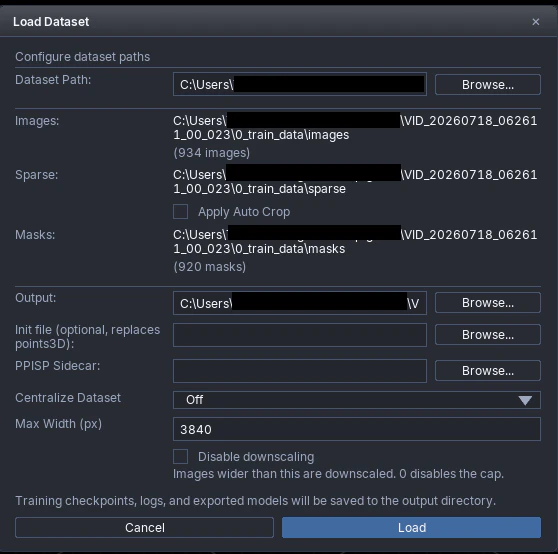
3. When the Load Dataset dialog appears, click Load
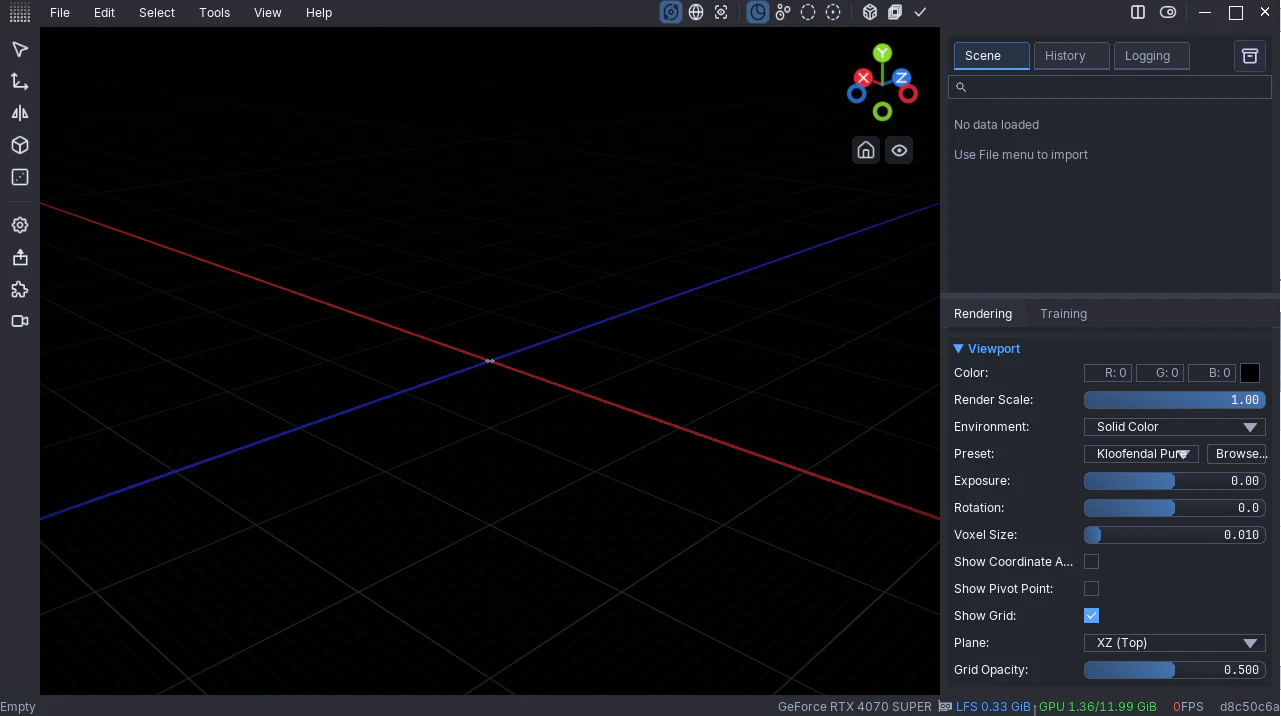
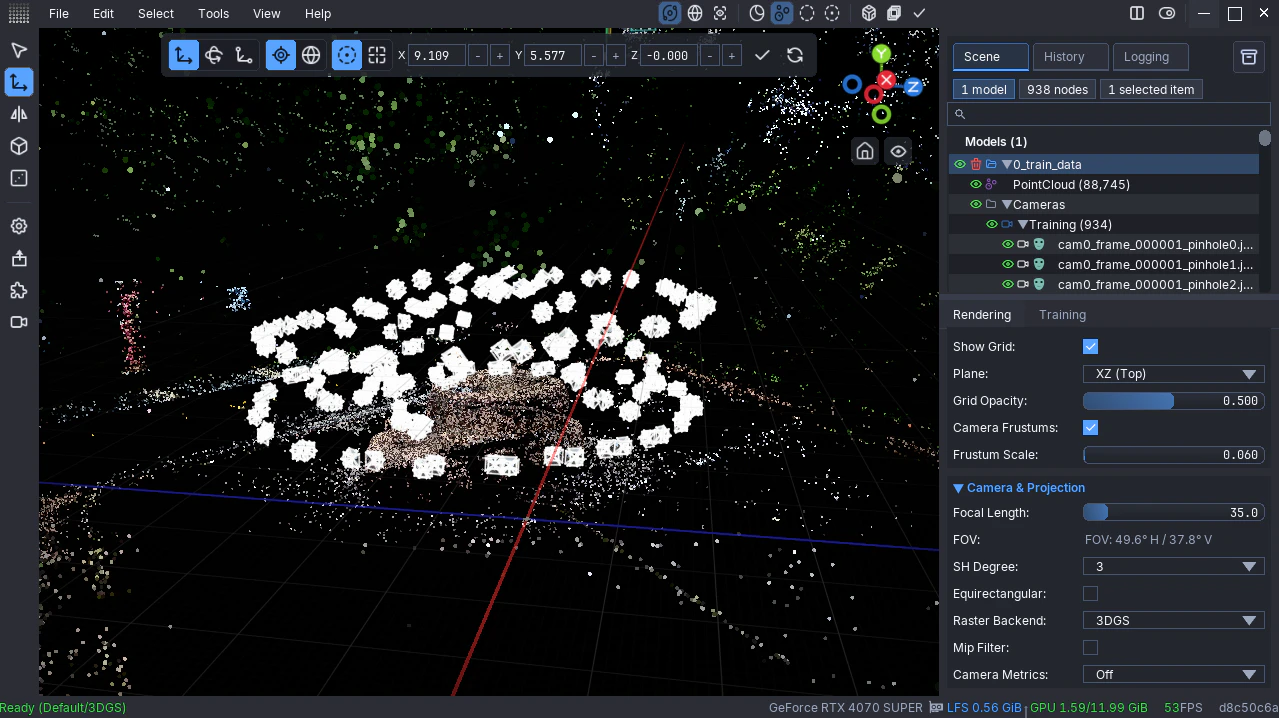
Confirm that the point cloud and images loaded correctly.
If you don't need the camera images displayed, uncheck Camera Frustums in the Rendering tab on the right side of the screen.
3.2 Training Configuration
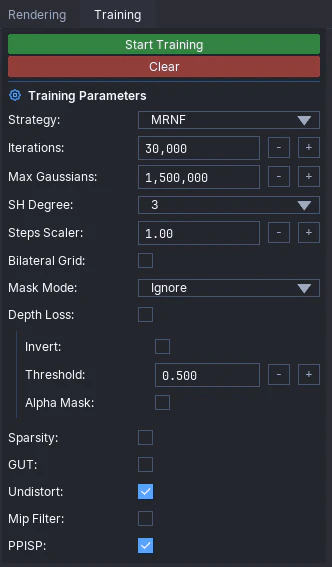
Here is one example of a training configuration. Once you're comfortable, try experimenting with other settings.
1. Click the Training tab
2. Select MRNF for Strategy
3. Set Steps Scaler as appropriate
| Condition | Recommended value |
|---|---|
| 300 images or fewer | 1 |
| More than 300 images | number of images / 300 |
⚠️ If training doesn't go well
If training fails to converge and the view whites out even with the settings above, setting Steps Scaler to 2–3× thenumber of images / 300value tends to stabilize it.
4. Set the maximum number of Gaussians with Max Gaussians
The default is a little high, so depending on the size of your scan area, starting around 1,500,000 and seeing how it goes is a good approach. Increase the value if you feel detail is lacking.
Optional setting 1:
If you want to use mask images, configure the following:
- Set Mask Mode to
Ignore - Uncheck Alpha Mask
Optional setting 2:
If you added detail photos, turn on Undistort.
For the other parameters, start with the settings above and experiment once you're more familiar with the tool.
3.3 Running Training
1. Use the mouse to zoom in on the area where you want to watch training progress
(in my case, around the object in the center)
2. Click Start Training to begin
3. The view starts out blurry and gradually becomes clearer as the steps progress
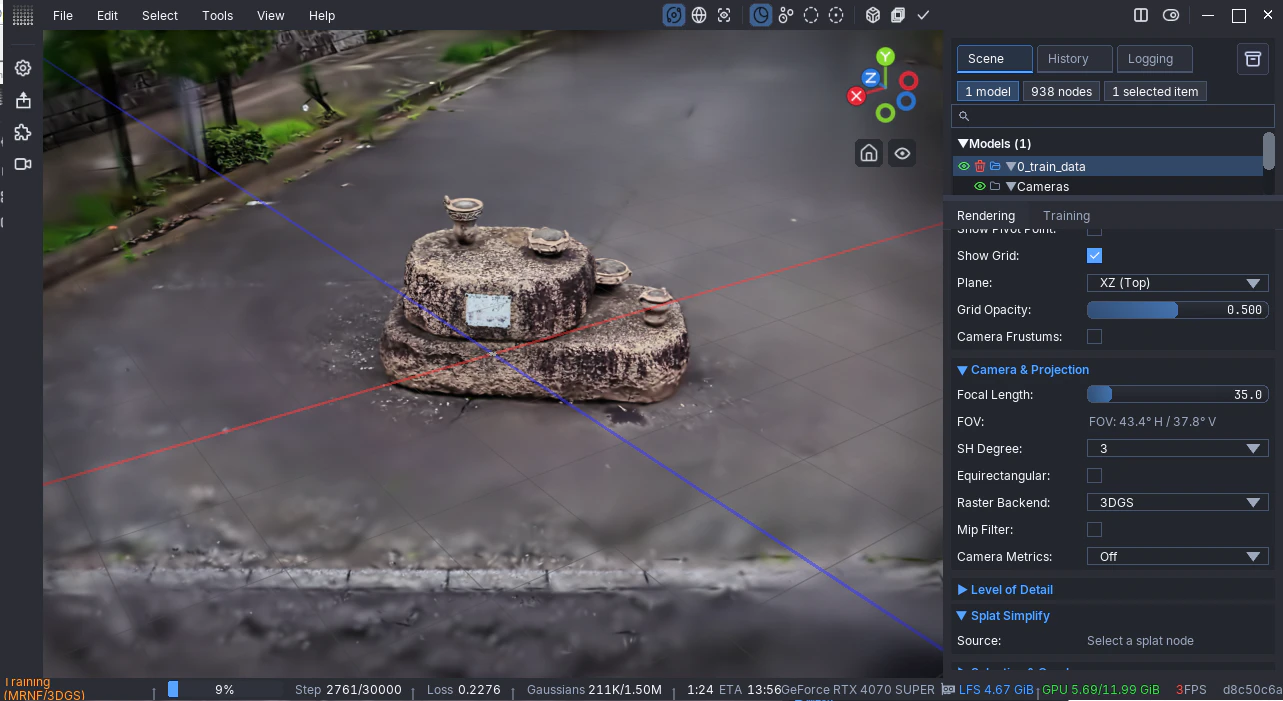
Training ends automatically once it reaches the step limit.
If you want to save an intermediate result, click Save Checkpoint to record the state at that point.
3.4 Export
The output data can be used with tools such as SuperSplat Editor for creating videos or viewing in a viewer.
1. Click File → Export
2. Select the output format (e.g. .ply)
Summary
I had been using the original free version until now, but with the Pro version SfM accuracy has improved, and as a result the quality of the 3DGS output has improved too.
Masking accuracy has also improved. Every step runs faster as well, so there is less waiting around.
This article covered the dual-fisheye workflow, but the flow is the same for equirectangular.
In my test environment, equirectangular was actually faster to process. I also personally preferred the results from the equirectangular images. Since this varies by scene and by taste, why not try both and find the flow that suits you?
The Pro version costs 149 EUR. It isn't free, but that is roughly the same price bracket as Metashape, a long-standing standard in this space.
Given that frame extraction, masking, and SfM can all be run with a single click without switching between applications, I think the convenience makes it well worth considering. If you're interested, please give it a try.
📝 About questions
I recommend the official Discord for questions, but feel free to ask me directly about minor things.
Sample Outputs (with / without detail photos)
For reference, here are the outputs with and without detail photos.