公式Doc通りにやっていたら意外な落とし穴にあったので、最初の設定から問題の所まで上手くいったやり方を書いときます。
問題があった所:
CloudFrontからhttpsのURLリンクにアクセスしたら以下の様な結果が返ってきた。
This XML file does not appear to have any style information associated with it. The document tree is shown below.
結論から言うと原因は、CloudFrontのOrigin Dmain Nameをリストからバケットを選択せずに、S3バケットの静的ホスティング名を記入しなければ行けなかった。
問題の部分を見たい方は呼び飛ばして、手順の第6項にスキップして下さい
手順:
1. ドメインの取得
お名前.com等を使ってドメインを取得して下さい
https://www.onamae.com/
2. Route53への登録
https://qiita.com/sadayuki-matsuno/items/4c371ba984d9b22b3737
こちらの記事を参考に、Route 53でHosted Zoneを作成するとNSレコードが作成されるので、お名前.comの場合ドメイン設定でNSレコードを購入したdomainに追加して下さい。
3. S3のバケットを作成し、HTMLファイルをアップロード
S3コンソールを開いて用意したhtmlファイルをアップロード
https://s3.console.aws.amazon.com/
こちらを参考に自分のドメイン名のbucketを作成しアップロード
https://qiita.com/TheONeru/items/e8aef19375befae6ee09
4. Website hostingでendpointを取得
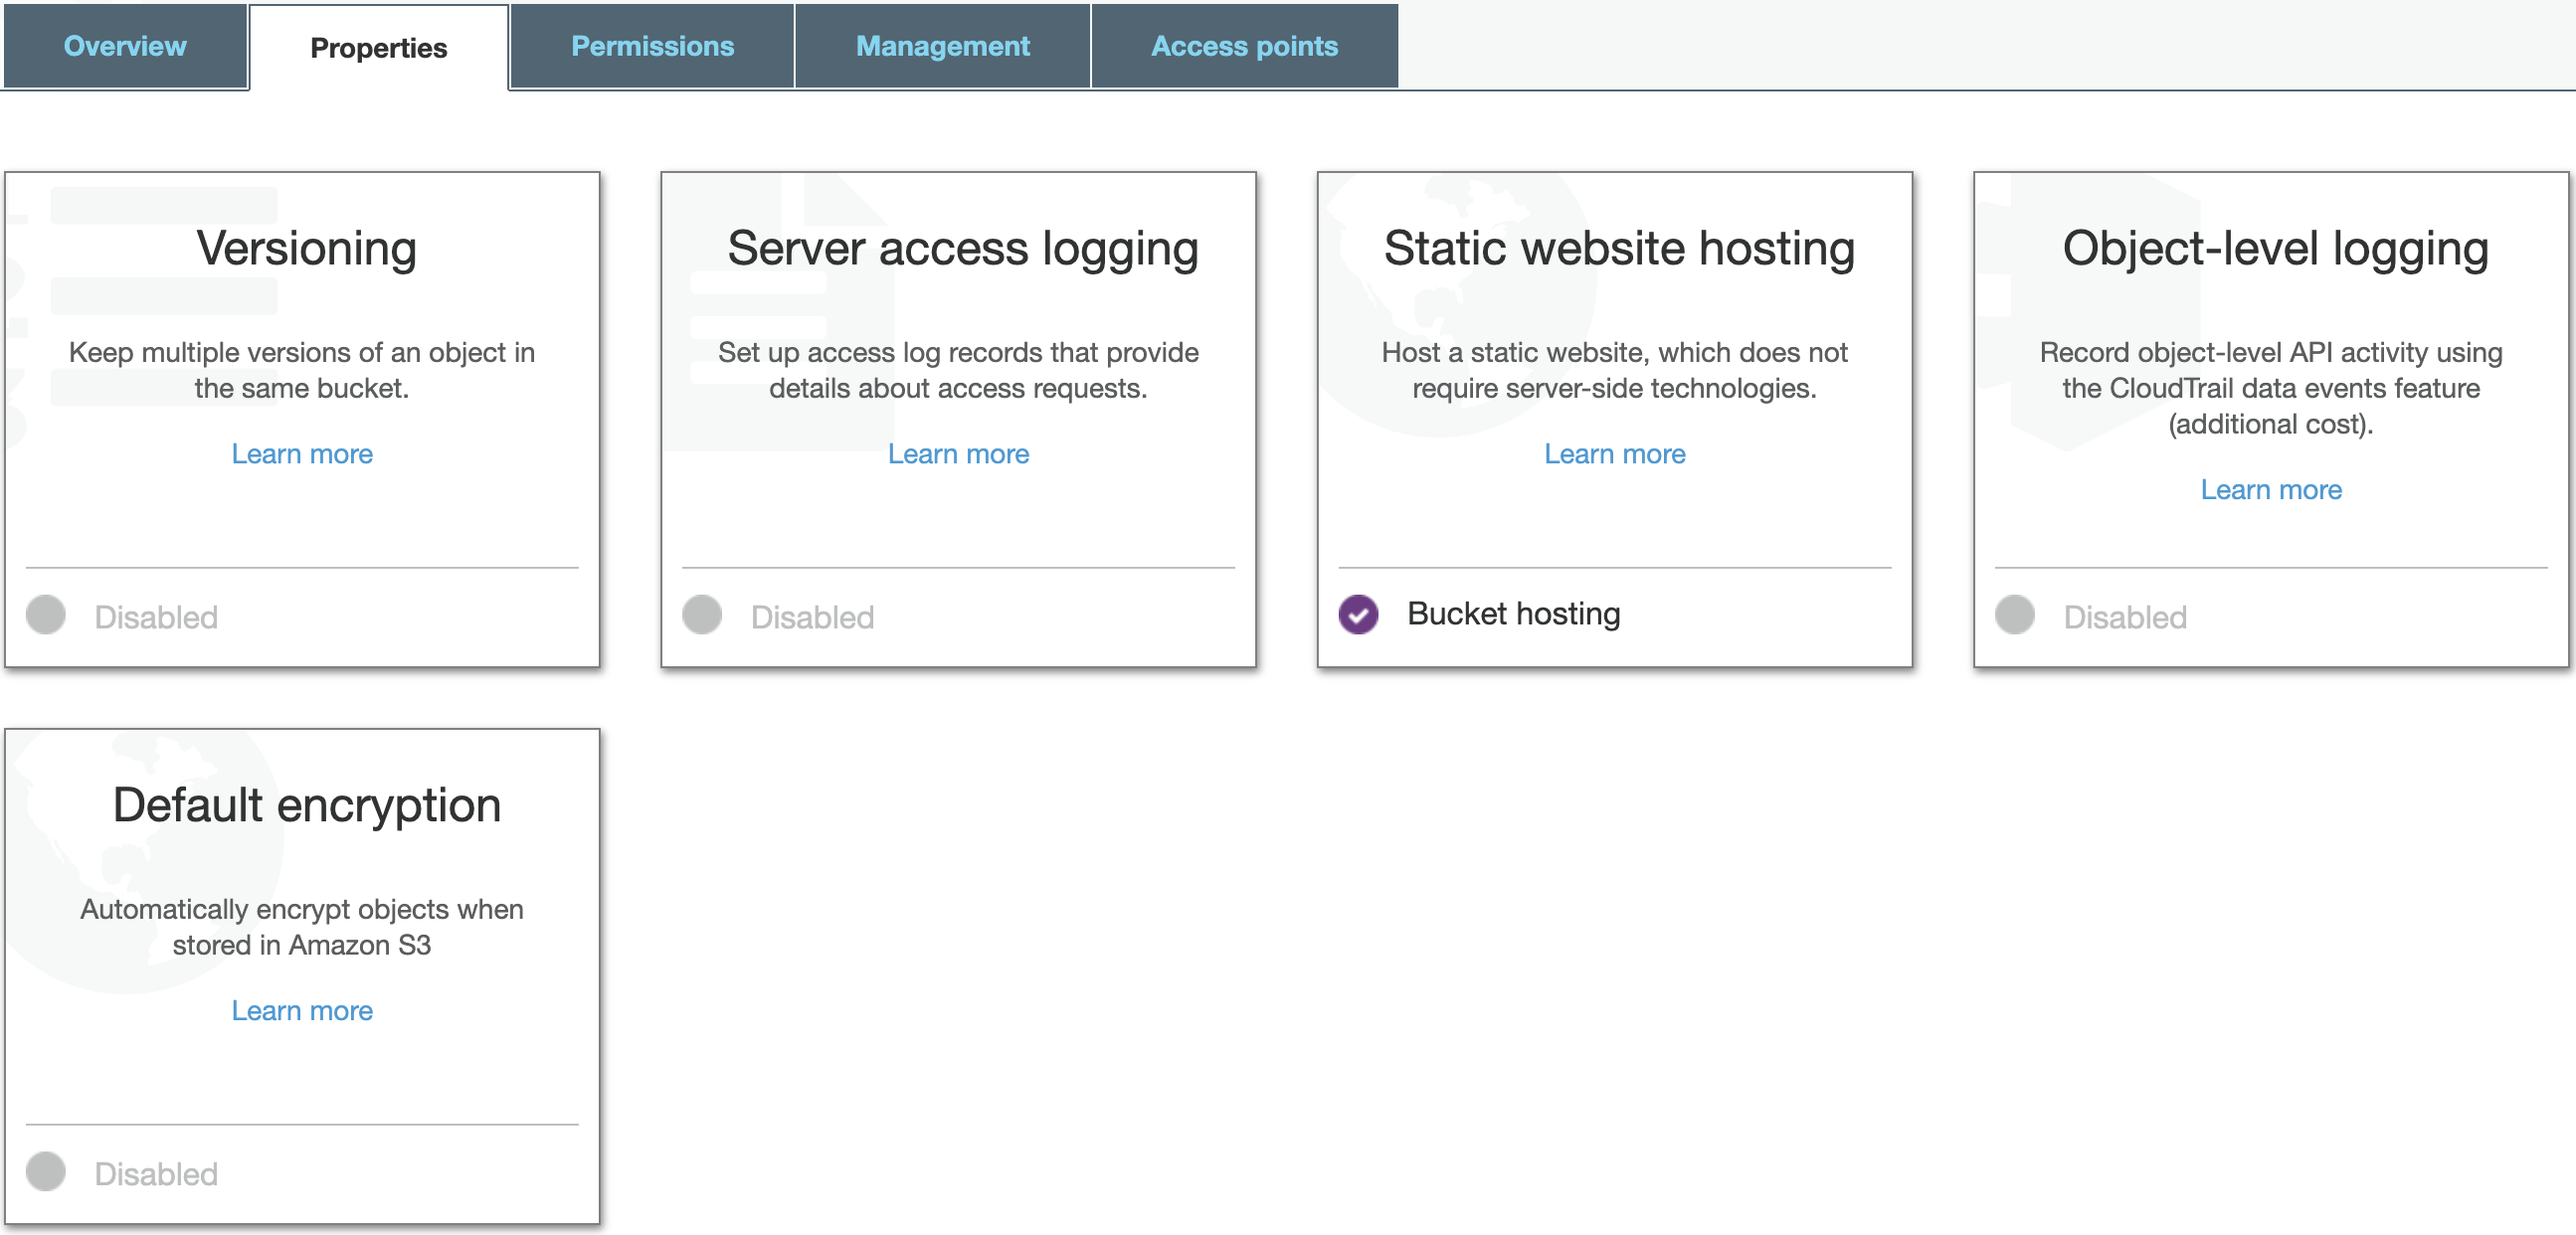
作成したbucketのPropertiesでStatic Website hositingを選択

・Use this bucke to host a websiteを選択し
index documentにアップロードしたトップページのhtmlファイル名を書く。
自分の場合はindex.html
EndpointのURLがあるのでメモする http://⬛️⬛️⬛️-website-us-east-1.amazonaws.com
試しにURLのリンクにアクセスすると、アップロードしたhtmlが閲覧できる
5. ACMでSSL証明書を発行
https://console.aws.amazon.com/acm/
からProvision CertificatesのGet Startedを選択
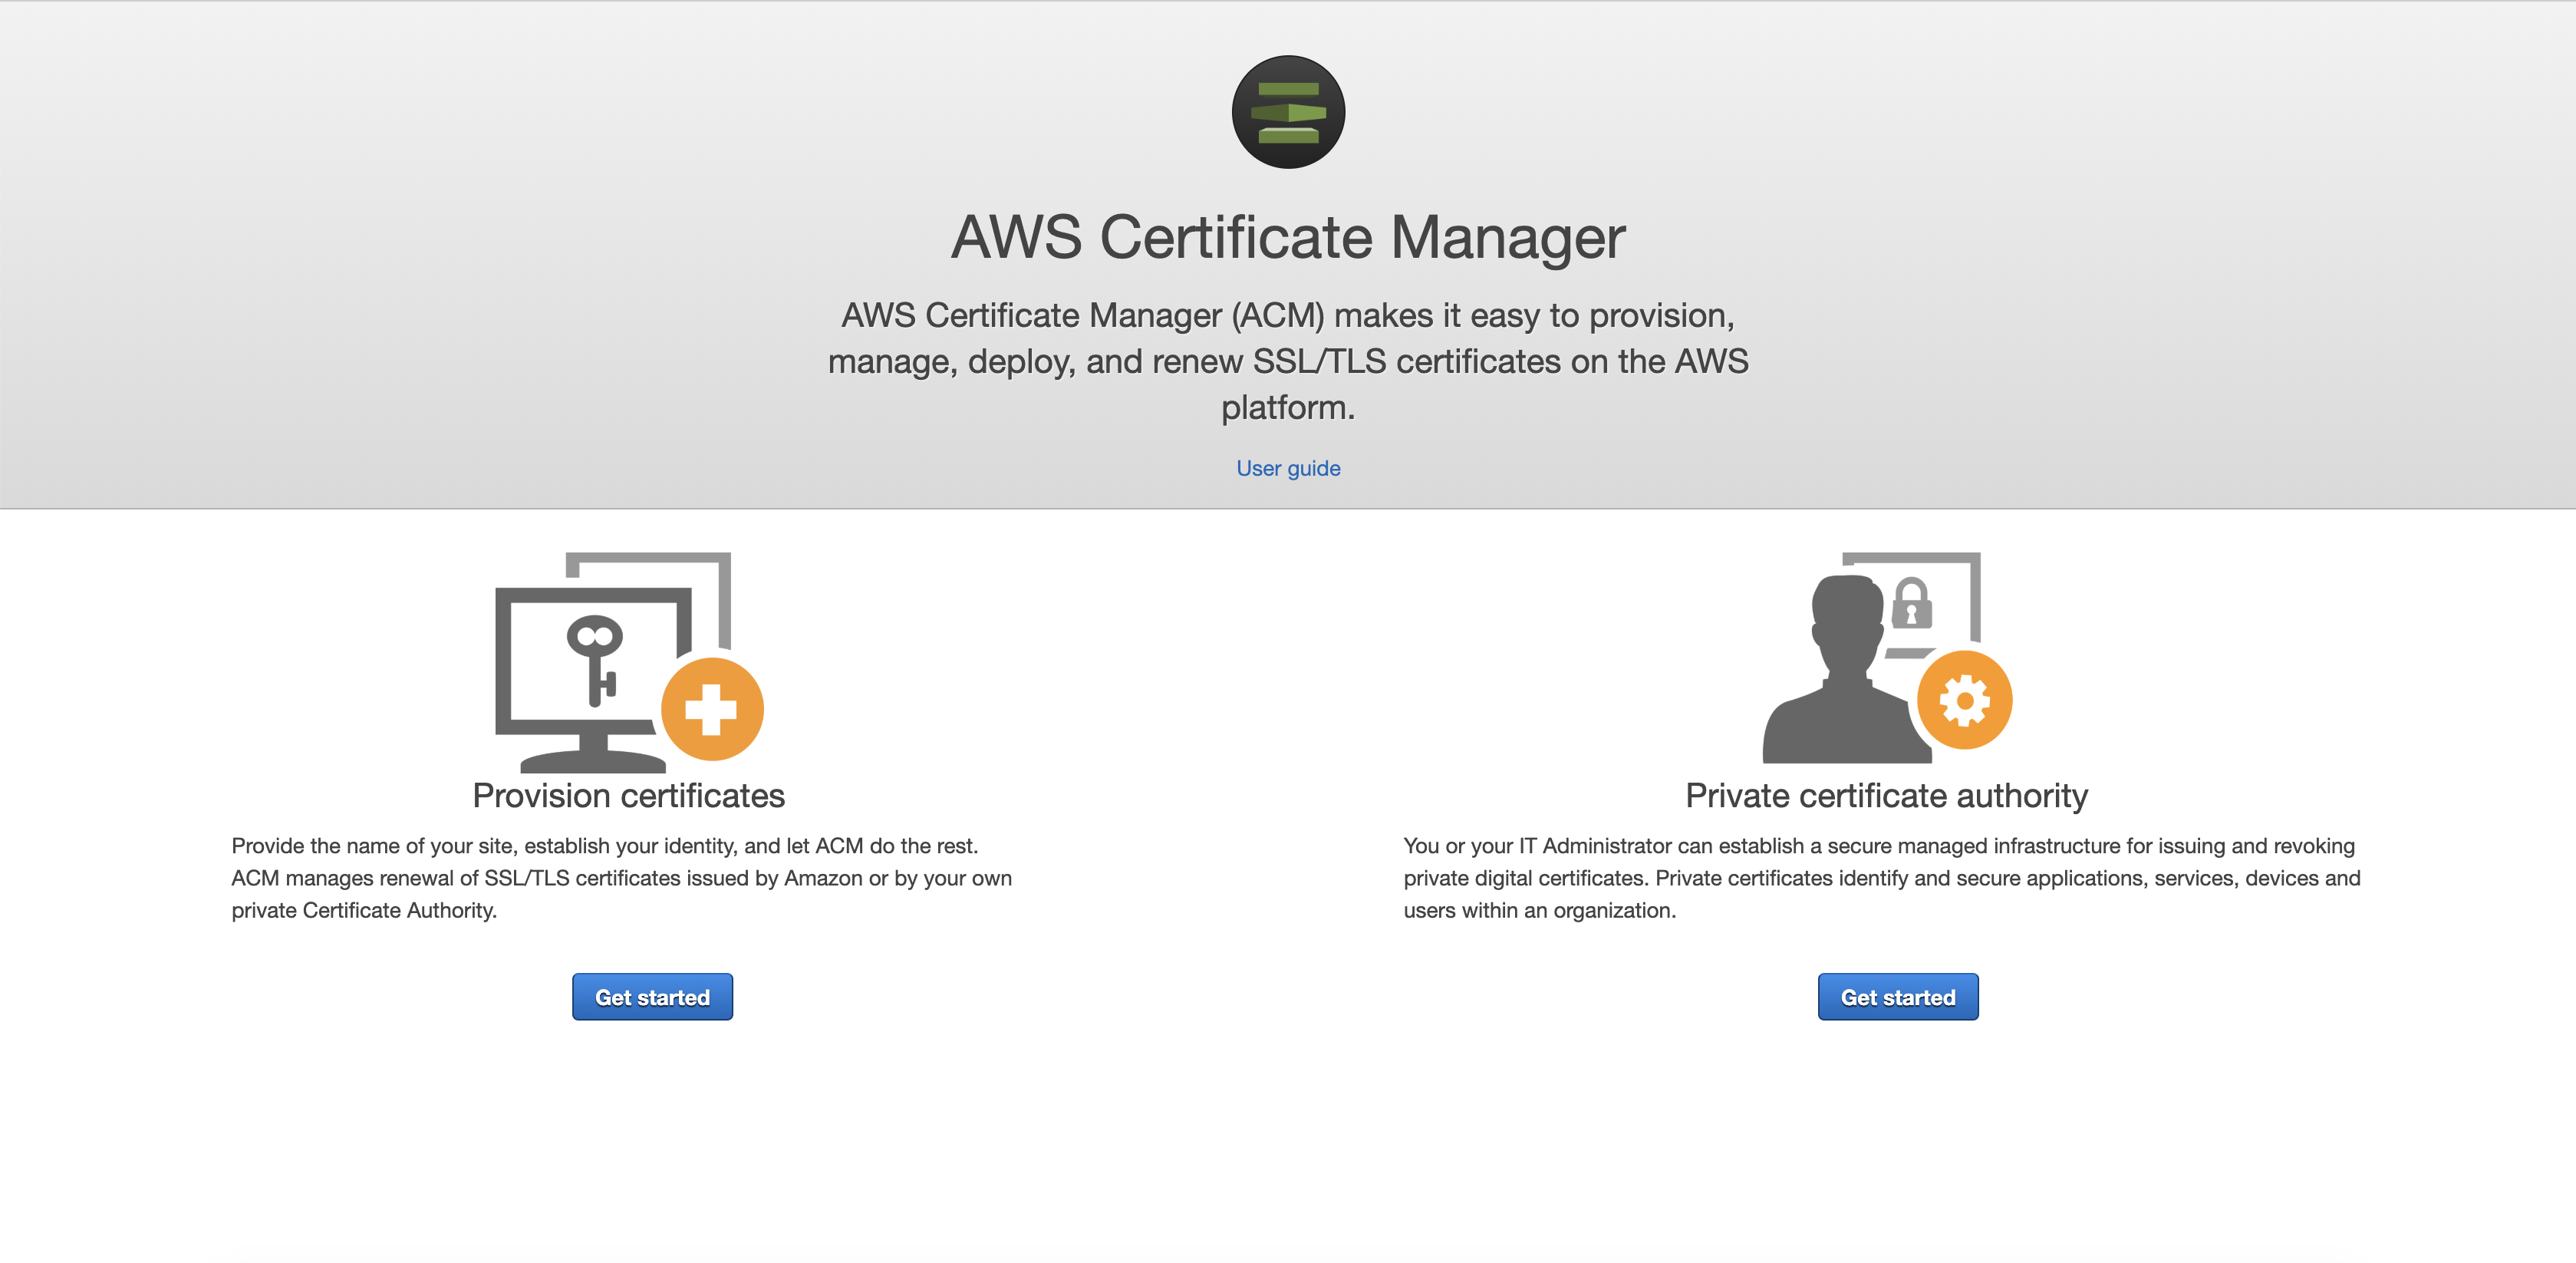
Request a public certificateを選択しRequest a certificateボタンをクリック

取得済みのドメインを入力
Add another name to this certificationをクリックし
*.⬛️⬛️⬛️.com
(⬛️⬛️⬛️は取得したドメイン名)
を入力

認証方法を選択
どちらでも問題ないがここではDNS validationで認証する

その後の項目は全てNext
ValidationのページでExport DNS configuration to fileをクリックし、csvファイルをダウンロードする。

Route 53のコンソールを開き
・Create Record Setをクリックし、NameにダウンロードしたCSVのRecord Nameを記述する。
・TypeはCNAMEを選択
・AliasはNoを選択し、ValueにCSVのRecord Valueを記述する
Save Recort Setをクリック
ACMのコンソールに戻り
https://console.aws.amazon.com/acm/
Validation statusがSuccessになっているのを確認

6. CloudFrontでACMで認可されたcustom SSL証明書を登録(要注意事項あり)
cloudfrontのコンソールを開く
https://console.aws.amazon.com/cloudfront/
create distributionをクリック
WebでGet startedをクリック
要注意事項発生!
Origin Domain Nameを選択するとプルダウンにAmazon S3 Bucketで作成したbucketがでてくるが、
選択してはいけない!
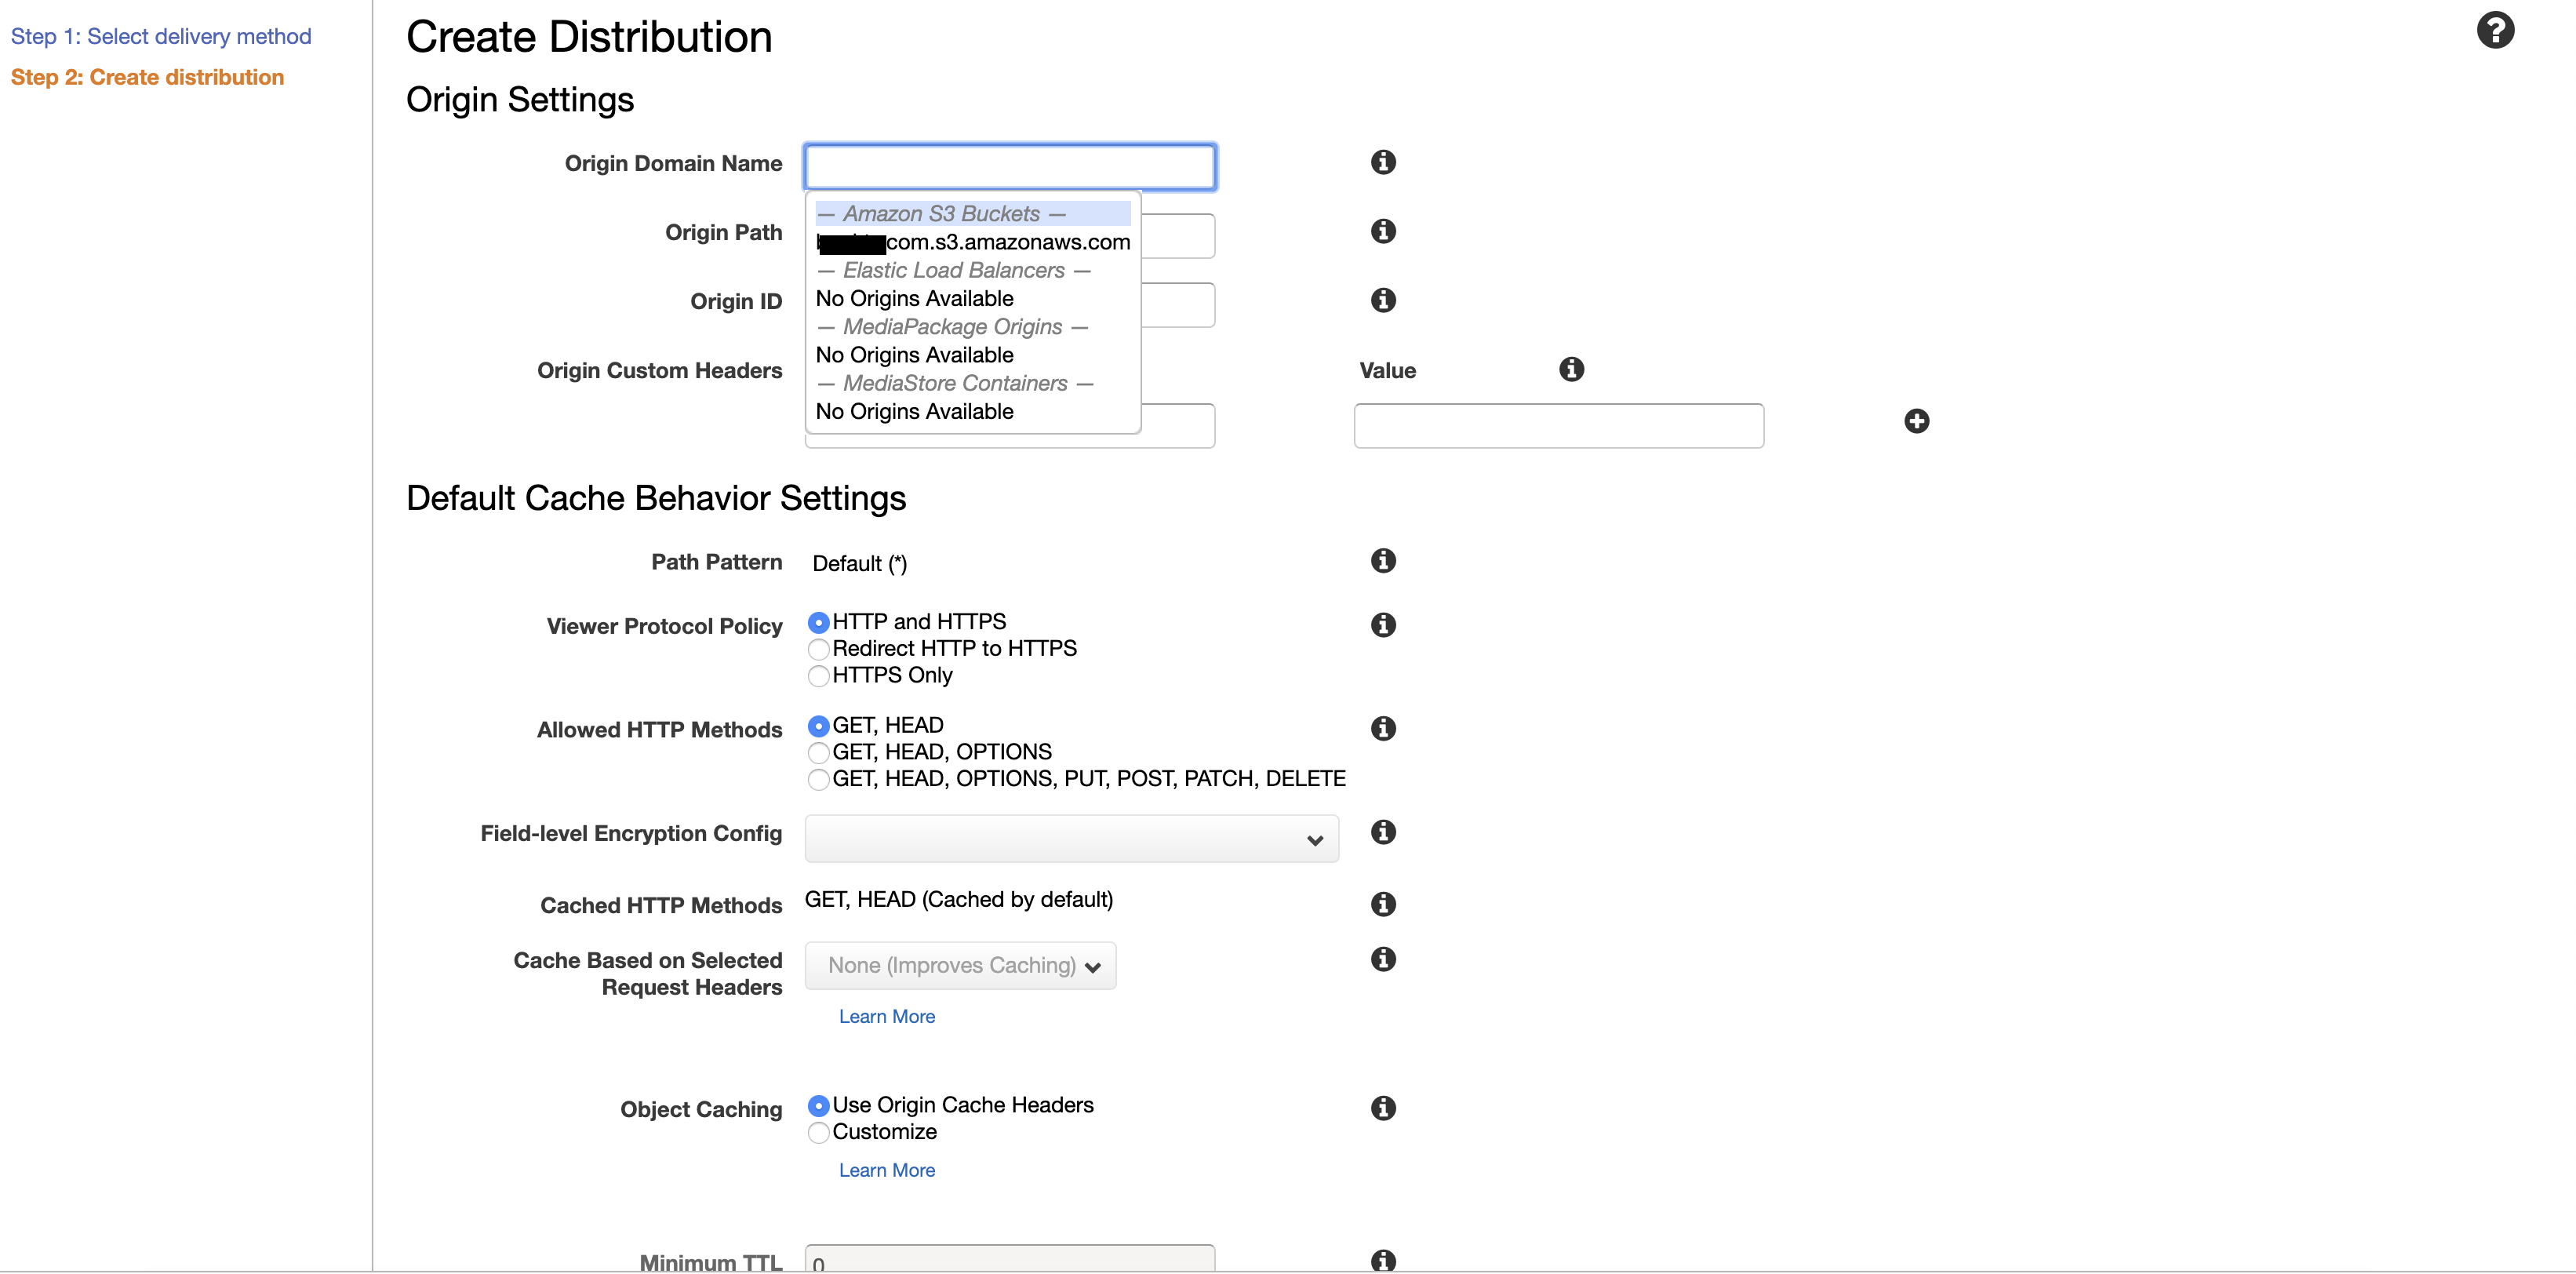
Origin Domain Nameには
Website hostingで書かれていたEndpointを記述する


Alternate Domain Namesに
取得した
domain と www⬛️⬛️⬛️
(⬛️⬛️⬛️はdomain名)
を追加し
Custom SSL Certificateを選択し
ACMで認証したSSLを選択

あとはCreate Distributionをクリック
StatusがIn progressからDeployedに変わるまで待つ!
(結構時間がかかる。15分くらい?)

DeployedになったらIDをクリックし以下のDomain nameの
〇〇.cloudfront.netをメモする
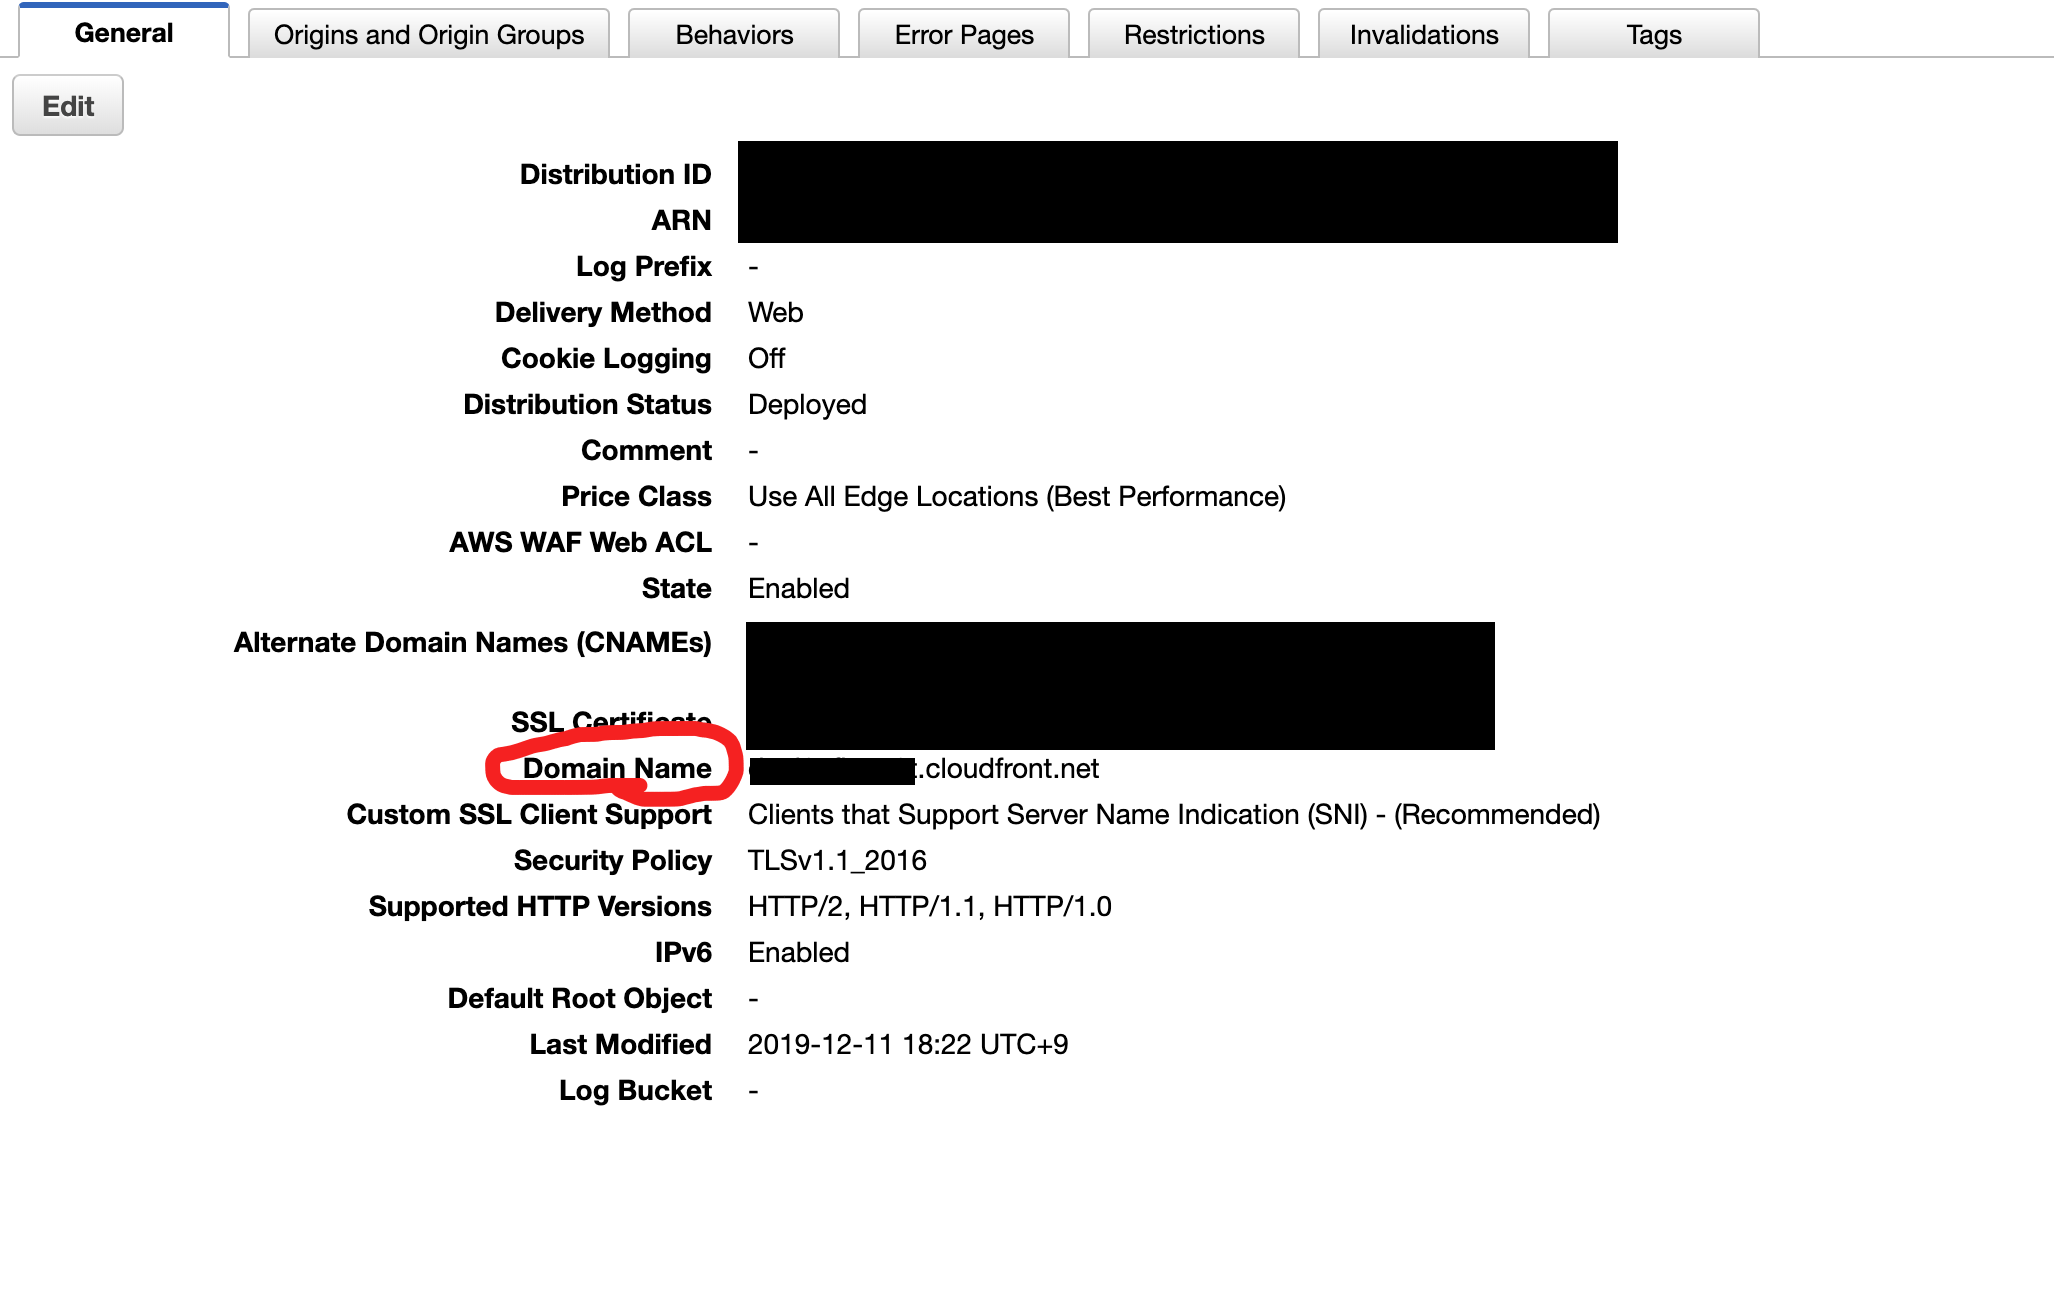
〇〇.cloudfront.netのURLでアクセスして、
httpsで表示されれば、ここまでは順調です!
7. Route53のドメインにtype AでCloudFrontのDmain Nameを登録
Route53でCreate Record Setをクリック
Nameは空で問題ない
AliasはYesで、Aliastargetに〇〇.cloudfront.netを記述
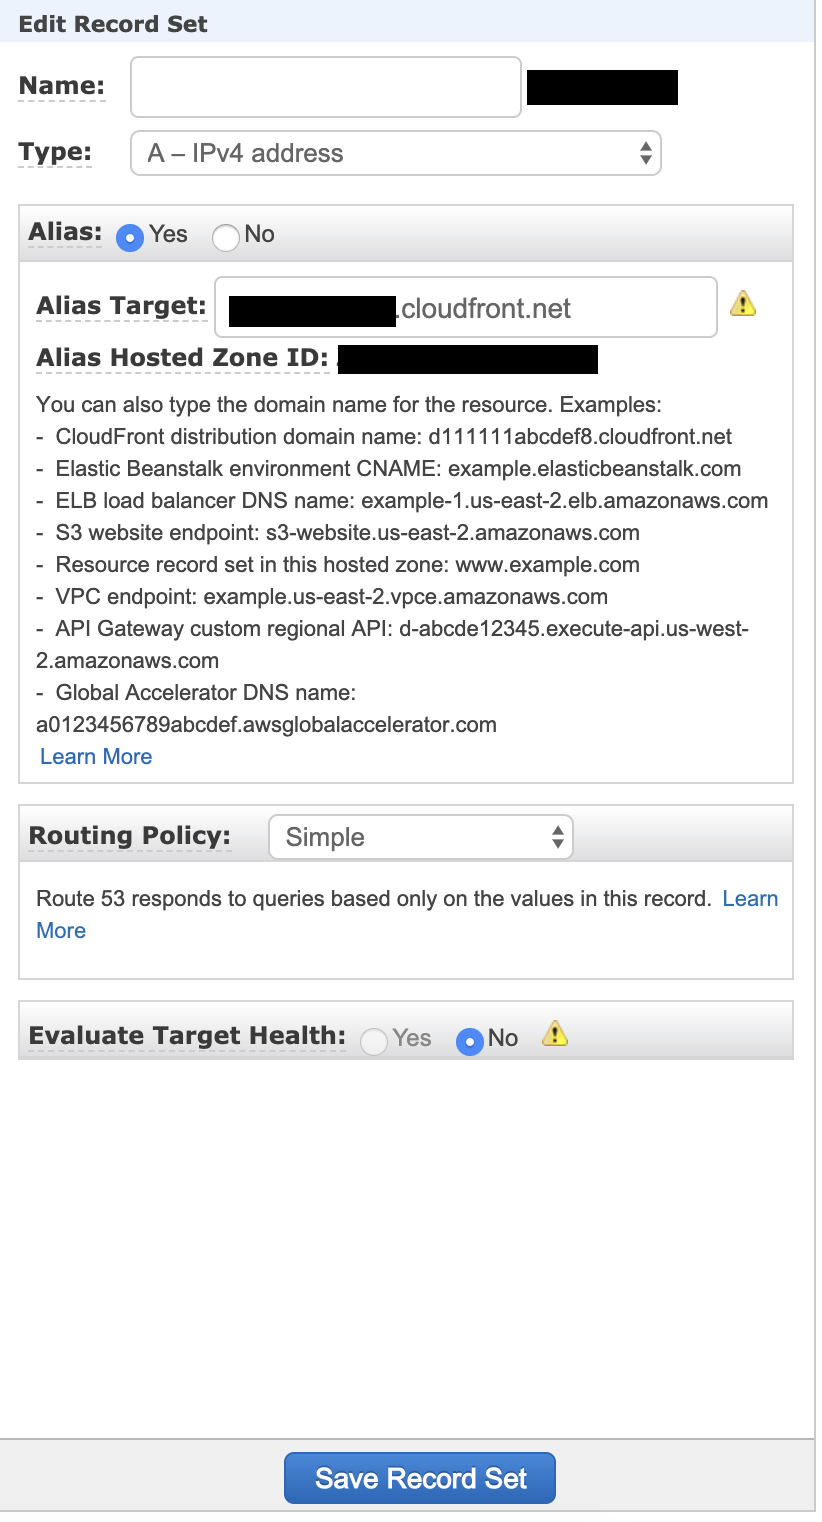
Save Record Setをクリック
8. httpsでの表示が可能になる
表示されれば成功!