Tensorflow lite/micro にはサンプルに人認識のモデルが用意されています。そのモデルを SPRESENSE に組み込んで、SPRESENSEカメラでリアルタイムで認識するようにしてみたいと思います。次のURLにある ”person_detect.tflite” がTensorflow lite で用意された人認識用の学習済のモデルになります。
今回のシステムはカメラに加えて、認識しようとしている対象がカメラがきちんと収まっているか見てみたいので、LCDディスプレイもつけて、画像を表示させながら認識をさせたいと思います。

"person_detect.tflite" をC言語ヘッダーに変換する
tfliteファイルのままでは、Spresense に組み込むことができませんので、このバイナリデータをC言語ヘッダーに変換します。次の Pythonスクリプトを使って変換しました。
import os
import tensorflow as tf
import binascii

def convert_to_c_array(bytes) -> str:
    hexstr = binascii.hexlify(bytes).decode("UTF-8")
    hexstr = hexstr.upper()
    array = ["0x" + hexstr[i:i + 2] for i in range(0, len(hexstr), 2)]
    array = [array[i:i+10] for i in range(0, len(array), 10)]
    return ",\n  ".join([", ".join(e) for e in array])

tflite_binary = open('person_detect.tflite', 'rb').read()
ascii_bytes = convert_to_c_array(tflite_binary)
header_file = "const unsigned char model_tflite[] = {\n  " + ascii_bytes + "\n};\nunsigned int model_tflite_len = " + str(len(tflite_binary)) + ";"
# print(c_file)
with open("person_detect_model.h", "w") as f:
    f.write(header_file)
ここで、person_detect_model.h というヘッダーファイルが出来上がりますので、これをArduinoのスケッチと同じディレクトリにコピーしておきます。モデルは、300kB とかなりのサイズになりました。int8で量子化してこのサイズですので、オリジナルのネットワークはそこそこの規模だったと思います。
Arduino IDE を使ってスケッチを書く
Arduino IDE を使って Tensorflow lite/micro 用のスケッチを作成します。Tensorflow 用のスケッチを書く際は、Tensorflow をサポートした Spresense Arduino Library をあらかじめインストールしてください。
推論部分のスケッチ
Tensorflow で推論するスケッチを次に示します。拡張子は便宜上”cpp”になっていますが、実際は"ino"です。ディスプレイに表示するスケッチは別ファイルになっています。
#include <Camera.h>
#include "tensorflow/lite/micro/all_ops_resolver.h"
#include "tensorflow/lite/micro/micro_error_reporter.h"
#include "tensorflow/lite/micro/micro_interpreter.h"
#include "tensorflow/lite/micro/system_setup.h"
#include "tensorflow/lite/schema/schema_generated.h"
#include "person_detect_model.h"
tflite::ErrorReporter* error_reporter = nullptr;
const tflite::Model* model = nullptr;
tflite::MicroInterpreter* interpreter = nullptr;
TfLiteTensor* input = nullptr;
TfLiteTensor* output = nullptr;
int inference_count = 0;
constexpr int kTensorArenaSize = 100000;
uint8_t tensor_arena[kTensorArenaSize];
/* cropping and scaling parameters */
const int offset_x = 32;
const int offset_y = 12;
const int width = 160;
const int height = 120;
const int target_w = 96;
const int target_h = 96;
const int pixfmt = CAM_IMAGE_PIX_FMT_YUV422;
/* callback function of the camera streaming */
/* the inference process is done in this function */
void CamCB(CamImage img) {
static uint32_t last_mills = 0;
if (!img.isAvailable()) {
Serial.println("img is not available");
return;
}
/* get image data from the frame memory */
uint16_t* buf = (uint16_t*)img.getImgBuff();
int n = 0;
for (int y = offset_y; y < offset_y + target_h; ++y) {
for (int x = offset_x; x < offset_x + target_w; ++x) {
/* extracting luminance data from YUV422 data */
uint16_t value = buf[y*width + x];
uint16_t y_h = (value & 0xf000) >> 8;
uint16_t y_l = (value & 0x00f0) >> 4;
value = (y_h | y_l); /* luminance data */
/* set the grayscale data to the input buffer for TensorFlow */
input->data.f[n++] = (float)(value)/255.0;
}
}
Serial.println("Do inference");
TfLiteStatus invoke_status = interpreter->Invoke();
if (invoke_status != kTfLiteOk) {
Serial.println("Invoke failed");
return;
}
/* get the result */
bool result = false;
int8_t person_score = output->data.uint8[1];
int8_t no_person_score = output->data.uint8[0];
Serial.print("Person = " + String(person_score) + ", ");
Serial.println("No_person = " + String(no_person_score));
if ((person_score > no_person_score) && (person_score > 60)) {
digitalWrite(LED3, HIGH);
result = true;
} else {
digitalWrite(LED3, LOW);
}
/* display the captured data */
disp_image(buf, offset_x, offset_y, target_w, target_h, result);
uint32_t current_mills = millis();
uint32_t duration = current_mills - last_mills;
Serial.println("duration = " + String(duration));
last_mills = current_mills;
}
void setup() {
Serial.begin(115200);
setup_display();
tflite::InitializeTarget();
memset(tensor_arena, 0, kTensorArenaSize*sizeof(uint8_t));
// Set up logging.
static tflite::MicroErrorReporter micro_error_reporter;
error_reporter = µ_error_reporter;
// Map the model into a usable data structure..
model = tflite::GetModel(model_tflite);
if (model->version() != TFLITE_SCHEMA_VERSION) {
Serial.println("Model provided is schema version "
+ String(model->version()) + " not equal "
+ "to supported version "
+ String(TFLITE_SCHEMA_VERSION));
return;
} else {
Serial.println("Model version: " + String(model->version()));
}
// This pulls in all the operation implementations we need.
static tflite::AllOpsResolver resolver;
// Build an interpreter to run the model with.
static tflite::MicroInterpreter static_interpreter(
model, resolver, tensor_arena, kTensorArenaSize, error_reporter);
interpreter = &static_interpreter;
// Allocate memory from the tensor_arena for the model's tensors.
TfLiteStatus allocate_status = interpreter->AllocateTensors();
if (allocate_status != kTfLiteOk) {
Serial.println("AllocateTensors() failed");
return;
} else {
Serial.println("AllocateTensor() Success");
}
size_t used_size = interpreter->arena_used_bytes();
Serial.println("Area used bytes: " + String(used_size));
input = interpreter->input(0);
output = interpreter->output(0);
Serial.println("Model input:");
Serial.println("dims->size: " + String(input->dims->size));
for (int n = 0; n < input->dims->size; ++n) {
Serial.println("dims->data[" + String(n) + "]: " + String(input->dims->data[n]));
}
Serial.println("Model output:");
Serial.println("dims->size: " + String(output->dims->size));
for (int n = 0; n < output->dims->size; ++n) {
Serial.println("dims->data[" + String(n) + "]: " + String(output->dims->data[n]));
}
Serial.println("Completed tensorflow setup");
digitalWrite(LED0, HIGH);
CamErr err = theCamera.begin(1, CAM_VIDEO_FPS_15, width, height, pixfmt);
if (err != CAM_ERR_SUCCESS) {
Serial.println("camera begin err: " + String(err));
return;
}
err = theCamera.startStreaming(true, CamCB);
if (err != CAM_ERR_SUCCESS) {
Serial.println("start streaming err: " + String(err));
return;
}
}
void loop() {
}
このモデルはint8で量子化されていますので、結果は整数値で返ってきます。配列は2つあって”人か”もしくは”人でないか”それぞれの結果が格納されています。(BinaryClassificationではありません)
| 出力 | 意味 |
|---|---|
| output->data.int8[0] | Non Person Score |
| output->data.int8[1] | Person Score |
判定は "Person Score" が60以上ということにしました。ここは環境に合わせて変更してください。
ディスプレイ部分のスケッチ
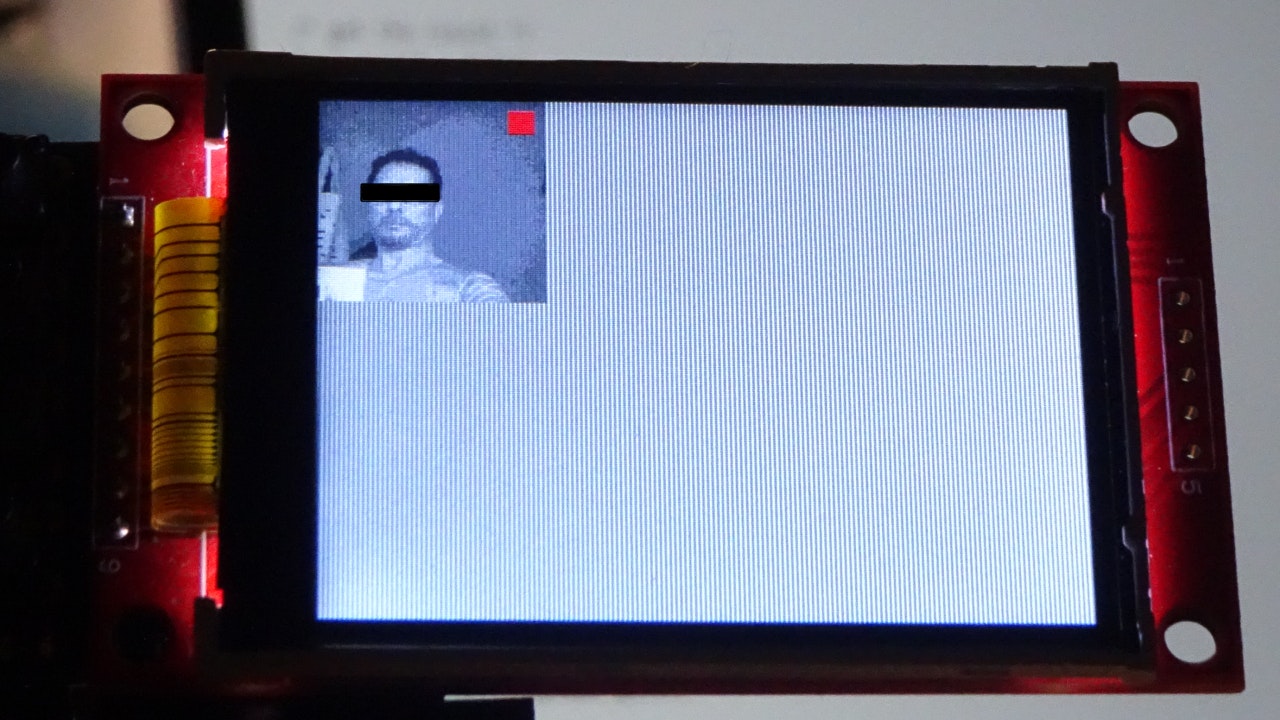
ディスプレイ部分のスケッチは、Spresense用にカスタマイズされた Adafruit のグラフィックスライブラリとデバイスライブラリを使っています。あからじめインストールをしておいてください。人がいると判定をしたら、赤い四角いボックスをLCDに表示させるようにしています。
#include "Adafruit_GFX.h"
#include "Adafruit_ILI9341.h"

#define TFT_RST 8
#define TFT_DC  9
#define TFT_CS  10
Adafruit_ILI9341 tft = Adafruit_ILI9341(TFT_CS ,TFT_DC ,TFT_RST);
uint16_t disp[target_w*target_h];

/* indicator box */
int box_sx = 80;
int box_ex = 90;
int box_sy = 5;
int box_ey = 15;

void setup_display() {
  tft.begin();
  tft.setRotation(3);
}

void disp_image(uint16_t* buf, int offset_x, int offset_y
              , int target_w, int target_h, bool result) {
  int n = 0;
  for (int y = offset_y; y < offset_y + target_h; ++y) {
    for (int x = offset_x; x < offset_x + target_w; ++x) {
      uint16_t value = buf[y*width + x];
      uint16_t y_h = (value & 0xf000) >> 8;
      uint16_t y_l = (value & 0x00f0) >> 4;
      value = (y_h | y_l);
      uint16_t value6 = (value >> 2);
      uint16_t value5 = (value >> 3);
      disp[n] = (value5 << 11) | (value6 << 5) | value5;
      if (result && (y >= (offset_y + box_sy)) && (y <= (offset_y + box_ey))
        && (x >= (offset_x + box_sx)) && (x <= (offset_x + box_ex))) {
        disp[n] = ILI9341_RED;
      }
      ++n;
    }
  }
  tft.drawRGBBitmap(0, 0, disp, target_w, target_h);
}
Person Detection を動作をさせてみる
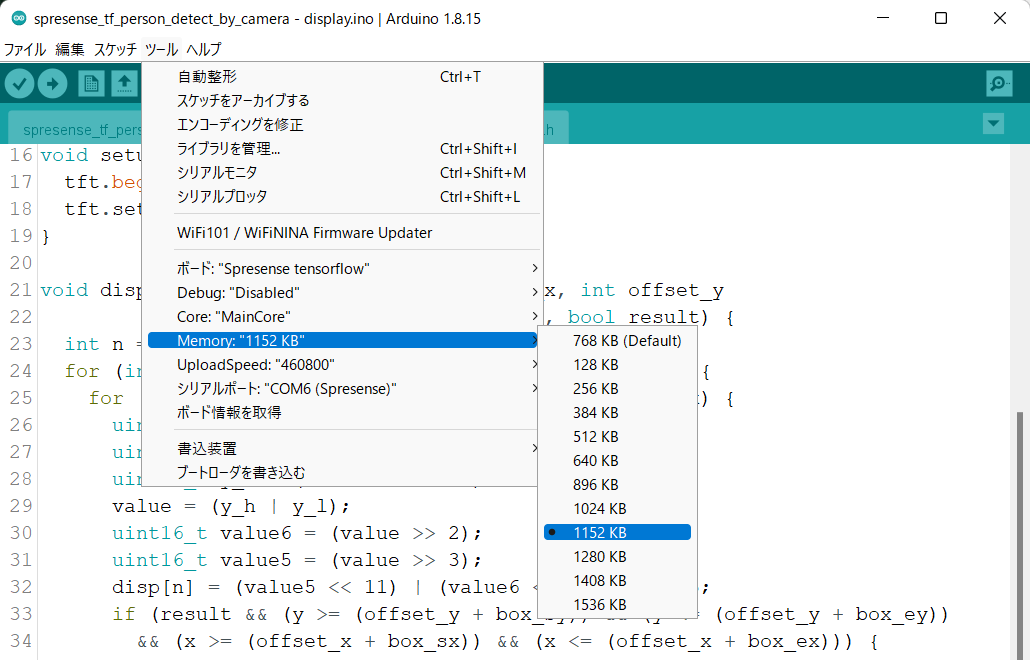
実際に動かしてみました。300kB の学習済モデルに加え、カメラ、ディスプレイも使うのでかなりメモリを消費しています。書き込むときは、"Main Core" のメモリ設定を"1152kB"に設定してください。
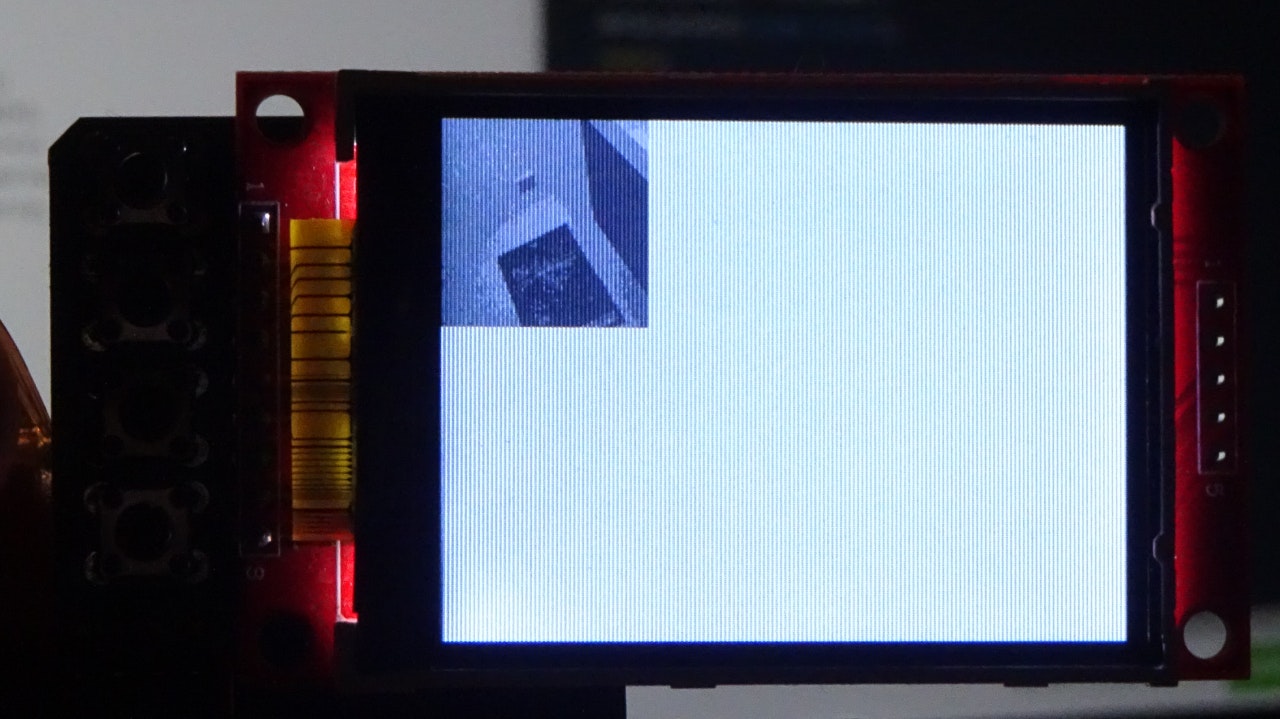
実際に動かしてみると、人がいると赤いボックスを表示し、カメラから人の姿がなくなると赤いボックスが消えるのが確認できました。認識速度は460ミリ秒でした。
使ってみた感想
量子化されたモデルで300kB もあるネットワークなので高性能を期待したのですが、思ったほどの認識率は得られませんでした。少し暗めの環境だったり、窓から夕日が差し込む環境では誤検出ばかりでした。室内灯がもっとも安定しているようなので、オフィスで撮影されたデータを中心に学習したのではないかと思います。
この経験からも組込みAIの場合は、ネットワークの規模よりも、認識させたい場所を安定した環境に整えて得られた画像で学習させることが最も重要であることを再認識しました。ただ、安定した環境を整えるのが難しいことも多々あります。その場合はHDRカメラが威力を発揮すると思っています。SPRESENSEのHDRカメラはまだ使いはじめたばかりなのですが、試しに使ってみた感じでは環境の変動によらず安定した画像が得られそうなので期待が大きいです。