Unity Recorderにカスタムの録音・録画ソースを追加したい!
お題がだいぶレアケース ですが、Unityのエディター上で動画や音声を記録できるUnity Recorderにカスタムのソースを追加したい場合のガイドです。
CRI ADX2はUnityに対応した統合型サウンドミドルウェアです。Unity内部のサウンドシステムとは完全に別のライブラリで処理されるため、通常のUnity Recorderの機能では音が記録できません。
そこで、Unity Recorderにカスタムな録音ソースを追加して対応しました。
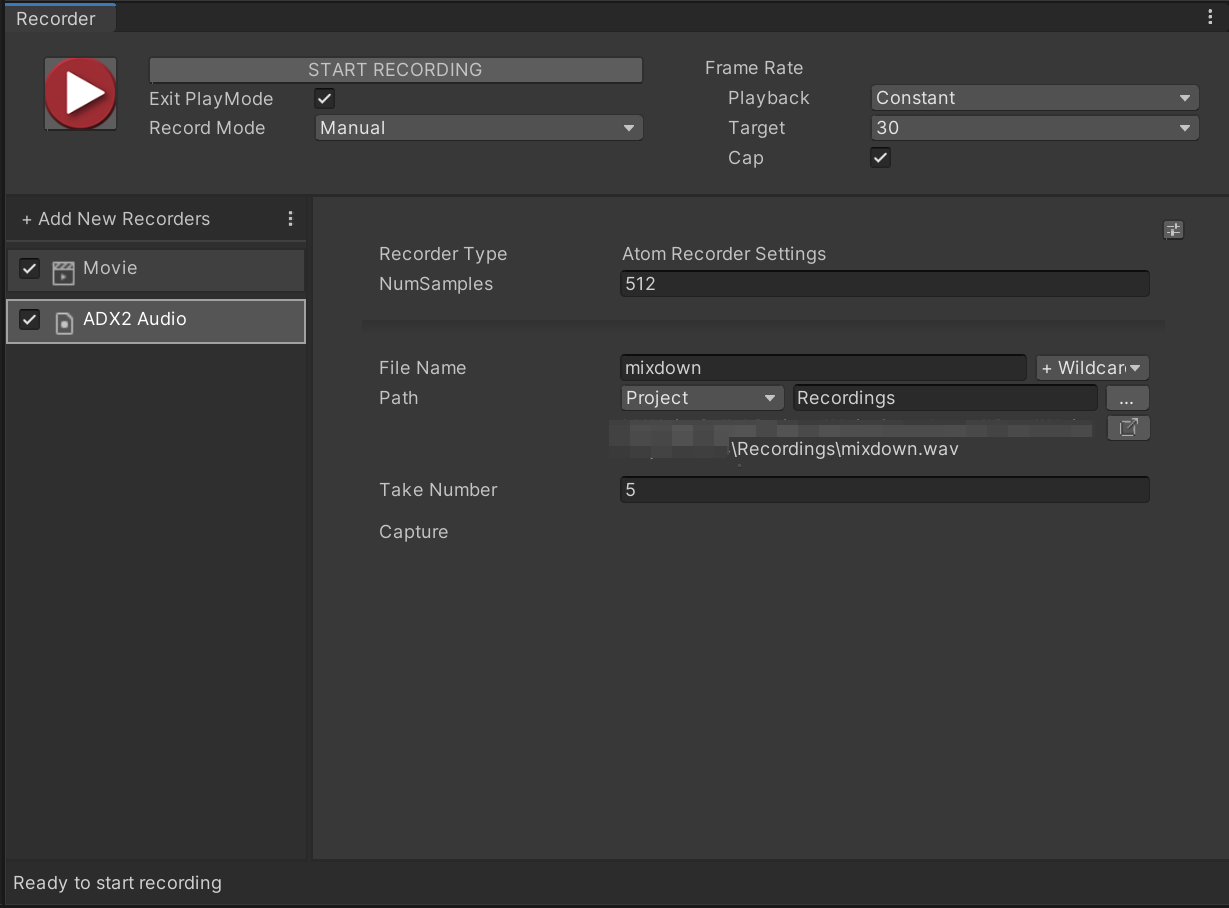
下図のように、Recordersの要素として「ADX2 Audio」を追加し、動画と一緒に録音できるようにしています。
パッケージは以下に公開していますので、機能を使いたい人はこちらからどうぞ。
ADX2 for Unity Recorder
https://github.com/TakaakiIchijo/ADX2forUnityRecorder
世の中にUnity Recorderに新しいソースを追加したいと思う人がどれだけいるかは不明なのですが、このパッケージの開発に結構手間取ったので記録します。
(機能拡張に関するドキュメントは見当たらなかったので、ソースを読んで仕組みを把握しました。)
今回のADX2対応ケース以外には、たとえば「XR系の特殊な描画部分を録画したい」「複数ソースの音声をミックスしてから録音したい」あたりが当該すると思います。
なお、ADX2の録音部分については以下の記事で解説しています。
Unity + ADX2環境でゲーム中の音を録音する
https://qiita.com/Takaaki_Ichijo/items/faf96c22740ff5a7587d
Unity Editor上でADX2再生データの音を録音する with Unity Recorder
https://qiita.com/Takaaki_Ichijo/items/853d963b3341b54d6454
動作確認環境
Unity 2020.1.0f1 + Unity Recorder 2.2.0-preview
必要なクラス
Unity Recorderで何らかのソースを記録・主力したい時、以下の4つのクラスが必要です。XXには記録対象の名前を当てはめてください。
XXRecorder
録音処理本体を定義します。
XXRecorderSettings
Recorderウィンドウで設定する値やファイル名などを保存する、ScriptableObject派生クラスです。
XXRecorderEditor
Recorderウィンドウの中に表示する設定項目を定義するCustomEditorアトリビュート付きクラスです。
XXRecorderInputSettings
保存するデータソースの設定をシリアライズするクラスです。
XXRecorderInputSettingsクラスの作成
まずは入力ソースの設定を保存するシリアライズクラスを用意します。
名前空間UnityEditor.Recorder.InputのRecorderInputSettingsの派生クラスとして用意します。
以下はADX2用クラスの例です。
using System;
using System.Collections.Generic;
using System.ComponentModel;

namespace UnityEditor.Recorder.Input
{
    [DisplayName("ADX2")]
    [Serializable]
    public class AtomInputSettings : RecorderInputSettings
    {
        protected override Type InputType
        {
            get { return typeof(RecorderInput); }
        }

        protected override bool ValidityCheck(List<string> errors)
        {
            return true;
        }
    }
}
ADX2はUnity外部のデータをソースとするため、実はこのクラスにはほとんど意味が無いのですが、RecorderSettings派生クラスがRecorderInputSettingsを必要とするため、用意しています。
XXRecorderクラスの作成
録音操作本体を記述します。
GenericRecorder<RecorderSettings>クラスの派生として用意します。
BeginRecordingオーバーライドメソッドで録音録画の初期化を行い、RecordFrameメソッドでフレームごとのキャプチャを行い、EndRecordingで終了処理とファイルの書き出し処理を記述します。
using System;
using UnityEngine;

namespace UnityEditor.Recorder
{
    class AtomRecorder : GenericRecorder<AtomRecorderSettings>
    {
       /中略/
        protected override bool BeginRecording(RecordingSession session)
        {
            if (!base.BeginRecording(session))
                return false;
            try
            {
                Settings.FileNameGenerator.CreateDirectory(session);
            }
            catch (Exception)
            {
                Debug.LogError(string.Format( "Atom recorder output directory \"{0}\" could not be created.", Settings.FileNameGenerator.BuildAbsolutePath(session)));
                return false;
            }

        /録音処理の初期化/
                return true;
        }

        protected override void RecordFrame(RecordingSession session)
        {
        /フレームごとの録音処理/
        }

        protected override void EndRecording(RecordingSession session)
        {
        /録音処理の終了・ファイルの保存/
        }
    }
}
基底クラスのSettings.FileNameGeneratorから、エディター内で設定したファイル名にアクセスできます。備え付けのAudioRecorderやMovieRecorderはSettings.fileNameGeneratorにアクセスしているのですが、カスタムソースを作った場合はFileNameGeneratorからアクセスします。
XXRecorderSettingsクラスの作成
RecorderSettingsクラスの派生として用意します。RecorderSettingsアトリビュートで先ほど作成したレコーダー本体と紐づけます。
ADX2拡張の場合はサンプル数をエディタで設定したかったので、カスタムの設定要素としてNumSumplesを追加しています。
using System.Collections.Generic;
using UnityEditor.Recorder.Input;
using UnityEngine;

namespace UnityEditor.Recorder
{
    [RecorderSettings(typeof(AtomRecorder), "ADX2Audio")]
    class AtomRecorderSettings : RecorderSettings
    {
        protected override string Extension => "wav";

        public int NumSamples
        {
            get { return numSamples; }
            set { numSamples = value; }
        }

        [SerializeField] private int numSamples = 512;

        [SerializeField] AtomInputSettings m_AtomInputSettings = new AtomInputSettings();

        public override IEnumerable<RecorderInputSettings> InputsSettings
        {
            get { yield return m_AtomInputSettings; }
        }

        public AtomRecorderSettings()
        {
            FileNameGenerator.FileName = "mixdown";
        }
    }
}
XXecorderEditorクラスの作成
さいごにUnity Recorderウィンドウ内の描画を定義するクラスを作成します。
RecorderEditorクラスの派生として用意します。
CustomEditorアトリビュートでXXRecorderSettingsと紐づけます。
using UnityEngine;

namespace UnityEditor.Recorder
{
    [CustomEditor(typeof(AtomRecorderSettings))]
    class AtomRecorderEditor : RecorderEditor
    {
        SerializedProperty m_NumSamples;

        static class Styles
        {
            internal static readonly GUIContent NumSamples = new GUIContent("NumSamples");
        }

        protected override void OnEnable()
        {
            base.OnEnable();

            if (target == null)
                return;

            m_NumSamples = serializedObject.FindProperty("numSamples");
        }

        protected override void FileTypeAndFormatGUI()
        {
            EditorGUILayout.PropertyField(m_NumSamples, Styles.NumSamples);
        }
    }
}
SerializedProperty として、カスタム設定要素を定義します。このとき、serializedObject.FindPropertyメソッドで値をフィールド名で引っ張ってきます。
手順は以上です。
カスタムソース由来の音声・動画をミックスするためには
標準のMovieRecorderでは、「Capture Audio」というチェックを入れると音声が動画とミックスされた状態で保存されます。
音声・動画が一体になったMP4などを出力することもできますが、その場合はMovieRecorderのソースにかなり手を入れないといけないため、今回は触っていません。
可能そうではあるので、大量にカスタムソース経由でのキャプチャをしなくてはならない場合は自作の検討もできます。
