0
1

Delete article

Deleted articles cannot be recovered.

Draft of this article would be also deleted.

Are you sure you want to delete this article?

More than 5 years have passed since last update.

Raspberry Pi B+のバックアップimgファイル作成

Last updated at Posted at 2018-12-29

手順

①予め、空のバックアップimgファイル(例:yyyymmdd_RasPiSdBackup.img)を作成しておく。
②Win32 Disk Imagerを起動する。
③「Image File」に①で作成したimgファイルを選択する。
④「Device」にRaspberry Pi B+のSDカードを挿したドライブ(例:R:)を選択する。
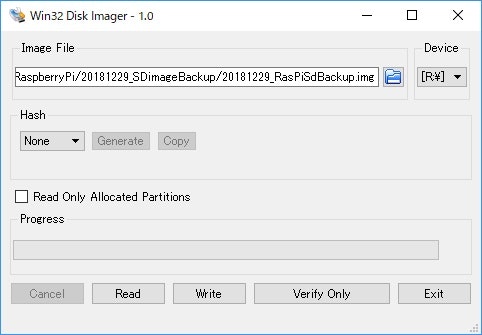
001_Setting.jpg
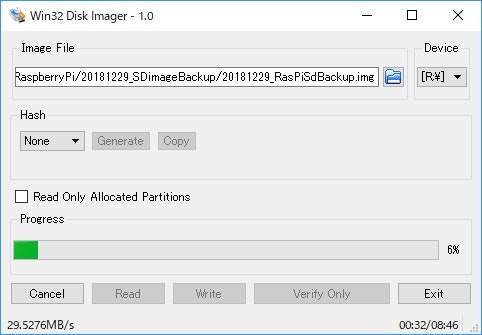
⑤「Read」ボタンをクリックする。
⑥ファイルの上書き確認画面が表示されるので、「Yes」ボタンをクリックする。
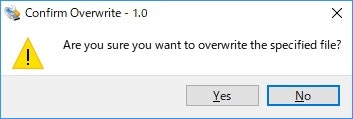
002_Check.jpg
⑦しばらく待つ
003_Process.jpg
⑧「Complete」画面が表示されたら「OK」ボタンをクリックして、完了。
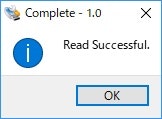
004_Complete.jpg

背景

以下でRaspberry Pi B+の再インストールを実施した際、
時間がかかり、もったいないと感じたので、当該内容を試行した。
https://qiita.com/TTakeshi/items/e9772a1293b1e3f88dea

今後の予定

バックアップimgファイルを使用したSDカードの復旧について、試行する。

0
1
0

Register as a new user and use Qiita more conveniently

  1. You get articles that match your needs
  2. You can efficiently read back useful information
  3. You can use dark theme
What you can do with signing up
0
1

Delete article

Deleted articles cannot be recovered.

Draft of this article would be also deleted.

Are you sure you want to delete this article?