はじめに
某プログラミングスクールでフリマアプリを作成しました。画像の複数投稿・編集を担当し、その備忘録として記事を投稿します。今回は、特に苦労した画像の複数投稿について記述していきます。また、プログラミング初学者であるため、拙い箇所や間違ってる解釈があるかもしれません。ご了承の程、よろしくお願い致します。
また、下記の記事を参考にさせて戴きました。
https://qiita.com/gakinchoy7/items/ac1d8e64e33c3ddd377b
https://qiita.com/shinnosuke960801/items/66f2a511803d7dac53a3
https://qiita.com/mylevel/items/bae2204f8a40ff1d2d37
仕様
1、10枚まで投稿ができるようにしました。
2、5枚画像を選択した後、2段目に移動するようにしました。
3、1枚ずつプレビューされるようにしました。
4、削除ボタンを押すと、プレビューが消えるようにしました。
(下記URLで挙動の確認ができます)
https://i.gyazo.com/baa9fdb1aaa4c2ffc4a1dc2225043486.mp4
https://i.gyazo.com/6a1b8af554c9c34792c8870cfd796580.mp4
https://i.gyazo.com/c73679d9c9bc3437b1abec53e63ce78c.mp4
モデルのアソシエーション
has_many :products
belongs_to :product
belongs_to :user
has_many :images, dependent: :destroy
画像付きで出品できるように
まず最初に、実装に必要なGemfileを編集します。
gem 'carrierwave'
gem 'mini_magick'
gem 'jquery-rails'
インストールが終わったら、モデルに追記します。
mount_uploader :image, ImageUploader
accepts_nested_attributes_for :images, allow_destroy: true
productが保存される時に、imageが紐づいて保存されるようになります。
次に、コントローラを編集します。
def new
  @product = Product.new
  @product.images.new
end

def create
    @product = Product.create(product_params)
    if @product.save
      redirect_to root_path
    # image以外のデータも送信する想定で下記のように記述しています。
    else
      unless @product.images.present?
        @product.images.new
        render 'new'
      else
        render 'new'
      end
    end
  end

private
def product_params
  params.require(:product).permit(images_attributes: [:image, :_destroy, :id]).merge(user_id: current_user.id)
end
form内で異なるモデルを編集する際に、fields_forというメソッドを使用します(今回だと、productを編集してimageを保存)。その際に、newアクションの@product.images.newという記述がないと、viewにフォームが表示されません。また、createアクションですが、画像が送信されたかそうでないかで条件分岐させています。単にrender 'new'だと画像を送信せずにページに戻ってきた際にフォームが表示されません。また、画像を送信しているにも関わらず@product.images.newの記述があると、フォームが2個表示されてしまいます。
続いて、viewを作成していきます。
.content-bg-gray
.shadowed-rounded-rectangle
= form_with(model: @product, local: true, class: "product-new-form") do |f|
%section.mainbox-product-header
%h2.mainbox-header__text
商品の情報を入力
.product__block__form
%span.label_title.profile-form__label
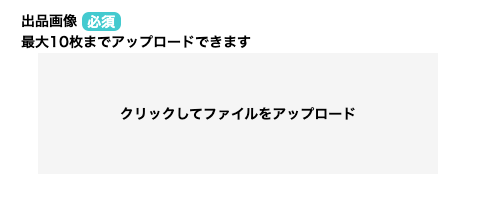
出品画像
%span.require 必須
%p.upload_limit 最大10枚までアップロードできます
.product-new__field__uploader
= f.fields_for :images do |image|
%ul#previews
%li.input
%label.upload-label
.upload-label__text
%p クリックしてファイルをアップロード
.input-area
= image.file_field :image, class: "hidden image_upload"
.content-bg-gray{
  background-color: #EFEFEF;
  padding-top: 80px;
  padding-bottom: 100px;
  .shadowed-rounded-rectangle{
    width: 700px;
    box-shadow: 1px 1px 10px 1px rgba(0,0,0,0.1);
    margin: 100px auto 0;
    background-color: #ffffff;
    border-radius: 60px;
    padding: 30px;
    .product-new-form{
      width: 434px;
      margin: auto;
      .product__block__form{
        .product-new__field__uploader{
          margin-bottom: 50px;
          width: 100%;
          ul{
            .input{
              display: flex;
              flex-wrap: wrap;
              width: 100%;
              .upload-label{
                width: 100%;
                height: 121px;
                background-color: rgb(245, 245, 245);
                .upload-label__text{
                  text-align: center;
                  position: absolute;
                  top: 50%;
                  z-index: 0;
                  width: 100%;
                  transform: translate(0, -50%);
                }
                .input-area{
                  display: none;
                }
              }
            }
          }
        }
      }
    }
  }
}
.mainbox-product-header{
  margin: 30px 0 8px;
  width: 434px;
  &__text{
    margin-bottom: 20px;
  }
}
.require{
  display: inline;
  width: 32px;
  height: 15px;
  padding: 2.5px 5.5px;
  background-color: #68C7CC;
  color: #ffffff;
  border-radius: 7px;
}
BEM規則に基づいて命名できていないので、分かりづらいかもしれませんがviewの完成です。
次に、画像を載せるごとに入力欄を変化させるようにします。
ます、jQueryを使えるよに下記ファイルを編集します。
//= require turbolinks
//= require jquery
//= require jquery_ujs
//= require_tree .
new_image.jsファイルを作成し、編集していきます。
$(function () {
  # プレビュー機能
  # 'change'イベントでは$(this)で要素が取得できないため、 'click'イベントを入れました。
  # これにより$(this)で'input'を取得することができ、inputの親要素である'li'まで辿れます。
  $(document).on('click', '.image_upload', function () {
    # inputの要素はクリックされておらず、inputの親要素であるdivが押されています。
    # だからdivのクラス名をclickした時にイベントが作動します。
    # div(this)から要素を辿ればinputを指定することが可能です。
    # $liに追加するためのプレビュー画面のHTMLです。
    var preview = $('<div class="image-preview__wapper"><img class="preview"></div><div class="image-preview_btn"><div class="image-preview_btn_delete">削除</div></div>');
    # 次の画像を読み込むためのinputです。
    var append_input = $(`<li class="input"><label class="upload-label"><div class="upload-label__text"><i class="fa fa-camera fa-4x"></i><div class="input-area display-none"><input class="hidden image_upload" type="file"></div></div></label></li>`)
    $ul = $('#previews')
    $li = $(this).parents('li');
    $label = $(this).parents('.upload-label');
    $inputs = $ul.find('.image_upload');
    # inputに画像を読み込んだら、"プレビューの追加"と"新しいli追加"処理が動きます。
    $('.image_upload').on('change', function (e) {
      # inputで選択した画像を読み込みます。
      var reader = new FileReader();
      # プレビューに追加させるために、inputから画像ファイルを読み込みます。
      reader.readAsDataURL(e.target.files[0]);
      # 画像ファイルが読み込んだら、処理が実行されます。
      reader.onload = function (e) {
        # previewをappendで追加する前に、プレビューできるようにinputで選択した画像を<img>に'src'で付与させます。
        # つまり、<img>タグに画像を追加させます。
        $(preview).find('.preview').attr('src', e.target.result);
      }
      # inputの画像を付与した,previewを$liに追加します。
      $li.append(preview);
      # 生成したliの横幅を決めます。
      $('#previews li').css({
        'width': `80px`
      })
      # プレビュー完了後は、inputを非表示にさせます。これによりプレビューだけが残ります。
      $label.css('display', 'none'); # inputを非表示にします。
      $li.removeClass('input');     # inputのクラスはjQueryで数を数える時に邪魔なので除去します。
      $li.addClass('image-preview'); # inputのクラスからプレビュー用のクラスに変更しました、
      $lis = $ul.find('.image-preview'); # クラス変更が完了したところで、プレビューの数を数えます。
      # 画像が9枚以内なら文字とインプットを追加させます。
      if ($lis.length < 10) {
        $ul.append(append_input)
        $('#previews li:last-child').css({
          'width': `80px`
        })
      }
      # inputの最後の"data-image"を取得して、input nameの番号を更新させています。
      # これをしないと、それぞれのinputの区別ができず、最後の1枚しかDBに保存されません。
      # 全部のプレビューの番号を更新することで、プレビューを削除して、新しく追加しても番号が1,2,3,4,5,6と綺麗に揃います。そのため、全部の番号を更新させます。
      $inputs.each(function (num, input) {
        # nameの番号を更新するために、現在の番号を除去します。
        $(input).removeAttr('name');
        $(input).attr({
          name: "product[images_attributes][" + num + "][image]",
          id: "images_attributes_" + num + "_image"
        });
      });

    });
  });
  # 削除ボタンをクリックしたとき、処理が動きます。
  $(document).on('click', '.image-preview_btn_delete', function () {
    var append_input = $(`<li class="input"><label class="upload-label"><div class="upload-label__text"><i class="fa fa-camera fa-4x"></i><div class="input-area display-none"><input class="hidden image_upload" type="file"></div></div></label></li>`)
    $ul = $('#previews')
    $lis = $ul.find('.image-preview');
    $li = $(this).parents('.image-preview');
    # "li"ごと削除して、previewとinputを削除させます。
    $li.remove();
    $lis = $ul.find('.image-preview'); # クラス変更が完了したところで、プレビューの数を数えます。
    # 画像が10枚以内なら文字とインプットを追加させます
    if ($lis.length == 9) {
      $ul.append(append_input)
    }
    $('#previews li:last-child').css({
      'width': `80px`
    })
  });
});
jsファイルで追加されたセレクタをcssで編集させていきます。
.content-bg-gray{
  background-color: #EFEFEF;
  padding-top: 80px;
  padding-bottom: 100px;
  .shadowed-rounded-rectangle{
    width: 700px;
    box-shadow: 1px 1px 10px 1px rgba(0,0,0,0.1);
    margin: 100px auto 0;
    background-color: #ffffff;
    border-radius: 60px;
    padding: 30px;
    .product-new-form{
      width: 434px;
      margin: auto;
      .product__block__form{
        .product-new__field__uploader{
          margin-bottom: 50px;
          width: 100%;
          #previews{
            list-style: none;
            display: flex;
            flex-wrap: wrap;
            .image-preview__wapper{
              width: 80px;
              height: 80px;
              .preview{
                width: 80px;
                height: 80px;
              }
            }
            .image-preview_btn{
              text-align: center;
              padding: 8px;
              border-top: 1px solid #cccccc;
              cursor: pointer;
              &:hover{
                transition: 0.5s;
                background-color: #cccccc;
              }
            }
            .input{
              display: flex;
              flex-wrap: wrap;
              width: 100%;
              .upload-label{
                width: 100%;
                height: 121px;
                background-color: rgb(245, 245, 245);
                .upload-label__text{
                  text-align: center;
                  position: absolute;
                  top: 50%;
                  z-index: 0;
                  width: 100%;
                  transform: translate(0, -50%);
                }
                .input-area{
                  display: none;
                }
              }
            }
          }
        }
      }
    }
  }
}
.mainbox-product-header{
  margin: 30px 0 8px;
  width: 434px;
  &__text{
    margin-bottom: 20px;
  }
}
.require{
  display: inline;
  width: 32px;
  height: 15px;
  padding: 2.5px 5.5px;
  background-color: #68C7CC;
  color: #ffffff;
  border-radius: 7px;
}
#previewsの中に.previewと.inputを横並べにし、flex-wrap: wrap;をかけます。5枚×2段になるようにサイズを調整しています。
以上で画像の複数投稿の実装は終わりです。
おわりに
リファクタリングが出来ていなかったり、BEMに従って命名出来ていなかったり、他にも課題はいくつかあると思います。機会があれば、画像の枚数に応じてフォームの大きさを小さくしていくするような実装をしてみたいと思います。質問や間違っている点がございましたら、コメントで指摘してくださると幸いです。