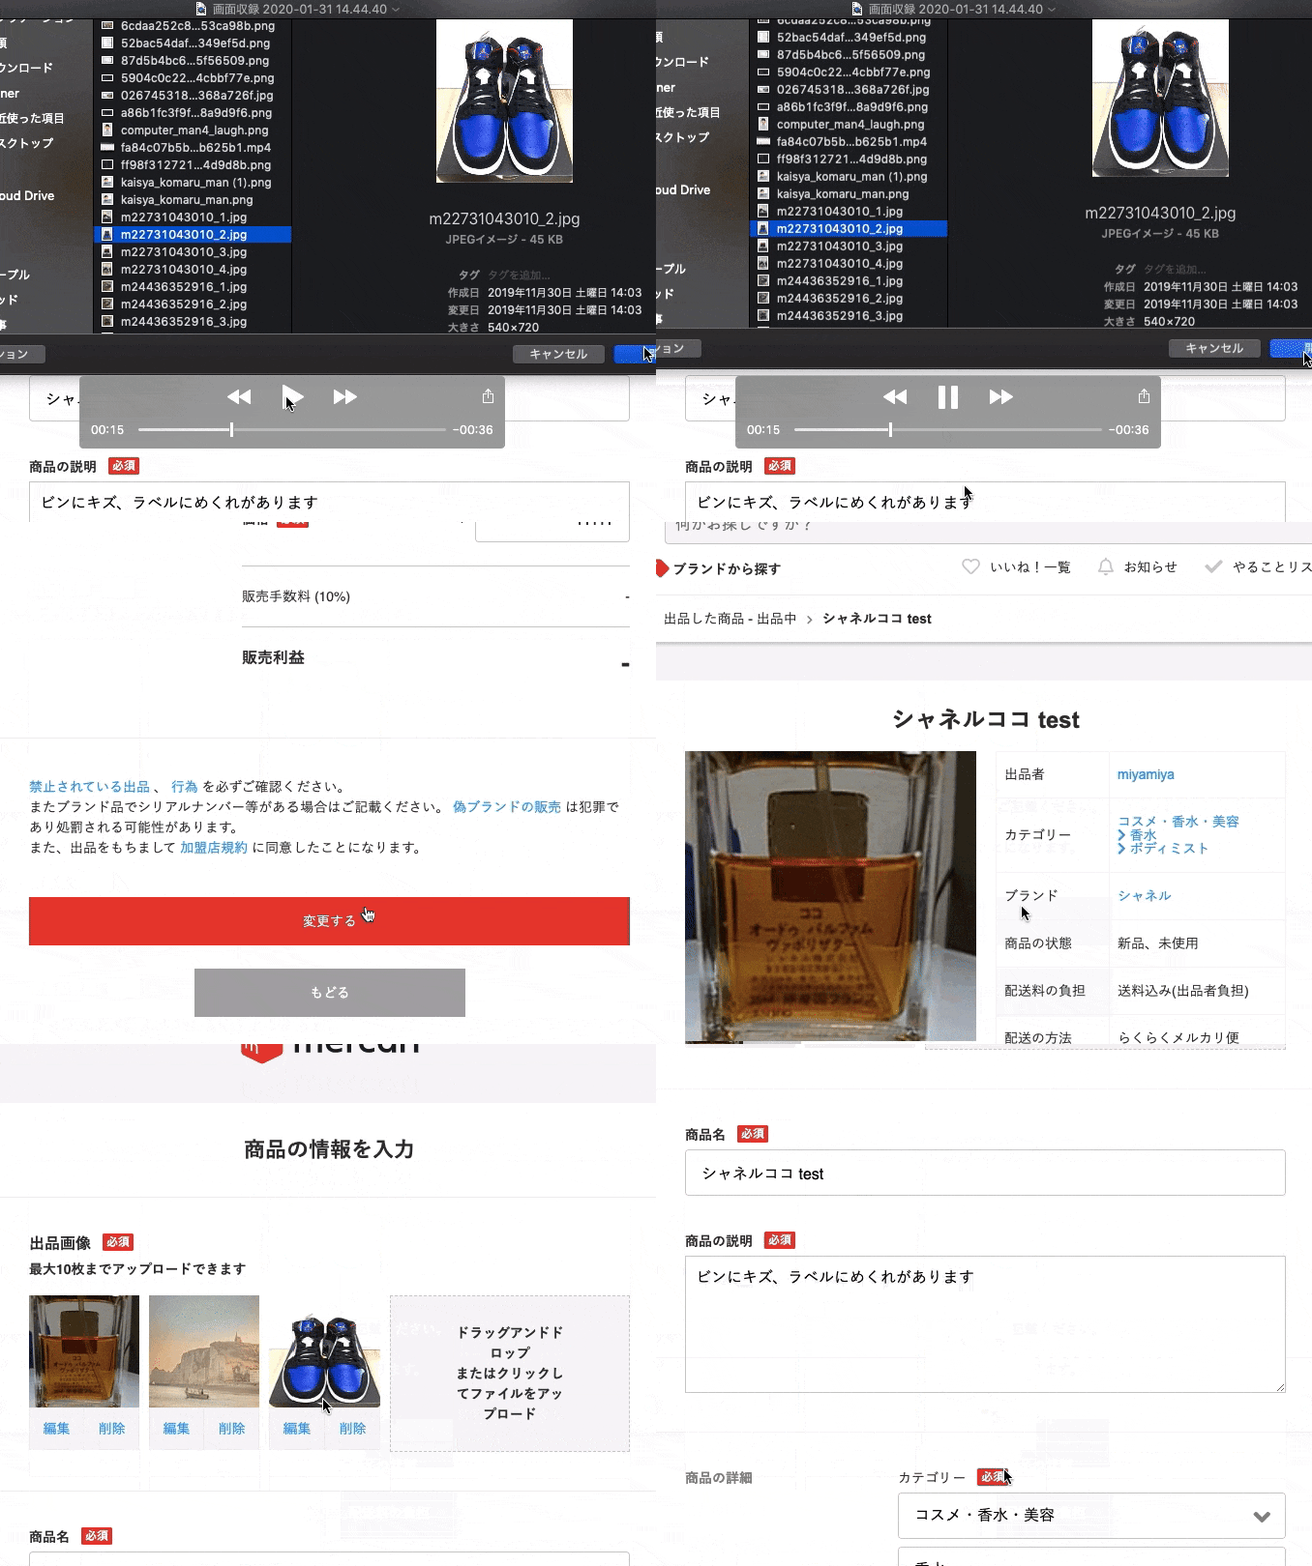
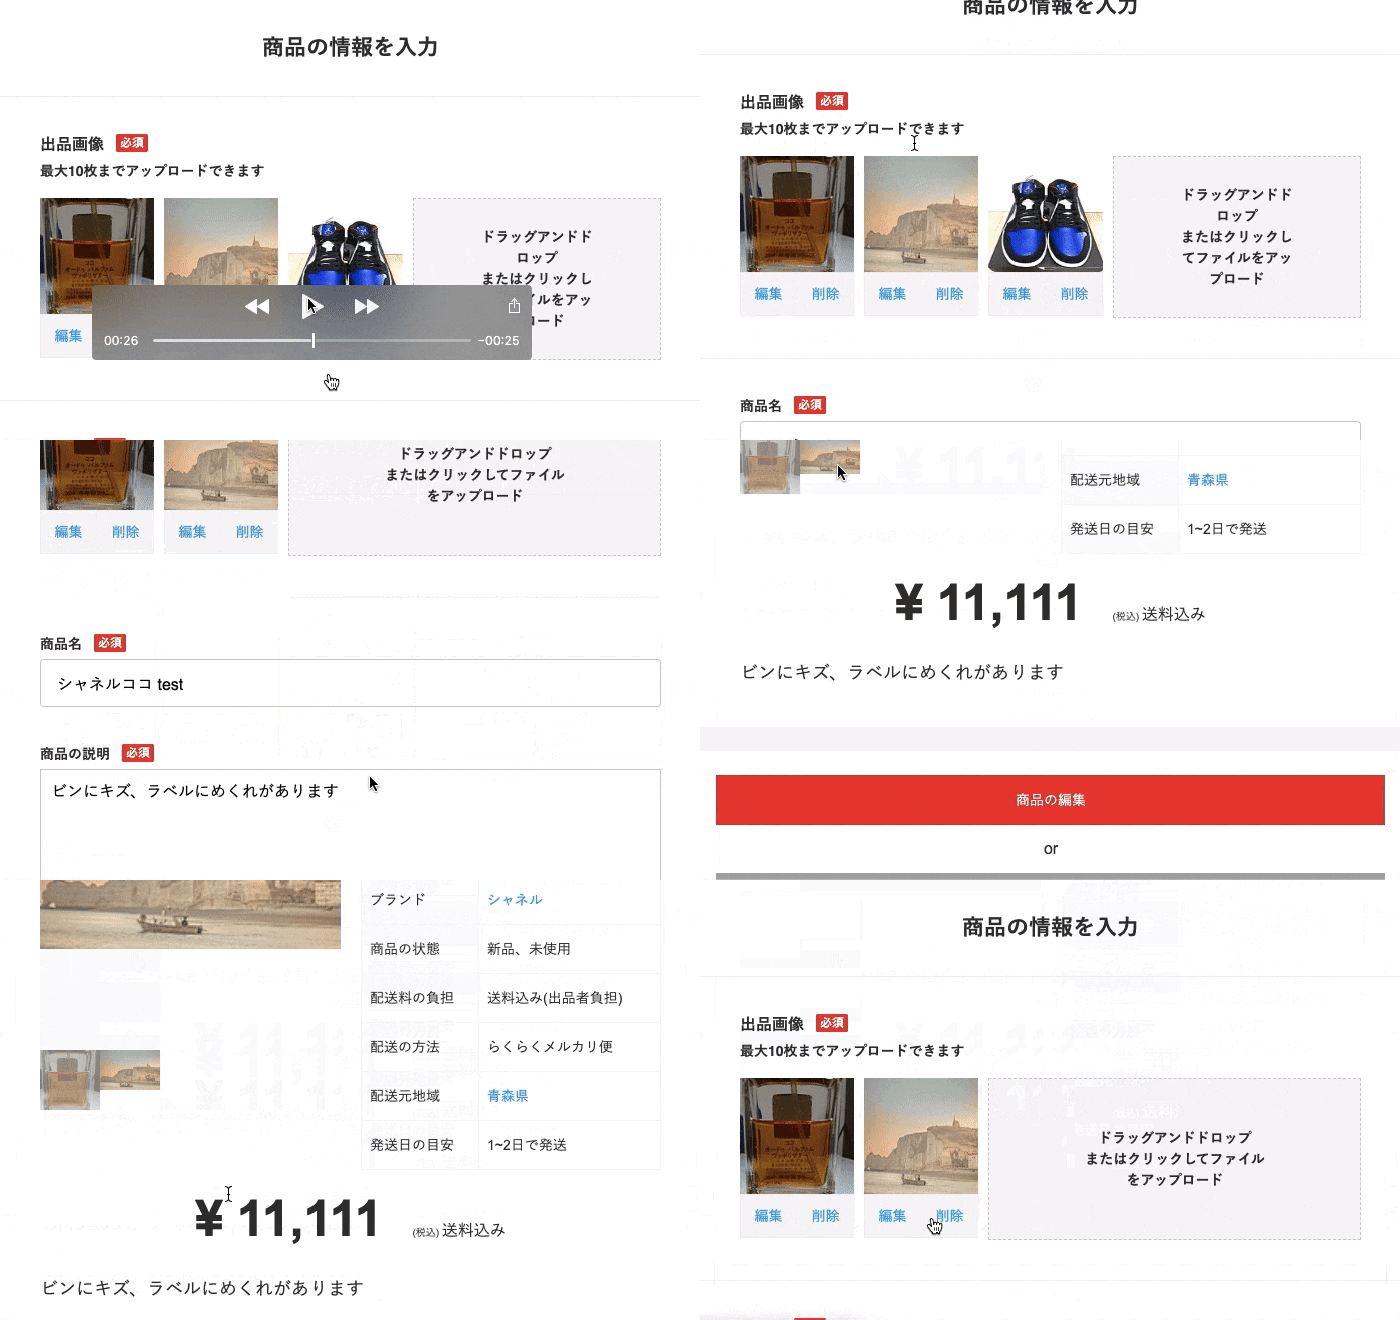
複数画像で困っていませんか?
もし内容がよければ、
いいね!とフォローをいただければ幸いです
完全にオリジナルですが、考え方はあっているはず。
productと同時に画像をformに投稿する。
accepts_nested_attributes_for を記述して、productのformでimageを同時投稿できるようにします。
class Product < ApplicationRecord
  has_many :images, dependent: :destroy
  accepts_nested_attributes_for :images
end
一方のimageはbelongs_toだけで構いません
class Image < ApplicationRecord
  mount_uploader :image, ImageUploader
  belongs_to :product
end
product_controllerのparamsにもimageを含めましょう
  private
  def product_params
    params.require(:product).permit(
      :name,
      :description,
      :period,
      :price,
      category_ids: []
      images_attributes: [:name, :id],
    )
    .merge(user_id: current_user.id)
  end
これにより、productのformにimageを同時に記述できます。
productモデルのformにfields_forを記述して、imageのformを追加します。
/productのform
= form_with model: @product, class:"form" do |f|
  /imageのform
  = f.fields_for :images do |f_img|
    = f_img.file_field :name, class: "hidden image_upload"
さて、これでいけると思うかもしれませんが、実際にはfields_forの項目が表示されません。

これは、コントローラー上でimageを作成していないからです。
= f.fields_for :images do |f_img|に必要な:imagesを用意できていないので、formに表示されないという問題です。
なので、コントローラーにimageを用意します。
class ProductsController < ApplicationController
  def new
    @product = Product.new
    @product.images.build
  end
end
上記の記述により、imageを作成します。
@product.images.buildを記述することで、productに紐付けた状態でimageを作成しています。これだと楽ですね。
これで、form上に表示されます。
あとは、cssで綺麗にしたり、javascriptでプレビュー機能を実装させます。
複数画像投稿 - new編 -
出品画面のHTML
.new-product
  =render "./registrations/sub-header"
  .main
    .head
      %h2 商品の情報を入力
    = form_with model: @product, class: "form", id: "product-form" do |f|
      .form-image
        .form-image__title
          %label 出品画像
          %span 必須
          .form-image__text 最大10枚までアップロードできます
          = f.fields_for :images do |image|
            .clearfix
              // 写真のプレビューとインプットボタンのul
              %ul#previews
                %li.input
                  // 画像を取り込むインプットボタン
                  %label.upload-label
                    .upload-label__text
                      ドラッグアンドドロップ
                      %br
                      またはクリックしてファイルをアップロード
                      .input-area
                        = image.file_field :name, class: "hidden image_upload"
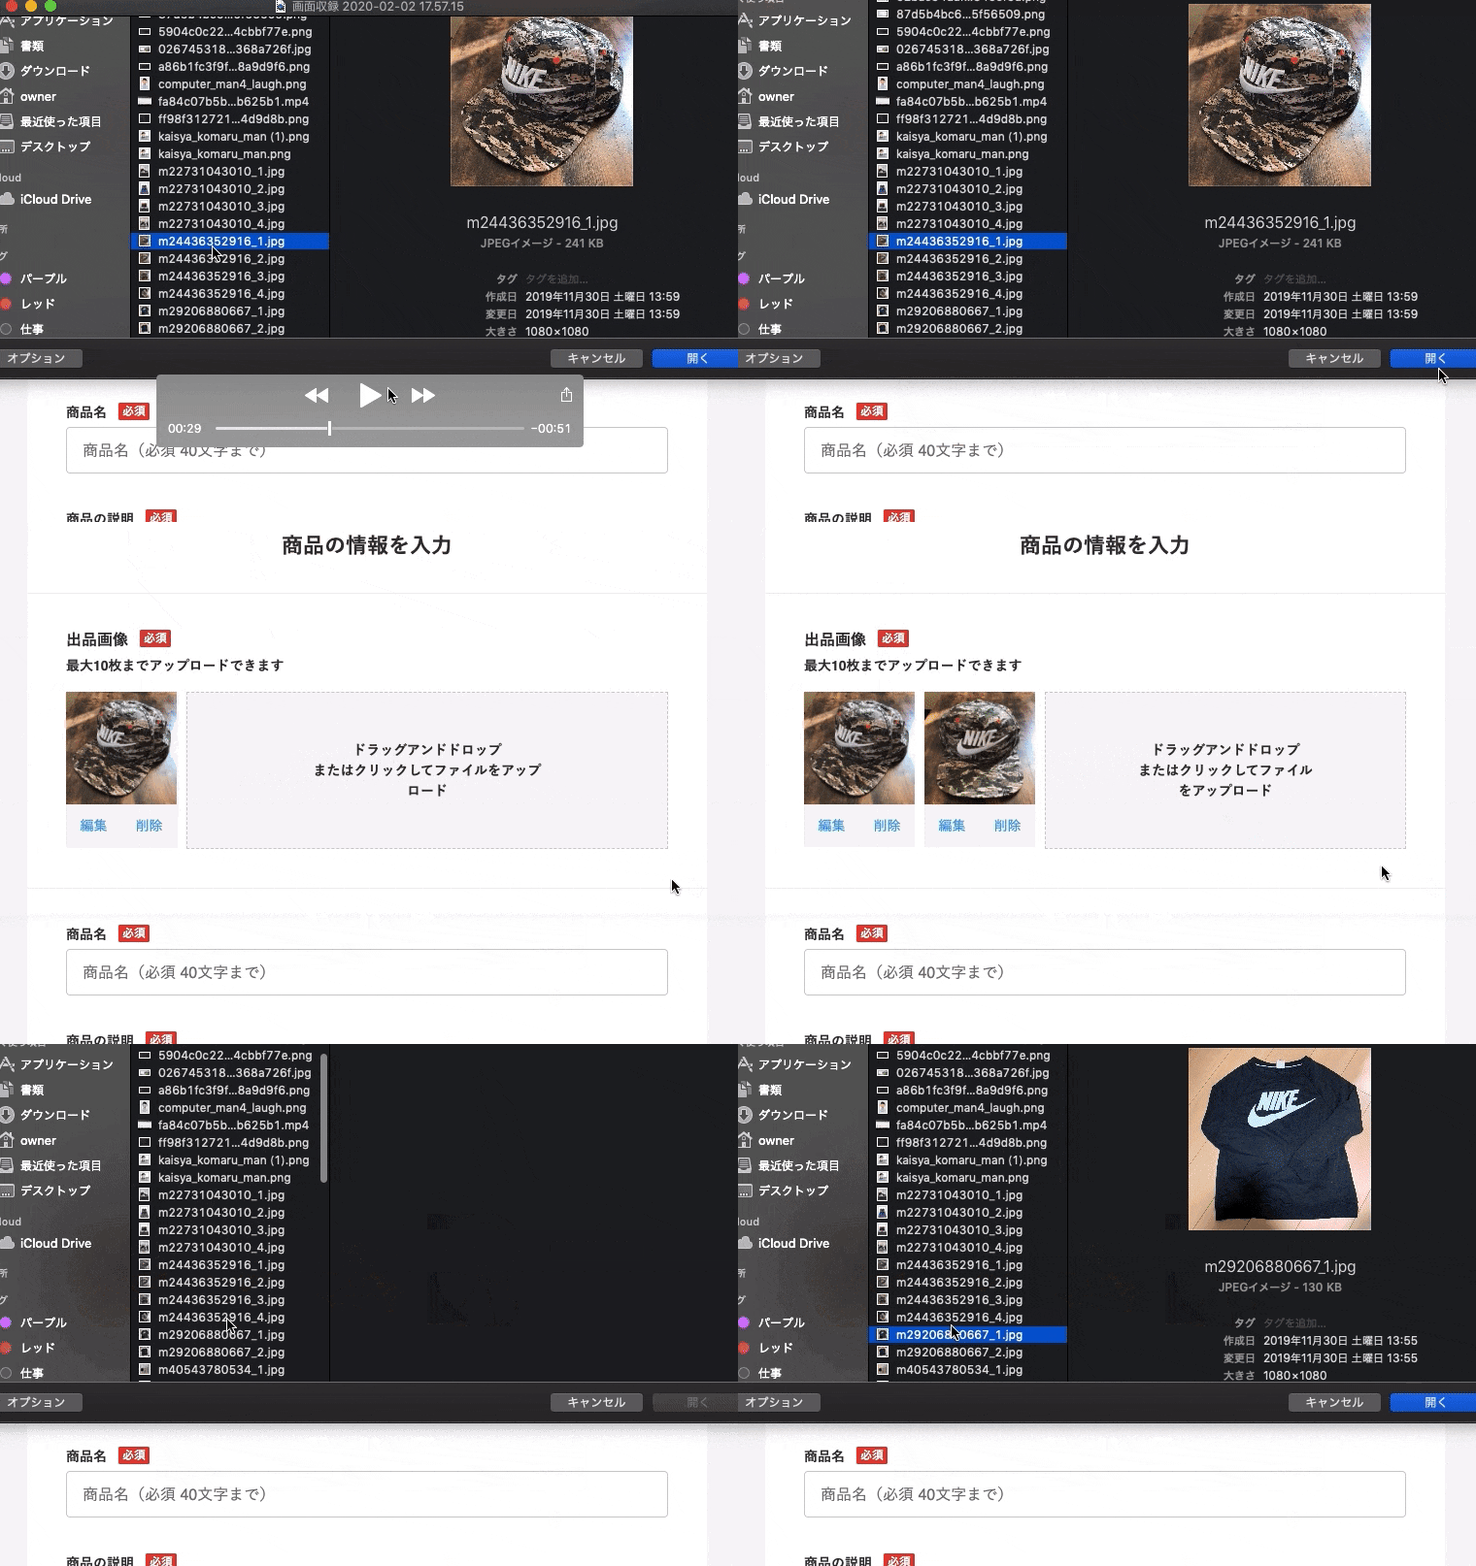
js:プレビューとインプットの仕組み
- inputだけある状態
- inputに写真が追加される
- その画像URLを取得
- imgタグに画像URLを追加
- そのimgタグをliにに追加=プレビューが表示
- inputをdisplay: none;で非表示にする
- display: none;にしてもhtml上には残るので、removeClassでinputクラスを除去(jQueryで数を数える時に邪魔)
- プレビューとわかるクラス、
.image-previewを付与 - li(プレビュー)のサイズを指定サイズにする
- 新しいinputを追加(append)する。
- 新しいinputのサイズを変更する
完了
1.inputだけある状態
= form_with model: @product, class:"form" do |f|
 = f.fields_for :images do |f_img|
   .clearfix
     %ul#previews
       %li.input
         %label.upload-label
           .upload-label__text
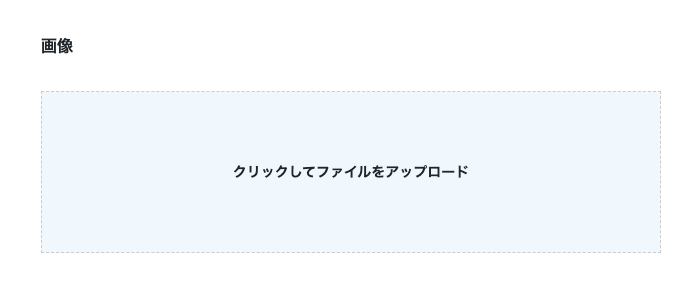
             クリックしてファイルをアップロード
               .input-area
                 = f_img.file_field :name, class: "hidden image_upload"
上記のhamlの= f_img.file_field :name, class: "hidden image_upload"がinputです
2. inputをクリックしてイベント発生
$(document).on("click", ".image_upload", function () {
= f_img.file_field :name, class: "hidden image_upload"がinputですが、これをクリックした時にイベントを発生させます。
なぜ、inputクリック時にイベんト発生にしたかというと、ulやli、inputがthisで簡単に取得できるからです。
$(document).on("click", ".image_upload", function () {
//素材を用意
    $ul = $("#previews");
    $li = $(this).parents("li");
    $label = $(this).parents(".upload-label");
    $inputs = $ul.find(".image_upload");
    //$liに追加するためのプレビュー画面のHTML
    var preview = $(
      `<div class="image-preview__wapper"><img class="preview"></div><div class="image-preview_btn"><div class="image-preview_btn_edit">編集</div><div class="image-preview_btn_delete">削除</div></div>`
    );
    //次の画像を読み込むためのinput。処理の最後にappendで追加する。
    var append_input = $(
      `<li class="input"><label class="upload-label"><div class="upload-label__text">ドラッグアンドドロップ<br>またはクリックしてファイルをアップロード<div class="input-area"><input class="hidden image_upload" type="file"></div></div></label></li>`
    );
画像を選択後、イベント発生
素材配置のためのイベントが
$(document).on("click", ".image_upload", function () {
でしたが、今度はプレビュー用の本命イベントを用意します。
まず、画像を選択されたらイベントを発生させます。
$(".image_upload").on("change", function (e) {
inputの情報がchangeされたら発生します。なので、画像が選択後に処理が動きます。
$(".image_upload").on("change", function (e) {
      //inputで選択した画像を読み込む
      var reader = new FileReader();
      // プレビューに追加させるために、inputから画像ファイルを読み込む。
      reader.readAsDataURL(e.target.files[0]);
画像を読み込んだら、プレビュー用imgタグに画像URLを埋め込んであげます。
reader.readAsDataURL(e.target.files[0]);で画像URLを取得します。
これをimgタグに挿入することで、画像がプレビューされます。
プレビュー用の![]() に画像URLを埋め込む
に画像URLを埋め込む
var preview = $(
      `<div class="image-preview__wapper"><img class="preview"></div><div class="image-preview_btn"><div class="image-preview_btn_edit">編集</div><div class="image-preview_btn_delete">削除</div></div>`
    );
プレビュー用のhtml素材var previewと定義し、<img class="preview">に画像URLのsrcを追加します。
var preview = $(
      `<div class="image-preview__wapper"><img class="preview"></div><div class="image-preview_btn"><div class="image-preview_btn_edit">編集</div><div class="image-preview_btn_delete">削除</div></div>`
    );

$(preview).find('.preview').attr('src', e.target.result);
//<img class="preview">をfindで指定。
//attrでimgタグにsrcを挿入
jsのattrを使って、srcにreader.readAsDataURL(e.target.files[0])で取得した画像URLを挿入しています。これで画像が表示されます。
<img src="画像URLが追加されて表示される" class="preview">
imgタグを用意できたので、この素材をliに追加しましょう。
inputのliにimgを挿入してプレビュー表示
では、inputのliにプレビュー用のを
appendで追加しましょう。
                %ul#previews
                  %li.input //こちらを取得
                    %label.upload-label
                      .upload-label__text
                        クリックしてファイルをアップロード
                        .input-area
                          = f_img.file_field :name, class: "hidden image_upload"
上記の%li.inputを$liと定義します。
$(document).on("click", ".image_upload", function () {
  //inputタグがあるliを取得
  $li = $(this).parents("li");
続いて、この$liにimgを追加します。
プレビュー画像の<img>をpreviewと定義し、$liにpreviewをappendで追加します。
$li.append(preview);
これでプレビュー用の画像が表示されます。
では、ここまでの処理を合算させると、下記になります。
  $(document).on('click', '.image_upload', function(){
//素材
    $ul = $('#previews')
    $li = $(this).parents('li');
    $label = $(this).parents('.upload-label');
    $inputs = $ul.find('.image_upload');
    //$liに追加するためのプレビュー画面のHTML
    var preview = $('<div class="image-preview__wapper"><img class="preview"></div><div class="image-preview_btn"><div class="image-preview_btn_edit">編集</div><div class="image-preview_btn_delete">削除</div></div>');
    //次の画像を読み込むためのinput。処理の最後にappendで追加する。
    var append_input = $(`<li class="input"><label class="upload-label"><div class="upload-label__text">ドラッグアンドドロップ<br>またはクリックしてファイルをアップロード<div class="input-area"><input class="hidden image_upload" type="file"></div></div></label></li>`)

//処理
    //inputに画像を読み込んだら、"プレビューの追加"と"新しいli追加"処理が動く
    $('.image_upload').on('change', function (e) {
      //画像URLを取得
      var reader = new FileReader();
      reader.readAsDataURL(e.target.files[0]);

      //画像URLをimgに追加
      //画像ファイルが読み込んだら、処理が実行される。
      reader.onload = function(e){
        $(preview).find('.preview').attr('src', e.target.result);
      }

      //inputを保有する、liにimgを追加
      $li.append(preview);
  }
不要なinputを非表示にする
$liに<img>を挿入したので、<input>は不要です
  %label.upload-label
    .upload-label__text
      クリックしてファイルをアップロード
      .input-area
        = f_img.file_field :name, class: "hidden image_upload"
上記を無くして、プレビュー画像の<img>だけを<li>に残したい。
なので、%label.upload-labelをdisplay: none;にして非表示にします。
$label = $(this).parents(".upload-label");
$label.css("display", "none");
これで画面上から消えました。
しかし、html上にクラスは存在します。
不要なクラスを剥奪します。
一つだけあるinputを下記で取得しています。
$input = $ul.find(".input");
同様の処理を繰り返すので、.inputクラスを剥奪します
%li.input //inputを非表示にしたので、.inputを剥奪
removeClassを利用して、クラスを剥奪
$li.removeClass("input");
これで``.input```クラスはなくなりました。
代わりに新しいクラスを付与して、プレビュー用のliだとわかるようにします。
      $label.css("display", "none");
      $li.removeClass("input");
      $li.addClass("image-preview");
      $lis = $ul.find(".image-preview");

      //widthでプレビューのサイズを指定
      $("#previews li").css({
        width: `114px`,
      });
あとは新しいinputを追加します。
新しいinput(li)を追加する
inputタグを非表示にしたので、新しいinputを追加します。
//新しいinputタグ(li)
var append_input = $(
      `<li class="input"><label class="upload-label"><div class="upload-label__text">ドラッグアンドドロップ<br>またはクリックしてファイルをアップロード<div class="input-area"><input class="hidden image_upload" type="file"></div></div></label></li>`
    );

//新しいliを追加
$ul.append(append_input);
まだ画像を取得していない、新しいinputを用意できました。
これで処理を繰り返せます。
しかし、プレビュー用のliがあるので、inputのサイズを変更したいです。
inputのサイズを変化させる。
プレビューのサイズは固定ですが、inputのサイズは徐々に小さく成ります。
だったら、
width: 100% - (プレビューのサイズ*プレビュー数);
で表現すれば大丈夫ではないか?
これをjQueryで実施します
$('#previews li:last-child').css({
      'width': `calc(100% - (20% * (${$lis.length}  )))`
 })

// プレビューはliの最後にあるので、last-childを利用してます。
こんな感じですね。
5個になるとinputのサイズがwidth: 100%に戻るので、下記にするといいでしょう。
$('#previews li:last-child').css({
      'width': `calc(100% - (20% * (${$lis.length} - 5 )))`
 })
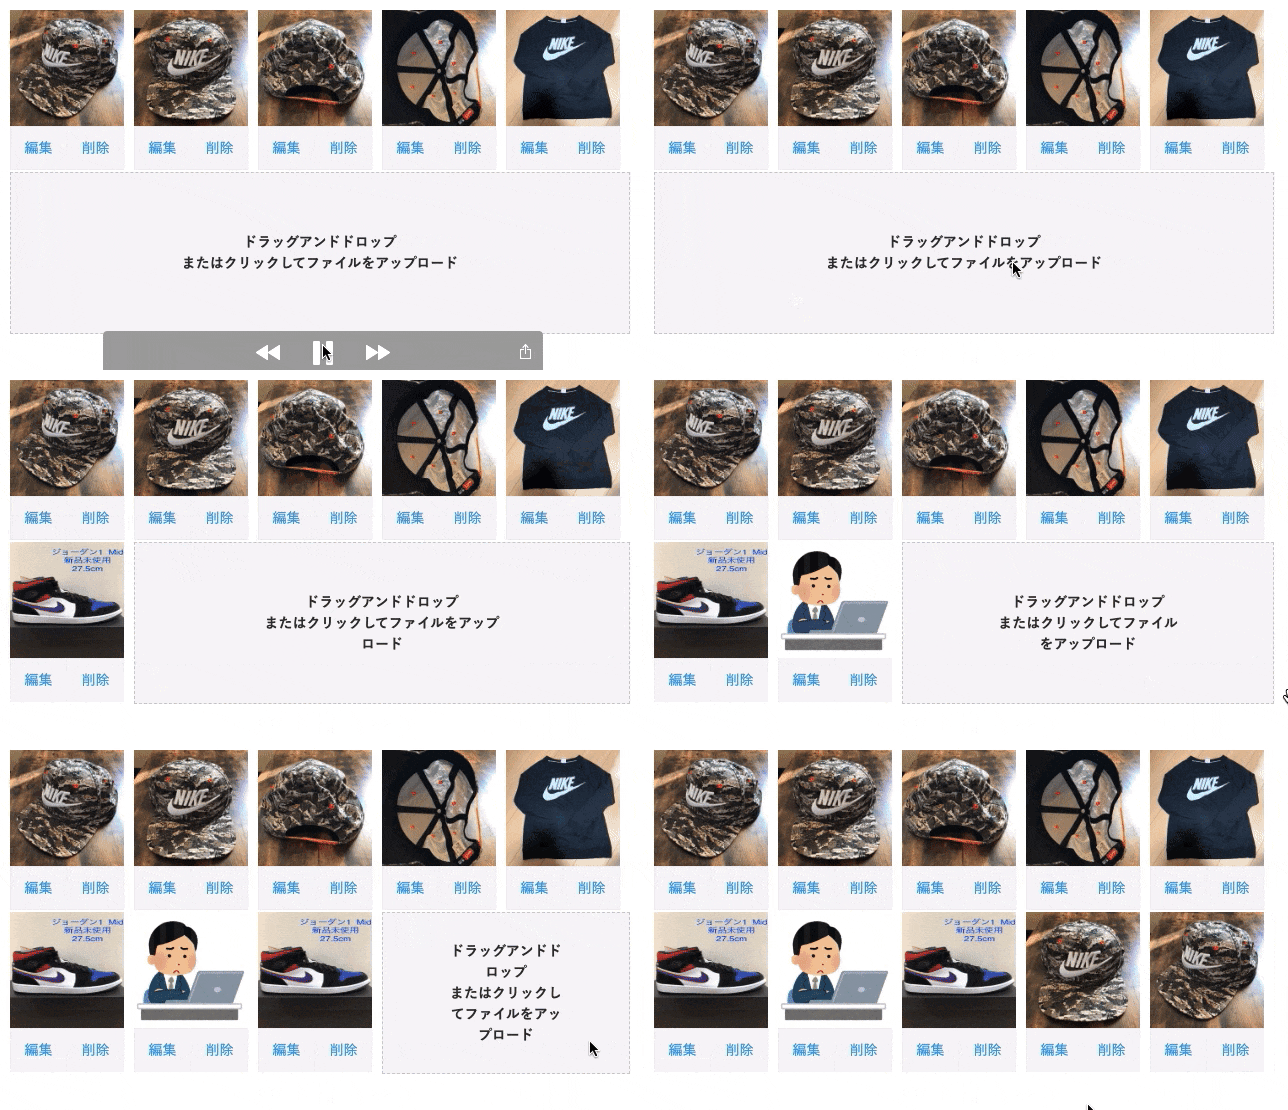
- 1〜4個ときの処理
- 5個のときの処理
- 6〜9個ときの処理
- 10個のときの処理
この4つの条件で変わるので、下記のif文が成立します。
      $lis = $ul.find(".image-preview");

      if ($lis.length <= 4) {
        $ul.append(append_input);
        $("#previews li:last-child").css({
          width: `calc(100% - (20% * ${$lis.length}))`,
        });
      } else if ($lis.length == 5) {
        $li.addClass("image-preview");
        $ul.append(append_input);
        $("#previews li:last-child").css({
          width: `100%`,
        });
      } else if ($lis.length <= 9) {
        $li.addClass("image-preview");
        $ul.append(append_input);
        $("#previews li:last-child").css({
          width: `calc(100% - (20% * (${$lis.length} - 5 )))`,
        });
      }
これでプレビューの数に応じて、inputのサイズは変化します。
最後の画像しか保存されない。
これで完成かと思われるかもしれませんが、実際に試すと最後の画像しか保存されません。
なぜか?
inputを非表示で隠していますが、名前等で区別されていないので、上書きされていきます。ですから、最後の画像のみ保存されます。
最後のinputの情報のみsubmitされてしまうのです。
ですから、区別してあげましょう
htmlを確認すると
<input class="hidden image_upload" type="file" id="product_images_attributes_0_name" name="product[images_attributes][0][name]">
name="product[images_attributes][0][name]"とあります。
これでinputを区別しています。
ですから、[0]の番号を変えてあげて、nameを区別してあげます。
<input type="file" id="product_images_attributes_0_name" name="product[images_attributes][0][name]">
<input type="file" id="product_images_attributes_1_name" name="product[images_attributes][1][name]">
<input type="file" id="product_images_attributes_2_name" name="product[images_attributes][2][name]">
<input type="file" id="product_images_attributes_3_name" name="product[images_attributes][3][name]">
<input type="file" id="product_images_attributes_4_name" name="product[images_attributes][4][name]">
これを行うために、nameを追加します
      $inputs.each(function (num, input) {
        //nameの番号を更新するために、現在の番号を除去
        $(input).removeAttr("name");
        $(input).attr({
          name: "product[images_attributes][" + num + "][name]",
          id: "product_images_attributes_" + num + "_name",
        });
      });
idとnameの番号を変えてあげて無事に区別されました。
これで複数画像が無事にsubmitされます。
newのときのjavascriptまとめ
これまでのまとめ
  $(document).on("click", ".image_upload", function () {
    //$liに追加するためのプレビュー画面のHTML
    var preview = $(
      `<div class="image-preview__wapper"><img class="preview"></div><div class="image-preview_btn"><div class="image-preview_btn_edit">編集</div><div class="image-preview_btn_delete">削除</div></div>`
    );
    //次の画像を読み込むためのinput。処理の最後にappendで追加する。
    var append_input = $(
      `<li class="input"><label class="upload-label"><div class="upload-label__text">ドラッグアンドドロップ<br>またはクリックしてファイルをアップロード<div class="input-area"><input class="hidden image_upload" type="file"></div></div></label></li>`
    );
    $ul = $("#previews");
    $li = $(this).parents("li");
    $label = $(this).parents(".upload-label");
    $inputs = $ul.find(".image_upload");
    //inputに画像を読み込んだら、"プレビューの追加"と"新しいli追加"処理が動く
    $(".image_upload").on("change", function (e) {
      //inputで選択した画像を読み込む
      var reader = new FileReader();

      // プレビューに追加させるために、inputから画像ファイルを読み込む。
      reader.readAsDataURL(e.target.files[0]);

      //画像ファイルが読み込んだら、処理が実行される。
      reader.onload = function (e) {
        //previewをappendで追加する前に、プレビューできるようにinputで選択した画像を<img>に'src'で付与させる
        $(preview).find(".preview").attr("src", e.target.result);
      };

      //inputの画像を付与した,previewを$liに追加。
      $li.append(preview);

      //プレビュー完了後は、inputを非表示にさせる。これによりプレビューだけが残る。
      $label.css("display", "none");
      $li.removeClass("input");
      $li.addClass("image-preview");
      $lis = $ul.find(".image-preview");

      $("#previews li").css({
        width: `114px`,
      });
      //"ul"に新しい"li(inputボタン)"を追加させる。
      if ($lis.length <= 4) {
        $ul.append(append_input);
        $("#previews li:last-child").css({
          width: `calc(100% - (20% * ${$lis.length}))`,
        });
      } else if ($lis.length == 5) {
        $li.addClass("image-preview");
        $ul.append(append_input);
        $("#previews li:last-child").css({
          width: `100%`,
        });
      } else if ($lis.length <= 9) {
        $li.addClass("image-preview");
        $ul.append(append_input);
        $("#previews li:last-child").css({
          width: `calc(100% - (20% * (${$lis.length} - 5 )))`,
        });
      }

      //inputの最後の"data-image"を取得して、input nameの番号を更新させてる。
      $inputs.each(function (num, input) {
        //nameの番号を更新するために、現在の番号を除去
        $(input).removeAttr("name");
        $(input).attr({
          name: "product[images_attributes][" + num + "][name]",
          id: "product_images_attributes_" + num + "_name",
        });
      });
    });
  });
コントローラーの処理
  def new
    @product = Product.new
    @product.images.build
  end


  def create
    @product = Product.new(product_params)
    if @product.save
      redirect_to users_path, notice: "商品を出品しました"
    else
      render 'new'
    end
  end


  private

  def product_params
    params.require(:product).permit(
      :name,
      images_attributes: [:name, :id],
    )
    .merge(seller_id: current_user.id)
  end
具体的に見てみる
$(document).on('turbolinks:load', function(){
  // 下記はedit用です。できれば別ファイルで作成することを推奨。バグの元
  var append_input = $(`<li class="input"><label class="upload-label"><div class="upload-label__text">ドラッグアンドドロップ<br>またはクリックしてファイルをアップロード<div class="input-area"><input class="hidden image_upload" type="file"></div></div></label></li>`)
  $ul = $('#previews')
  $lis = $ul.find('.image-preview');
  $input = $ul.find('.input');
  if($input.length == 0){
    if($lis.length <= 4 ){
      $ul.append(append_input)
      $('#previews .input').css({
        'width': `calc(100% - (20% * ${$lis.length}))`
      })
    }
    else if($lis.length == 5 ){
      $ul.append(append_input)
      $('#previews .input').css({
        'width': `100%`
      })
    }
    else if($lis.length <= 9 ){
      $ul.append(append_input)
      $('#previews .input').css({
        'width': `calc(100% - (20% * (${$lis.length} - 5 )))`
      })
    }
  }

  //newにおいては、下記が本題

  // プレビュー機能
  //'change'イベントでは$(this)で要素が取得できないため、 'click'イベントを入れた。
  //これにより$(this)で'input'を取得することができ、inputの親要素である'li'まで辿れる。

  $(document).on('click', '.image_upload', function(){
    //inputの要素はクリックされておらず、inputの親要素であるdivが押されている。
    //だからdivのクラス名をclickした時にイベントが作動。
    //div(this)から要素を辿ればinputを指定することが可能。

    //$liに追加するためのプレビュー画面のHTML。横長でないとバグる
    var preview = $('<div class="image-preview__wapper"><img class="preview"></div><div class="image-preview_btn"><div class="image-preview_btn_edit">編集</div><div class="image-preview_btn_delete">削除</div></div>');
    //次の画像を読み込むためのinput。
    var append_input = $(`<li class="input"><label class="upload-label"><div class="upload-label__text">ドラッグアンドドロップ<br>またはクリックしてファイルをアップロード<div class="input-area"><input class="hidden image_upload" type="file"></div></div></label></li>`)
    $ul = $('#previews')
    $li = $(this).parents('li');
    $label = $(this).parents('.upload-label');
    $inputs = $ul.find('.image_upload');
    //inputに画像を読み込んだら、"プレビューの追加"と"新しいli追加"処理が動く
    $('.image_upload').on('change', function (e) {
      //inputで選択した画像を読み込む
      var reader = new FileReader();


      // プレビューに追加させるために、inputから画像ファイルを読み込む。
      reader.readAsDataURL(e.target.files[0]);

      //画像ファイルが読み込んだら、処理が実行される。
      reader.onload = function(e){
        //previewをappendで追加する前に、プレビューできるようにinputで選択した画像を<img>に'src'で付与させる
        // つまり、<img>タグに画像を追加させる
        $(preview).find('.preview').attr('src', e.target.result);
      }

      //inputの画像を付与した,previewを$liに追加。
      $li.append(preview);

      //プレビュー完了後は、inputを非表示にさせる。これによりプレビューだけが残る。
      $label.css('display','none'); // inputを非表示
      $li.removeClass('input');     // inputのクラスはjQueryで数を数える時に邪魔なので除去
      $li.addClass('image-preview'); // inputのクラスからプレビュー用のクラスに変更した
      $lis = $ul.find('.image-preview'); // クラス変更が完了したところで、プレビューの数を数える。
      $('#previews li').css({
        'width': `114px`
      })


      //"ul"に新しい"li(inputボタン)"を追加させる。
      if($lis.length <= 4 ){
        $ul.append(append_input)
        $('#previews li:last-child').css({
          'width': `calc(100% - (20% * ${$lis.length}))`
        })
      }
      else if($lis.length == 5 ){
        $li.addClass('image-preview');
        $ul.append(append_input)
        $('#previews li:last-child').css({
          'width': `100%`
        })
      }
      // 9個のプレビューのとき、1個のinputを追加。最後の数は9です。
      else if($lis.length <= 9 ){
        $li.addClass('image-preview');
        $ul.append(append_input)
        $('#previews li:last-child').css({
          'width': `calc(100% - (20% * (${$lis.length} - 5 )))`
        })
      }

      //inputの最後の"data-image"を取得して、input nameの番号を更新させてる。
      // これをしないと、それぞれのinputの区別ができず、最後の1枚しかDBに保存されません。
      // 全部のプレビューの番号を更新することで、プレビューを削除して、新しく追加しても番号が1,2,3,4,5,6と綺麗に揃う。だから全部の番号を更新させる
      $inputs.each( function( num, input ){
        //nameの番号を更新するために、現在の番号を除去
        $(input).removeAttr('name');
        $(input).attr({
          name:"product[images_attributes][" + num + "][name]",
          id:"product_images_attributes_" + num + "_name"
        });
      });
    })
  })
});
これで完了です。
//inputの最後の"data-image"を取得して、input nameの番号を更新させてる。
// これをしないと、それぞれのinputの区別ができず、最後の1枚しかDBに保存されません。
上記について補足します
# Rails方式でname inputを書くと(Product)
= f.text_field :name
<input type="text" name="product[name]">
要点
つまり、inputはnameで識別されている。
このnameが全く同じ場合、最後に取得した情報だけparamsに渡る
なので、nameに数字を混ぜて、それぞれ異なる情報としている
<input type="file" name="product[images_attributes][0][name]">
<input type="file" name="product[images_attributes][1][name]">
<input type="file" name="product[images_attributes][2][name]">
<input type="file" name="product[images_attributes][3][name]">
<input type="file" name="product[images_attributes][4][name]">
images_attributesの中に順番に入る
続いては削除する際の動作にいきましょう!
複数画像投稿 - 削除編 -
inputに入った画像は、
jQueryじゃ更新できない!!!
だから、inputごと削除してやる。
$li.remove();
これでliを削除できます。
inputごとliを削除したので、新しいli.inputを追加します。
//削除ボタンをクリックしたとき、処理が動く。
$(document).on('click','.image-preview_btn_delete',function(){
  var append_input = $(`<li class="input"><label class="upload-label"><div class="upload-label__text">ドラッグアンドドロップ<br>またはクリックしてファイルをアップロード<div class="input-area"><input class="hidden image_upload" type="file"></div></div></label></li>`)
  $ul = $('#previews')
  $lis = $ul.find('.image-preview');
  $input = $ul.find('.input');
  $ul = $('#previews')
  $li = $(this).parents('.image-preview');


  //"li"ごと削除して、previewとinputを削除させる。
  $li.remove();

  // inputボタンのサイズを更新する、または追加させる
  // まずはプレビューの数を数える。
  $lis = $ul.find('.image-preview');
  $label = $ul.find('.input');
  if($lis.length <= 4 ){
    // inputのサイズを変更
    $('#previews li:last-child').css({
      'width': `calc(100% - (20% * ${$lis.length}))`
    })
  }
  else if($lis.length == 5 ){
    // inputのサイズを変更
    $('#previews li:last-child').css({
      'width': `100%`
    })
  }
  else if($lis.length < 9 ){
    // inputのサイズを変更
    $('#previews li:last-child').css({
      'width': `calc(100% - (20% * (${$lis.length} - 5 )))`
    })
  }
  else if($lis.length == 9 ){
    $ul.append(append_input) // 9個の時だけ、新しいinputを追加してやる
    $('#previews li:last-child').css({
      'width': `calc(100% - (20% * (${$lis.length} - 5 )))`
    })
  }
});
追記:編集方法
複数画像 - edit編 -
一番、難しいのはここ
edit画面では、投稿済み画像を削除しても”DB”上には残ります。
だって、HTMLしか消してないんだもん。
そりゃあ、DBは残るよ。
これで、だいぶムッチャ苦しんだ。
ここがハマるポイント。
じゃあ、どうやって消す??
考え方
考えたのが、paramsとDBを比較して、投稿済み画像を消しているようなら、
コントローラー上で画像をdestroyして削除する
paramsのハッシュですが、
- 投稿済み画像: imageハッシュ。これはform上でそう設定してます。
- 新しく追加した画像:images_attributesハッシュ
でハッシュ名が異なります。
imageハッシュの分は、投稿済み画像ですが、削除されていないか確認する。
- image ハッシュがない場合、edit画面で投稿済み画像を全部消している = いらないようなので、コントローラーで画像を全部削除する
- image ハッシュがある場合、 一部消しているかもしれないので、paramsと比較する。なければ削除。
images_attributesの分は、newと同じでそのまま追加。
流れ
- imageハッシュとimage_attributeハッシュ両方がない場合は、やり直しさせる。
- 片方どちらかある場合は、画像が少なくとも1枚あるということなので処理を進める
- 投稿済み画像のハッシュである、imageがあるか? if文で確認。
- image ハッシュがある場合は、paramsとDBのIDを比較。一致しない分は削除する
- image ハッシュがない場合は、画像を全部削除
- update処理をする。
- 新しい画像が追加されて、更新完了
完了
HTML
.new-product
  =render "./registrations/sub-header"
  .main
    .head
      %h2 商品の情報を入力
    = form_with model: @product, class: "form", id: "product-form-edit" do |f|
      .form-image
        .form-image__title
          %label 出品画像
          %span 必須
          .form-image__text 最大10枚までアップロードできます
          .clearfix
            %ul#previews
              = f.fields_for :image do |image|
                - @product.images.each_with_index do |img, i|
                  %li.image-preview
                    %label.upload-label{style:"display: none;"}
                      .upload-label__text
                        ドラッグアンドドロップ
                        %br
                        またはクリックしてファイルをアップロード
                        .input-area
                          = image.file_field :name, value: img.name ,class: "hidden image_upload"
                          = image.hidden_field :id, value: img.id, name:"product[image][#{i}]"
                    .image-preview__wapper
                      = image_tag img.name.to_s, class:"preview"
                    .image-preview_btn
                      .image-preview_btn_edit 編集
                      .image-preview_btn_delete 削除
コントローラー
  def update
    @parents = Category.where(ancestry: nil)
    # each do で並べた画像が image
    # 新しくinputに追加された画像が image_attributes
    # この二つがない時はupdateしない
    if params[:product].keys.include?("image") || params[:product].keys.include?("images_attributes")
      if @product.valid?
        if params[:product].keys.include?("image")
        # dbにある画像がedit画面で一部削除してるか確認
          update_images_ids = params[:product][:image].values #投稿済み画像
          before_images_ids = @product.images.ids
          #  商品に紐づく投稿済み画像が、投稿済みにない場合は削除する
          # @product.images.ids.each doで、一つずつimageハッシュにあるか確認。なければdestroy
          before_images_ids.each do |before_img_id|
            Image.find(before_img_id).destroy unless update_image_ids.include?("#{before_img_id}")

          end
        else
          # imageハッシュがない = 投稿済みの画像をすべてedit画面で消しているので、商品に紐づく投稿済み画像を削除する。
          # @product.images.destroy = nil と削除されないので、each do で一つずつ削除する
          before_images_ids.each do |before_img_id|
            Image.find(before_img_id).destroy
          end
        end
        @product.update(product_params)
        @size = @product.categories[1].sizes[0]
        @product.update(size: nil) unless @size
        redirect_to item_product_path(@product), notice: "商品を更新しました"
      else
        render 'edit'
      end
    else
      redirect_back(fallback_location: root_path,flash: {success: '画像がありません'})
    end
  end
ポイントは下記になります
       if params[:product].keys.include?("image")
        # dbにある画像がedit画面で一部削除してるか確認
          update_images_ids = params[:product][:image].values #投稿済み画像の残り
          before_images_ids = @product.images.ids
          #  商品に紐づく投稿済み画像が、投稿済みにない場合は削除する
          # before_images_ids.each do doで、一つずつimageハッシュにあるか確認。なければdestroy
          before_images_ids.each do |before_img_id|
            Image.find(before_img_id).destroy unless update_image_ids.include?("#{before_img_id}")
          end
        else
          # imageハッシュがない = 投稿済みの画像をすべてedit画面で消しているので、商品に紐づく投稿済み画像を削除する。
          # @product.images.destroy = nil と削除されないので、each do で一つずつ削除する
          before_images_ids.each do |before_img_id|
            Image.find(before_img_id).destroy
          end
        end
valueはhtmlで定義をしています
= f.fields_for :image do |image|
  - @product.images.each_with_index do |img, i|
    .input-area
      = image.file_field :name, value: img.name ,class: "hidden image_upload"
      = image.hidden_field :id, value: img.id, name:"product[image][#{i}]"
