はじめに
HoloLensアドベントカレンダー2020の4日目の記事です。
前回に引き続き、Cognitive Services系をまとめていきまーす。
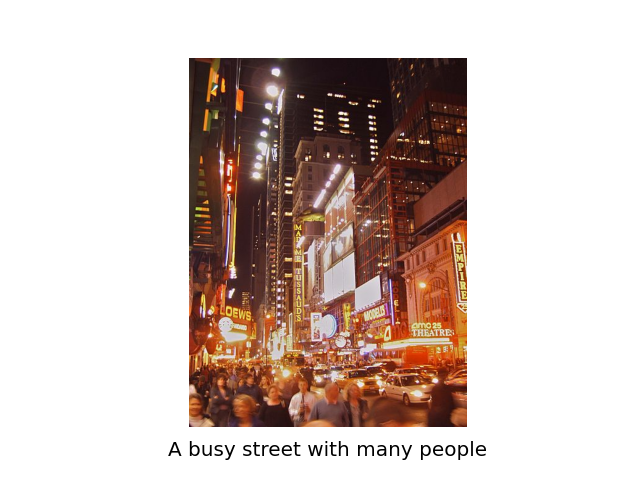
今日は、Azure Computer Vision APIの画像分析APIを用いて画像から視覚的特徴を抽出します。
例えば、下のサンプル画像を見て、「人通りの多い道」と説明してくれます。
これで韓ドラ「スタートアップ」に出てきたアプリ「ヌンギル」が作れそうですね。
開発環境
- Azure
- Computer Vision API(画像分析 API)
- HoloLens2
- Unity 2019.4.1f1
- MRTK 2.5.1
- OpenCV for Unity
- Windows PC
プライムデーで安かったので、予備PC
— 藤本賢志(ガチ本)@XRKaigi (@sotongshi) October 18, 2020
【基本スペック】
OS:Windows 10 Home 64bit、CPU:インテル Core i7-9750H、GPU:NVIDIA GeForce GTX 1650 Ti Max-Q デザイン 4GB GDDR5、メモリ:16GB(8GB ×2)、SSD:512GB、液晶パネル:15.6インチ、フルHD(1,920×1,080)、リフレッシュレート120Hz pic.twitter.com/S8RIsayFPY
導入
前回の顔検出をほぼほぼ使って、異なるところだけ説明していきます。
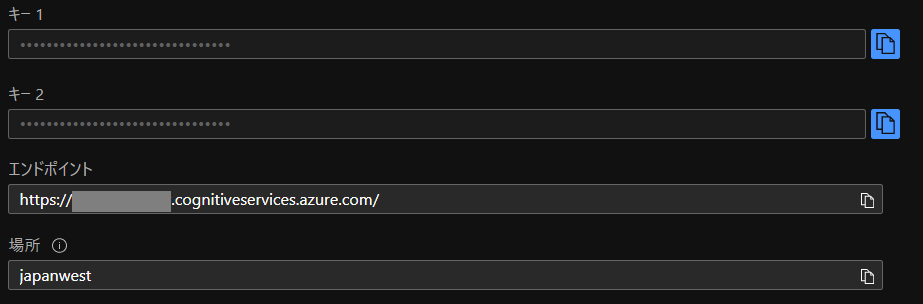
1.AzureポータルからComputer Vision APIを作成し、エンドポイントとサブスクリプションキーをメモしておいてください。
2.Unityのプロジェクトはこんな感じ。前回の「TapToCapture」を無効にして「TapToCaptureAnalyzeAPI」を作成しました。
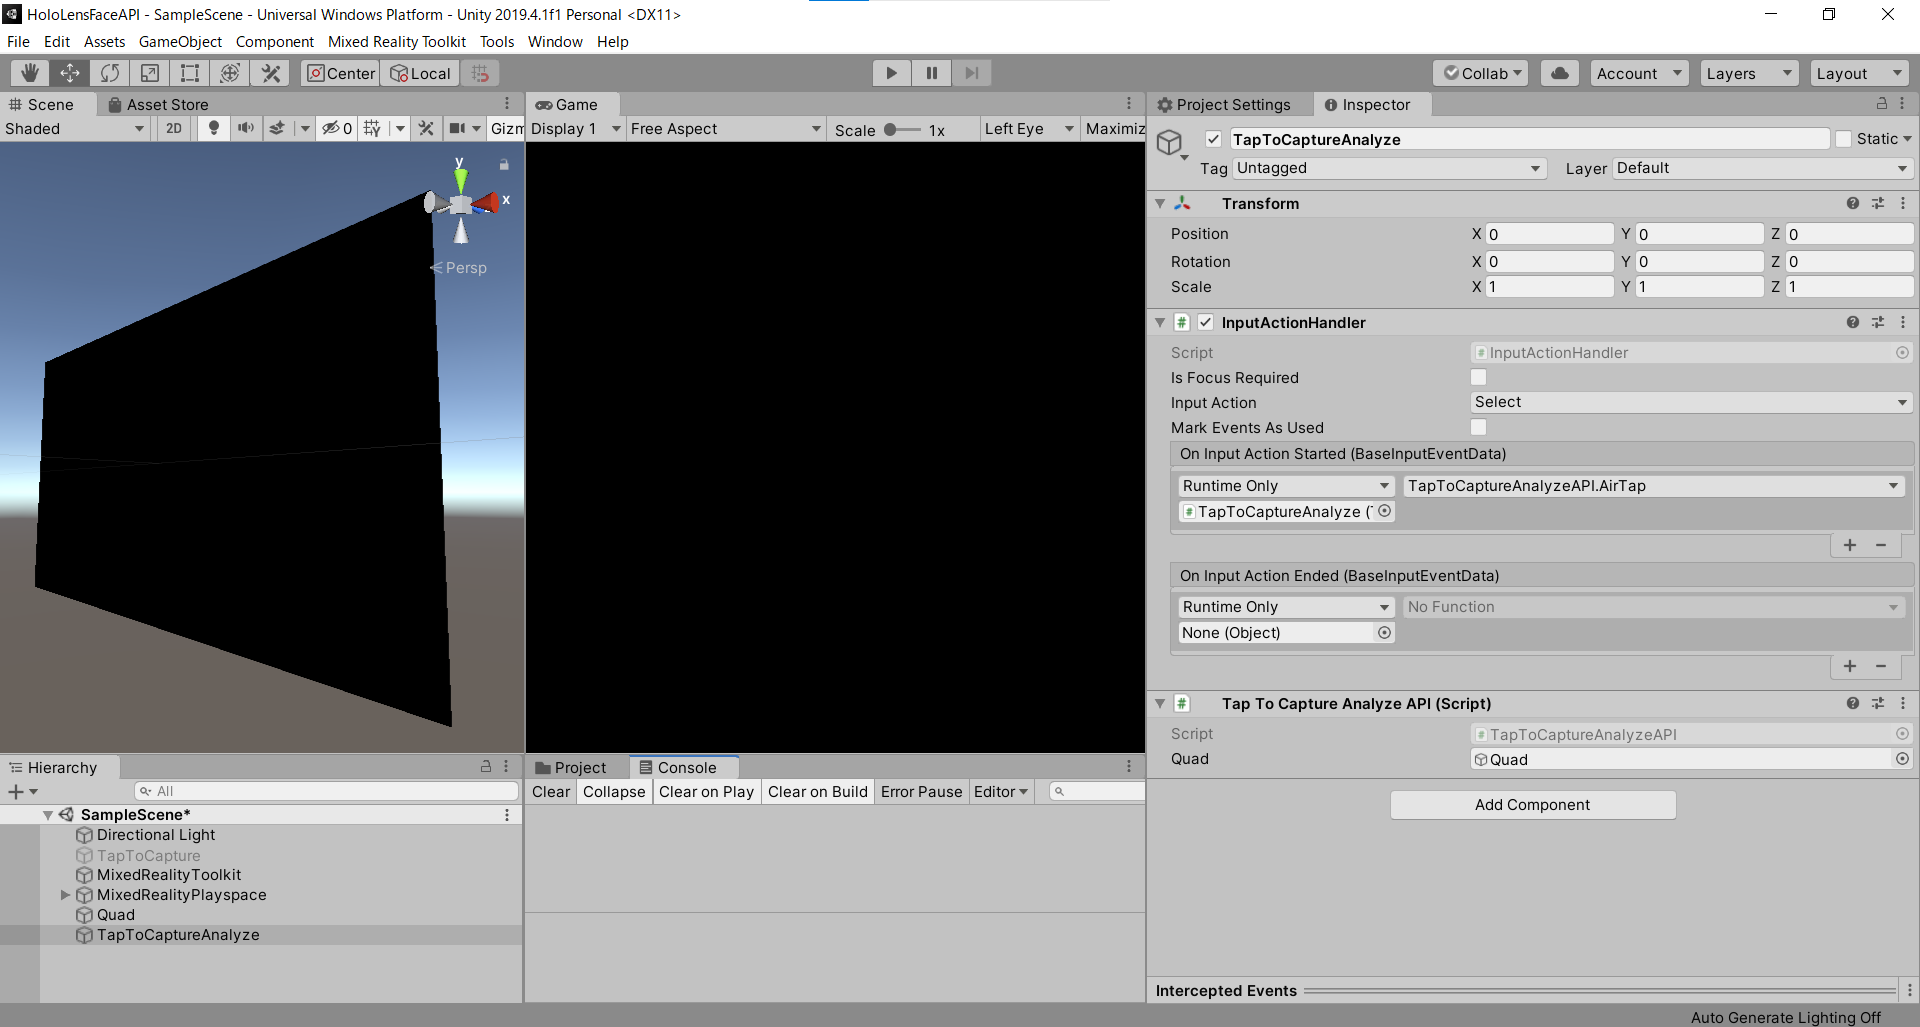
3.「TapToCaptureAnalyzeAPI.cs」は、エアタップしたら画像をキャプチャし、Analyze APIに投げるスクリプトになります。
using System.Collections;
using System.Collections.Generic;
using System.Linq;
using System;
using UnityEngine;
using Microsoft.MixedReality.Toolkit.Utilities;
using System.Threading.Tasks;
using OpenCVForUnity.CoreModule;
using OpenCVForUnity.UnityUtils;
using OpenCVForUnity.ImgprocModule;

public class TapToCaptureAnalyzeAPI : MonoBehaviour
{
    public GameObject quad;

    [System.Serializable]
    public class Analyze
    {
        public Categories[] categories;
        public Color color;
        public Description description;
        public string requestId;
        public Metadata metadata;
    }

    [System.Serializable]
    public class Categories
    {
        public string name;
        public float score;
    }

    [System.Serializable]
    public class Color
    {
        public string dominantColorForeground;
        public string dominantColorBackground;
        public string[] dominantColors;
        public string accentColor;
        public bool isBwImg;
        public bool isBWImg;
    }

    [System.Serializable]
    public class Description
    {
        public string[] tags;
        public Captions[] captions;
    }

    [System.Serializable]
    public class Captions
    {
        public string text;
        public float confidence;
    }

    [System.Serializable]
    public class Metadata
    {
        public int height;
        public int width;
        public string format;
    }

    UnityEngine.Windows.WebCam.PhotoCapture photoCaptureObject = null;
    Texture2D targetTexture = null;

    private string endpoint = "https://<Insert Your Endpoint>/vision/v3.1/analyze";
    private string subscription_key = "<Insert Your API Key>";
    private bool waitingForCapture;

    void Start(){
        waitingForCapture = false;
    }

    public void AirTap()
    {
        if (waitingForCapture) return;
        waitingForCapture = true;

        Resolution cameraResolution = UnityEngine.Windows.WebCam.PhotoCapture.SupportedResolutions.OrderByDescending((res) => res.width * res.height).First();
        targetTexture = new Texture2D(cameraResolution.width, cameraResolution.height);

        // PhotoCapture オブジェクトを作成します
        UnityEngine.Windows.WebCam.PhotoCapture.CreateAsync(false, delegate (UnityEngine.Windows.WebCam.PhotoCapture captureObject) {
            photoCaptureObject = captureObject;
            UnityEngine.Windows.WebCam.CameraParameters cameraParameters = new UnityEngine.Windows.WebCam.CameraParameters();
            cameraParameters.hologramOpacity = 0.0f;
            cameraParameters.cameraResolutionWidth = cameraResolution.width;
            cameraParameters.cameraResolutionHeight = cameraResolution.height;
            cameraParameters.pixelFormat = UnityEngine.Windows.WebCam.CapturePixelFormat.BGRA32;

            // カメラをアクティベートします
            photoCaptureObject.StartPhotoModeAsync(cameraParameters, delegate (UnityEngine.Windows.WebCam.PhotoCapture.PhotoCaptureResult result) {
                // 写真を撮ります
                photoCaptureObject.TakePhotoAsync(OnCapturedPhotoToMemoryAsync);
            });
        });
    }

    async void OnCapturedPhotoToMemoryAsync(UnityEngine.Windows.WebCam.PhotoCapture.PhotoCaptureResult result, UnityEngine.Windows.WebCam.PhotoCaptureFrame photoCaptureFrame)
    {
        // ターゲットテクスチャに RAW 画像データをコピーします
        photoCaptureFrame.UploadImageDataToTexture(targetTexture);
        byte[] bodyData = targetTexture.EncodeToJPG();

        Response response = new Response();

        try
        {
            string query = endpoint + "?visualFeatures=Categories,Description,Color";
            var headers = new Dictionary<string, string>();
            headers.Add("Ocp-Apim-Subscription-Key", subscription_key);
            response = await Rest.PostAsync(query, bodyData, headers, -1, true);
        }
        catch (Exception e)
        {
            photoCaptureObject.StopPhotoModeAsync(OnStoppedPhotoMode);
            return;
        }

        if (!response.Successful)
        {
            photoCaptureObject.StopPhotoModeAsync(OnStoppedPhotoMode);
            return;
        }

        Debug.Log(response.ResponseCode);
        Debug.Log(response.ResponseBody);
        Analyze analyze = JsonUtility.FromJson<Analyze>(response.ResponseBody);
        Debug.Log(analyze.description.captions[0].text);

        // OpenCVを用いて結果をて画像に書き込み
        Mat imgMat = new Mat(targetTexture.height, targetTexture.width, CvType.CV_8UC4);
        Utils.texture2DToMat(targetTexture, imgMat);
        Debug.Log("imgMat.ToString() " + imgMat.ToString());
        Imgproc.putText(imgMat, analyze.description.captions[0].text, new Point(10, 100), Imgproc.FONT_HERSHEY_SIMPLEX, 4.0, new Scalar(255, 255, 0, 255), 4, Imgproc.LINE_AA, false);
        Texture2D texture = new Texture2D(imgMat.cols(), imgMat.rows(), TextureFormat.RGBA32, false);
        Utils.matToTexture2D(imgMat, texture);
        Renderer quadRenderer = quad.GetComponent<Renderer>() as Renderer;
        quadRenderer.material.SetTexture("_MainTex", texture);

        // カメラを非アクティブにします
        photoCaptureObject.StopPhotoModeAsync(OnStoppedPhotoMode);
    }

    void OnStoppedPhotoMode(UnityEngine.Windows.WebCam.PhotoCapture.PhotoCaptureResult result)
    {
        // photo capture のリソースをシャットダウンします
        photoCaptureObject.Dispose();
        photoCaptureObject = null;
        waitingForCapture = false;
    }
}
4.endpointとsubscription_keyにメモしておいたものを貼り付けてください。
5.クエリパラメータはCategories,Description,Colorを指定しています。
endpoint + "?visualFeatures=Categories,Description,Color";
6.MRTKのRestを用いて、分析する画像をPOSTしたら、response.ResponseBodyが次のように返ってきます。
{'categories': [{'name': 'outdoor_', 'score': 0.00390625, 'detail': {'landmarks': []}}, {'name': 'outdoor_street', 'score': 0.33984375, 'detail': {'landmarks': []}}], 'color': {'dominantColorForeground': 'Brown', 'dominantColorBackground': 'Brown', 'dominantColors': ['Brown'], 'accentColor': 'B54316', 'isBwImg': False, 'isBWImg': False}, 'description': {'tags': ['building', 'outdoor', 'street', 'city', 'people', 'busy', 'night', 'ride', 'crowd'], 'captions': [{'text': 'a busy street with many people', 'confidence': 0.3540118634700775}]}, 'requestId': '88d8a3c6-8972-4315-8a15-b20bf14c33ce', 'metadata': {'height': 600, 'width': 450, 'format': 'Jpeg'}}
7.今回はリストのJsonにはなっていないので、JsonHelperを使わずにJsonUtilityで読むことができます。
8.仕様に合わせてAnalyzeクラスとCategoriesクラス、Colorクラス、Descriptionクラス、Captionsクラス、Metadataクラスを作成しました。
9.生成された画像説明文をOpenCVを用いて、画像に張り付けてquadのテクスチャに表示します。
実行
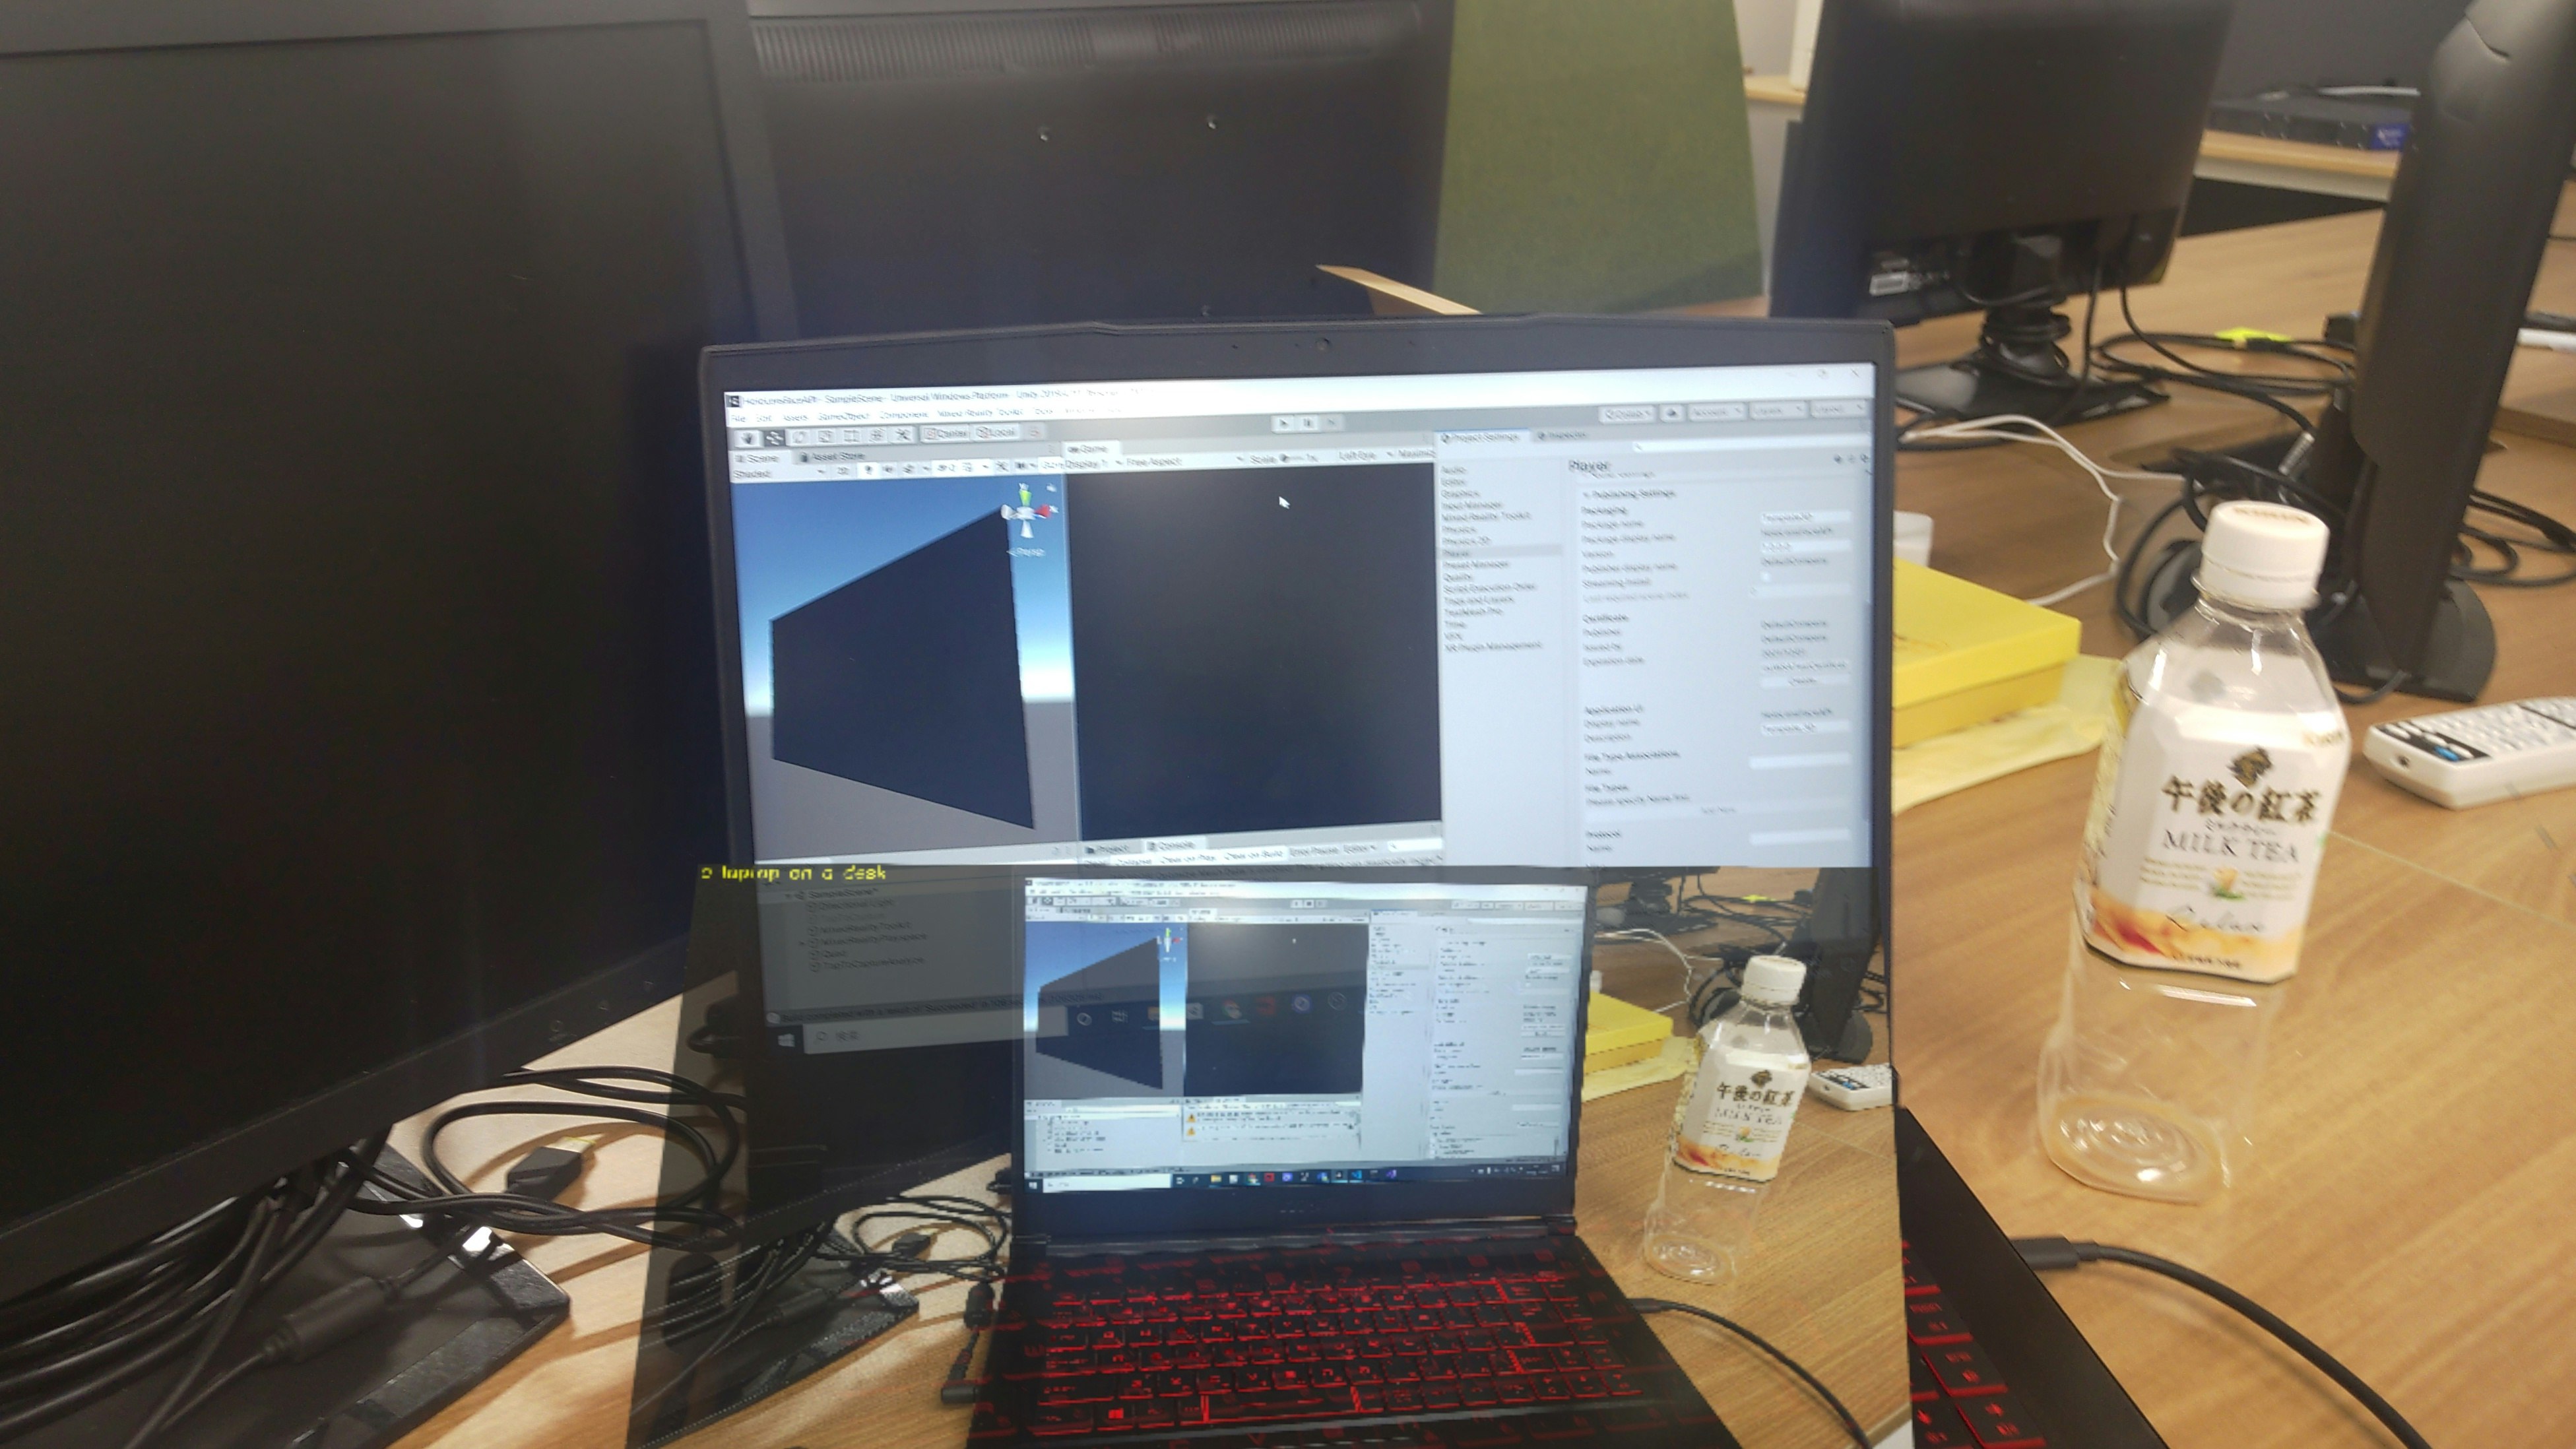
HoloLens2にデプロイして、実行した結果がこちらになります。Editor上でもできるので試してみてください。
"a laptop on a desk"
"a person using a laptop"
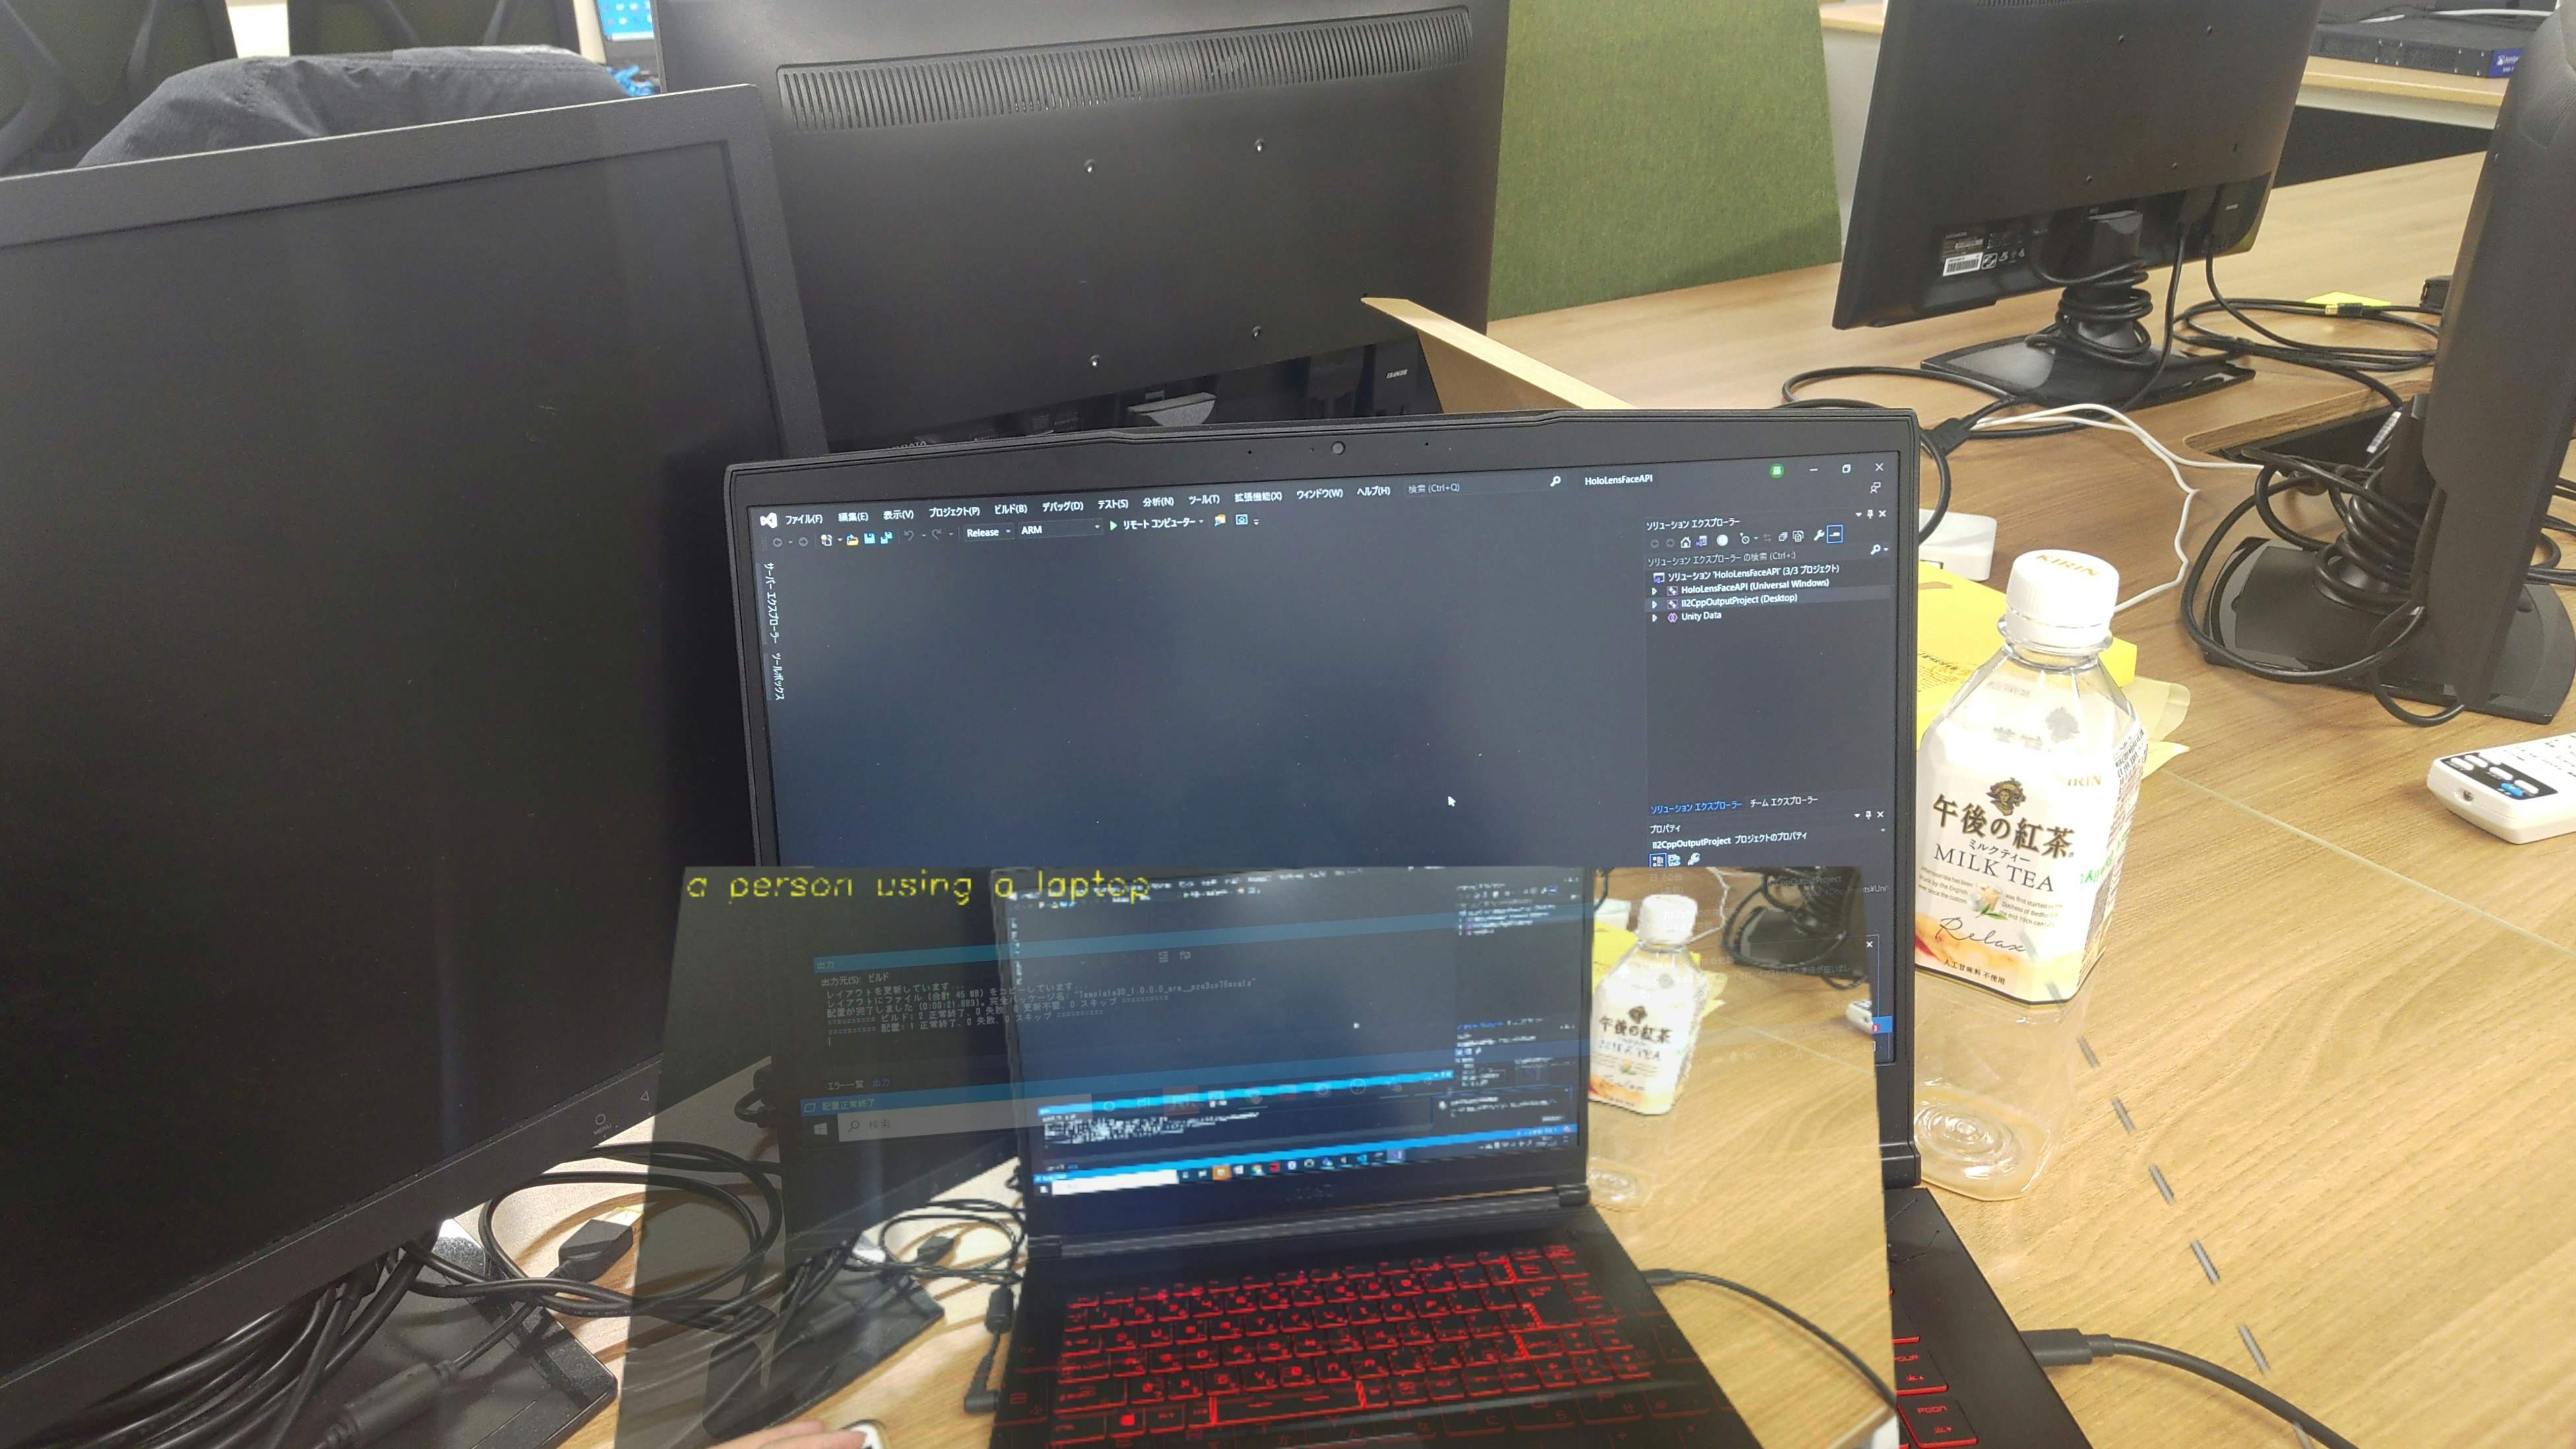
この文章を読み上げさせたら、ヌンギルの完成ですね!
お疲れ様でした。
明日(というか遅れたので今日)は、弟子(@Horomoto-Asahi)による「Holo関連のなにか書きます」です。
参考
- Computer Vision のドキュメント
- ローカル画像の分析(C#、Python)