はじめに
HoloLensアドベントカレンダー1日目の記事です!
APIよくわからないと弟子から相談があったので、Cognitive Services系をまとめていきたいと思いまーす。
今日は、Cognitive ServicesのFace APIをHoloLens2でやってみました。
実機なしでもできるのでやってみてください。
開発環境
- Azure
- Face API
- HoloLens2
- Unity 2019.4.1f1
- MRTK 2.5.1
- OpenCV for Unity
- Windows PC
プライムデーで安かったので、予備PC
— 藤本賢志(ガチ本)@pixivFANBOXはじめました (@sotongshi) October 18, 2020
【基本スペック】
OS:Windows 10 Home 64bit、CPU:インテル Core i7-9750H、GPU:NVIDIA GeForce GTX 1650 Ti Max-Q デザイン 4GB GDDR5、メモリ:16GB(8GB ×2)、SSD:512GB、液晶パネル:15.6インチ、フルHD(1,920×1,080)、リフレッシュレート120Hz pic.twitter.com/S8RIsayFPY
導入
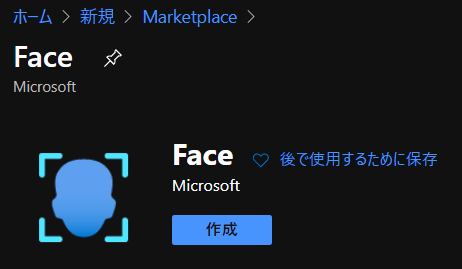
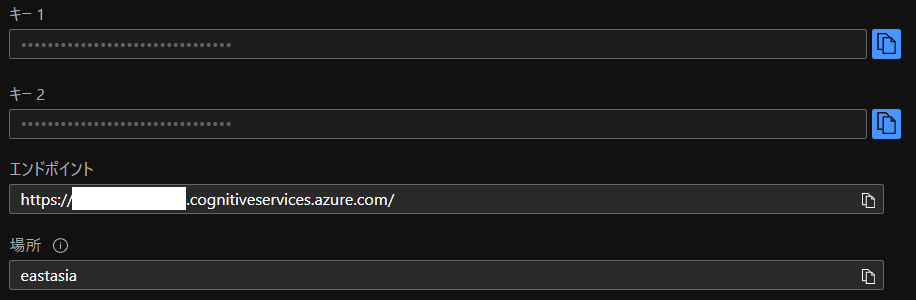
1.AzureポータルからFace APIを作成し、エンドポイントとサブスクリプションキーをメモしておいてください。
2.Unityでプロジェクトを作成、MRTK2.5.1をインポートします。なんかウィンドウでたらApplyします。
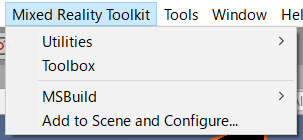
3.メニューのMixed Reality Toolkit->Add to Scene and Configureしてください。
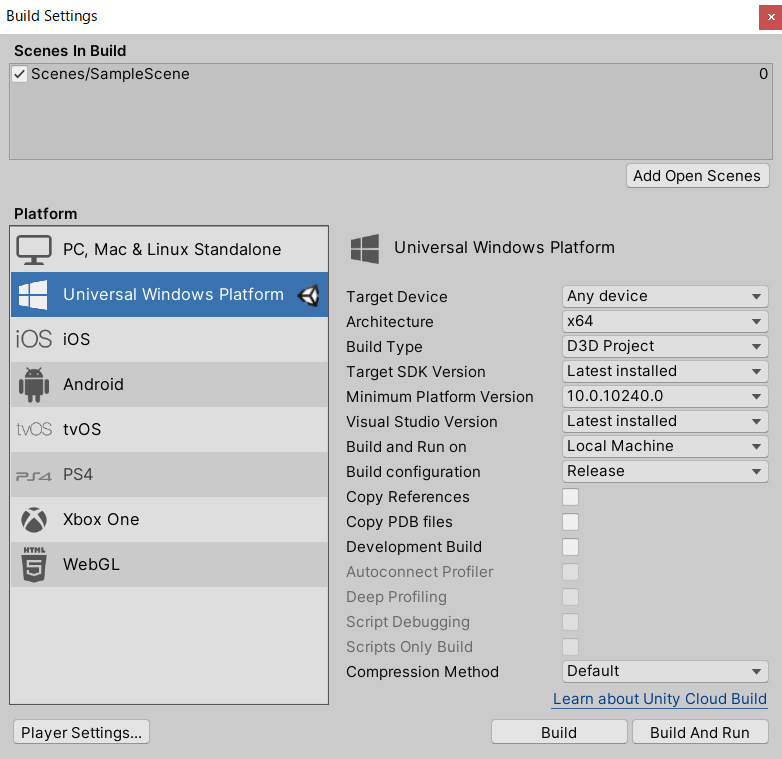
4.Build Settingsから、Universal Windows PlatformにSwitch Platformして、以下のように設定してください。あとAdd Open ScenesでScenes/SampleSceneにチェックが入っていることを確認します。
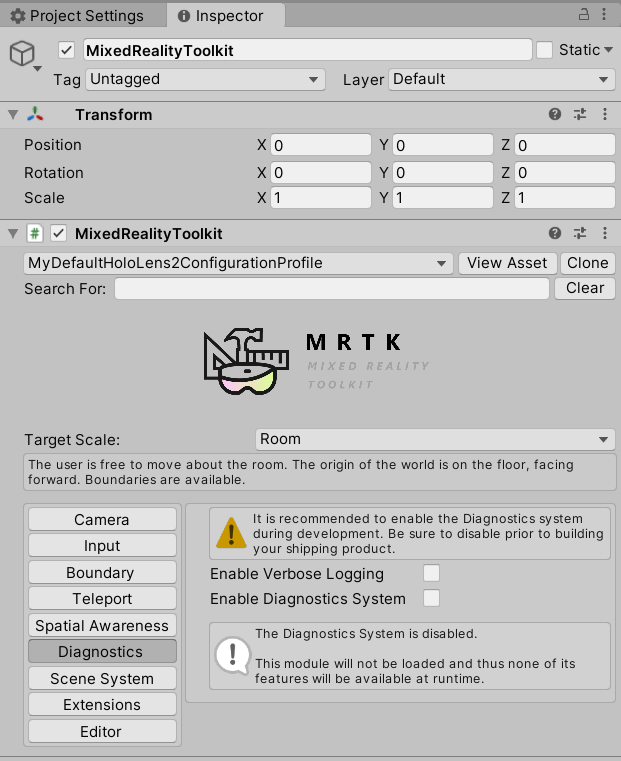
5.MixedRealityToolkitのDefaultHoloLens2ConfigureProfileをcloneし、Diagnostics->Enable Diagnostics Systemのチェックを外します。これでCPU使用率とかのデバッグ情報を非表示にできます。
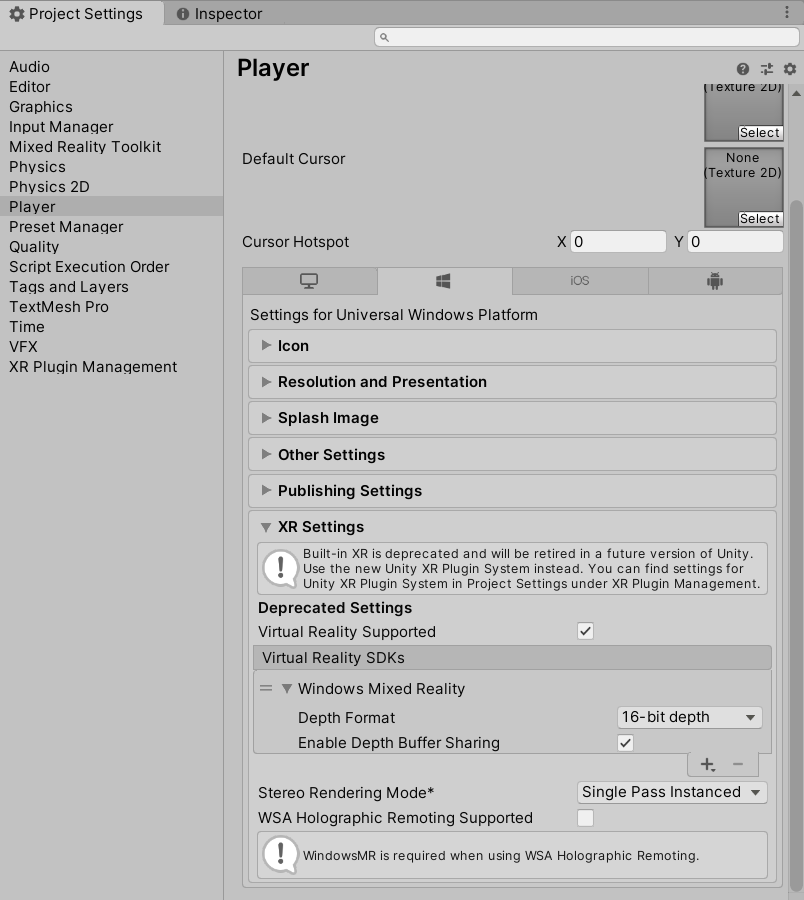
6.Project SettingsのXR Settings、Publishing Settings->Capabilitiesを以下のように設定してください。

7.空のGameObjectを作成し、名前を「TapToCapture」にします。

8.Add Componentから「TapToCapture.cs」スクリプトを作成します。エアタップしたら、画像をキャプチャし、Face APIに投げるスクリプトになります。
using System.Collections;
using System.Collections.Generic;
using System.Linq;
using System;
using UnityEngine;
using Microsoft.MixedReality.Toolkit.Utilities;
using System.Threading.Tasks;
using OpenCVForUnity.CoreModule;
using OpenCVForUnity.UnityUtils;
using OpenCVForUnity.ImgprocModule;

public class TapToCapture : MonoBehaviour
{
    public GameObject quad;

    [System.Serializable]
    public class Face
    {
        public string faceId;
        public FaceRectangle faceRectangle;
        public FaceAttribute faceAttributes;
    }

    [System.Serializable]
    public class FaceRectangle
    {
        public int top;
        public int left;
        public int width;
        public int height;
    }

    [System.Serializable]
    public class FaceAttribute
    {
        public float age;
        public string gender;
    }

    UnityEngine.Windows.WebCam.PhotoCapture photoCaptureObject = null;
    Texture2D targetTexture = null;

    private string endpoint = "https://<Insert Your Endpoint>/face/v1.0/detect";
    private string subscription_key = "<Insert Your API Key>";
    private bool waitingForCapture;

    void Start(){
        waitingForCapture = false;
    }

    public void AirTap()
    {
        if (waitingForCapture) return;
        waitingForCapture = true;

        Resolution cameraResolution = UnityEngine.Windows.WebCam.PhotoCapture.SupportedResolutions.OrderByDescending((res) => res.width * res.height).First();
        targetTexture = new Texture2D(cameraResolution.width, cameraResolution.height);

        // PhotoCapture オブジェクトを作成します
        UnityEngine.Windows.WebCam.PhotoCapture.CreateAsync(false, delegate (UnityEngine.Windows.WebCam.PhotoCapture captureObject) {
            photoCaptureObject = captureObject;
            UnityEngine.Windows.WebCam.CameraParameters cameraParameters = new UnityEngine.Windows.WebCam.CameraParameters();
            cameraParameters.hologramOpacity = 0.0f;
            cameraParameters.cameraResolutionWidth = cameraResolution.width;
            cameraParameters.cameraResolutionHeight = cameraResolution.height;
            cameraParameters.pixelFormat = UnityEngine.Windows.WebCam.CapturePixelFormat.BGRA32;

            // カメラをアクティベートします
            photoCaptureObject.StartPhotoModeAsync(cameraParameters, delegate (UnityEngine.Windows.WebCam.PhotoCapture.PhotoCaptureResult result) {
                // 写真を撮ります
                photoCaptureObject.TakePhotoAsync(OnCapturedPhotoToMemoryAsync);
            });
        });
    }

    async void OnCapturedPhotoToMemoryAsync(UnityEngine.Windows.WebCam.PhotoCapture.PhotoCaptureResult result, UnityEngine.Windows.WebCam.PhotoCaptureFrame photoCaptureFrame)
    {
        // ターゲットテクスチャに RAW 画像データをコピーします
        photoCaptureFrame.UploadImageDataToTexture(targetTexture);
        byte[] bodyData = targetTexture.EncodeToJPG();

        Response response = new Response();

        try
        {
            // string query = endpoint + "?detectionModel=detection_02&returnFaceId=true";
            // string query = endpoint + "?detectionModel=detection_01&returnFaceId=true&returnFaceLandmarks=false&returnFaceAttributes=age,gender,headPose,smile,facialHair,glasses,emotion,hair,makeup,occlusion,accessories,blur,exposure,noise";
            string query = endpoint + "?detectionModel=detection_01&returnFaceId=true&returnFaceAttributes=age,gender";
            var headers = new Dictionary<string, string>();
            headers.Add("Ocp-Apim-Subscription-Key", subscription_key);
            // headers.Add("Content-Type", "application/octet-stream");

            response = await Rest.PostAsync(query, bodyData, headers, -1, true);
        }
        catch (Exception e)
        {
            photoCaptureObject.StopPhotoModeAsync(OnStoppedPhotoMode);
            return;
        }

        if (!response.Successful)
        {
            photoCaptureObject.StopPhotoModeAsync(OnStoppedPhotoMode);
            return;
        }

        Debug.Log(response.ResponseCode);
        Debug.Log(response.ResponseBody);
        string newResponseBody = "{ \"results\": " + response.ResponseBody + "}";
        Face[] faces = JsonHelper.FromJson<Face>(newResponseBody);

        Mat imgMat = new Mat(targetTexture.height, targetTexture.width, CvType.CV_8UC4);

        Utils.texture2DToMat(targetTexture, imgMat);
        // Debug.Log("imgMat.ToString() " + imgMat.ToString());

        foreach (var face in faces){
            //Debug.Log(face.faceId);
            //Debug.Log(face.faceRectangle.left);
            //Debug.Log(face.faceRectangle.top);
            //Debug.Log(face.faceRectangle.width);
            //Debug.Log(face.faceRectangle.height);
            Imgproc.putText(imgMat, face.faceAttributes.age.ToString()+","+face.faceAttributes.gender, new Point(face.faceRectangle.left, face.faceRectangle.top-10), Imgproc.FONT_HERSHEY_SIMPLEX, 1.5, new Scalar(0, 0, 255, 255), 2, Imgproc.LINE_AA, false);
            Imgproc.rectangle(imgMat, new Point(face.faceRectangle.left, face.faceRectangle.top), new Point(face.faceRectangle.left + face.faceRectangle.width, face.faceRectangle.top + face.faceRectangle.height), new Scalar(0, 0, 255, 255), 2);
        }

        Texture2D texture = new Texture2D(imgMat.cols(), imgMat.rows(), TextureFormat.RGBA32, false);
        Utils.matToTexture2D(imgMat, texture);

        // テクスチャが適用されるゲームオブジェクトを作成
        // GameObject quad = GameObject.CreatePrimitive(PrimitiveType.Quad);

        Renderer quadRenderer = quad.GetComponent<Renderer>() as Renderer;
        // quadRenderer.material = new Material(Shader.Find("Unlit/UnlitTexture"));

        // quad.transform.parent = this.transform;
        // quad.transform.localPosition = new Vector3(0.0f, 0.0f, 3.0f);

        quadRenderer.material.SetTexture("_MainTex", texture);

        // カメラを非アクティブにします
        photoCaptureObject.StopPhotoModeAsync(OnStoppedPhotoMode);
    }

    void OnStoppedPhotoMode(UnityEngine.Windows.WebCam.PhotoCapture.PhotoCaptureResult result)
    {
        // photo capture のリソースをシャットダウンします
        photoCaptureObject.Dispose();
        photoCaptureObject = null;
        waitingForCapture = false;
    }
}
9.PhotoCaptureのサンプルはこちらです。エアタップしたら、画像キャプチャするようにInputActionHandlerをAdd Componentし、AirTap関数を作成します。エアタップ(On Input Action Started)したらAirTap関数が発火するように設定します。
10.撮影できたら、targetTextureに画像データが入っているので、JPGにエンコードして、Face APIに投げます。FaceAPIのサンプルはこちらC#、Pythonです。
11.endpointとsubscription_keyにメモしておいたものを貼り付けてください。
12.クエリパラメータは、detection_01モデルを使用、FaceId、年齢と性別を返すように設定しています。
https://<Insert Your Endpoint>/face/v1.0/detect?detectionModel=detection_01&returnFaceId=true&returnFaceAttributes=age,gender"
ちなみにfaceAttributesはsmile, headPose, gender, age, facialHair, glasses, emotion, blur, exposure, noise, makeup, accessories, occlusion, hairといった情報が取れます。
13.MRTKのRestを用いてHTTPリクエストします。
ヘッダーは、"Ocp-Apim-Subscription-Key": subscription_keyを指定、"Content-Type": "application/octet-stream"はRestの中でやってくれるのでコメントアウトします。
14.クエリと画像データ、ヘッダーをPOSTします。
response = await Rest.PostAsync(query, bodyData, headers, -1, true);
15.response.ResponseBodyが下記のように返ってくればOKです。
[{"faceId":"f1b97cf1-58d0-4dc9-9169-e19cb0655e48","faceRectangle":{"top":347,"left":451,"width":285,"height":285},"faceAttributes":{"gender":"male","age":23.0}}]
16.Face APIのResponseBodyがリストのjsonになっているので、パースできるようにJsonHelper.csスクリプトを作成します。
using UnityEngine;
using System;

public class JsonHelper
{
    public static T[] FromJson<T>(string json)
    {
        Wrapper<T> wrapper = JsonUtility.FromJson<Wrapper<T>>(json);
        return wrapper.results;
    }

    [Serializable]
    private class Wrapper<T>
    {
        public T[] results;
    }
}
JsonHelperについて
17.返ってきたResponseBodyを次のようにすることで、パースすることが可能になります。
{
    "results" : [ {...} ]
}
18.あとは仕様に合わせてFaceクラスとFaceRectangleクラス、FaceAttributeクラスを作成しました。
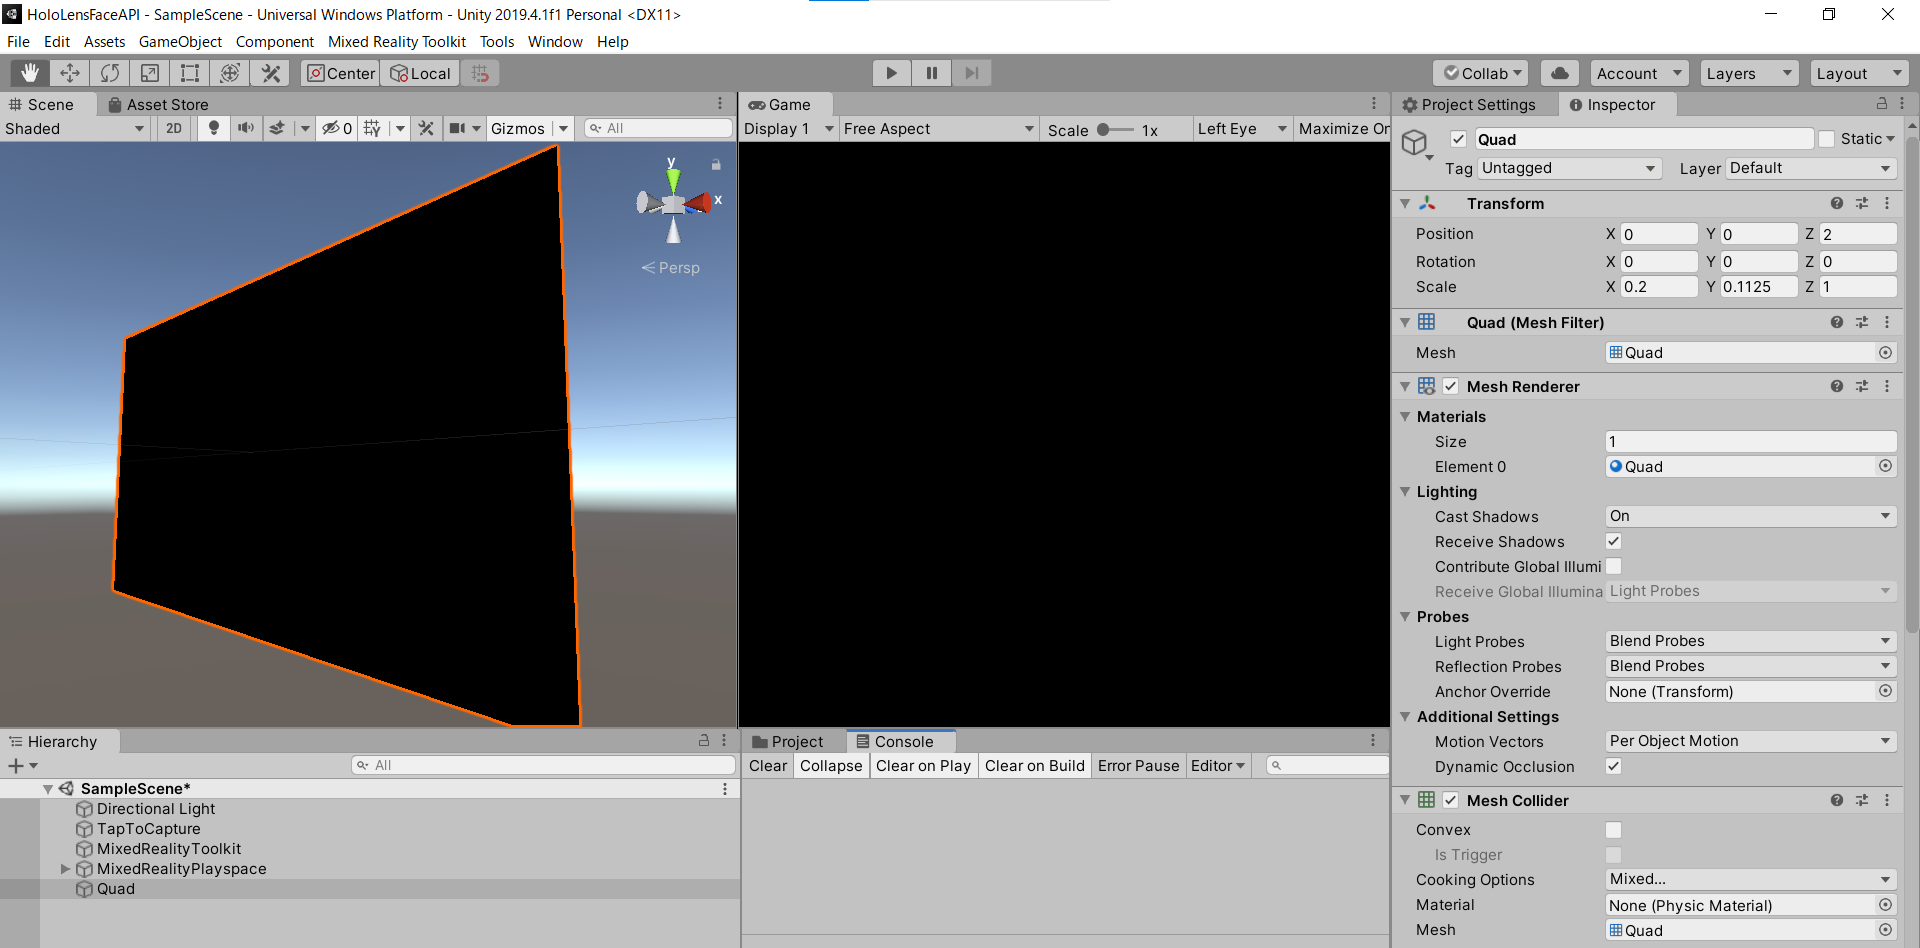
19.顔検出結果をOpenCVを使って画像に描画し、Quadのマテリアルに割り当てます。3D Object->Quadを作成しましょう。
OpenCV for Unity サンプルはこちら
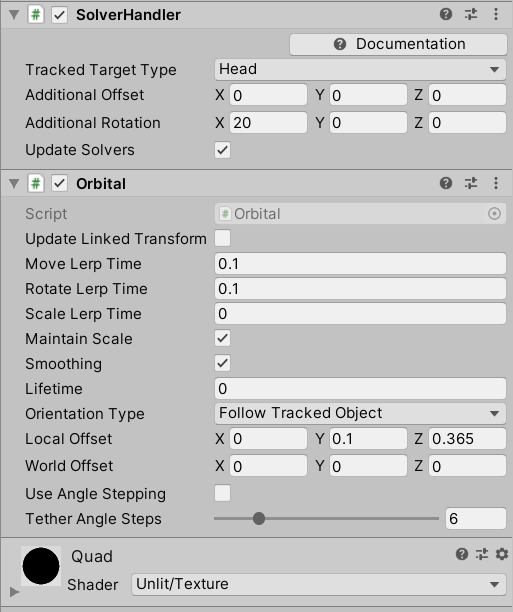
20.OrbitalをAdd Componentし、Quadがカメラに追従するようにしています。
21.TapToCaptureにQuadをD&Dしてアタッチしたら完成です。
実行
HoloLens2にデプロイして、実行した結果がこちらになります。Editor上でもできるので試してみてください。
HoloLens2 × Cognitive Services Face API#HoloLens2 #Azure #CognitiveServices #MRTK #Unity #AI pic.twitter.com/B3G38kEveT
— がちもとさん@熊本 (@sotongshi) December 1, 2020
お疲れ様でした。
明日は弟子(@Horomoto-Asahi)による「HoloLens 2のSpatialAwarenessの調査」です。