4
2

Delete article

Deleted articles cannot be recovered.

Draft of this article would be also deleted.

Are you sure you want to delete this article?

More than 3 years have passed since last update.

Androidエミュレータで指紋認証を実行する方法

Last updated at Posted at 2020-08-17

F1(Mac の場合は Command+/)キーを押してExtended controlsウィンドウを開きます。
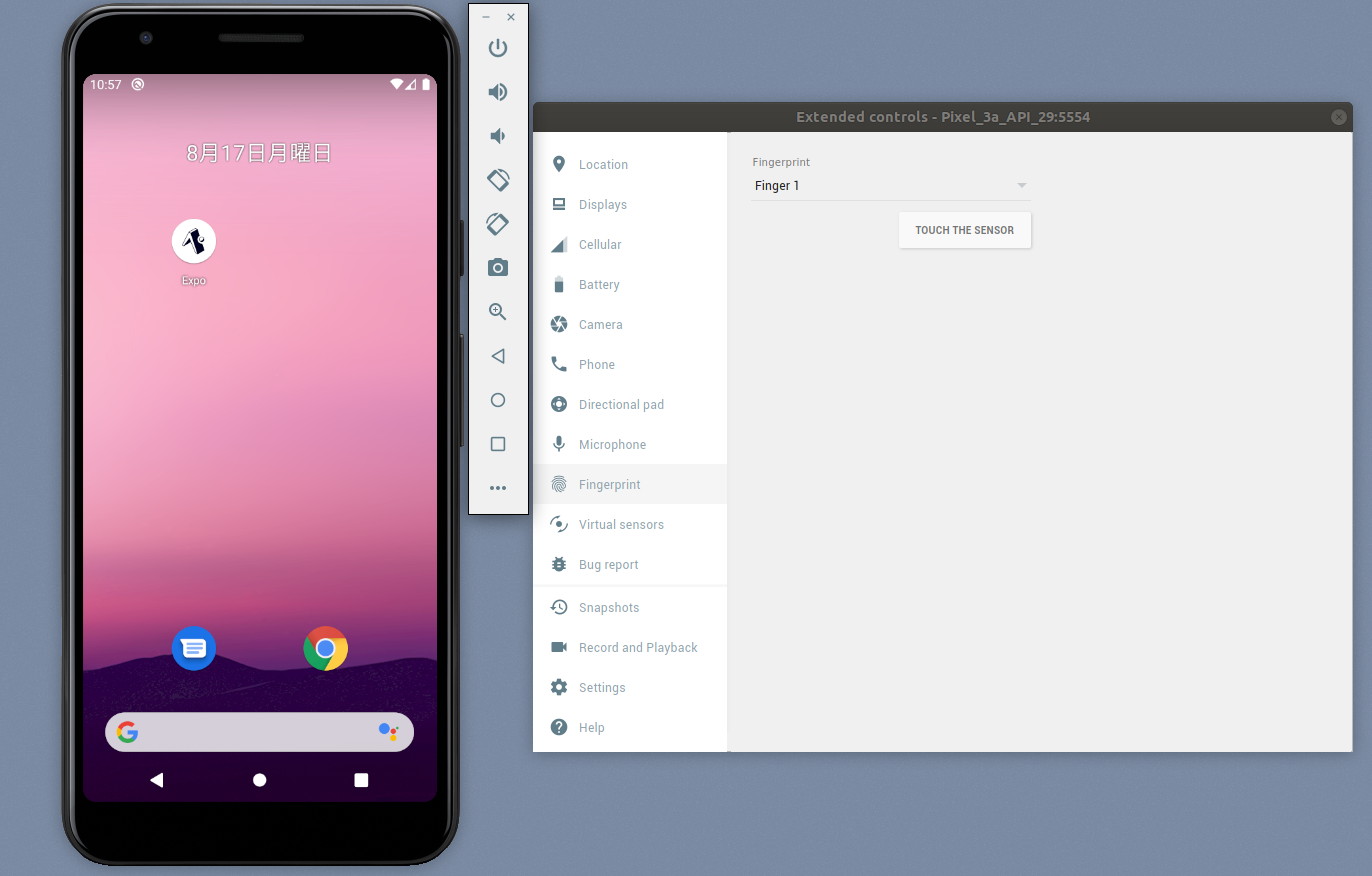
Screenshot from 2020-08-17 10-57-52.png

メニュー内の「Fingerprint」から指紋認証をエミュレータ上で実行することが出来ます。

指紋データの登録

設定→セキュリティ→指紋登録画面を開きます。
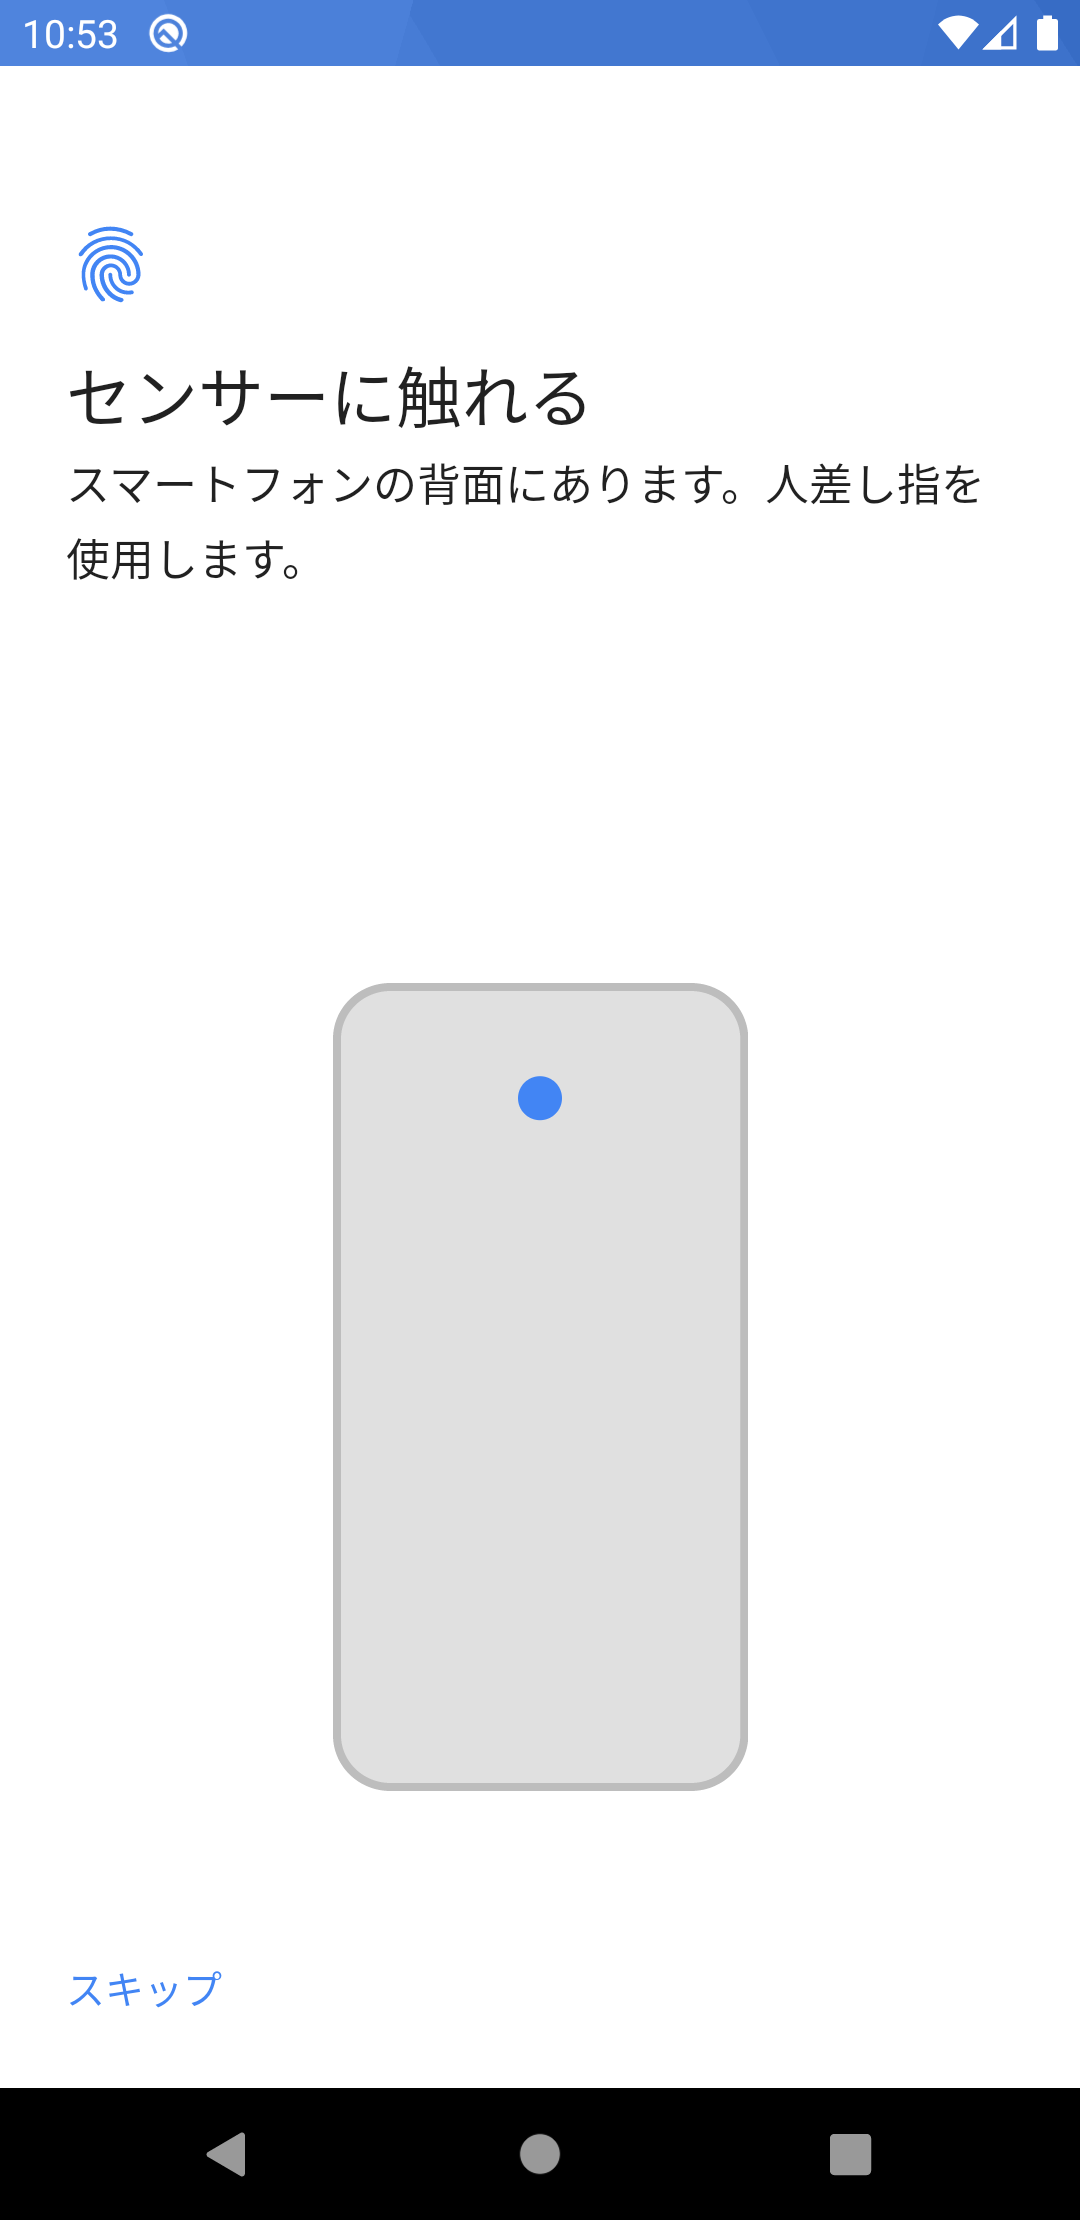
TOUCH THE SENSORをクリックしてFinger1の指紋を登録します。

指紋認証を実行する

あとは指紋認証を使用したいときに、事前に登録しておいたFinger1を指定してTOUCH THE SENSORをクリックするだけで指紋認証に通るようになります。登録してないFinger2などの選択すると指紋認証を失敗させることもできます。

Peek 2020-08-17 11-20.gif

参考:Android Emulator 上でアプリを実行する

4
2
0

Register as a new user and use Qiita more conveniently

  1. You get articles that match your needs
  2. You can efficiently read back useful information
  3. You can use dark theme
What you can do with signing up
4
2

Delete article

Deleted articles cannot be recovered.

Draft of this article would be also deleted.

Are you sure you want to delete this article?