これからよく使うのと、忘れそうなのでメモっておきます。
1.スクリーンショットを撮る
Windows
| キー | 効果 |
|---|---|
| [PrintScreen] | 全画面スクリーンショット |
| [Alt] + [PrintScreen] | アクティブなウィンドウのスクリーンショット |
Mac(参考)
| キー | 効果 |
|---|---|
| [Command] + [Shift] + [3] | 全画面スクリーンショット |
| [Command] + [Shift] + [4] | 指定した範囲のスクリーンショット |
| [Command] + [Shift] + [4] 後に [Space] |
選択したウィンドウのスクリーンショット |
2.Photoshopでモザイクをかける
ツールのバージョンは「Photoshop CC 2015」です。
2-1.モザイクをかけたい画像のレイヤーを指定する
地味に重要な手順です。
2-1.モザイクをかけたい範囲を指定する
ショートカットキー「M」か、以下アイコンをメニューから選択。

2-2.モザイク処理
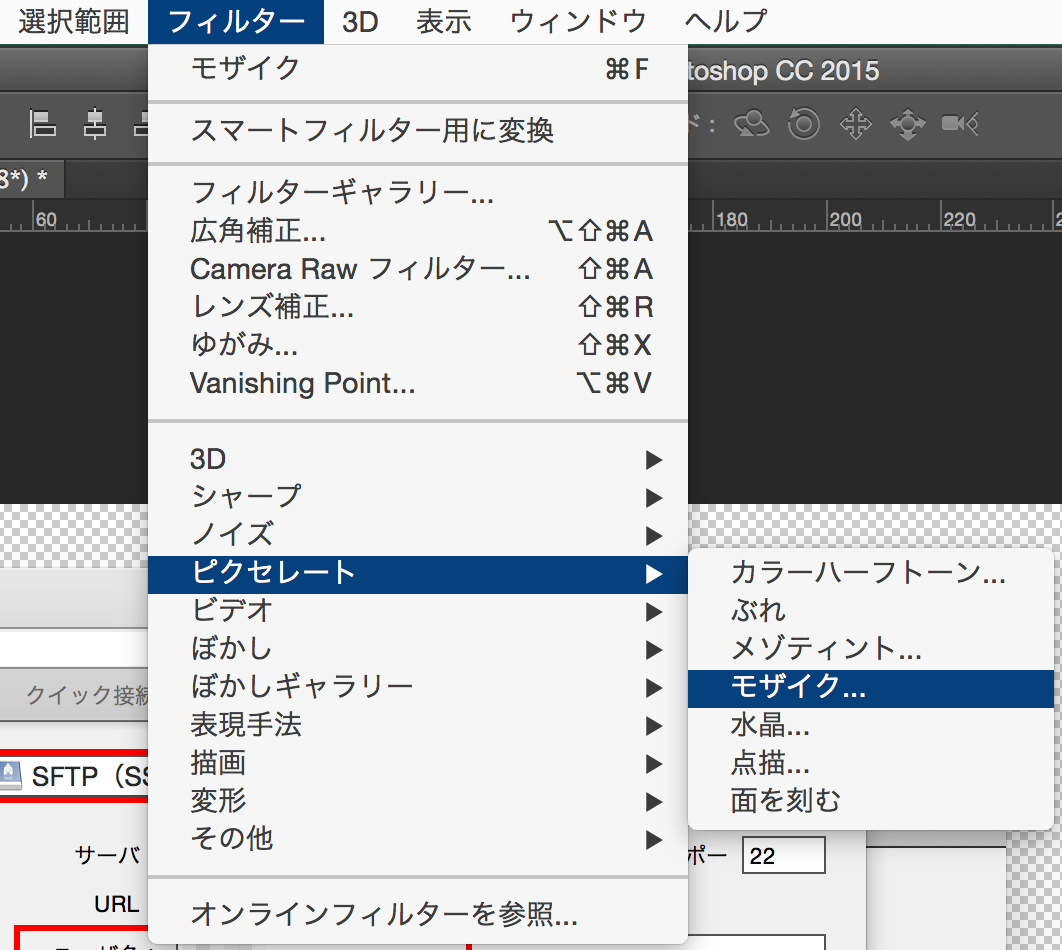
ショートカットキー「Command + F」か、
フィルタ > ピクセレータ > モザイク からモザイク処理。
モザイクの粒度はフィルタメニューからしか設定できないので注意。
一度変更したらその後はショートカットキーからでもクイックにモザイクかけられるので便利です。
以上です!
お疲れ様でした。
