前提
■JAVAがインストールされていること
今回はJava SE 14を使用しています
https://www.oracle.com/java/technologies/javase-downloads.html
■IntelliJがインストールされていること
【公式ダウンロード IntelliJ IDEA】
https://www.jetbrains.com/ja-jp/idea/download/#section=windows
■Dockerがインストールされていること
構築方法は下記を参照
【Windows10でDockerを無料で構築する】
https://qiita.com/SSM3G/items/79b7becc2169aac8ec6f
目標
IntelliJを使いつつ
Dockerでアプリケーションサーバとデータベースサーバを構築
サンプルのプロジェクトとソースを用いてデータベースの内容を表示するところまで目指す
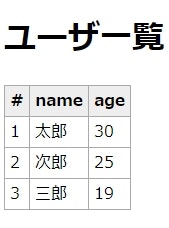
http://localhost/にアクセスして下記画面を表示させる
SpringBootのプロジェクトを作成 - Spring Initializr -
https://start.spring.io/
上記URLでプロジェクト作成に必要なものを選択
GENERATEすれば簡単に作成可能です
Dependenciesはとりあえず使いそうなものを追加 あとでpom.xmlから追加可能
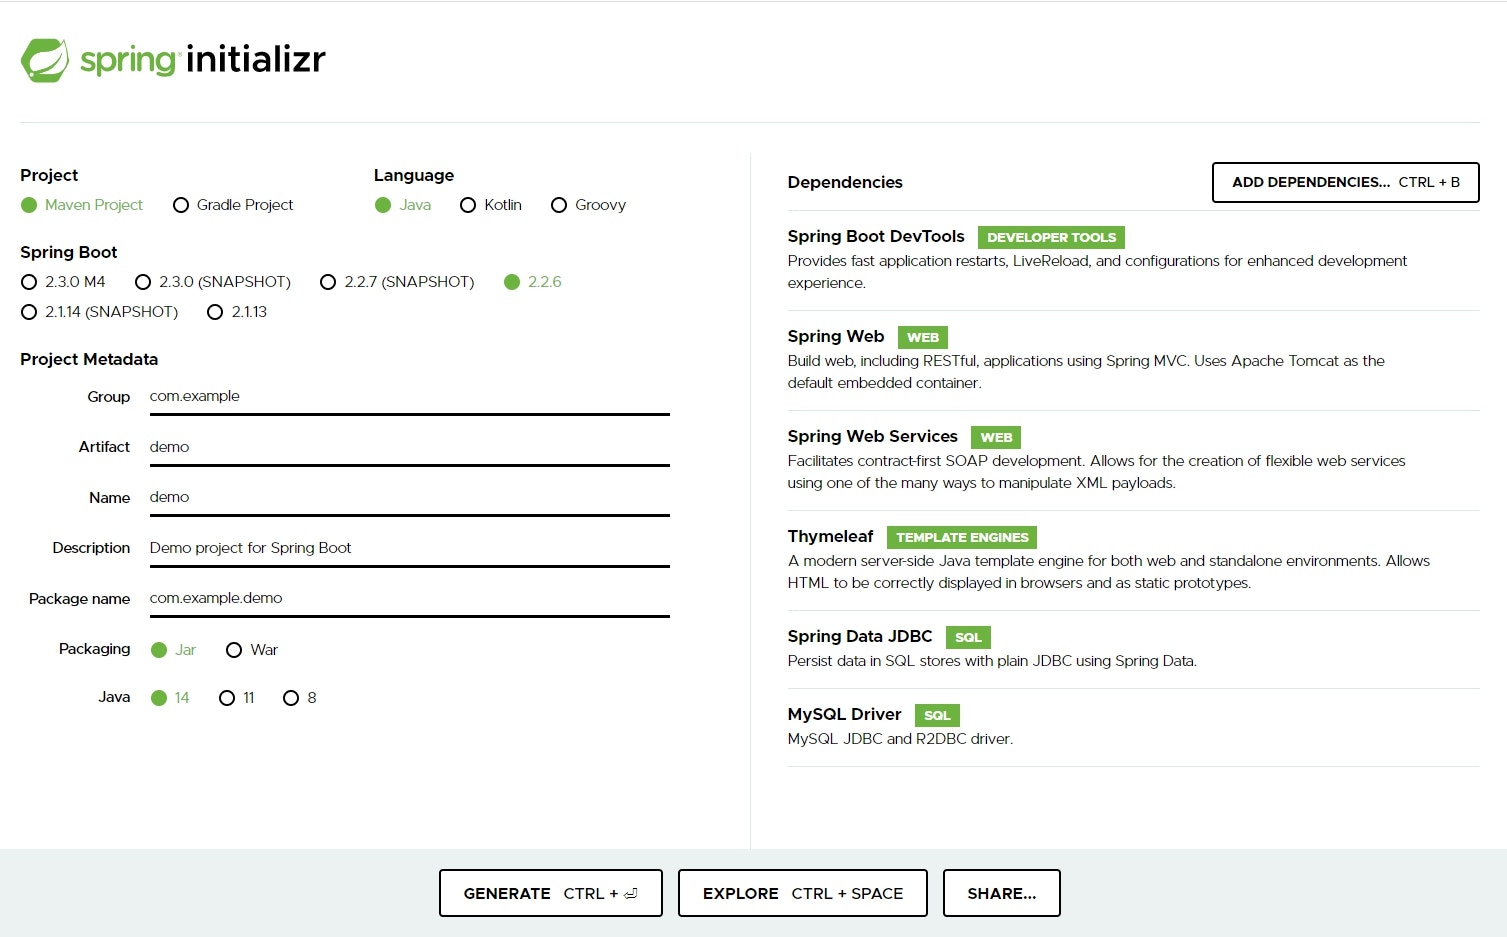
zipファイルで落とせるので解凍して適当なディレクトリに格納
IntelliJ
「Open or Import」から先ほど作成したファイルを開く
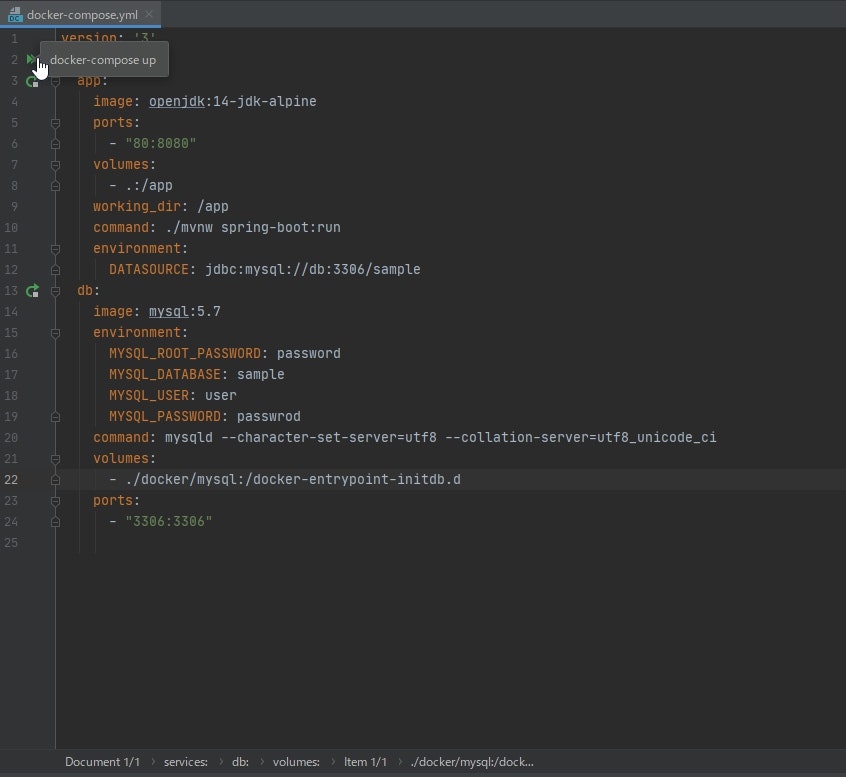
「demo」配下にdocker-compose.ymlを作成
追記
docker-compose.ymlに書いてあることが1行もわからない人はこちらへ
【docker-compose.ymlをなんとなく理解する】
https://qiita.com/SSM3G/items/4e5fc3e880fff0de3bfe
version: '3'
services:
  app:
    image: openjdk:14-jdk-alpine
    ports:
      - "80:8080"
    volumes:
      - .:/app
    working_dir: /app
    command: ./mvnw spring-boot:run
    environment:
      DATASOURCE: jdbc:mysql://db:3306/sample
  db:
    image: mysql:5.7
    environment:
      MYSQL_ROOT_PASSWORD: password
      MYSQL_DATABASE: sample
      MYSQL_USER: user
      MYSQL_PASSWORD: passwrod
    command: mysqld --character-set-server=utf8 --collation-server=utf8_unicode_ci
    volumes:
      - ./docker/mysql:/docker-entrypoint-initdb.d
    ports:
      - "3306:3306"
src\main\resources\application.properties
にDBに接続するための設定を書き込む
今回はJDBCを用いてDB接続を行う
spring.datasource.url=${DATASOURCE:jdbc:mysql://localhost:3306/sample}
spring.datasource.username=root
spring.datasource.password=password
spring.datasource.driver-class-name=com.mysql.jdbc.Driver
次はサンプルのデータを作成します
「demo」配下にdocker\mysql\sample.sqlを作成
SET CHARSET UTF8;
create table sample.users(
  id bigint(20) unsigned AUTO_INCREMENT PRIMARY KEY,
  name varchar(100),
  age tinyint,
  created_at TIMESTAMP DEFAULT CURRENT_TIMESTAMP,
  updated_at DATETIME
);
INSERT INTO sample.users(name,age) VALUES ('太郎',30),('次郎',25),('三郎',19);
あとはお馴染みのControllerとHTMLを作成
src\main\java\com\example\demo\controller\AppController.java
package com.example.demo.controller;

import org.springframework.jdbc.core.JdbcTemplate;
import org.springframework.stereotype.Controller;
import org.springframework.ui.Model;
import org.springframework.web.bind.annotation.RequestMapping;

import java.util.List;
import java.util.Map;

@Controller
public class AppController {
    final
    JdbcTemplate jdbcTemplate;

    public AppController(JdbcTemplate jdbcTemplate) {
        this.jdbcTemplate = jdbcTemplate;
    }

    @RequestMapping("/")
    String index(Model model) {
        List<Map<String, Object>> users = jdbcTemplate.queryForList("select * from sample.users");
        model.addAttribute("title", "ユーザ一覧");
        model.addAttribute("users", users);
        return "index";
    }
}
src\main\resources\templates\index.html
<!DOCTYPE html>
<html lang="ja" xmlns:th="http://www.thymeleaf.org">
<head>
    <meta charset="UTF-8">
    <title>Title</title>
    <style>
        table {
            border-collapse: collapse;
        }

        th, td {
            padding: 3px 5px 3px 5px;
            border: 1px solid #aaa;
        }

        th {
            background-color: #eee;
        }
    </style>
</head>
<body>
<h1 th:text="${title}"></h1>
<table>
    <thead>
    <tr>
        <th>#</th>
        <th>name</th>
        <th>age</th>
    </tr>
    </thead>
    <tbody>
    <tr th:each="user: ${users}">
        <td th:text="${user['id']}"></td>
        <td th:text="${user['name']}"></td>
        <td th:text="${user['age']}"></td>
    </tr>
    </tbody>
</table>
</body>
</html>
Docker
次はDockerの準備を行います
Dockerを無事にインストールすることができれば
右下にDockerのアイコンが表示されるのでSetting画面を開く
Expose daemon on tcp://localhost:2375 without TLS
にチェックを入れてTLC なしに変更する
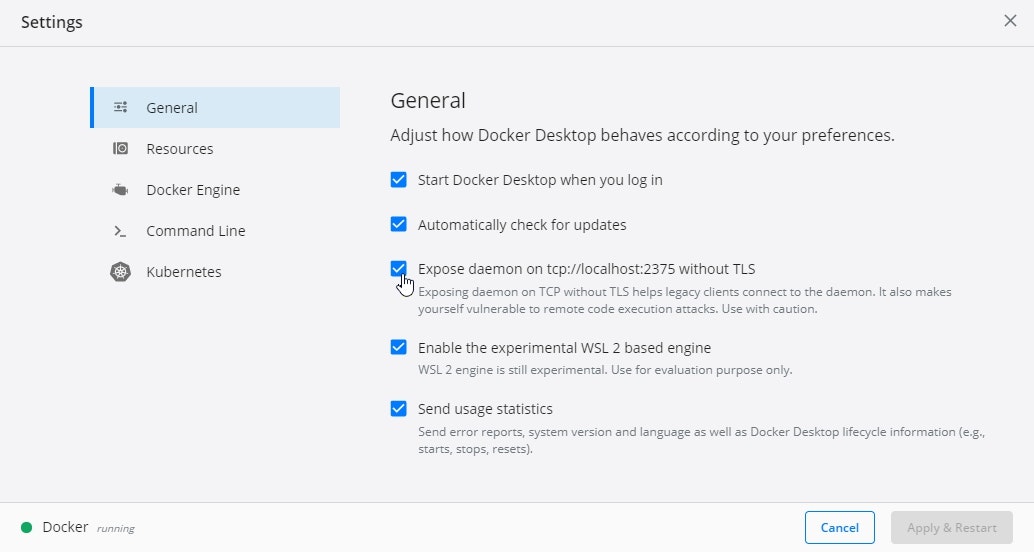
IntelliJでSetting画面を開く Ctrl + Alt + S
Pluginsで「Docker」をインストールする
するとSetting画面にDockerの項目が表示されます。
+を押してDockerを追加して完了です
※Spring関連とThymeleafのプラグインがインストールされていなかった場合はインストールして下さい
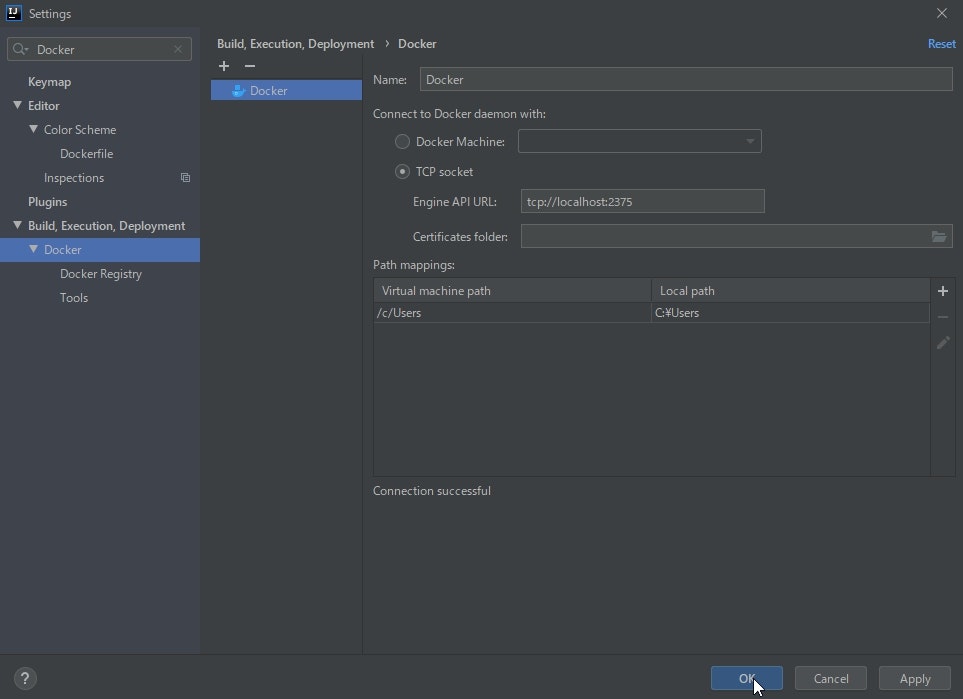
IntelliJの下メニューのServicesからDockerを起動
問題なければ起動すると思います
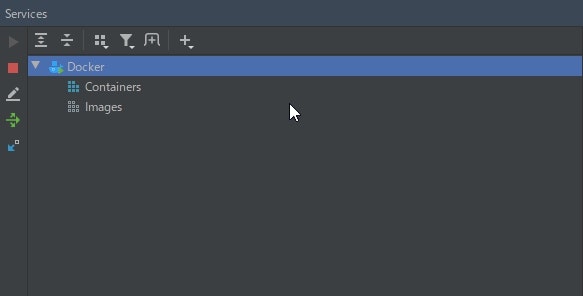
注意
appは初回起動時に時間がかかるので3~5分くらい待ちましょう
しばらくすると起動します

動作確認
http://localhost/にアクセスしてみましょう
ユーザ一覧が表示されれば完了となります
IntelliJからDB操作を行う
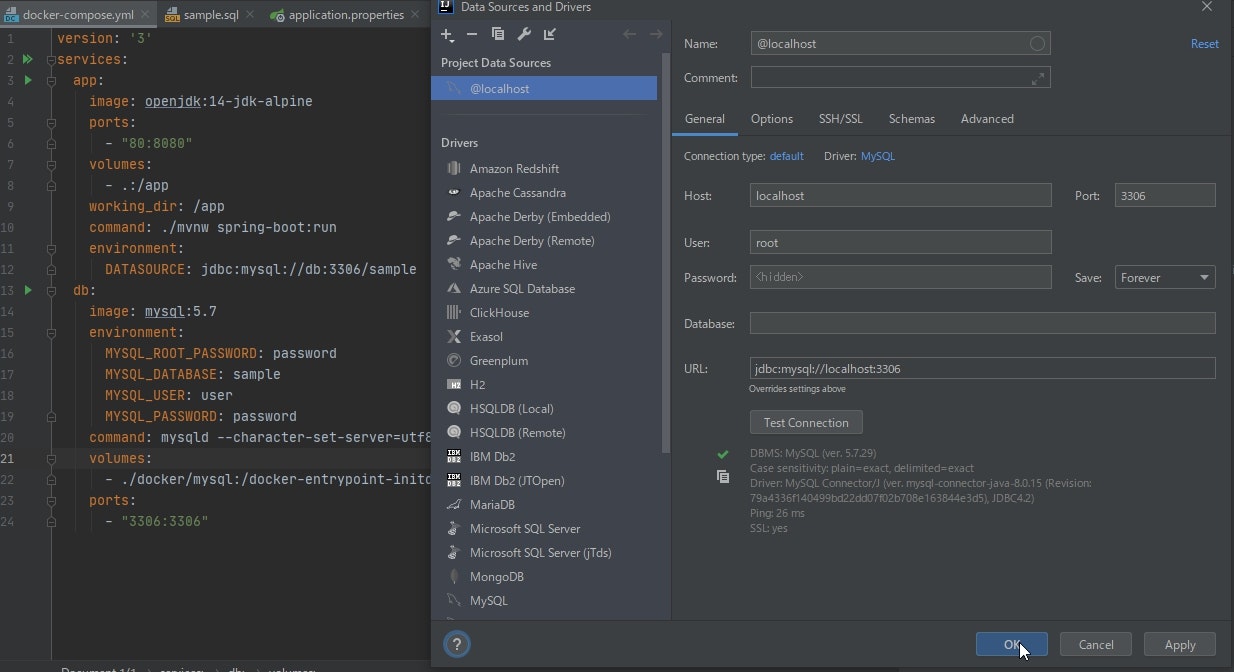
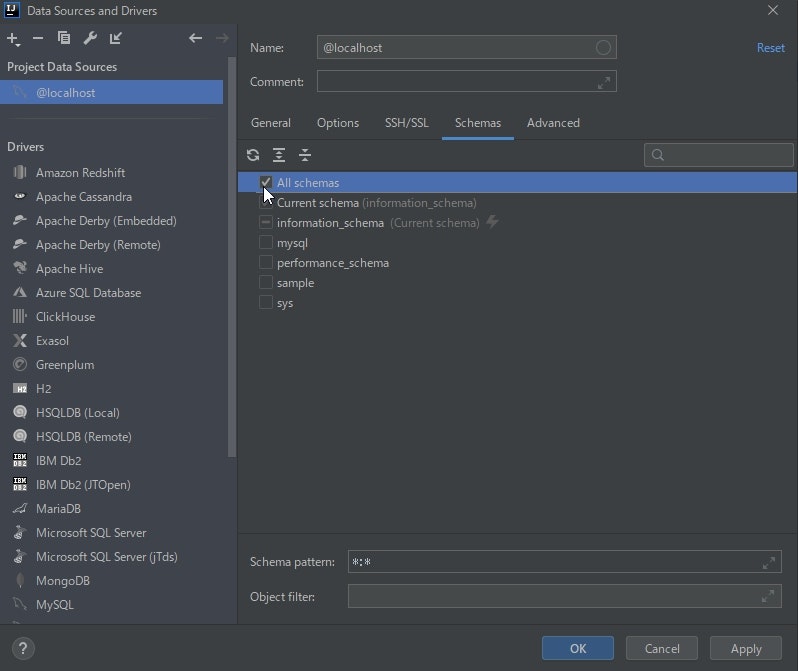
右側のメニューにDatabaseがあるので+を押してください
Data Source > MySQL
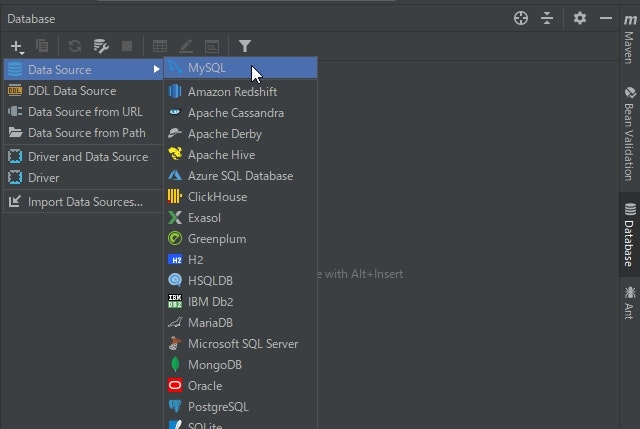
上記画像の通りに記入
User:root
Password:password
MYSQL_ROOT_PASSWORD: password
と設定しているので上記に値になります。後でお好きに編集してください
DBのテーブルが表示されるので
試しにレコードを追加してみましょう

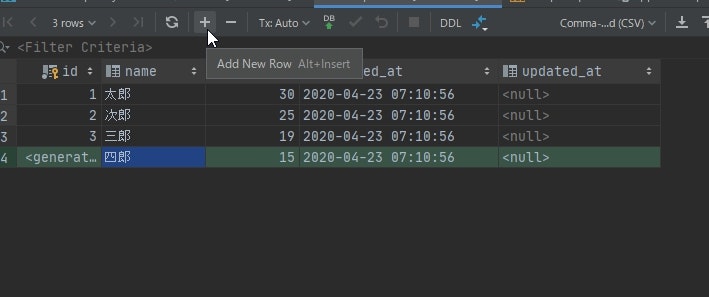
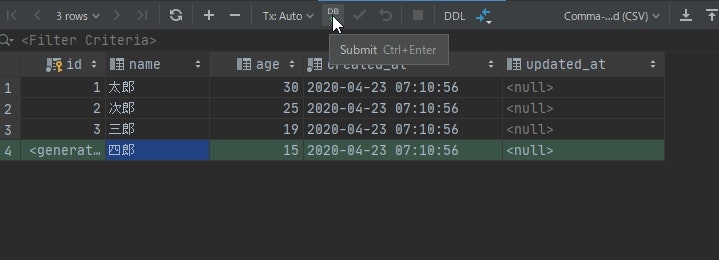
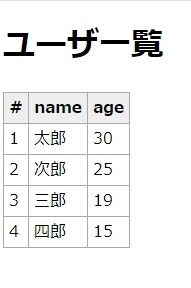
ローカルホストにアクセスして更新されていれば完了です!
お疲れ様です\(^o^)/あとは自分の好きなようにカスタマイズして知識を深めていってください
