Airflow環境構築
1. Airflow の公式サイトを参考に、docker-compose.yamlをダウンロードする。
$ curl -LfO 'https://airflow.apache.org/docs/apache-airflow/2.6.2/docker-compose.yaml'
  % Total    % Received % Xferd  Average Speed   Time    Time     Time  Current
                                 Dload  Upload   Total   Spent    Left  Speed
100 11632  100 11632    0     0  25841      0 --:--:-- --:--:-- --:--:-- 25848
2. docker composeを使って、Airflow環境を構築する。
 docker-compose up -d
Creating network "airflow_default" with the default driver
Pulling airflow-init (apache/airflow:2.6.2)...
2.6.2: Pulling from apache/airflow
759700526b78: Pull complete
0167f939c9b5: Pull complete
e460d26209ef: Pull complete
835221e3ec74: Pull complete
116eb26d30a0: Pull complete
5284abf95bb7: Pull complete
bcf24152424e: Pull complete
84a6c4d06a75: Pull complete
28328c623bce: Pull complete
8e39b8606b68: Pull complete
5cd403287497: Pull complete
835c1622ff4b: Pull complete
1b382cb186b7: Pull complete
0ca6778a4ad0: Pull complete
913a51e57913: Pull complete
eea8ac944152: Pull complete
01ff5004b362: Pull complete
0aad50ab46fb: Pull complete
4f4fb700ef54: Pull complete
Digest: sha256:7dbd78fc92b15c92edc222a2fc5096ac22acd46f0e5f2e1ac9de55ada671ef93
Status: Downloaded newer image for apache/airflow:2.6.2
Creating airflow_redis_1    ... done
Creating airflow_postgres_1 ... done
Creating airflow_airflow-init_1 ... done
Creating airflow_airflow-scheduler_1 ... done
Creating airflow_airflow-triggerer_1 ... done
Creating airflow_airflow-webserver_1 ... done
Creating airflow_airflow-worker_1    ... done
$ docker ps
CONTAINER ID   IMAGE                  COMMAND                  CREATED         STATUS                   PORTS
                            NAMES
ac67b37461ee   apache/airflow:2.6.2   "/usr/bin/dumb-init …"   5 minutes ago   Up 5 minutes (healthy)   8080/tcp                                    airflow_airflow-worker_1
dfaeb9997132   apache/airflow:2.6.2   "/usr/bin/dumb-init …"   5 minutes ago   Up 5 minutes (healthy)   0.0.0.0:8080->8080/tcp, :::8080->8080/tcp   airflow_airflow-webserver_1
ef3ec278ebc5   apache/airflow:2.6.2   "/usr/bin/dumb-init …"   5 minutes ago   Up 5 minutes (healthy)   8080/tcp                                    airflow_airflow-triggerer_1
4399d4d2f373   apache/airflow:2.6.2   "/usr/bin/dumb-init …"   5 minutes ago   Up 5 minutes (healthy)   8080/tcp                                    airflow_airflow-scheduler_1
1457368877ce   redis:latest           "docker-entrypoint.s…"   5 minutes ago   Up 5 minutes (healthy)   6379/tcp                                    airflow_redis_1
3. ブラウザでairflow-webserverにアクセスする。
http://localhost:8080/login/
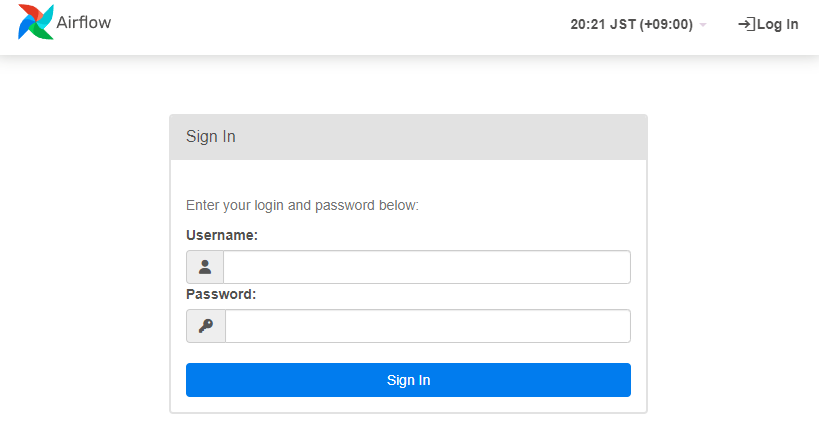
※初期ユーザー:Username、Password の両方に、airflow を入力して Sign In する。
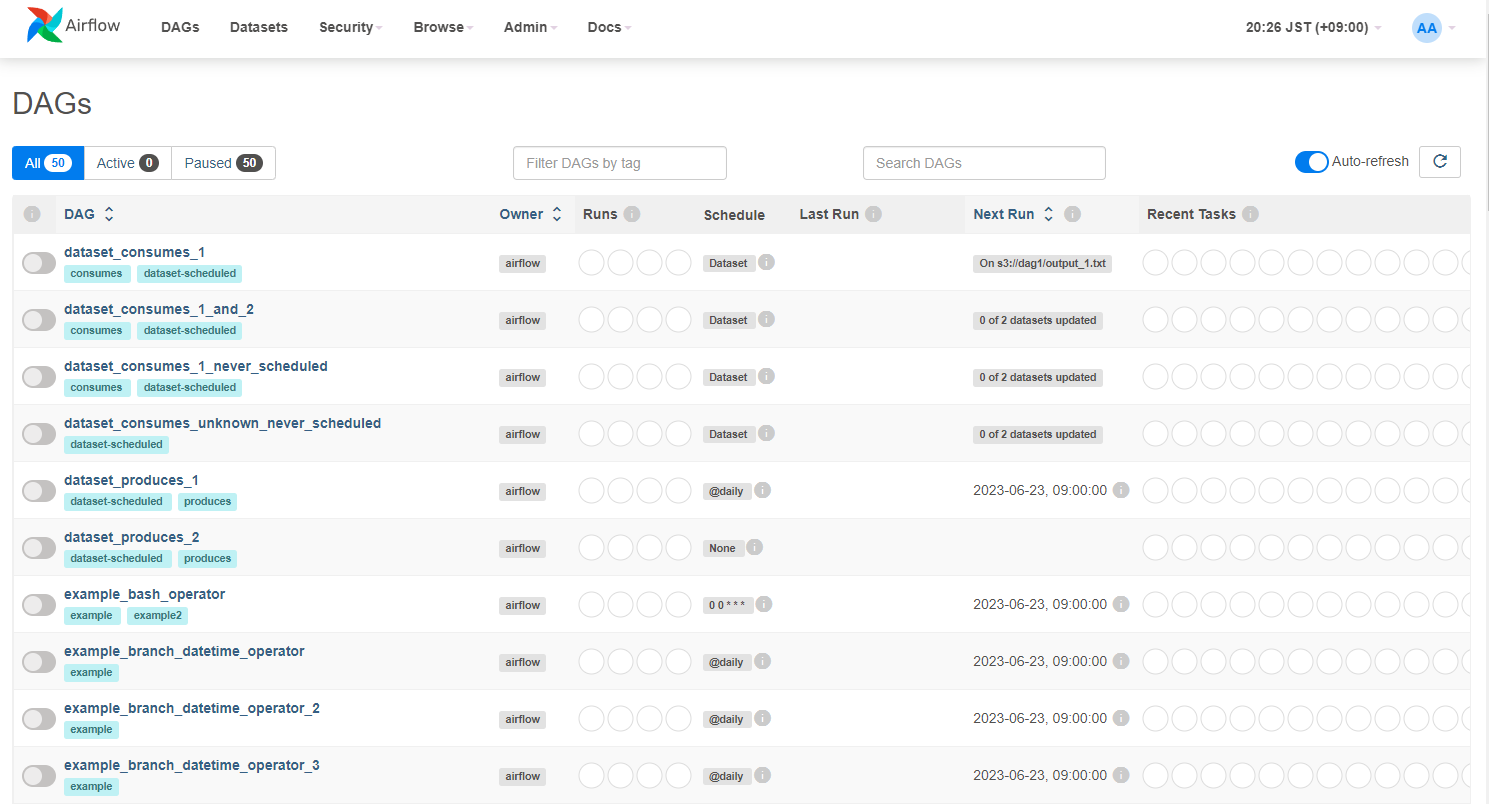
DAG のお試し実行
1. tutorial の DAG を確認する
tutorial の DAG のリンクを開く。

DAG の詳細ページ上部にあるリンクから[<> Code]を開き、DAG のコードを参照する。
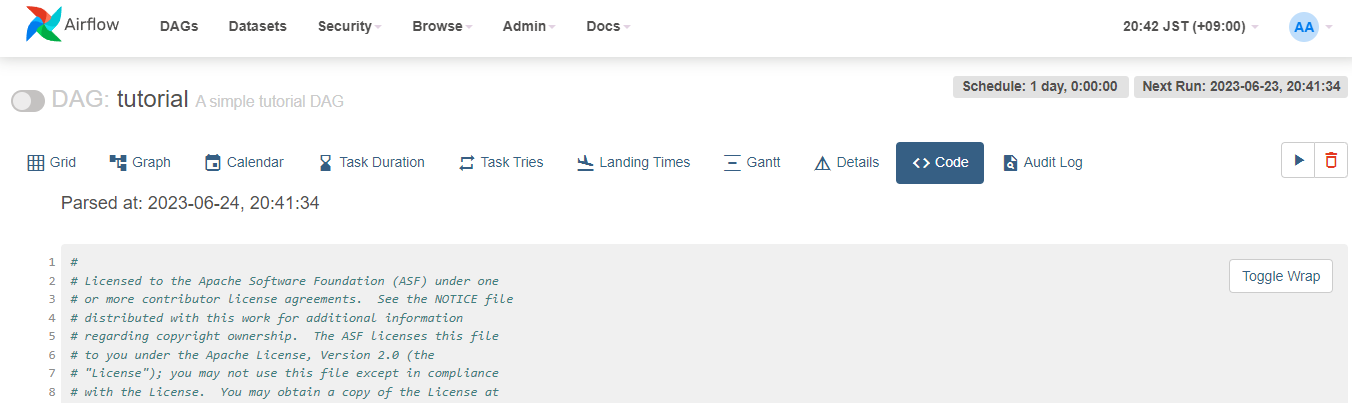
tutorial.py
#
# Licensed to the Apache Software Foundation (ASF) under one
# or more contributor license agreements. See the NOTICE file
# distributed with this work for additional information
# regarding copyright ownership. The ASF licenses this file
# to you under the Apache License, Version 2.0 (the
# "License"); you may not use this file except in compliance
# with the License. You may obtain a copy of the License at
#
# http://www.apache.org/licenses/LICENSE-2.0
#
# Unless required by applicable law or agreed to in writing,
# software distributed under the License is distributed on an
# "AS IS" BASIS, WITHOUT WARRANTIES OR CONDITIONS OF ANY
# KIND, either express or implied. See the License for the
# specific language governing permissions and limitations
# under the License.
"""
### Tutorial Documentation
Documentation that goes along with the Airflow tutorial located
[here](https://airflow.apache.org/tutorial.html)
"""
from __future__ import annotations
# [START tutorial]
# [START import_module]
from datetime import datetime, timedelta
from textwrap import dedent
# The DAG object; we'll need this to instantiate a DAG
from airflow import DAG
# Operators; we need this to operate!
from airflow.operators.bash import BashOperator
# [END import_module]
# [START instantiate_dag]
with DAG(
"tutorial",
# [START default_args]
# These args will get passed on to each operator
# You can override them on a per-task basis during operator initialization
default_args={
"depends_on_past": False,
"email": ["airflow@example.com"],
"email_on_failure": False,
"email_on_retry": False,
"retries": 1,
"retry_delay": timedelta(minutes=5),
# 'queue': 'bash_queue',
# 'pool': 'backfill',
# 'priority_weight': 10,
# 'end_date': datetime(2016, 1, 1),
# 'wait_for_downstream': False,
# 'sla': timedelta(hours=2),
# 'execution_timeout': timedelta(seconds=300),
# 'on_failure_callback': some_function, # or list of functions
# 'on_success_callback': some_other_function, # or list of functions
# 'on_retry_callback': another_function, # or list of functions
# 'sla_miss_callback': yet_another_function, # or list of functions
# 'trigger_rule': 'all_success'
},
# [END default_args]
description="A simple tutorial DAG",
schedule=timedelta(days=1),
start_date=datetime(2021, 1, 1),
catchup=False,
tags=["example"],
) as dag:
# [END instantiate_dag]
# t1, t2 and t3 are examples of tasks created by instantiating operators
# [START basic_task]
t1 = BashOperator(
task_id="print_date",
bash_command="date",
)
t2 = BashOperator(
task_id="sleep",
depends_on_past=False,
bash_command="sleep 5",
retries=3,
)
# [END basic_task]
# [START documentation]
t1.doc_md = dedent(
"""\
#### Task Documentation
You can document your task using the attributes `doc_md` (markdown),
`doc` (plain text), `doc_rst`, `doc_json`, `doc_yaml` which gets
rendered in the UI's Task Instance Details page.

**Image Credit:** Randall Munroe, [XKCD](https://xkcd.com/license.html)
"""
)
dag.doc_md = __doc__ # providing that you have a docstring at the beginning of the DAG; OR
dag.doc_md = """
This is a documentation placed anywhere
""" # otherwise, type it like this
# [END documentation]
# [START jinja_template]
templated_command = dedent(
"""
{% for i in range(5) %}
echo "{{ ds }}"
echo "{{ macros.ds_add(ds, 7)}}"
{% endfor %}
"""
)
t3 = BashOperator(
task_id="templated",
depends_on_past=False,
bash_command=templated_command,
)
# [END jinja_template]
t1 >> [t2, t3]
# [END tutorial]
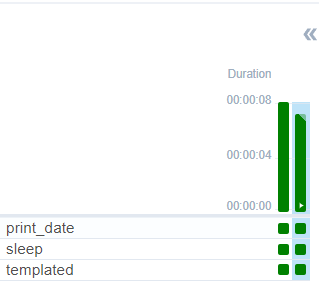
tutorialでは、t1, t2, t3 のタスクがあり、実行順序は t1 の後に t2 と t3 を並行実行する。
| タスク | task_id | 主な処理内容 |
|---|---|---|
| t1 | print_date | bash の date コマンド実行して現在日時を標準出力 |
| t2 | sleep | bash の sleep コマンドを実行して 5 秒スリープ |
| t3 | templated | jinja テンプレートの日付変数[ds]を標準出力後、Airflowマクロを使って日付に7日加算して標準出力する処理を、ループで5回実行 |
2. tutorial の DAG を実行する
DAG の詳細ページ上部にあるスイッチをONにする。


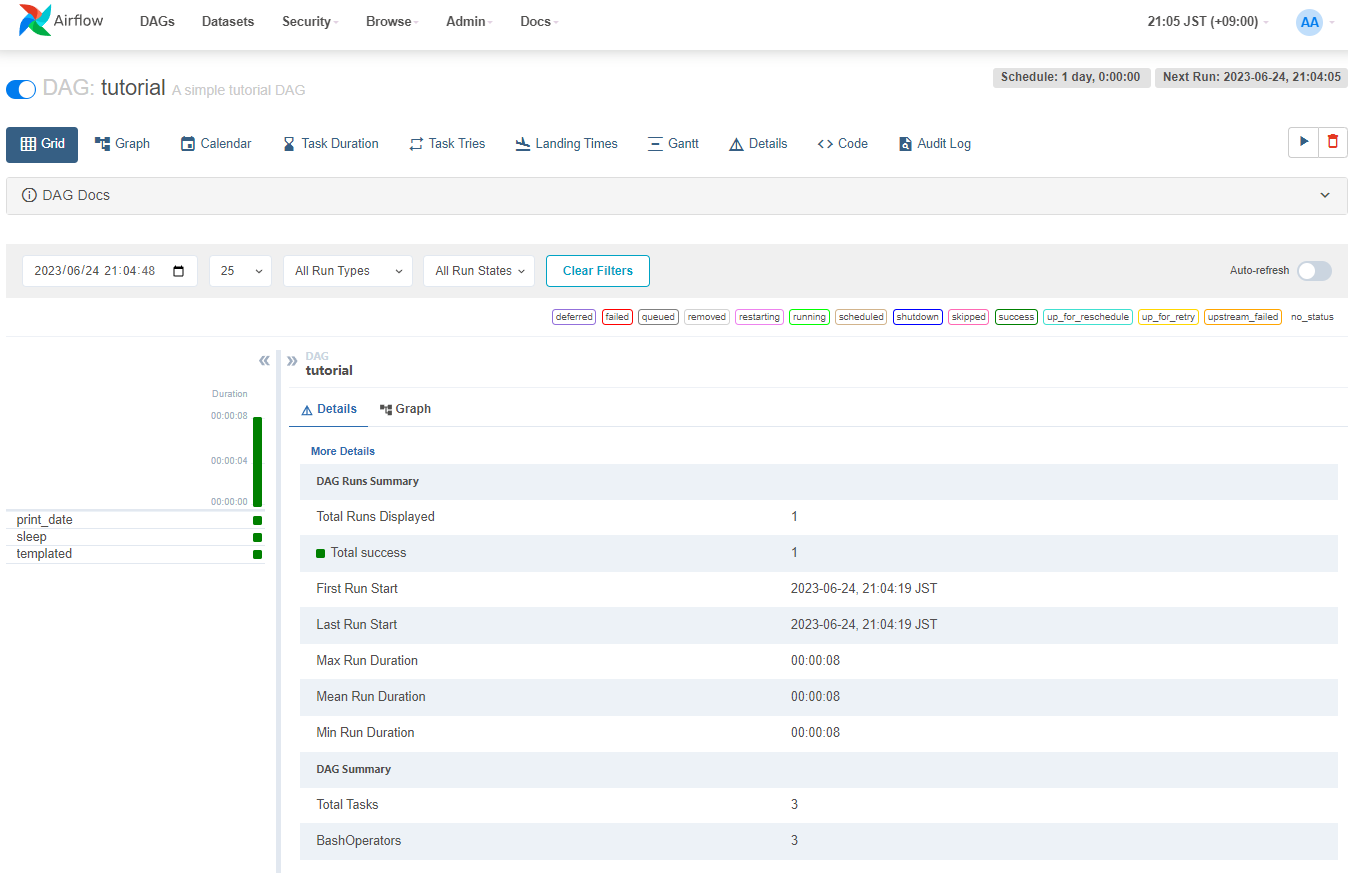
DAG の実行結果を確認する。
print_date タスクの確認
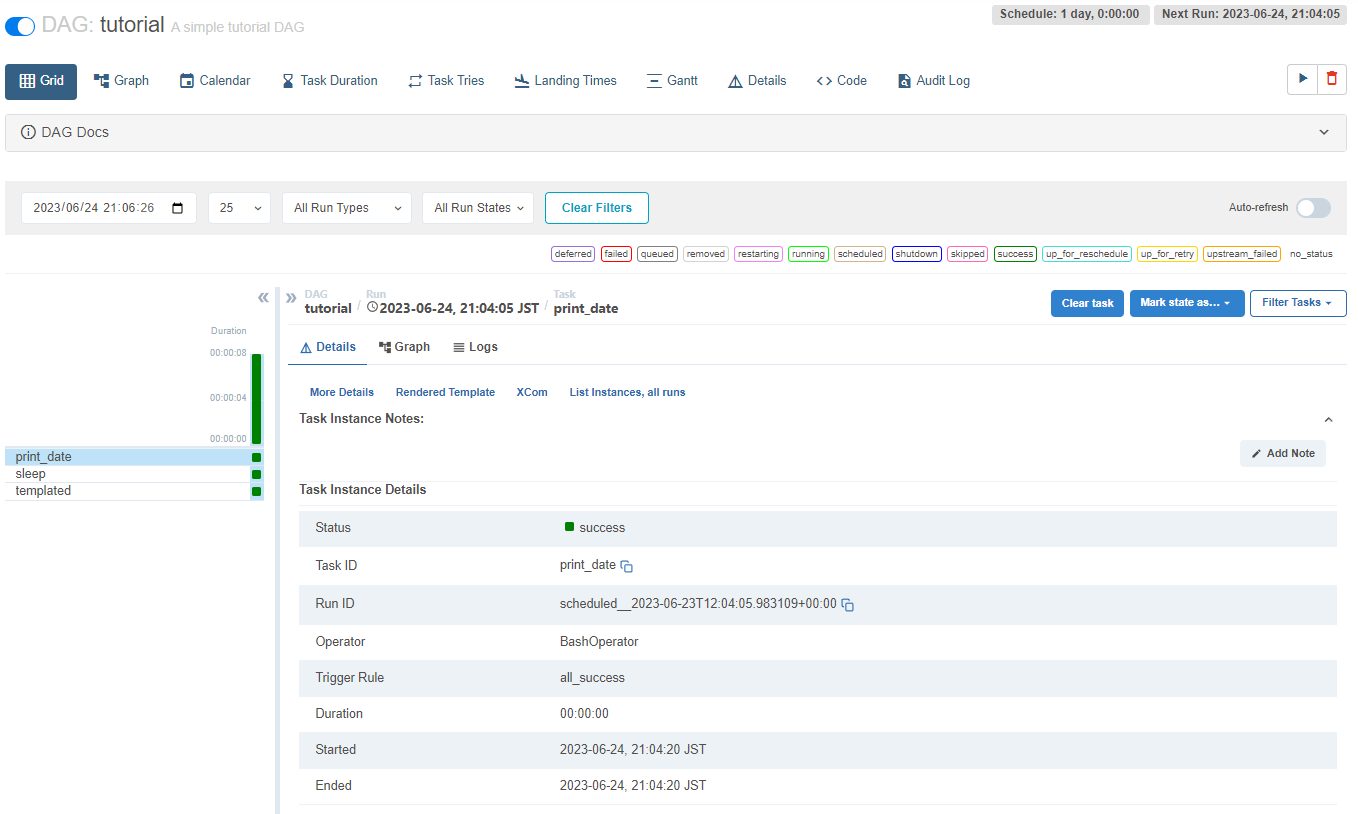
print_date タスクをクリックする。
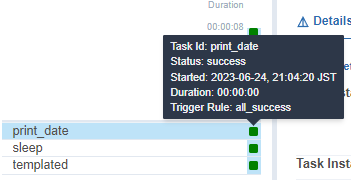
詳細を確認する。
Logs のタブから、実行ログを確認する。
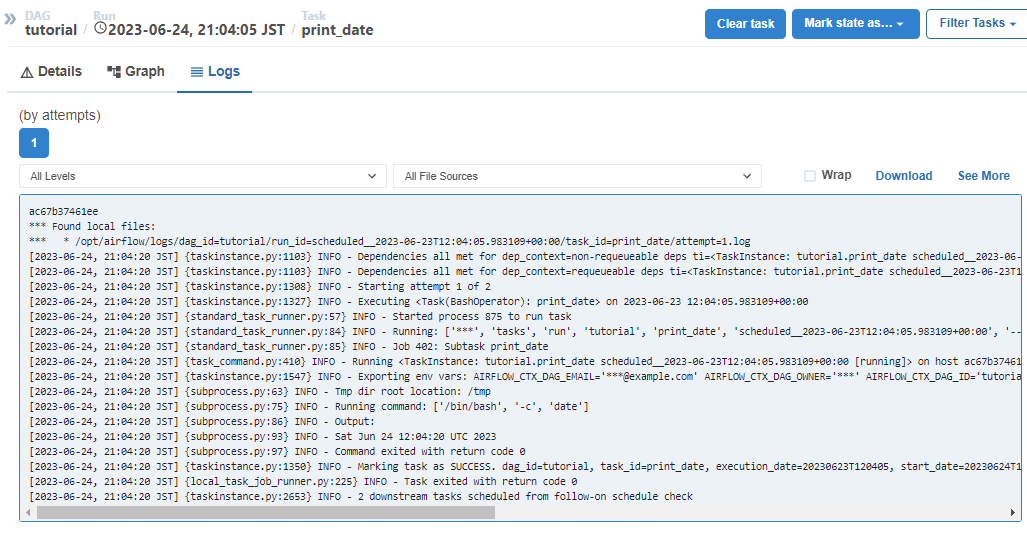
date コマンドで現在日時が出力されている。
[2023-06-24, 21:04:20 JST] {subprocess.py:75} INFO - Running command: ['/bin/bash', '-c', 'date']
[2023-06-24, 21:04:20 JST] {subprocess.py:86} INFO - Output:
[2023-06-24, 21:04:20 JST] {subprocess.py:93} INFO - Sat Jun 24 12:04:20 UTC 2023
[2023-06-24, 21:04:20 JST] {subprocess.py:97} INFO - Command exited with return code 0
sleep タスクの確認
同様に、sleep タスクの実行ログを確認する。
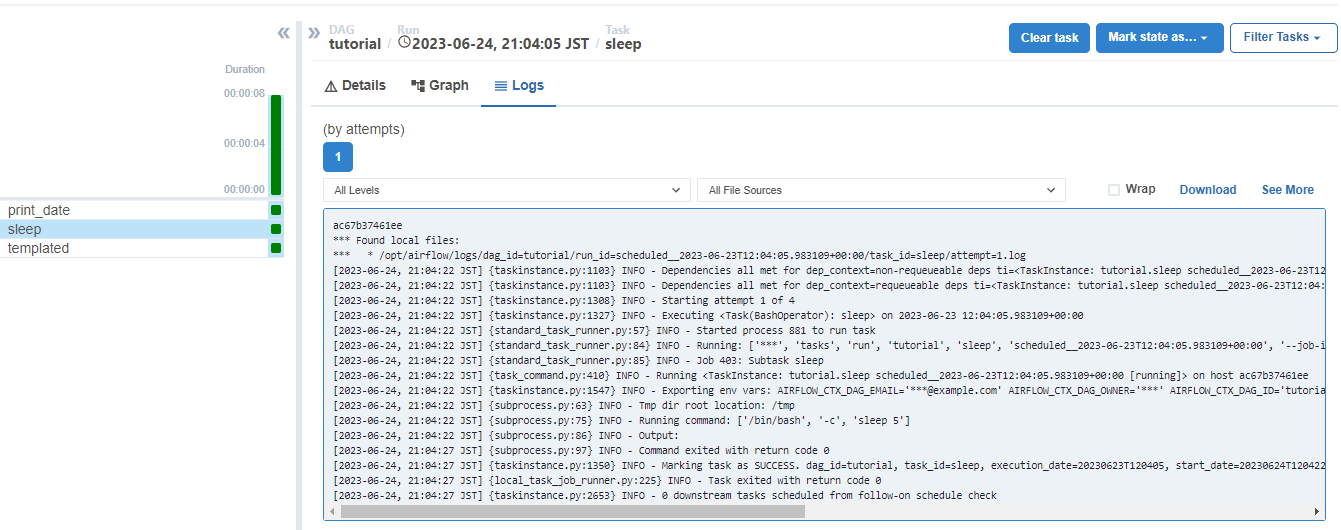
ログの実行日時から、5秒スリープしていることがわかる。
[2023-06-24, 21:04:22 JST] {subprocess.py:75} INFO - Running command: ['/bin/bash', '-c', 'sleep 5']
[2023-06-24, 21:04:22 JST] {subprocess.py:86} INFO - Output:
[2023-06-24, 21:04:27 JST] {subprocess.py:97} INFO - Command exited with return code 0
templated タスクの確認
同様に、templated タスクの実行ログを確認する。
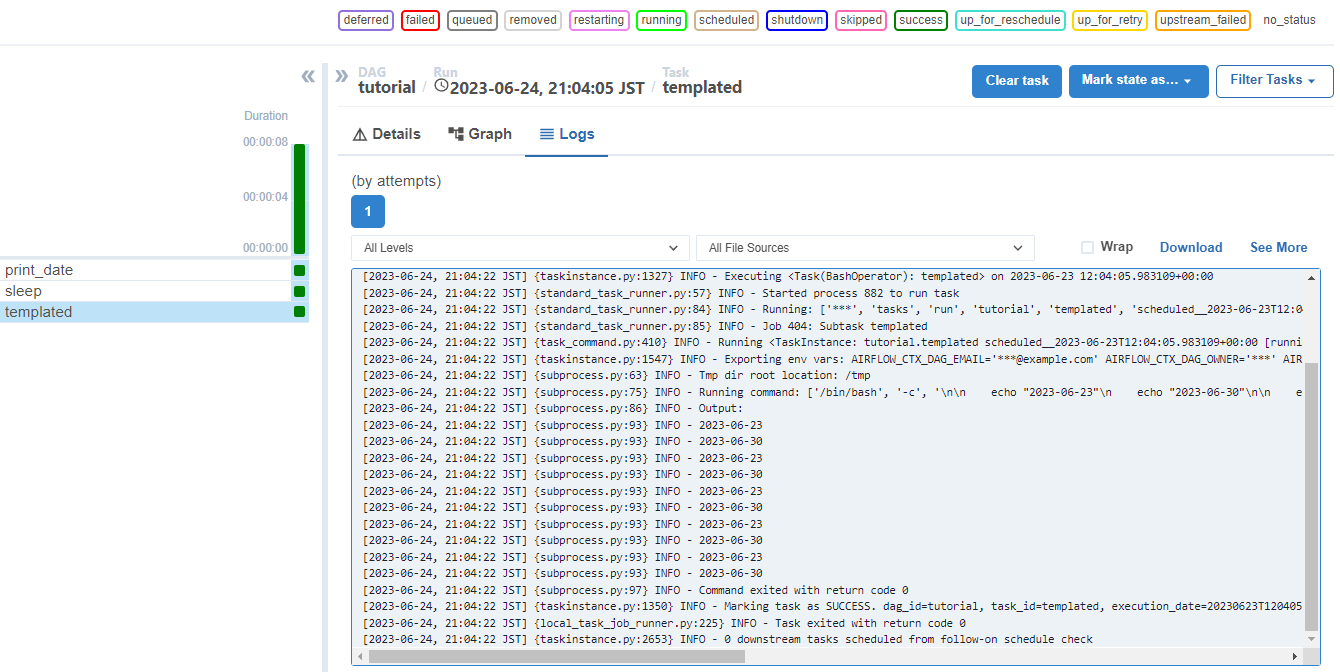
現在日付と、現在日付+7日を5回繰り返して出力していることがわかる。
[2023-06-24, 21:04:22 JST] {subprocess.py:75} INFO - Running command: ['/bin/bash', '-c', '\n\n    echo "2023-06-23"\n    echo "2023-06-30"\n\n    echo "2023-06-23"\n    echo "2023-06-30"\n\n    echo "2023-06-23"\n    echo "2023-06-30"\n\n    echo "2023-06-23"\n    echo "2023-06-30"\n\n    echo "2023-06-23"\n    echo "2023-06-30"\n']
[2023-06-24, 21:04:22 JST] {subprocess.py:86} INFO - Output:
[2023-06-24, 21:04:22 JST] {subprocess.py:93} INFO - 2023-06-23
[2023-06-24, 21:04:22 JST] {subprocess.py:93} INFO - 2023-06-30
[2023-06-24, 21:04:22 JST] {subprocess.py:93} INFO - 2023-06-23
[2023-06-24, 21:04:22 JST] {subprocess.py:93} INFO - 2023-06-30
[2023-06-24, 21:04:22 JST] {subprocess.py:93} INFO - 2023-06-23
[2023-06-24, 21:04:22 JST] {subprocess.py:93} INFO - 2023-06-30
[2023-06-24, 21:04:22 JST] {subprocess.py:93} INFO - 2023-06-23
[2023-06-24, 21:04:22 JST] {subprocess.py:93} INFO - 2023-06-30
[2023-06-24, 21:04:22 JST] {subprocess.py:93} INFO - 2023-06-23
[2023-06-24, 21:04:22 JST] {subprocess.py:93} INFO - 2023-06-30
[2023-06-24, 21:04:22 JST] {subprocess.py:97} INFO - Command exited with return code 0
REST API を使ったDAG実行
$ ENDPOINT_URL="http://localhost:8080/"
$ curl -X POST --user "airflow:airflow" "${ENDPOINT_URL}/api/v1/dags/tutorial/dagRuns" \
 -H "Content-Type: application/json" -d '{"conf": {},  "dag_run_id": "string",  "logical_date": "2023-06-25T02:10:14.275Z",  "note": "string"}'

{
  "conf": {},
  "dag_id": "tutorial",
  "dag_run_id": "string",
  "data_interval_end": "2023-06-25T02:10:14.275000+00:00",
  "data_interval_start": "2023-06-24T02:10:14.275000+00:00",
  "end_date": null,
  "execution_date": "2023-06-25T02:10:14.275000+00:00",
  "external_trigger": true,
  "last_scheduling_decision": null,
  "logical_date": "2023-06-25T02:10:14.275000+00:00",
  "note": "string",
  "run_type": "manual",
  "start_date": null,
  "state": "queued"
}
DAGが実行される。