2
4

Delete article

Deleted articles cannot be recovered.

Draft of this article would be also deleted.

Are you sure you want to delete this article?

More than 5 years have passed since last update.

industrial_ci で roslaunch test する 2. Travis CI と Github の連携

Last updated at Posted at 2018-07-03

はじめに

今回は,Travis CIとGithubの連携方法です.

目次

  1. はじめに 
  2. Travis CI と Github の連携 ← 今ココ
  3. industrial_ciの導入
  4. CMakeLists.txtの記述方法
  5. ローカルでのチェック
  6. 実際のパッケージでの動作例

前提条件

前提条件として下記のものがあります.

  • Githubのアカウントを持っていること
  • Travis CIのアカウントを持っていること
  • リポジトリが公開リポジトリであること

Travis CIのアカウントは,Githubのアカウントと連携可能です!
なので,持ってなくてもゼロから作る必要はありません.
また,非公開リポジトリの場合はどうするかというと,

  • ローカルでのみテストする
  • Jenkinsサーバーを自分で建てる

という方法があります.
今回は,そういった例外を除いた場合についてご紹介します.

連携の手順

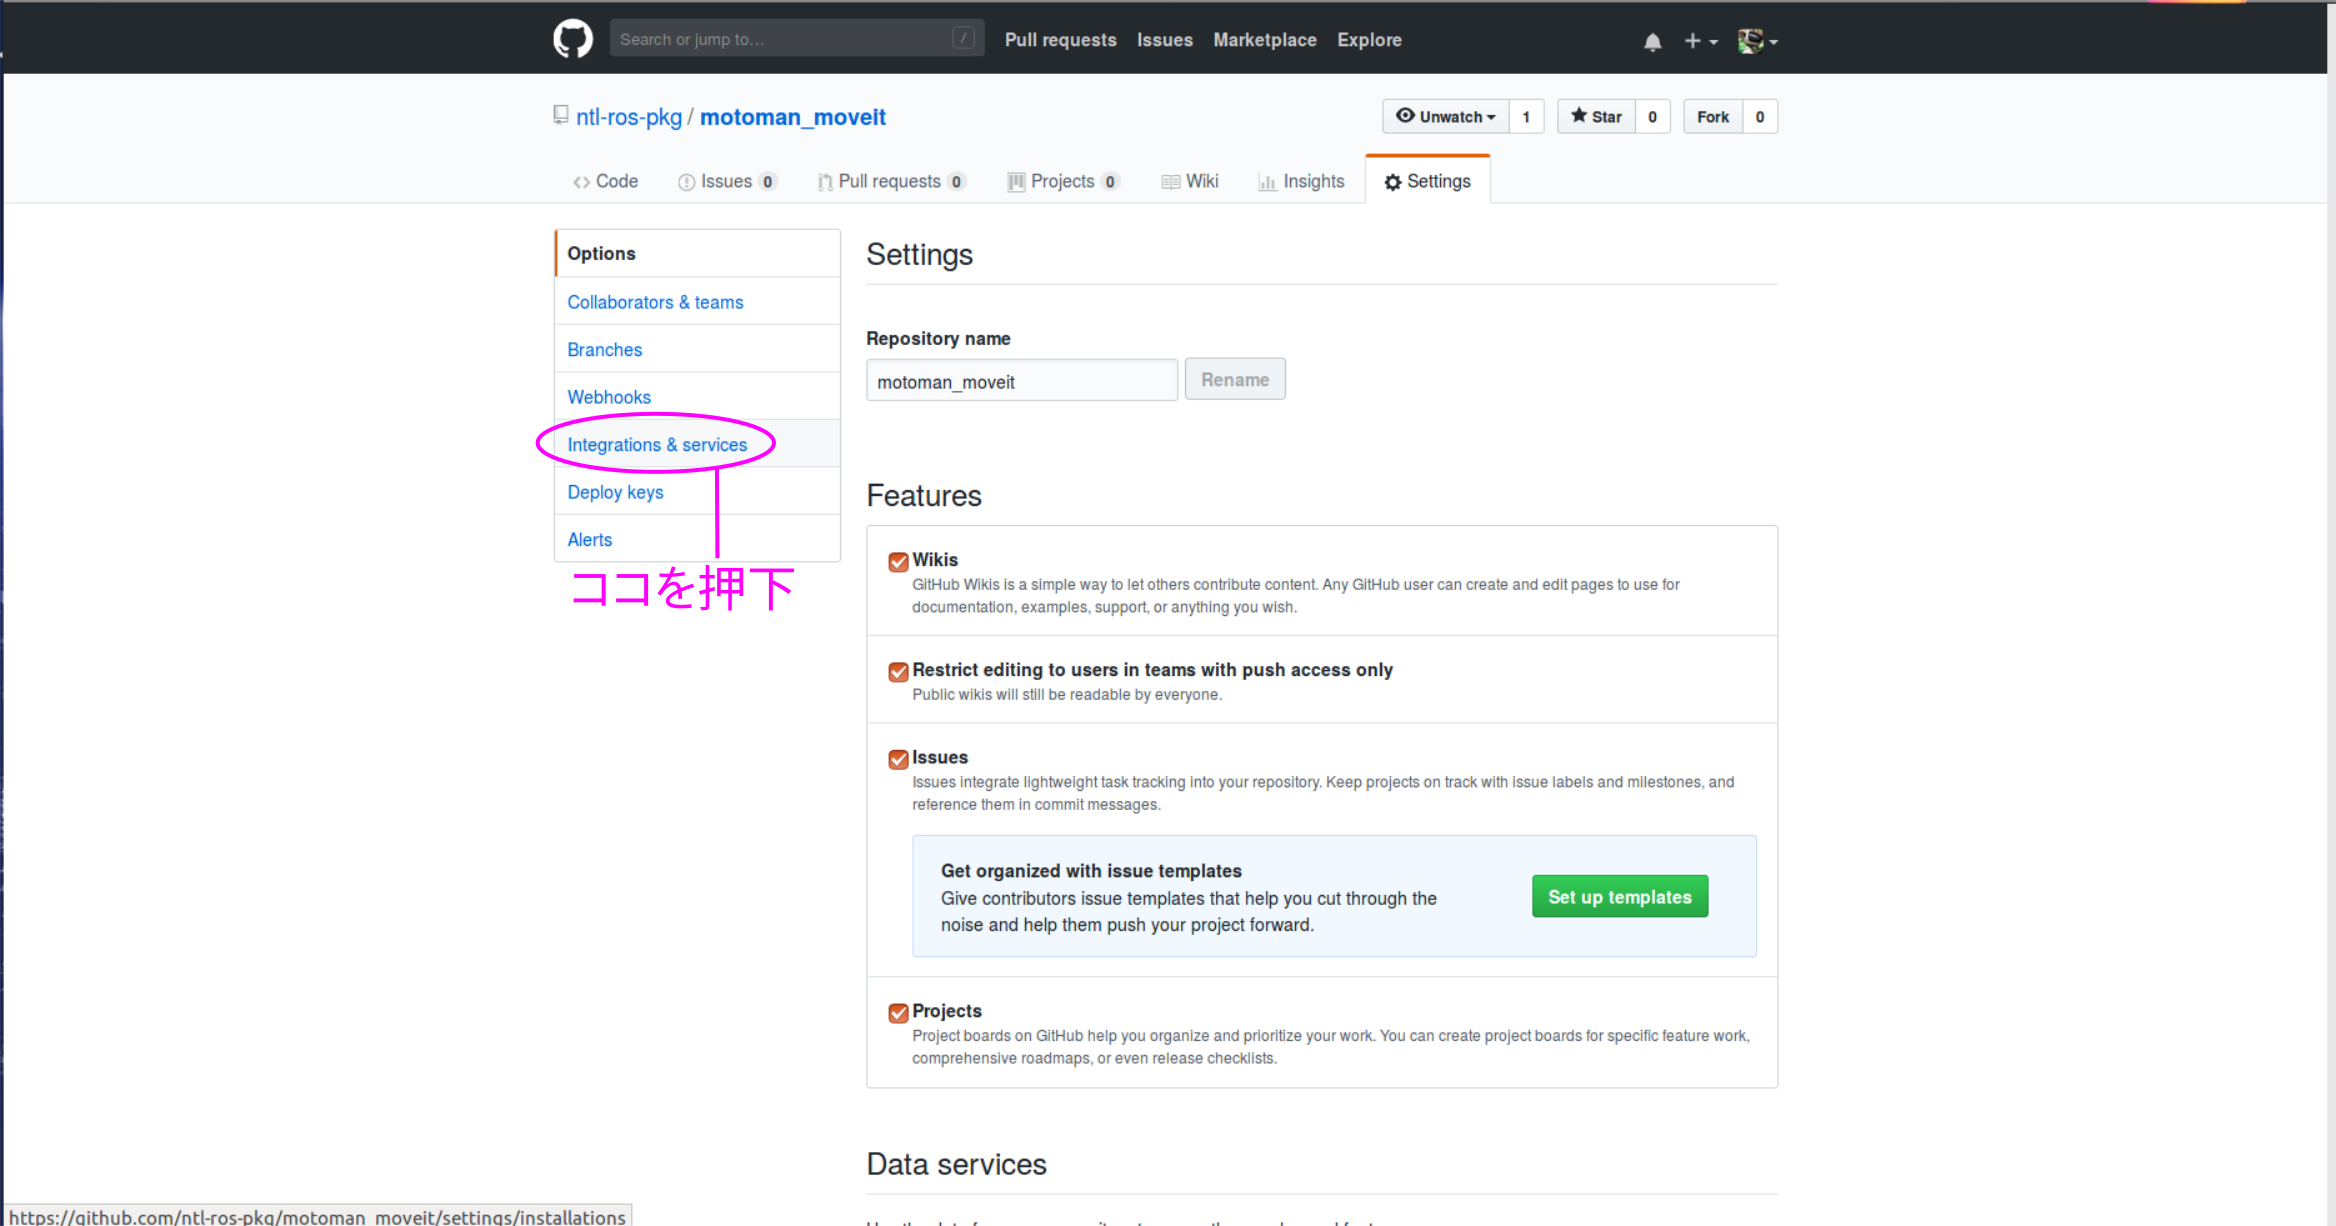
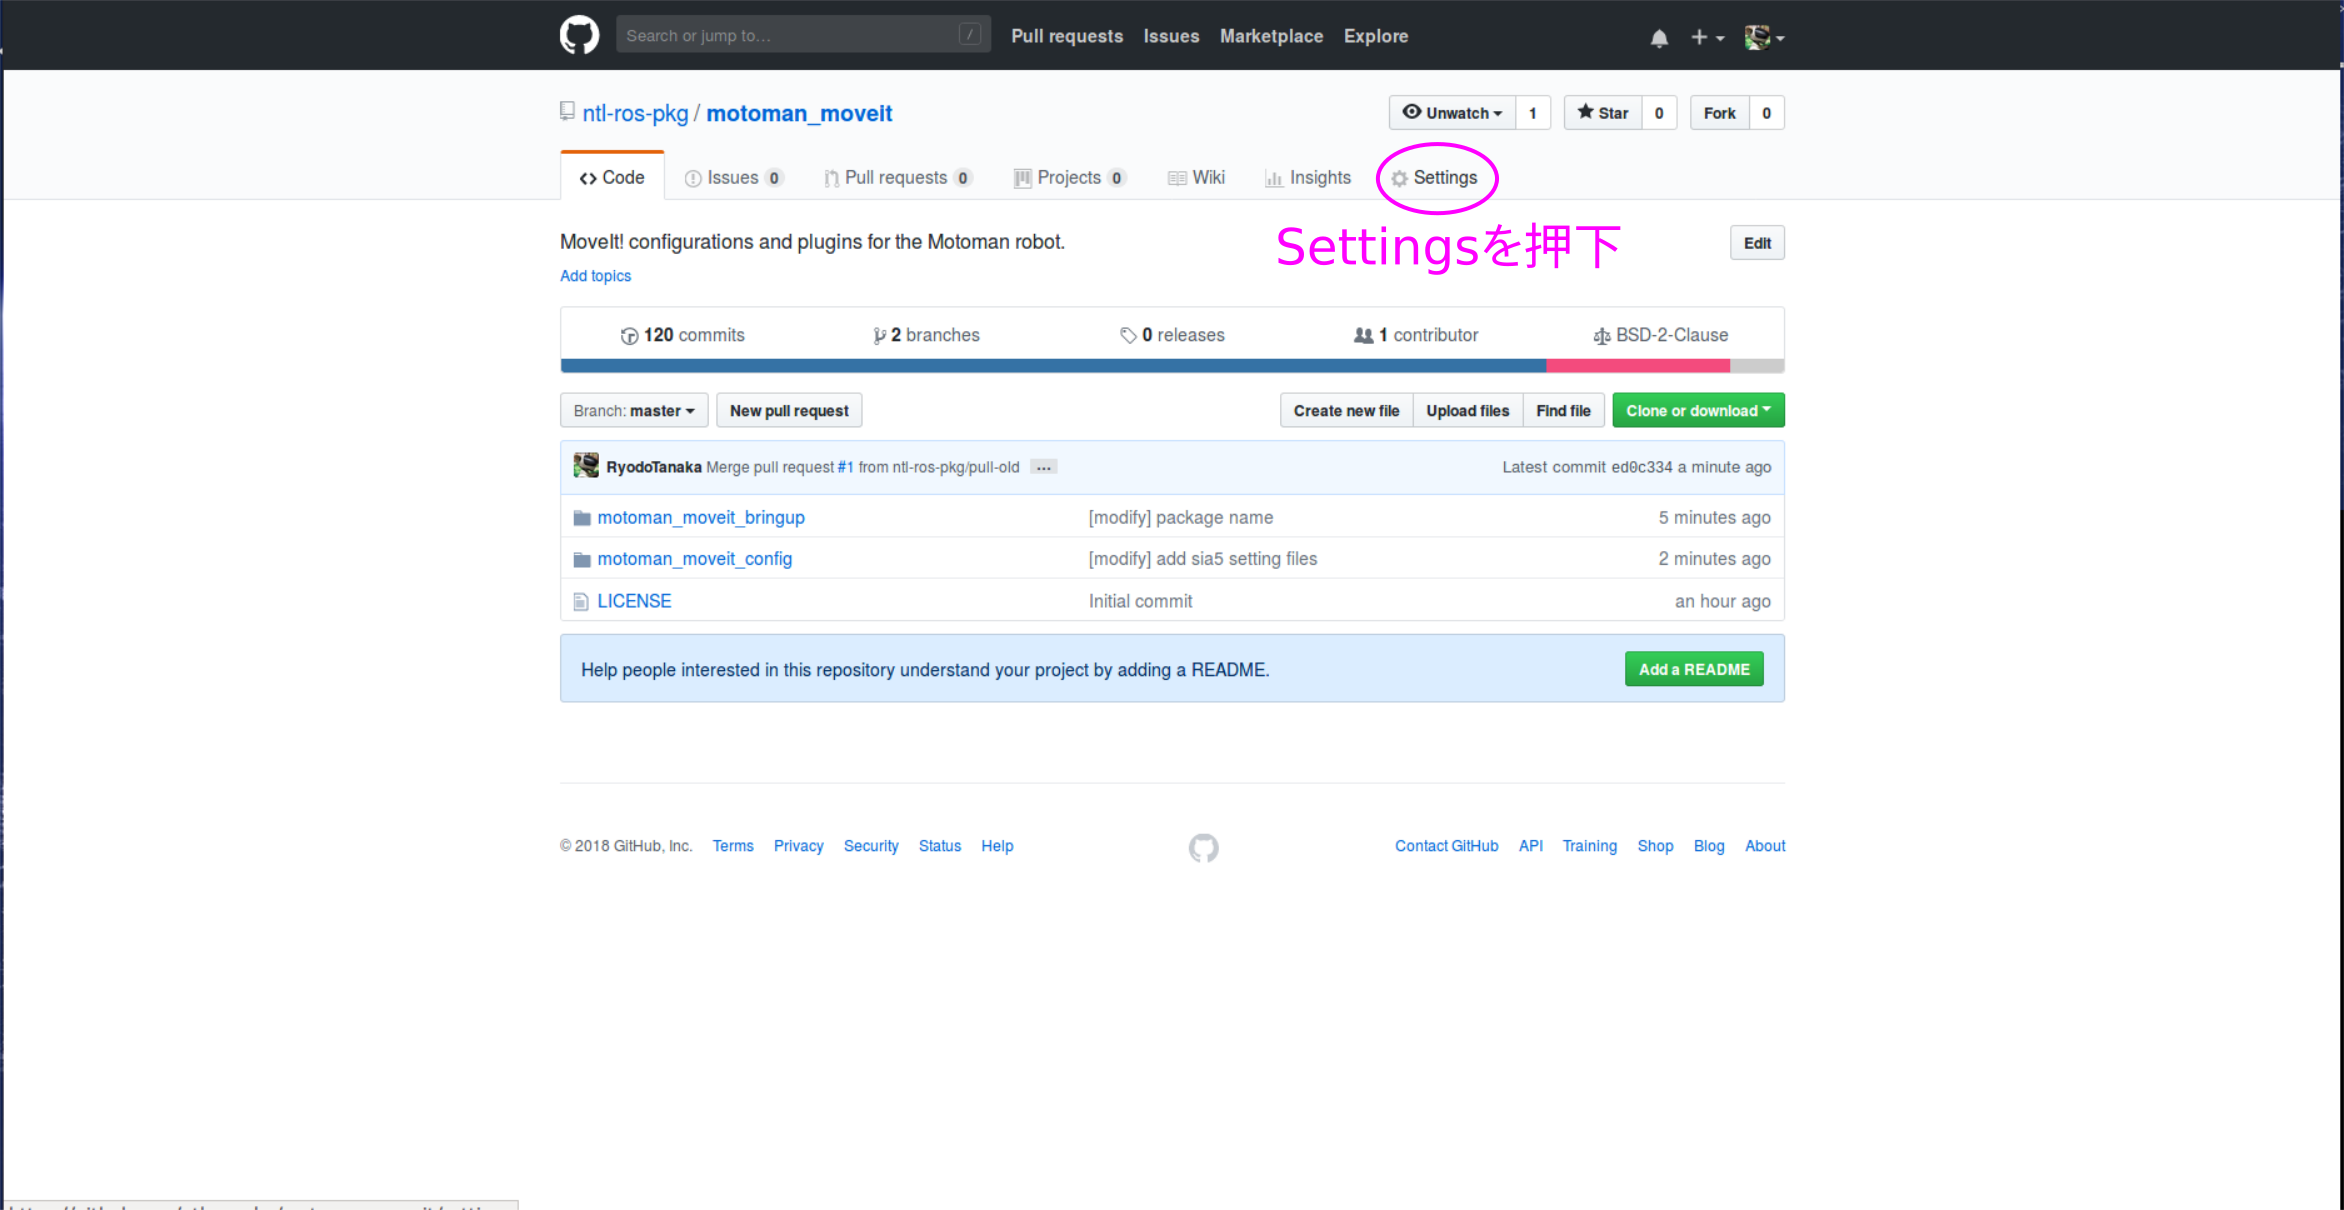
1. Settingsより設定画面へ

image0.png

2. Integration & Serviceを選択

image1.png

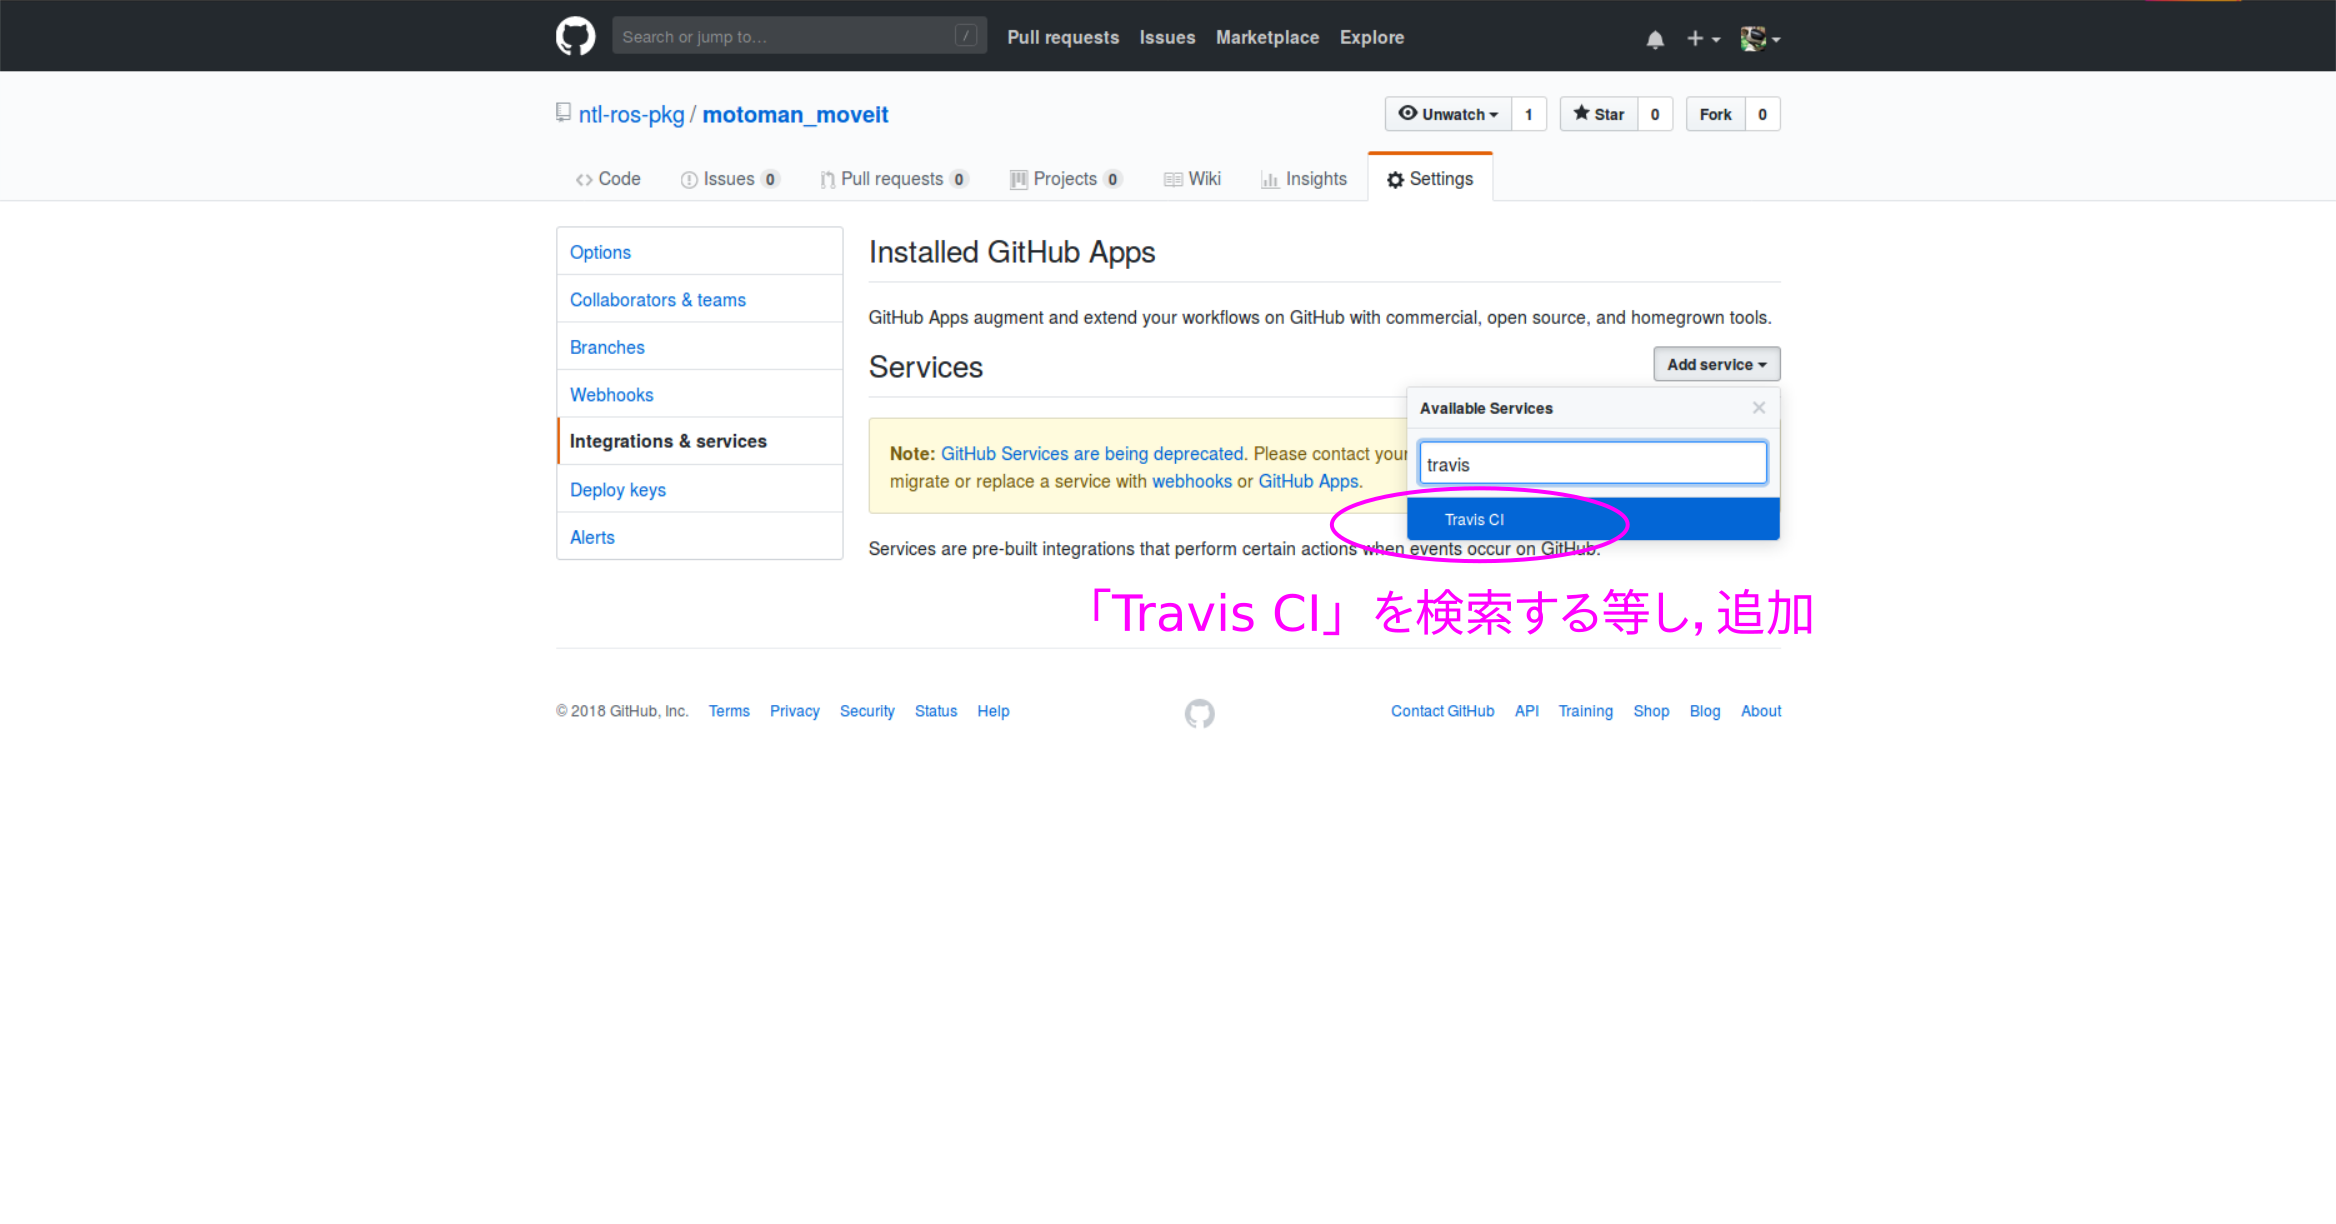
3. Travis CIの連携を追加

image2.png

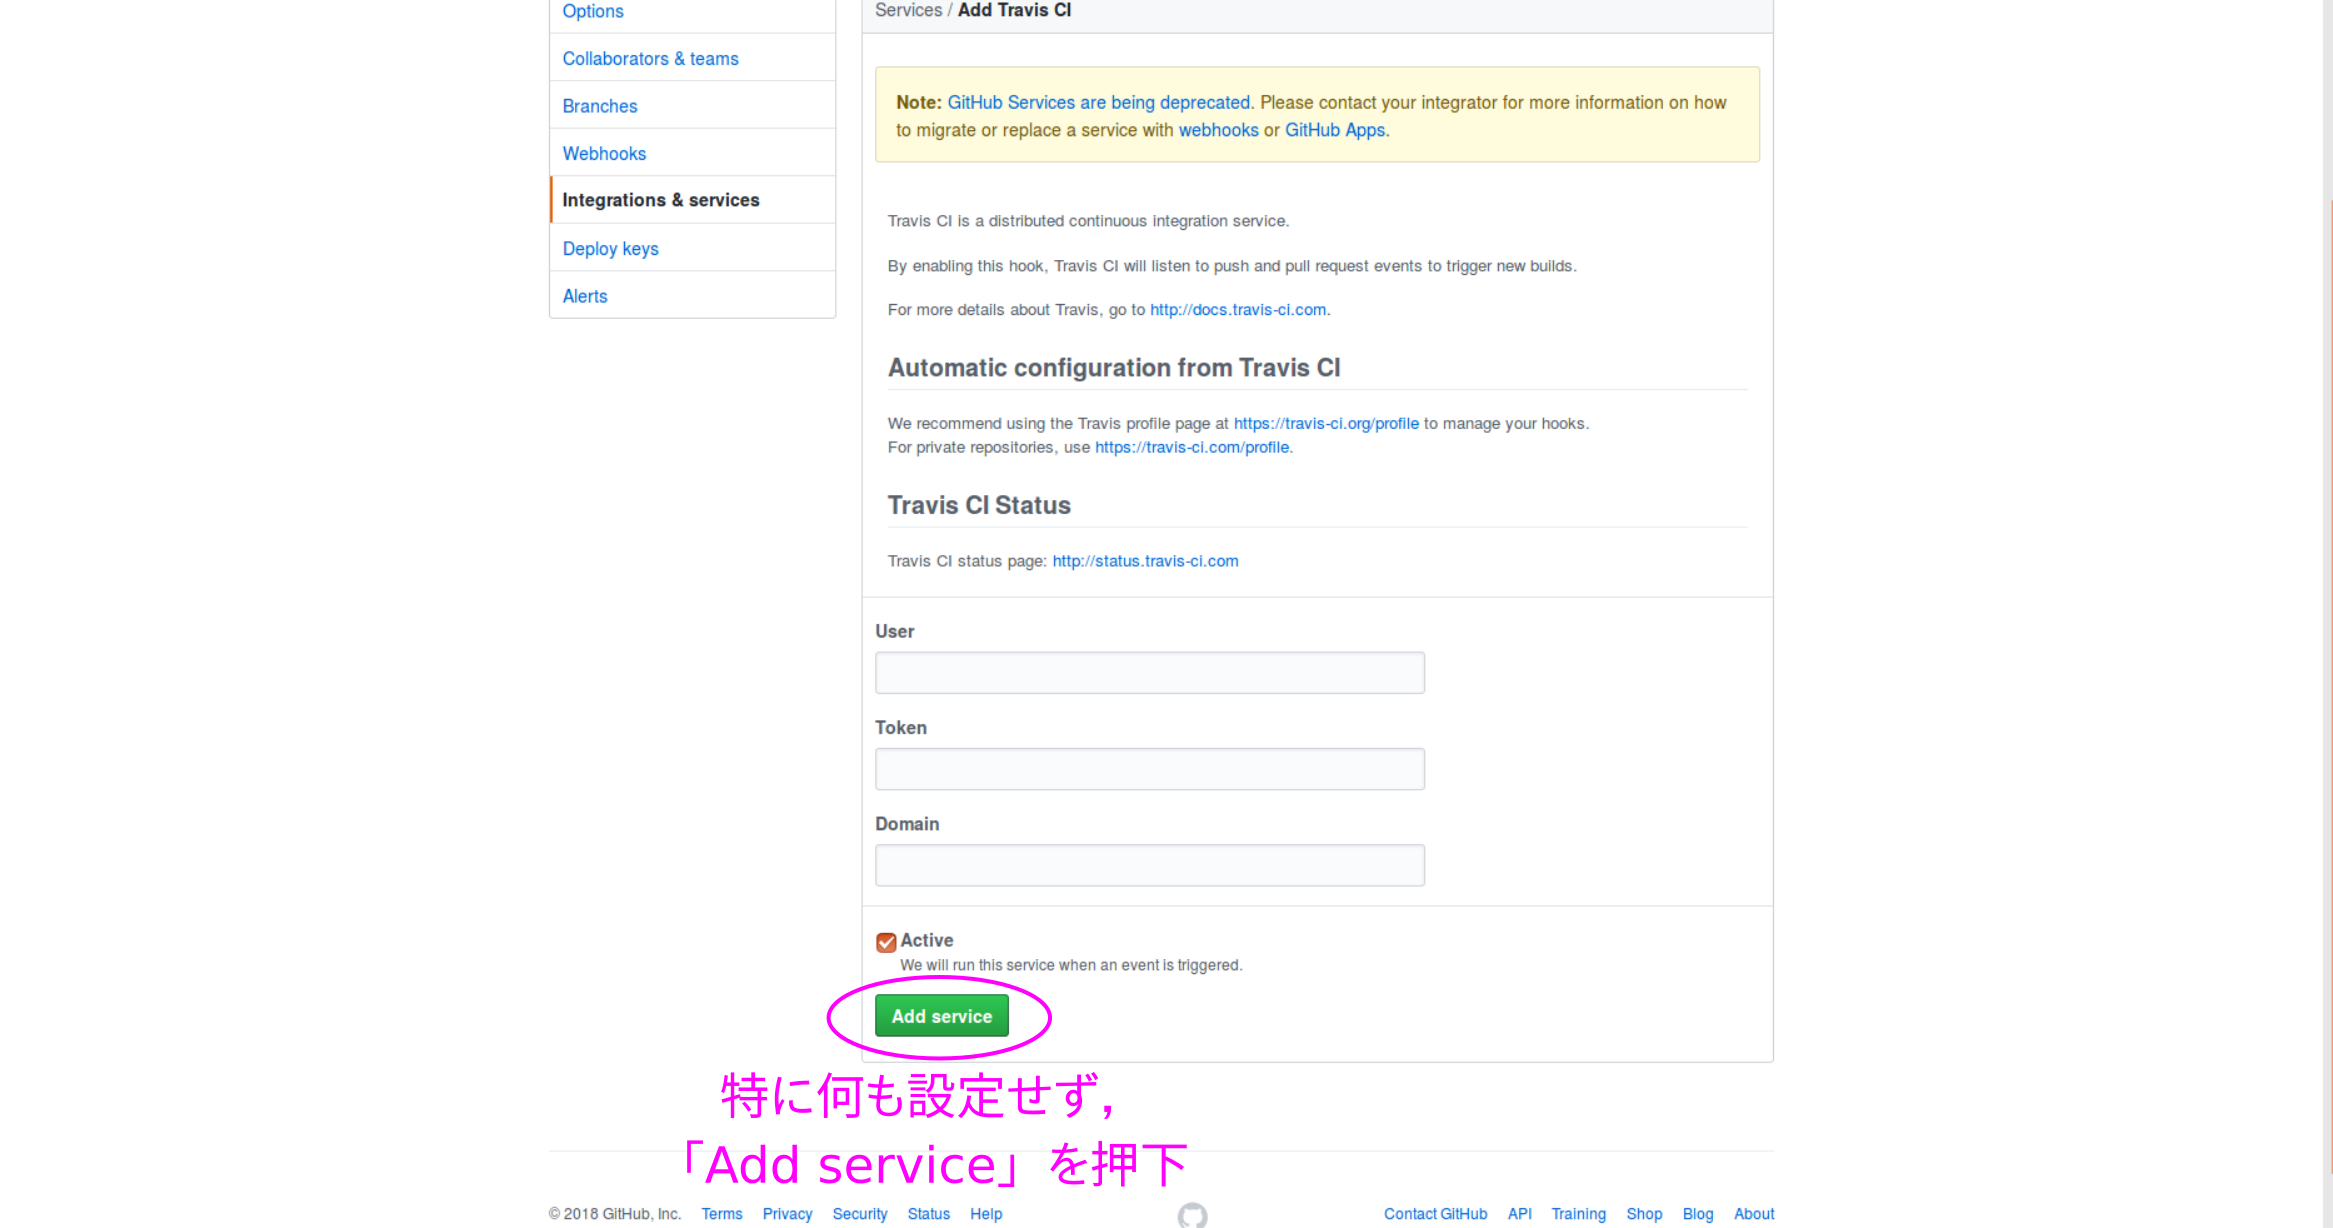
4. 設定は特にせず,追加を確定

image3.png

5. Travis CIにログイン

前述の通り,Githubアカウントがある方はそれを元にアカウント作れます.
いずれにせよ自分のTravis CIのページに飛んでください.

6. 連携するリポジトリを選択
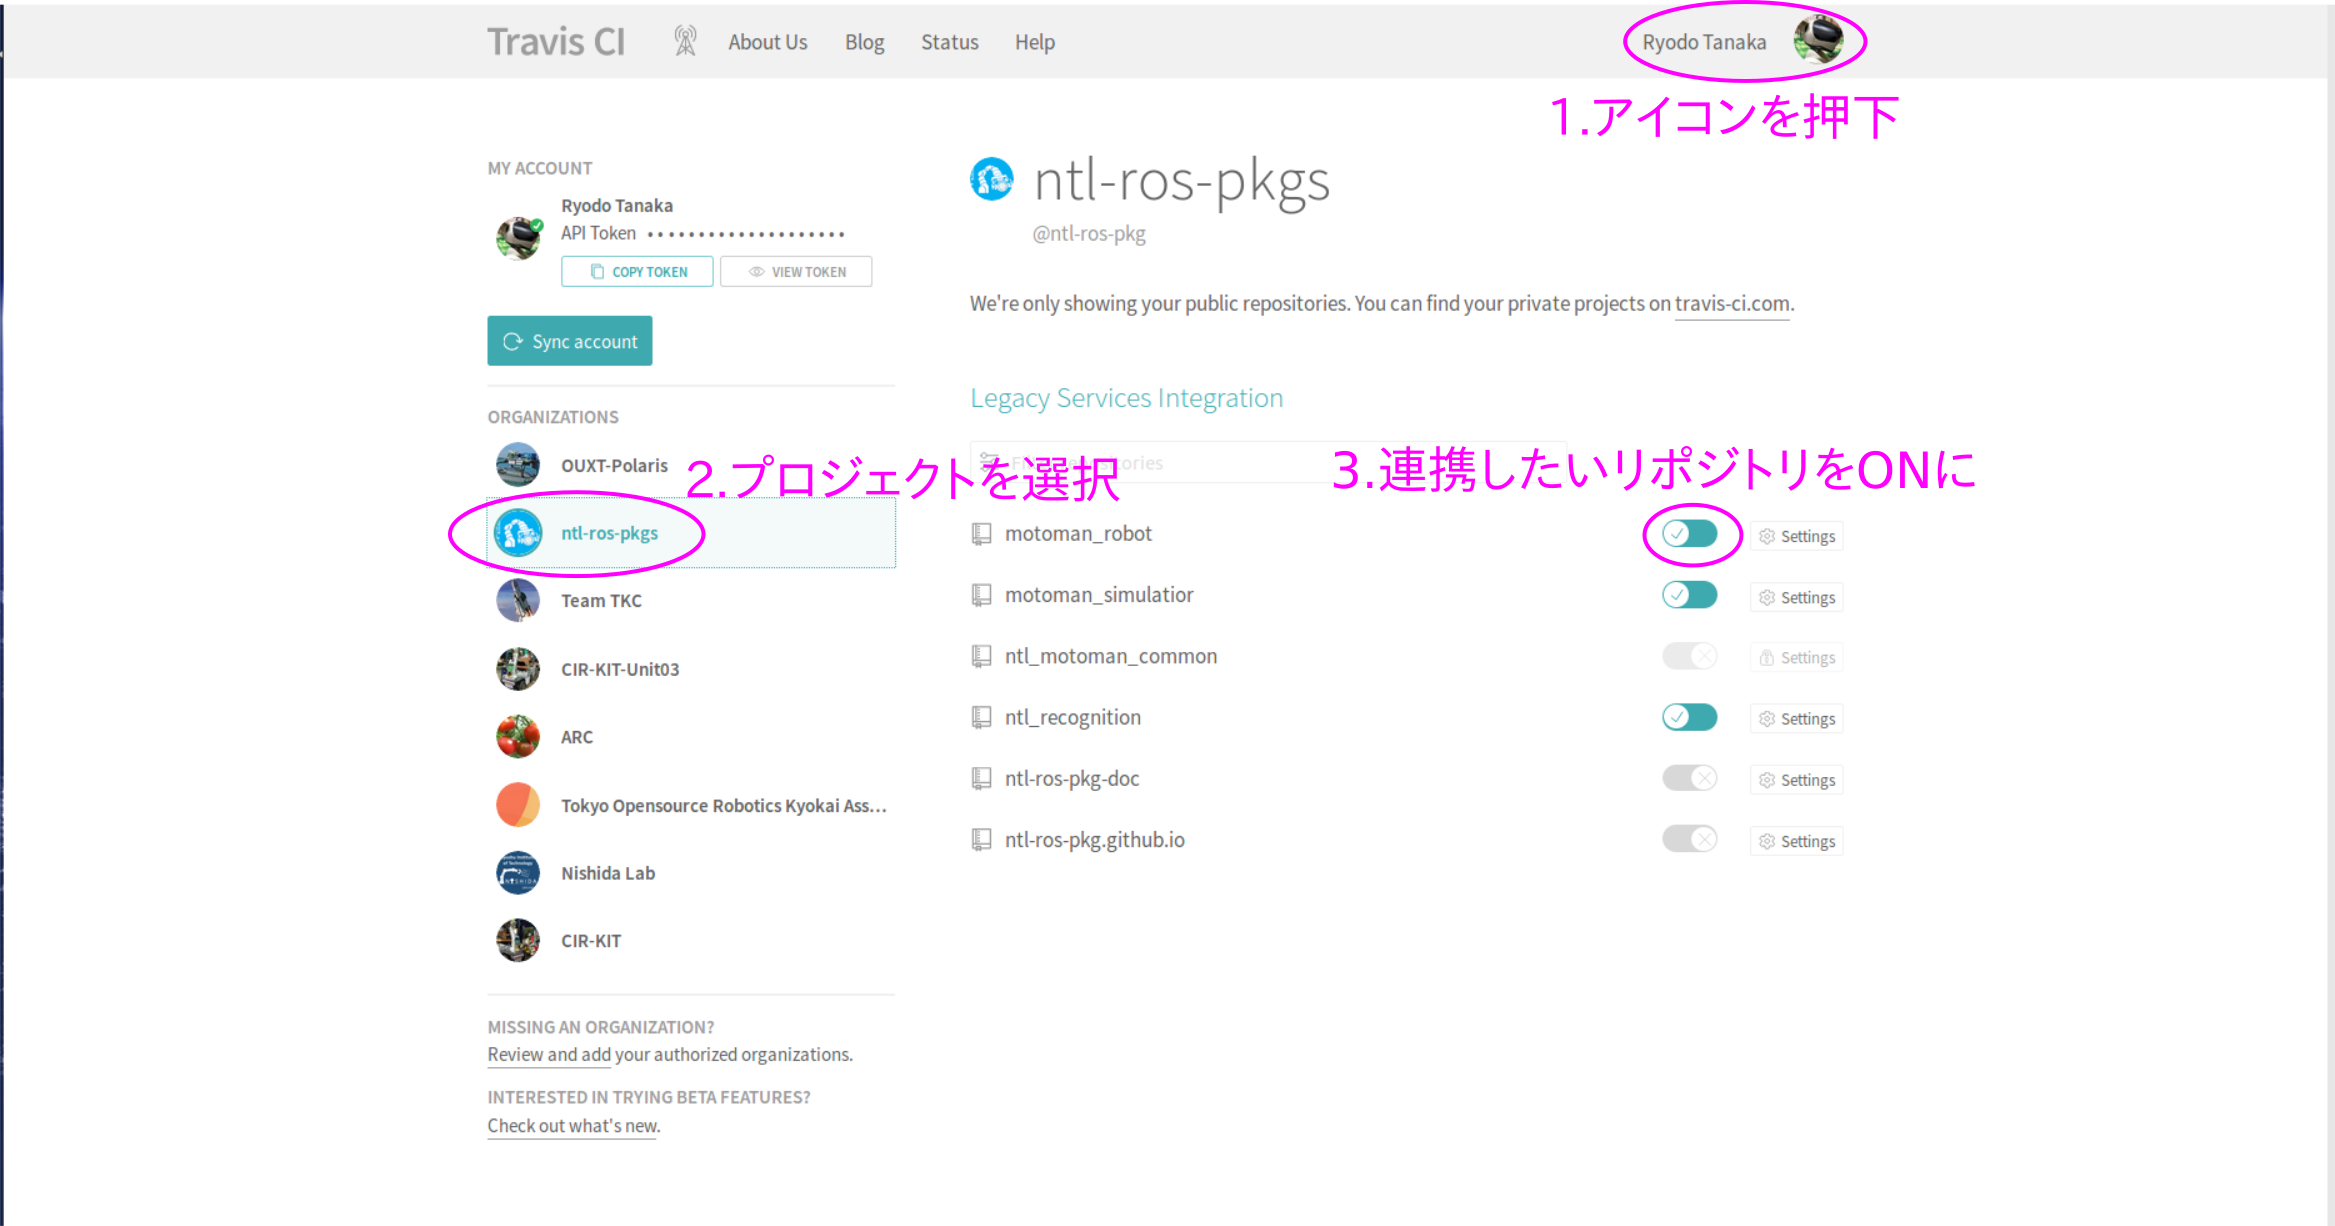
image4.png
連携の同期ができていなかったりしたら,下図のボタンを押下して更新しましょう.
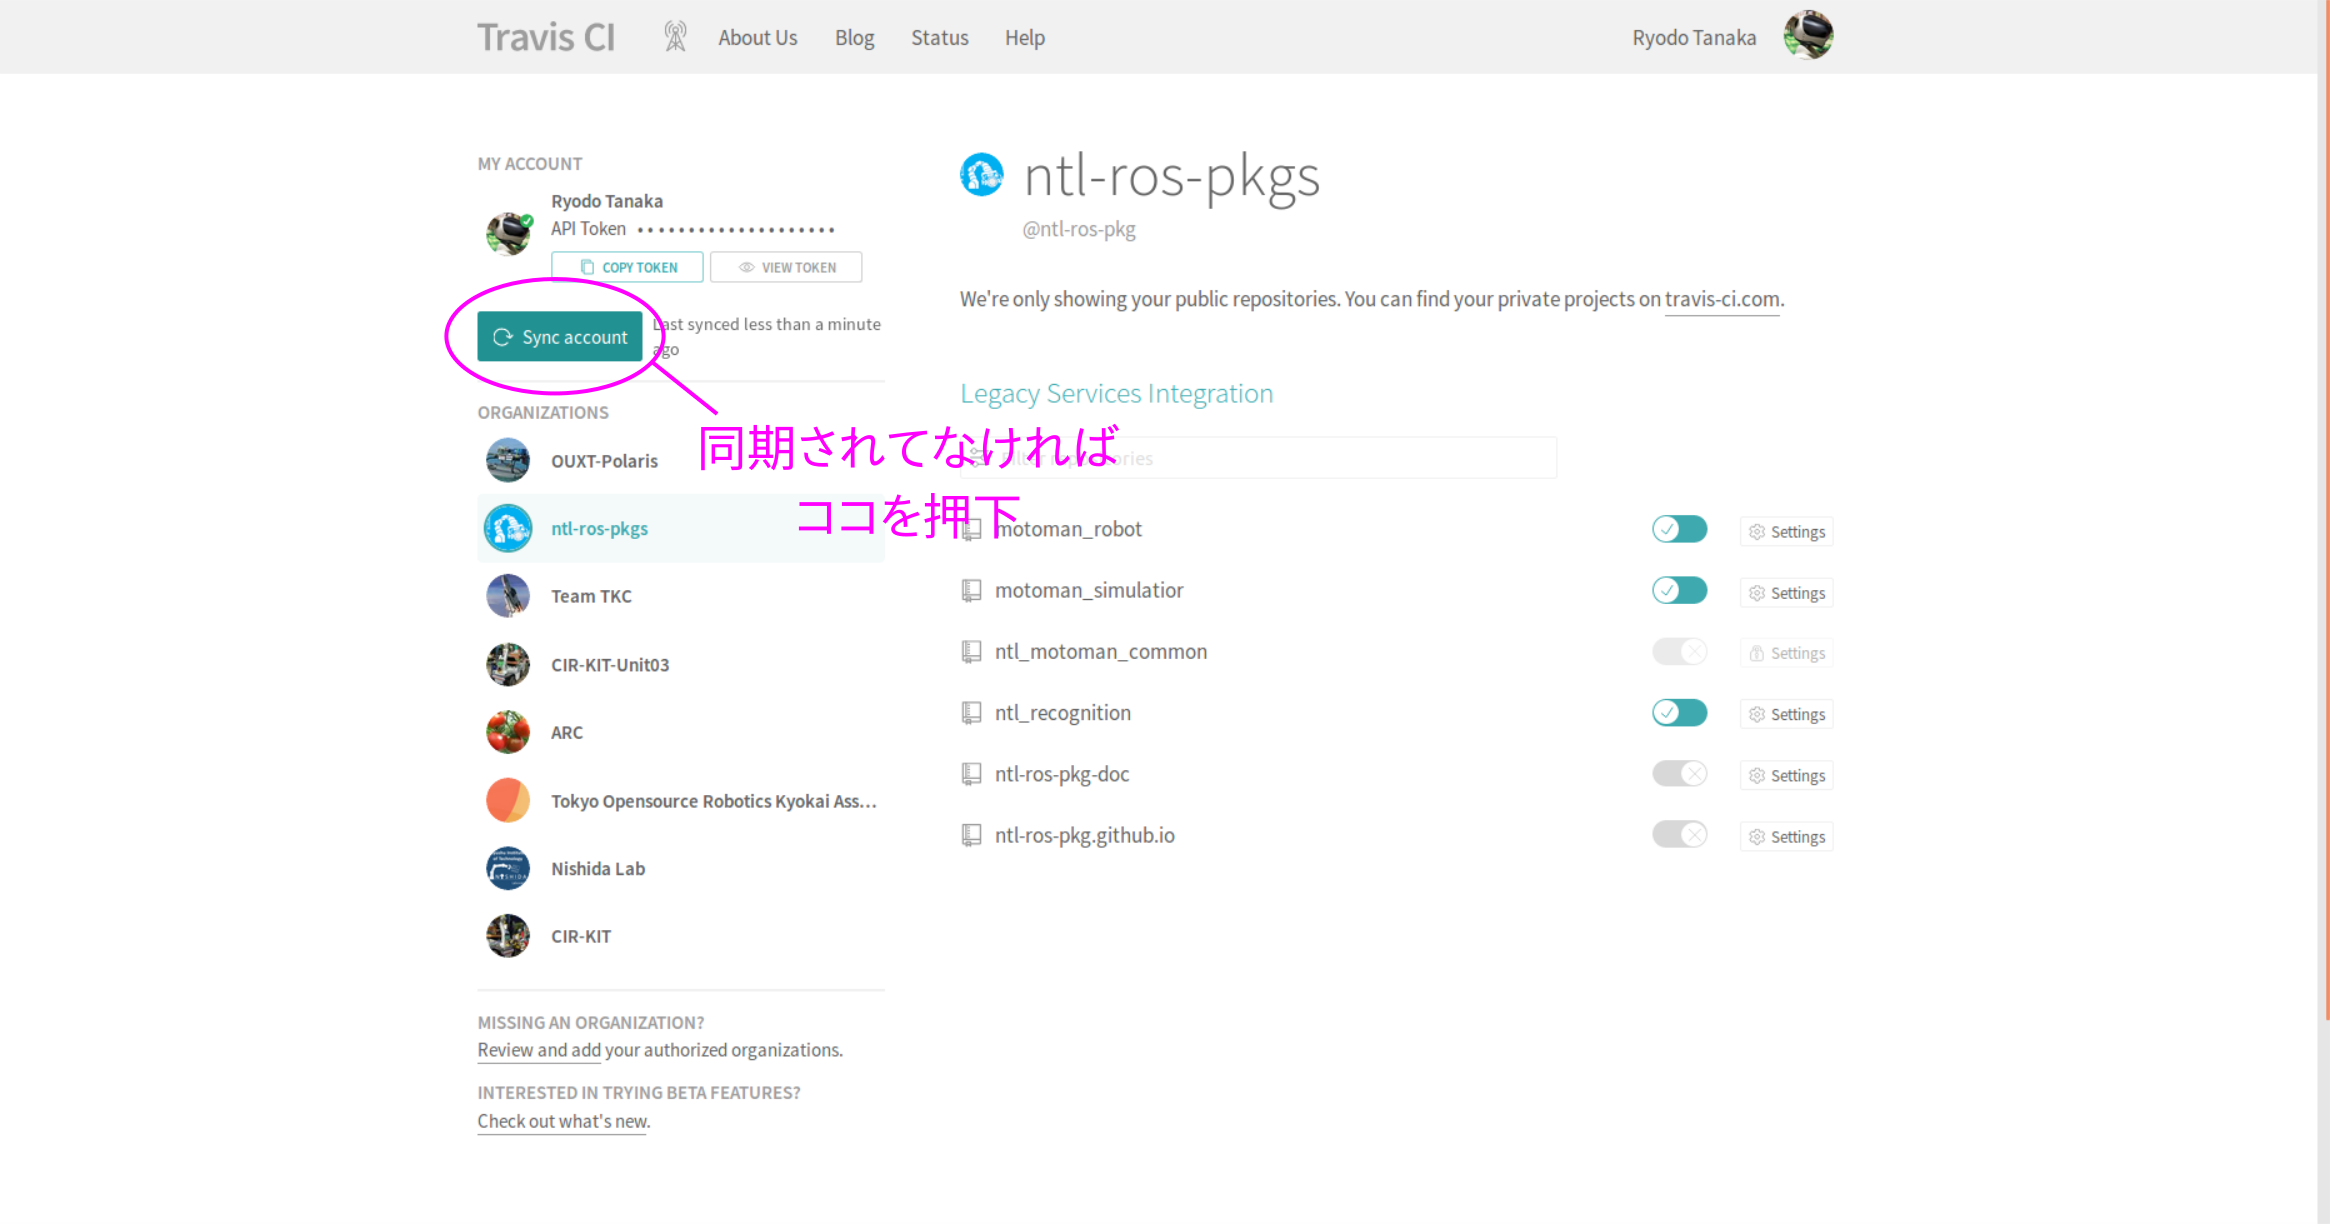
image5.png

以上で完了です.
超簡単ですね!
あとは,対象のリポジトリに.travis.ymlという設定ファイルをおいておけばOKです.
これについては次回ご紹介します.

おわりに

というわけで,今回はTravis CIとGithubの連携方法についてご紹介しました.
2
4
0

Register as a new user and use Qiita more conveniently

  1. You get articles that match your needs
  2. You can efficiently read back useful information
  3. You can use dark theme
What you can do with signing up
2
4

Delete article

Deleted articles cannot be recovered.

Draft of this article would be also deleted.

Are you sure you want to delete this article?