1
3

Delete article

Deleted articles cannot be recovered.

Draft of this article would be also deleted.

Are you sure you want to delete this article?

More than 5 years have passed since last update.

Qiita gemを使ってみる!

Last updated at Posted at 2017-02-11

##前提
Qiitaのアカウントを取得済みであること

##アクセストークンの発行

QiitaのTopページを開き、赤枠の「設定」を押下する
スクリーンショット 2017-02-11 18.15.56.png

赤枠の「アプリケーション」を押下する
スクリーンショット 2017-02-11 18.17.07.png

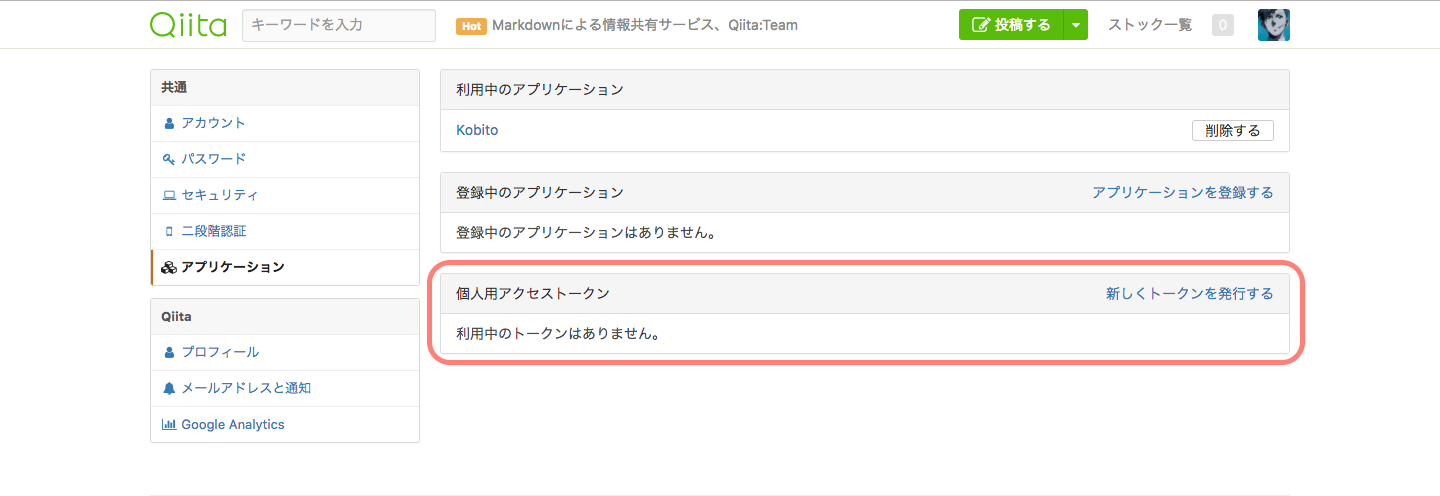
赤枠の「新しくトークンを発行する」を押下する
スクリーンショット 2017-02-11 18.17.25.png

赤枠の「説明」を入力、「スコープ」のチェックボックスは用途に合わせて、チェックする
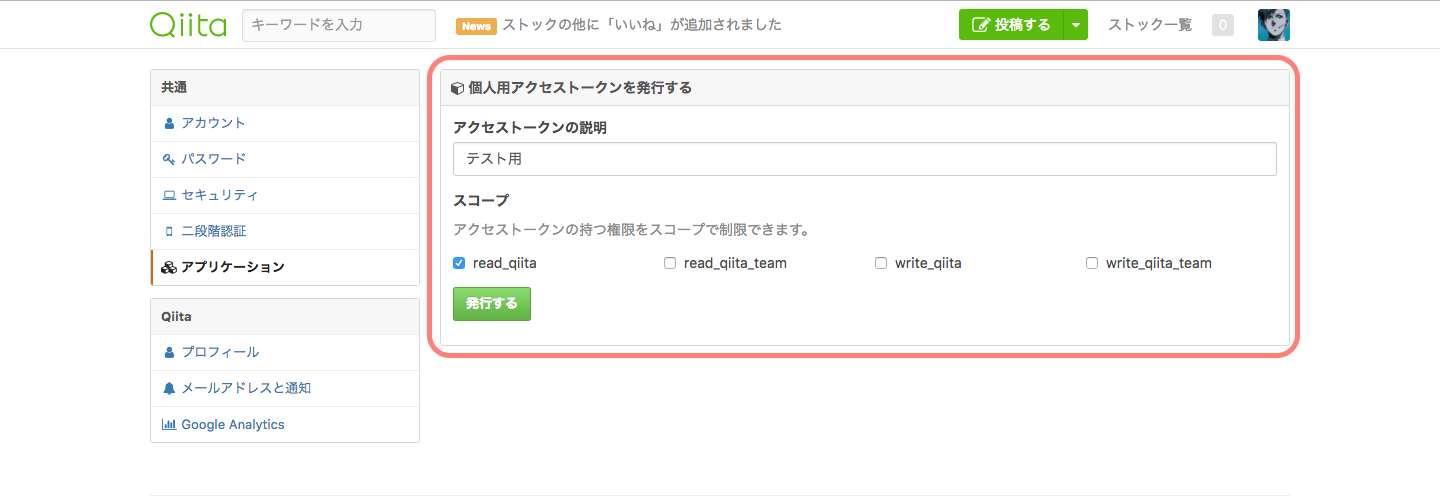
スクリーンショット 2017-02-11 18.21.33.png

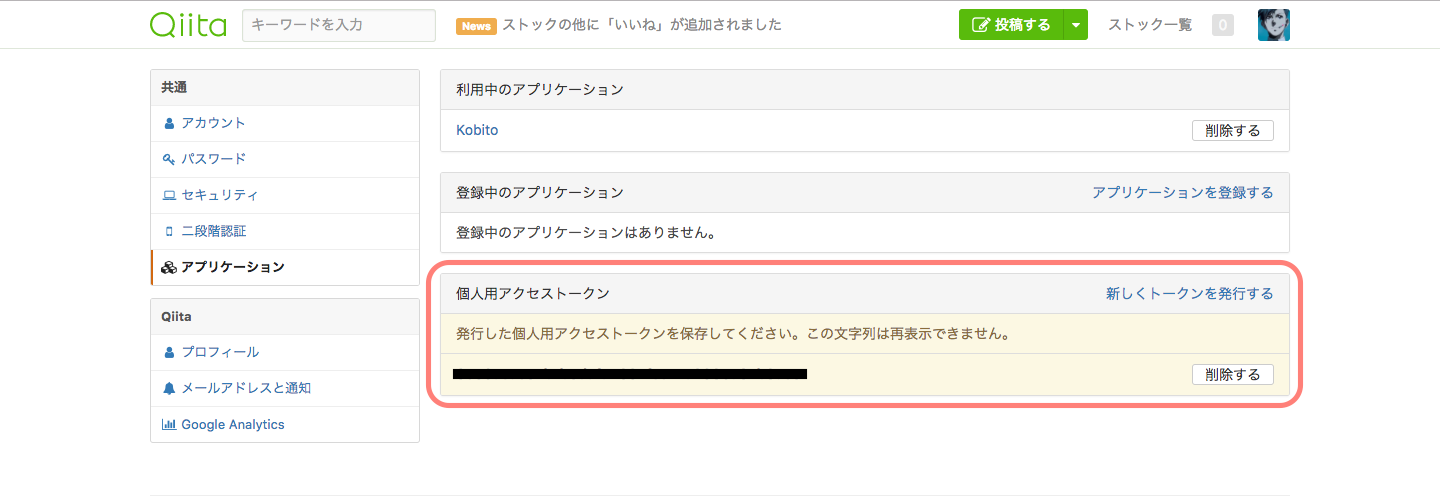
赤枠の黒塗り部分にアクセストークンが記述されている
スクリーンショット 2017-02-11 18.21.52.png

##gemのinstall
以下のコマンドを実行する

gem install qiita

bundle install

これで準備は完了!

##実際にAPIを呼んでみる
ここは実装によるので、処理を記述する場所はどこでもよいです、controllerでもmodelでもjobでも。

先ほど取得したアクセストークンを設定する

client = Qiita::Client.new(access_token: "取得したアクセストークン")

自分のqiitaIdを使用して、自分の情報を取得する

client.list_user_items("自分のqiitaId")

これでjson形式のレスポンスが返ってきます!

#終わりに
すごく簡単に取得できるので、是非やってみてください。
ただ「いいね」数を取得したかったんですが、qiitaチームに入ってないと「いいね」は取れないようです残念笑

1
3
0

Register as a new user and use Qiita more conveniently

  1. You get articles that match your needs
  2. You can efficiently read back useful information
  3. You can use dark theme
What you can do with signing up
1
3

Delete article

Deleted articles cannot be recovered.

Draft of this article would be also deleted.

Are you sure you want to delete this article?