Update
- 2020/11/18: add section
API for Exadata Cloud Service and Bare Metal
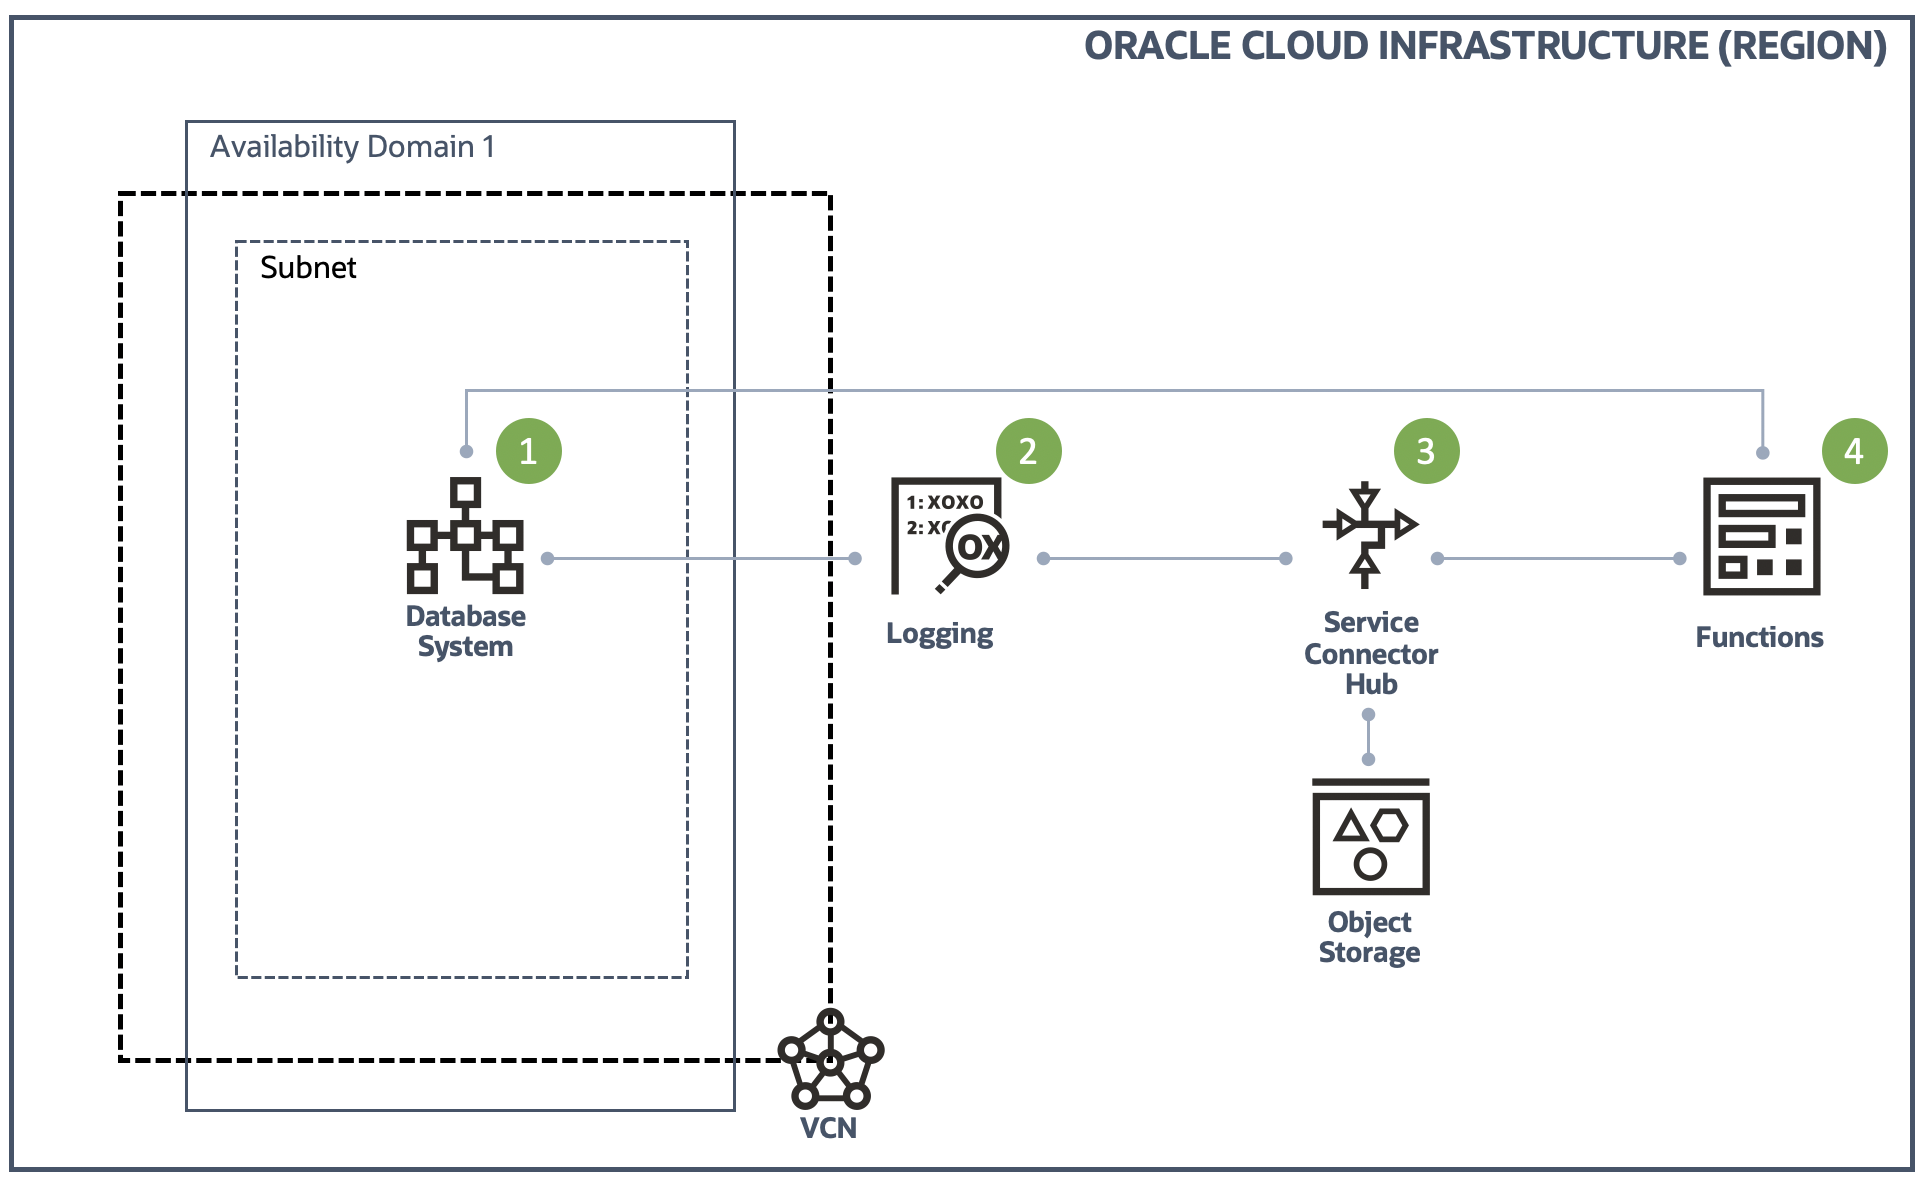
This is the step 4 of adding "Auto Scaling" to the Oracle Database Cloud Service.
If you want to check the other steps, please click the below links respectively.
- Step 1: Gather OCI DB System CPU Usage and write it into a custom log
- Step 2: Configure OCI Logging service to ingest the custom log
- Step 3: Configure OCI Service Connector Hub service to transfer the custom log to OCI Functions
- Step 4: Configure OCI Functions to act accordingly based on the CPU usage in the custom log
Configure OCI Functions to act accordingly based on the CPU usage in the custom log
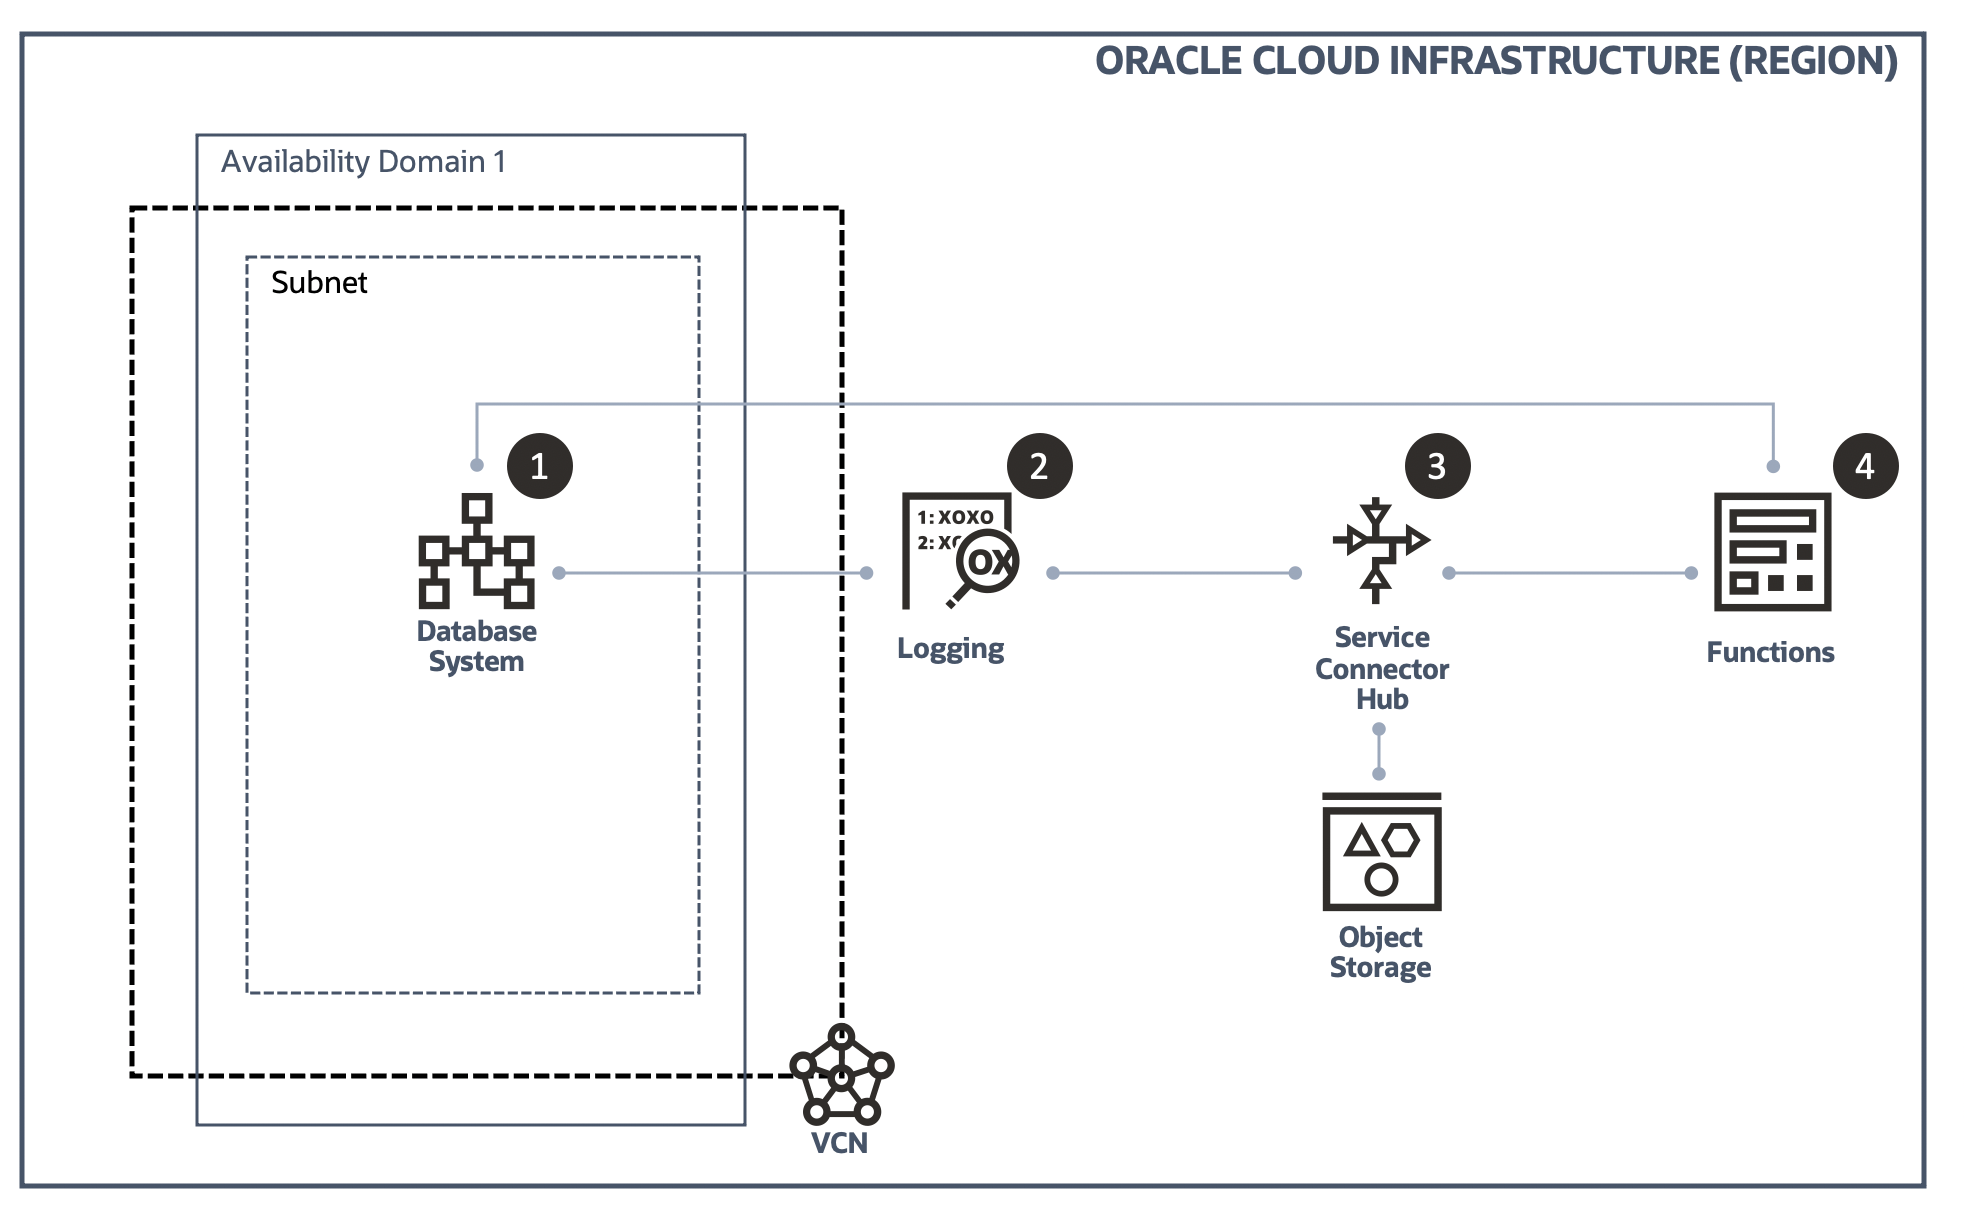
Through the step 1 to step 3, we have completed most of the jobs of adding "Auto Scaling" feature to the DBCS instance. In this part, we will talk about the final and most important part - Functions.
The reason we say this is the most important part is because this is the real ACTION of Auto Scaling. Step 1 - 3 focus gathering and transferring necessary information from the target instance to the Function, so the Function will be able to act properly based on these information.
Prerequisite
As mentioned in the prerequisite section in last step, the development environment should have been prepared and you should familiar with the basic workflow of Oracle Functions development.
Since we are going to implement this Function in Python language, so you are also expected to know some Python. But in real development, this is not required. With Oracle Functions, you can write code in Java, Python, Node, Go, and Ruby (and for advanced use cases, bring your own Dockerfile, and Graal VM)
For more information, please refer to the official document of Oracle Functions.
The "Scaling" feature is implemented by Database API in OCI SDK for Python. We use the update_db_system method to update the shape of the target DB System (DBCS instance). So knowledge of using OCI SDK to interact with OCI services is also required.
Create Dynamic Group and set policy
If there is no any interaction between your Function and OCI services, then you can skip this section.
It may be possible to use the traditional way - setting authentication information (user ocid, tenancy ocid, private key, etc) in the config to access OCI resources, but using dynamic group is recommended officially.
For more information on this topic please check Accessing Other Oracle Cloud Infrastructure Resources from Running Functions
Dynamic Group
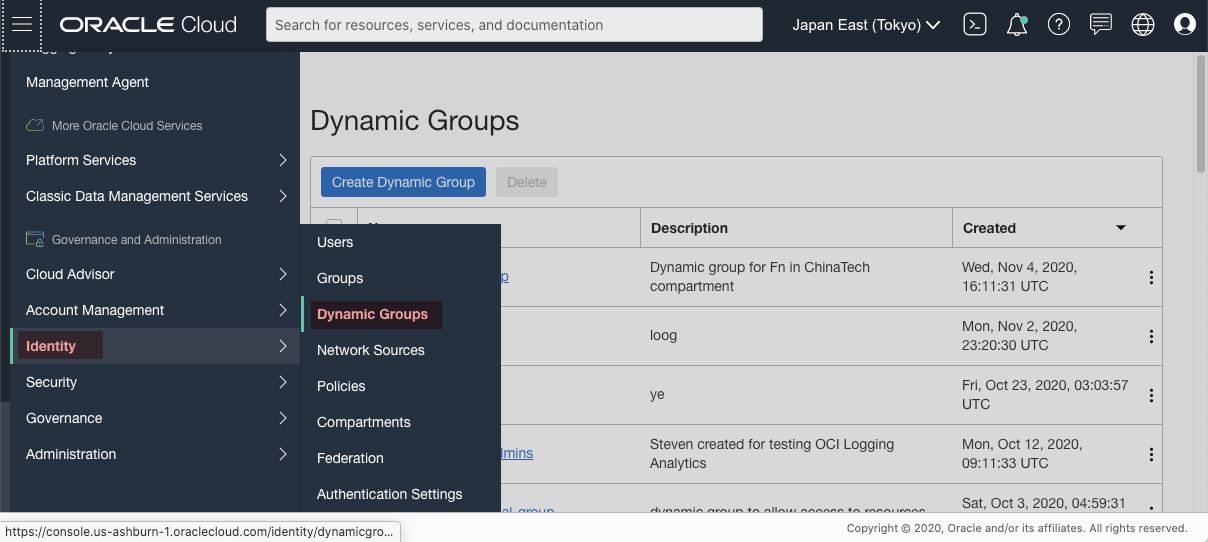
As shown in below screenshot, Identity -> Dynamic Groups, then click Create Dynamic Group to create a new one.
[Figure: create dynamic group]
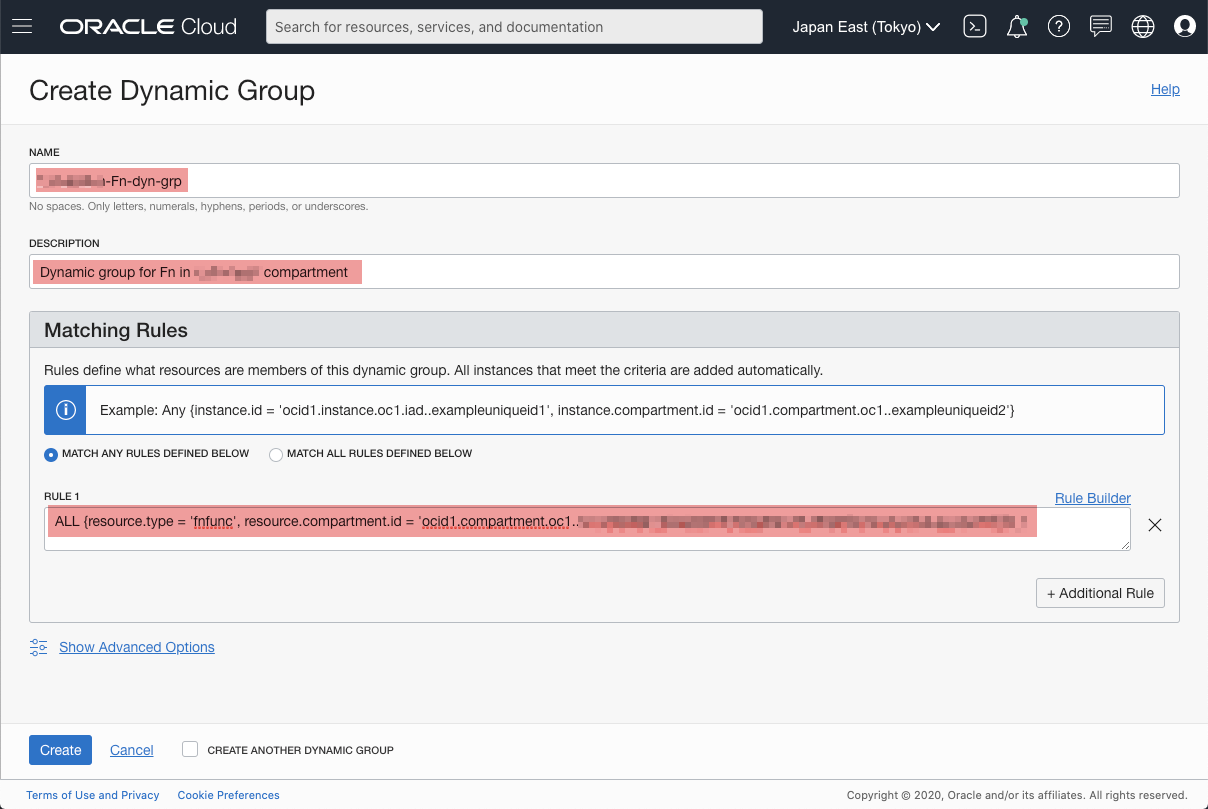
Input a meaningful name and some description of this dynamic group. The key part is the Matching Rules, because the rules decide who can access a OCI resource.
The rule I set allows all functions in a compartment to be able to access a resource
[Figure: create dynamic group - rules]
Policy
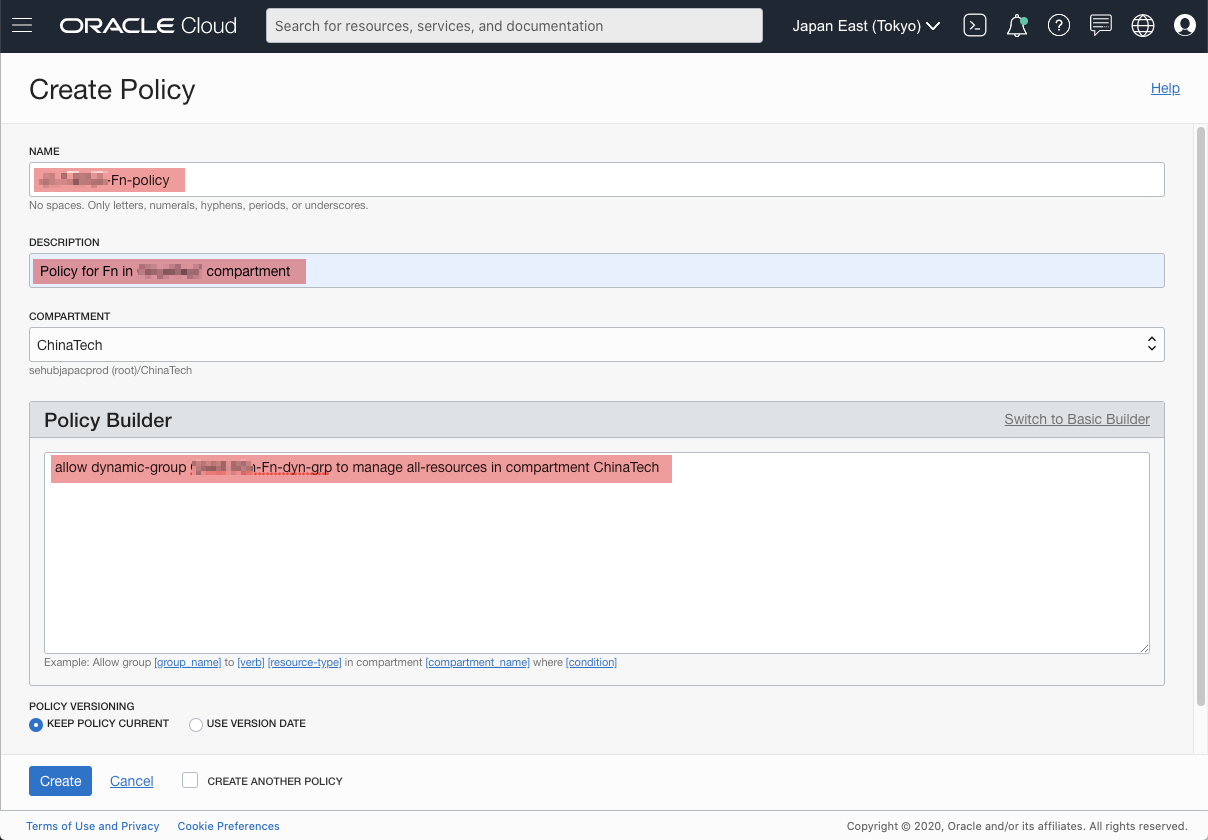
Next, we need to create a policy accordingly. The policy decides who can do what to whom.
In the following screenshot, I allow all functions in the Dynamic group I just created to manage all resources in the compartment. This is NOT recommended. You should follow the strategy of creating policy in your own organization.
Having set the dynamic group and policy properly, the Function should be able to access OCI resource without problem.
signer = oci.auth.signers.get_resource_principals_signer()
dbs = oci.database.DatabaseClient(config={}, signer=signer)
Deploy Function
This article focus on the workflow of our solution, so we will not talk about the details of how to develop/debug a Function. If you need information about how to create a Function, following sites should be helpful for you.
- Creating, Deploying, and Invoking a Helloworld Function
- Oracle Functions Samples
- Fn Project Tutorials
When developing and debugging a Function, you may encounter some errors, you may find the resolution at following place.
Deploy
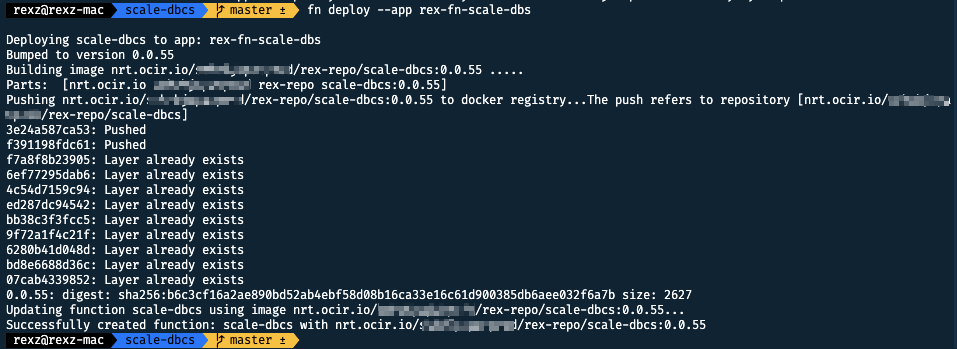
In the directory of the Function, execute following command to deploy it to the Application rex-fn-scale-dbs
fn deploy --app rex-fn-scale-dbs
You should see something similar to below.
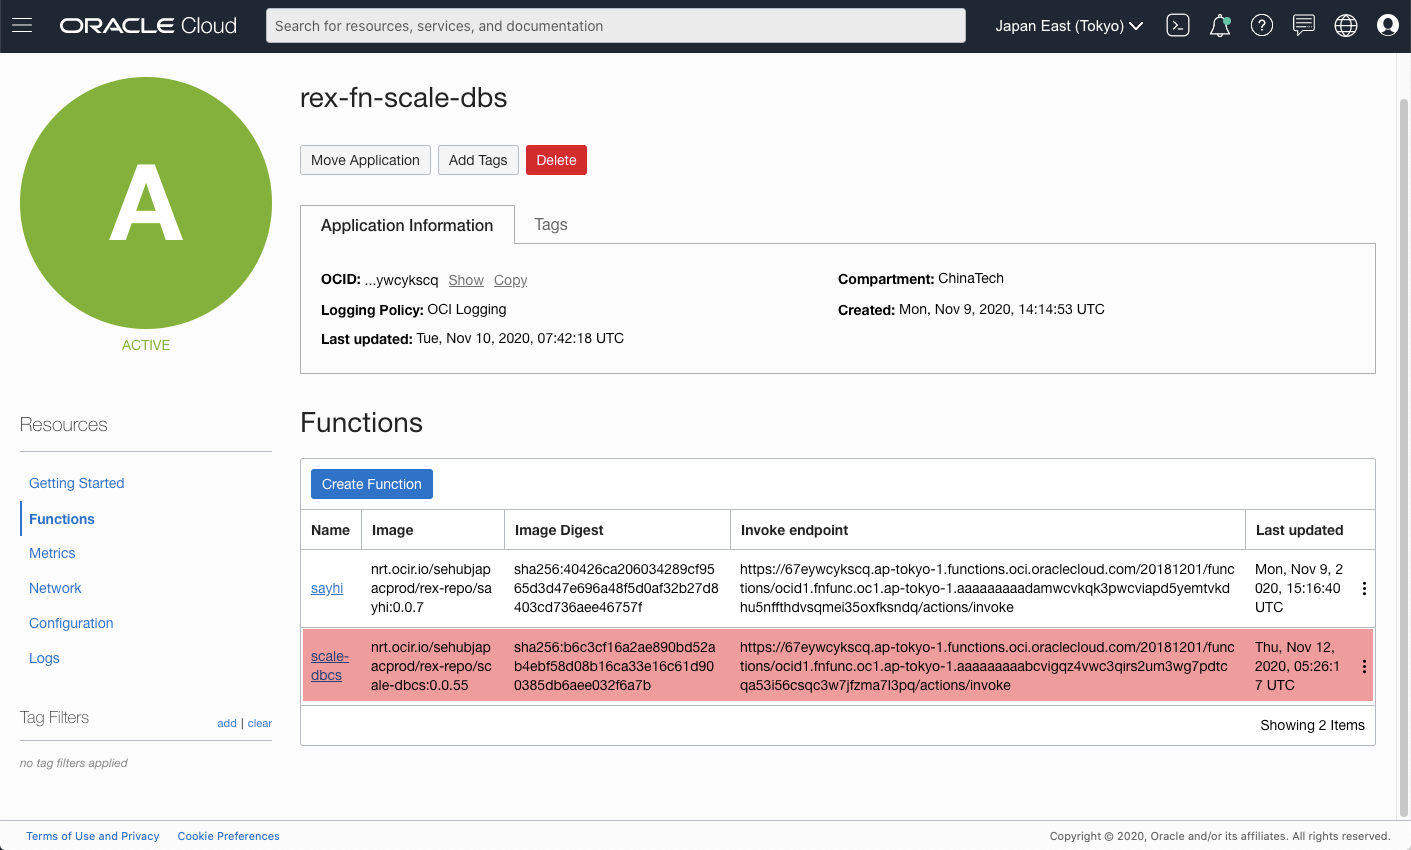
Check the web console of Functions, we should see the Function we just deployed is showing there.
[Figure: Function in the console]
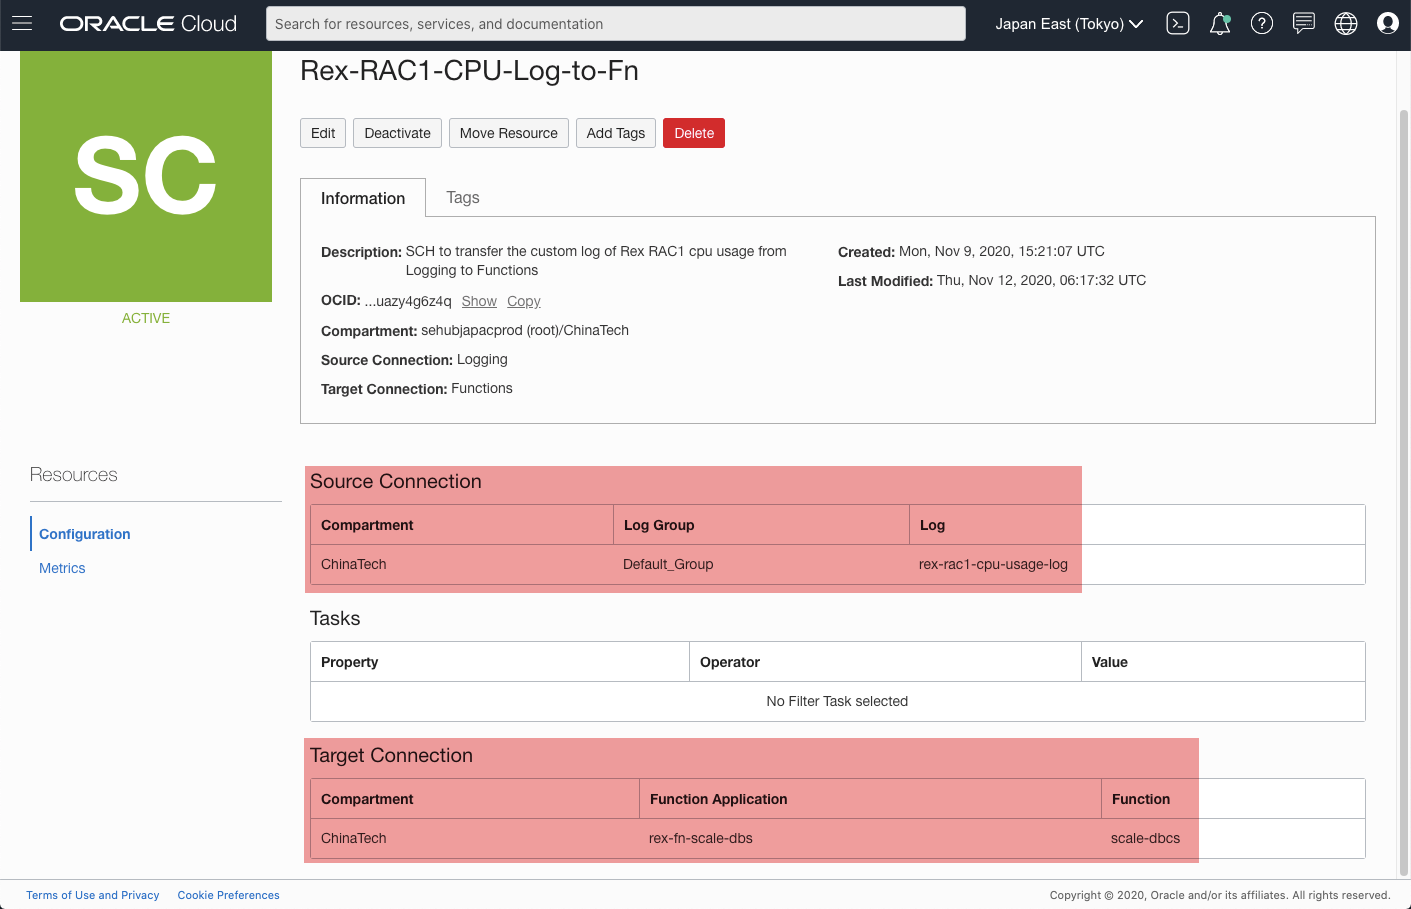
Update Service Connector Hub
Although we have deployed the Function, but we have not designated it as the target of SCH yet. Edit the SCH to reflect this change.
Now, the Function scale-dbcs should work as the target to process the custom log.
Verify Function invocations
After updating the SCH, the new Function scale-dbcs should be invoked when SCH transfer any ingested custom log from Logging service.
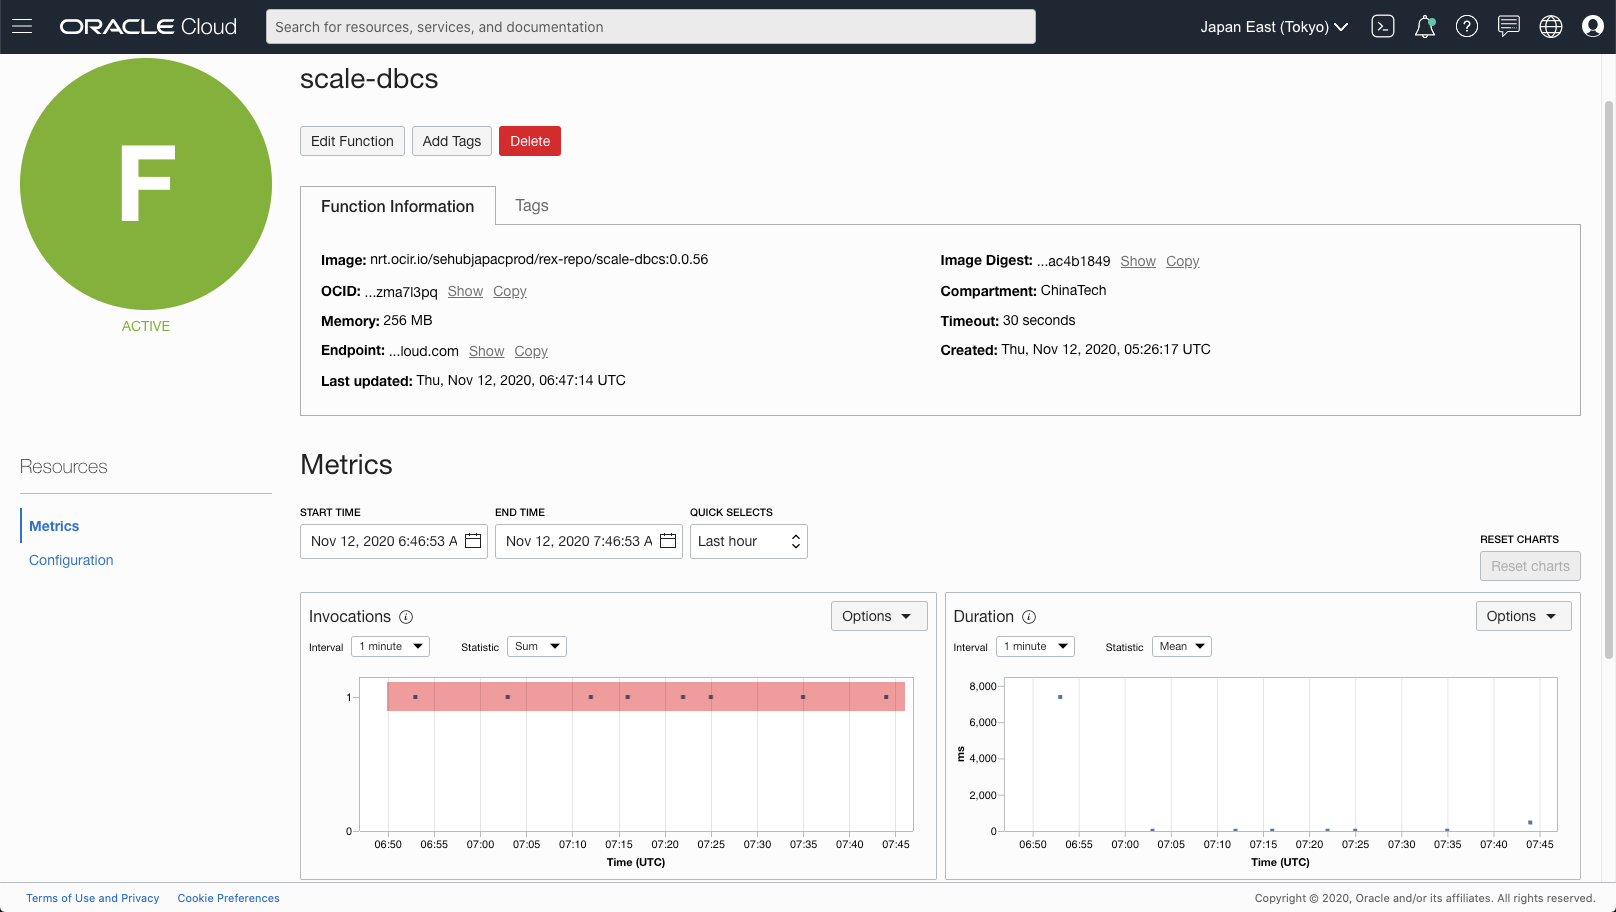
From the Metrics of the Function scale-dbcs, we can see that it is invoked periodically.
[Figure: Function invocations]
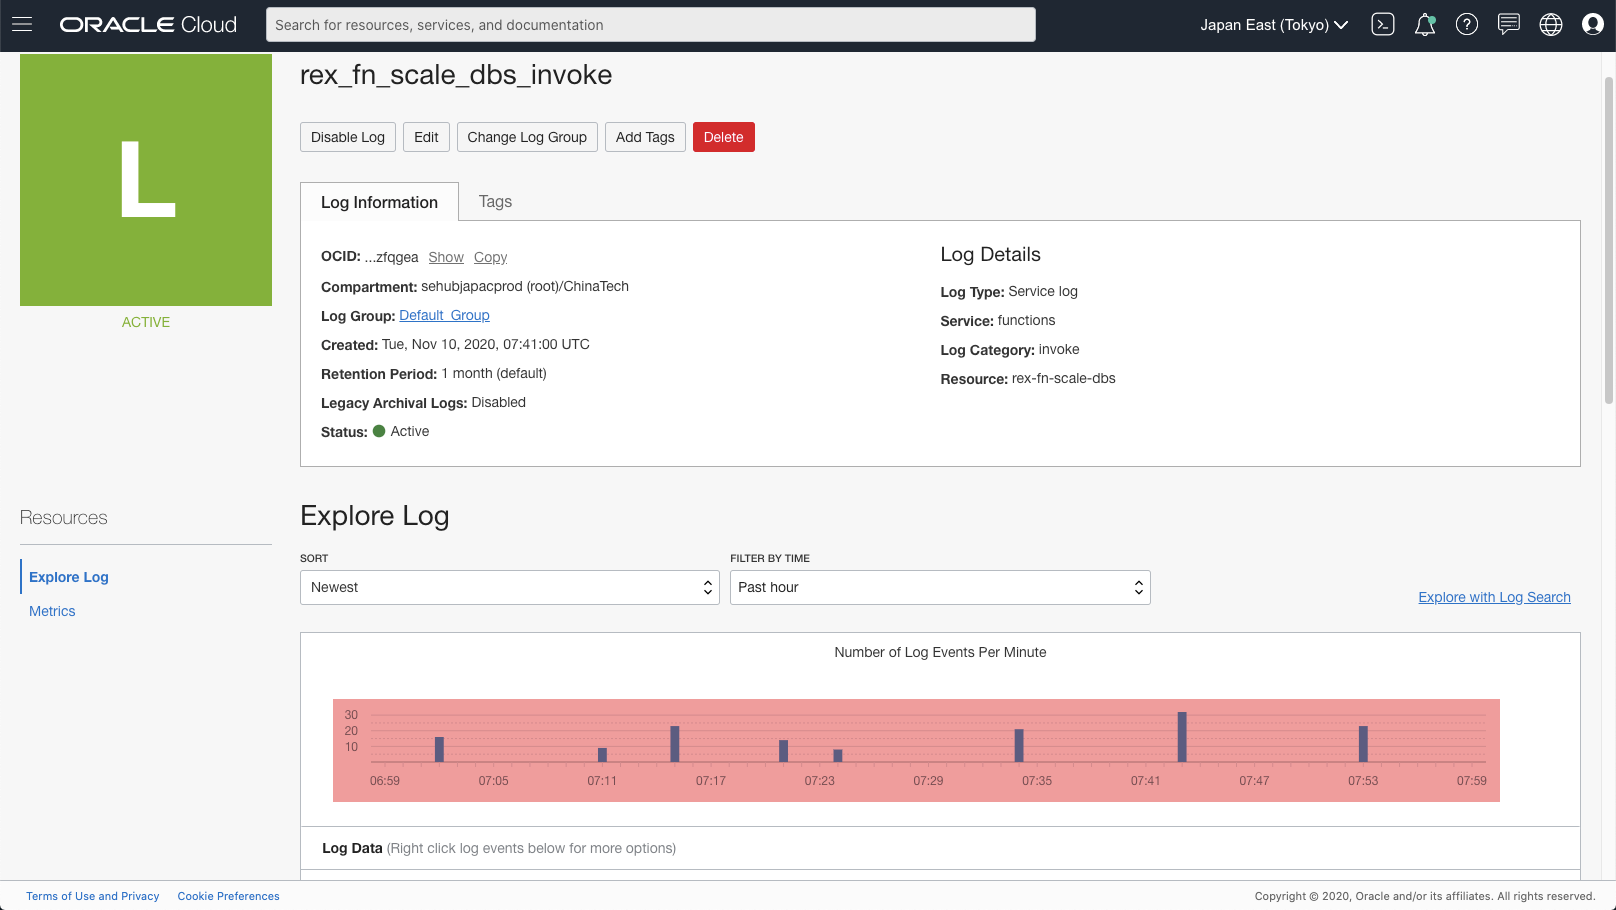
Also, if we check the logs of this Application, we can see the logs from the called Function.
Please note that there are some delay of the logs being able to shown in Logging service.
[Figure: log of Fn Application]
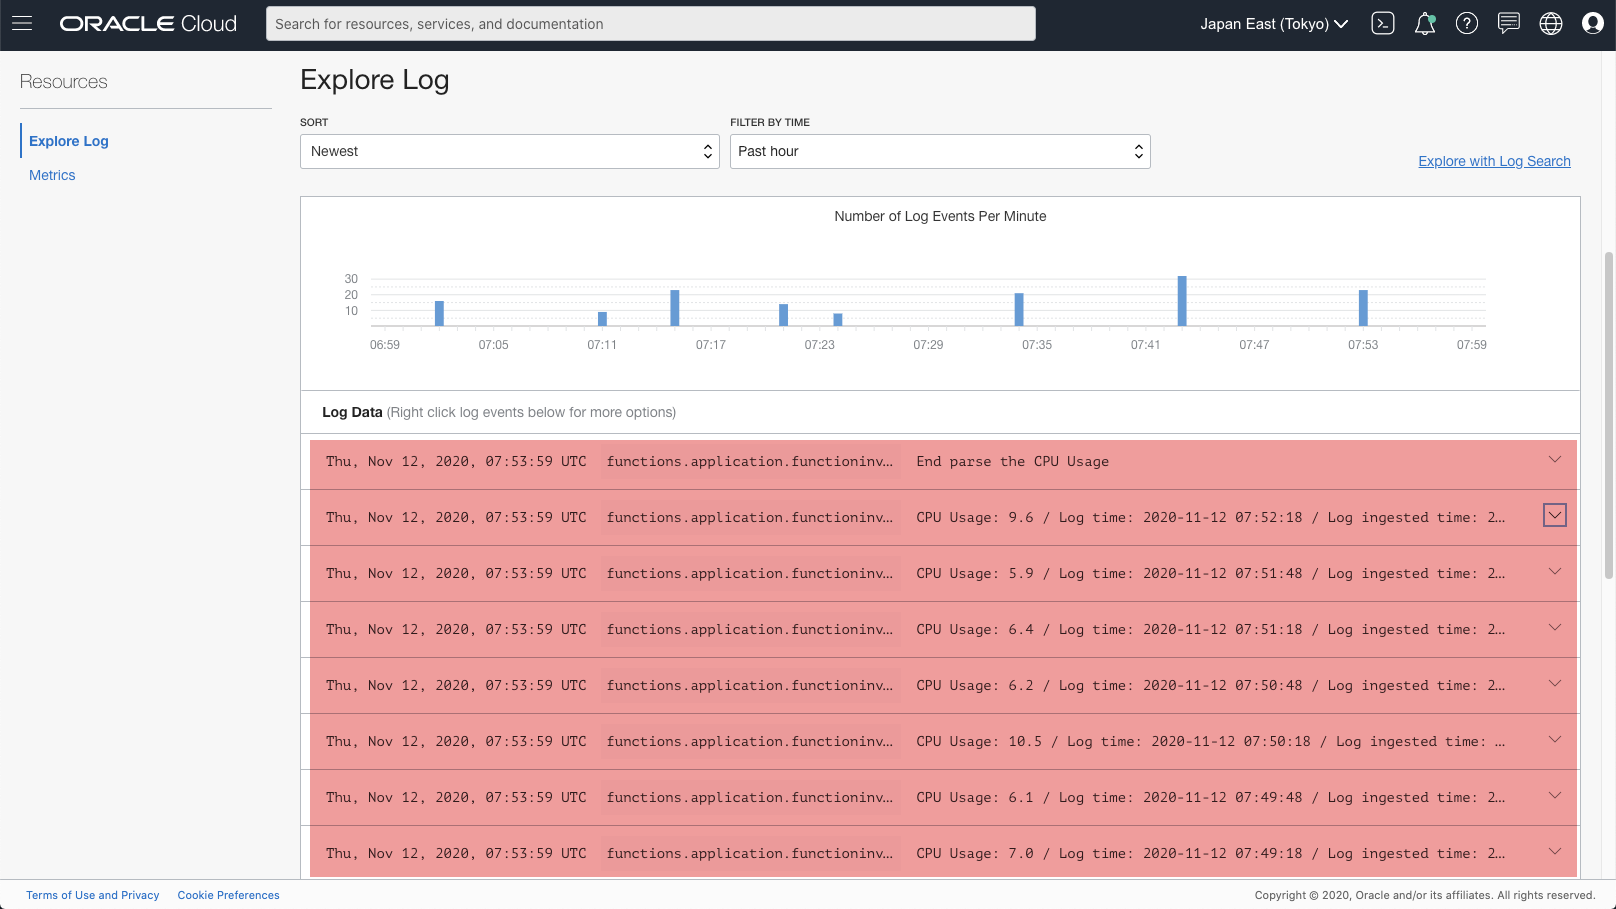
Due to the logic in Function scale-dbcs, you may see different content in the log entries.
[Figure: log entries of Fn Application ]
Sample code
This the sample code I used for testing purpose. It is workable, but obviously, too many things need to improve. So it is just for your reference.
import io
import json
import re

from fdk import response
import oci


def handler(ctx, data: io.BytesIO = None):
    print("Start to parse the CPU Usage", flush=True)
    try:
        log_list = []
        body = json.loads(data.getvalue())
        for log_item in body:
            item = {}
            item["log_time"] = log_item.get("data").get("log-time")
            item["cpu_usage"] = float(log_item.get("data").get("cpu-usage"))
            item["ingested_time"] = log_item.get("oracle").get("ingestedtime")
            tailed_path = log_item.get("data").get("tailed_path")
            pattern = re.compile(r'^.*\/(ocid.+)_cpu.log')
            my_list = re.findall(pattern, tailed_path)
            item["db_system_ocid"] = my_list[0]
            log_list.append(item)
            print("CPU Usage: {} / Log time: {} / Log ingested time: {}".format(item["cpu_usage"], item["log_time"], item["ingested_time"]), flush=True)

        for item in log_list:
            if item["cpu_usage"] > 80:

                signer = oci.auth.signers.get_resource_principals_signer()

                # Scale the DB System
                target_shape = "VM.Standard2.4"
                scale_db_system(signer, item["db_system_ocid"], target_shape)
                break
    except (Exception, ValueError) as ex:
        print(str(ex), flush=True)

    print("End parse the CPU Usage", flush=True)

    return response.Response(
        ctx, response_data=json.dumps(
            {"message": "Fn response"}
        ),
        headers={"Content-Type": "application/json"}
    )


def scale_db_system(signer, db_system_ocid, target_shape):
    output = {}
    try:
        dbs = oci.database.DatabaseClient(config={}, signer=signer)
        request = oci.database.models.UpdateDbSystemDetails()
        request.shape = target_shape
        print("Start to scale DBCS {} to {}".format(db_system_ocid, target_shape), flush=True)
        response = dbs.update_db_system(db_system_ocid, request)
        print("Scale DBCS response status: {}".format(str(response.status)), flush=True)
        print("Scale DBCS response data: {}".format(str(response.data).replace("\n", "")), flush=True)
        output["response"] = response
    except Exception as ex:
        output["exception"] = str(ex.message)
    return output
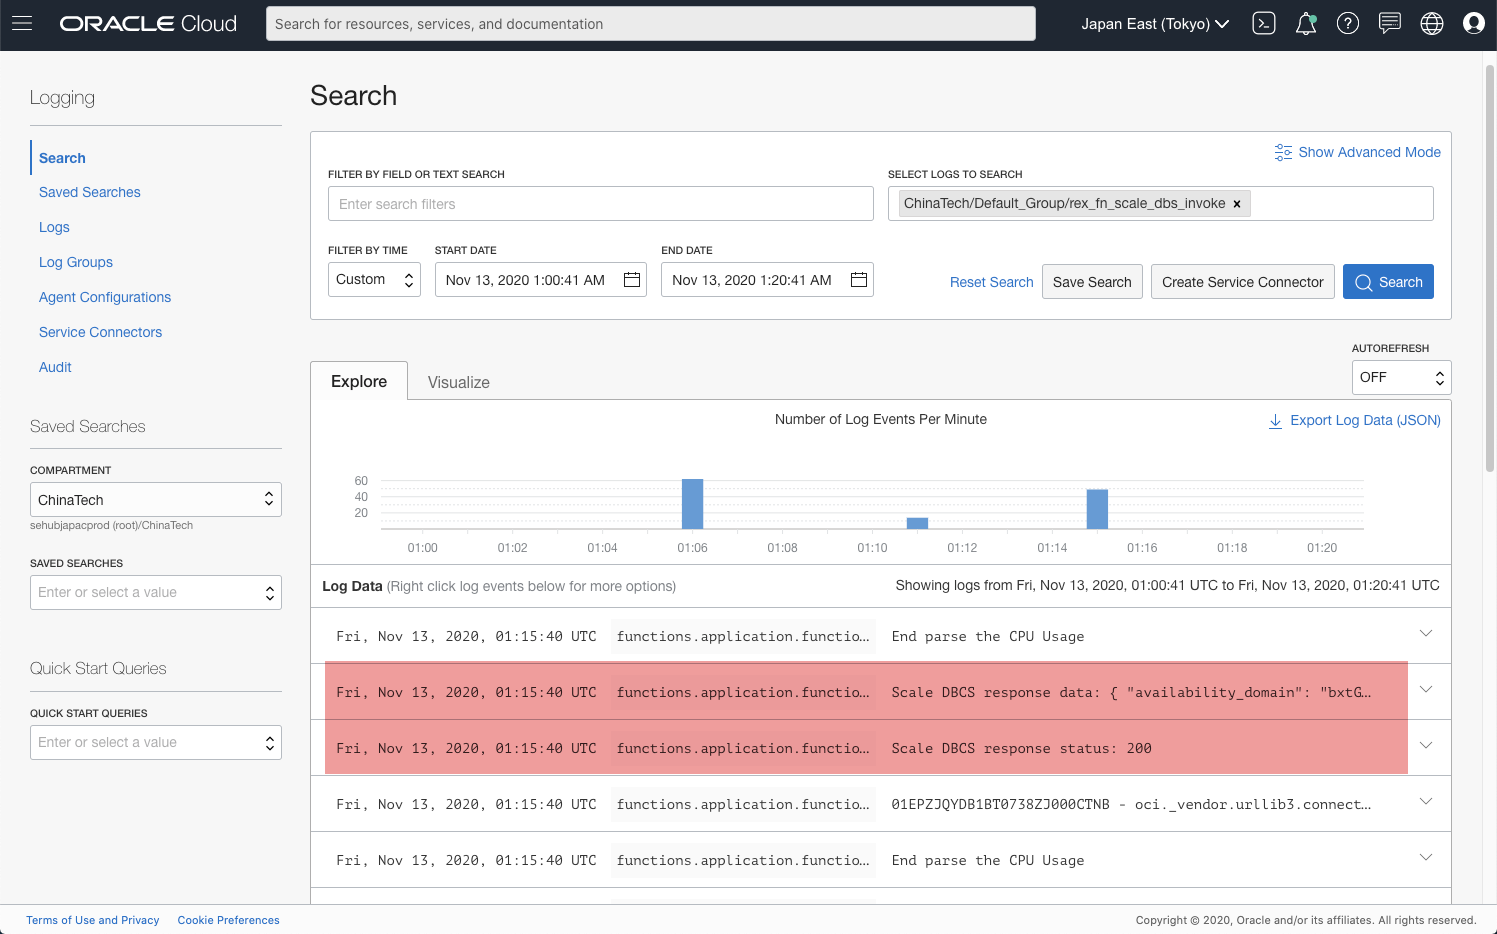
Deploying above code as the Function, you will see some logs in Logging similar to below screenshot.
[Figure: scale-up success log]
API for Exadata Cloud Service and Bare Metal
The sample code above is for manipulating VM based DB Systems. For Bare Metal, the API is the same UpdateDbSystem. But for Exadata Cloud Service, since there are two different resource model
- Cloud VM cluster
- DB systems
We need to call the appropriate API to perform scale up/down.
For Cloud VM cluster resource model, we need to use UpdateCloudVmCluster.
For DB system resource model, we need to use UpdateDbSystem.
Please check detailed information on this topic at this page.
If you use Python SDK, please check the appropriate methods at this page .
Note: after scaling the DB system / Cloud VM cluster, we also need to update the database parameter CPU_COUNT to reflect the change into the database. To connect into the database, you may use the package cx_Oracle if you use Python.
Next
Until now, we can successfully "Auto Scale" the DBCS instance. So there should be no next. But obviously there are lots of things we can improve in this solution, for example:
- trigger a notification of the auto scale to the admin
- auto scale down?
- apply machine learning to analyse the gathered logs?
- etc.
On the OCI platform, there are lots of services have been released, and more new services will be released soon. The only limitation of using Oracle Cloud Infrastructure Services is our imagination. Go and check out the OCI Services here.
