
日本語 English
- Japanese -
1. Introduction
今回は私が半年間掛けてためてきた、学習済みモデルの量子化ワークフローをメモがてら共有したいと思います。 Tensorflow の checkpoint (.ckpt/.meta)、 FreezeGraph (.pb)、 saved_model (.pb)、 keras_model (.h5)、 Tensorflow.js のモデル、 PyTorchのcheckpoint (.pth) を Tensorflow Lite用の量子化モデルへ変換するノウハウのアウトプットです。 Tensorflow に関しては v1.x から v2.x へメジャーバージョンアップしたこともあり、バージョン間の差異を吸収するために特殊な手順を踏む必要があったり、変換に着手するための素材が大きく不足していると感じることが多く、私なりにハマりにはまったすえにたどりついた内容をココに残します。 Tensorflow、 Tensorflow Lite、 Keras、 ONNX、 PyTorch、OpenVINO(OpenCV) を組み合わせて全て使用します。
日々Neural Networkの量子化に勤しんでいます。 速い・安い・ウマいが大好物です。 軽量化したモデルを使用して RaspberryPi4 などのエッジ端末でGPUを使わずにそこそこ高速に推論することを目的に量子化モデルを量産しています。 一例ですが、モデルの 8bit整数量子化 (Integer Quantization) を行った上で RaspberryPi4 の CPUのみで2種類のモデルを多段推論した結果は以下の動画のような感じになります。 Object Detection (MobileNetV2-SSDLite dm=0.5) と Head Pose Estimation の2種類の量子化モデルを直列に実行しています。
Head Pose Estimation の RaspberryPi4 CPU only + Tensorflow Lite + 4 Threads はかなりうまくいきました。 2段階推論にも関わらずサクサクの 13 FPS です。 発想力が足りないため見苦しいオッサンの顔でテストしてしまったことをお許しください。 あ〜、久々に達成感🤪https://t.co/hIwxA8eAZC
— Super PINTO (@PINTO03091) April 27, 2020
動画が小さくて見にくい、という方は こちらの PINTO_model_zoo に拡大したサンプルGIFがありますので Wi-Fi あるいは 有線環境下でご覧ください。こちらはサイズが大きい10MBほどのGIFですのでWi-Fi環境下でご覧いただかないと皆様のスマホのギガを猛烈に消費します。
2. Table of contents
1. Introduction
2. Table of contents
3. Environment
4. Procedure
4-1. Model の INPUT と OUTPUT の名前・型を調べるとともにバッチサイズ・型などを変更する
4-1-1. Tensorflow checkpoint の場合
4-1-2. Tensorflow Freeze_Graph の場合
4-1-3. Tensorflow saved_model の場合
4-1-4. Tensorflow/Keras .h5/.json の場合
4-2. 様々な量子化手順
4-2-1. Tensorflow checkpoint (.ckpt) からの量子化
4-2-1-1. .index と .data-00000-of-00001 から .meta の生成
4-2-1-2. checkpoint (.meta) から Freeze_Graph を生成
4-2-1-3. Freeze_Graph から saved_model を生成
4-2-1-4. saved_model から Weight Quantization (重みのみの量子化)
4-2-1-5. saved_model から Integer Quantization (8bit整数量子化)
4-2-1-6. saved_model から Full Integer Quantization (全8bit整数量子化)
4-2-1-7. saved_model から Float16 Quantization (Float16量子化)
4-2-1-8. Full Integer Quantization から EdgeTPU convert
4-2-2. Tensorflow checkpoint (.meta) からの量子化
4-2-3. Tensorflow Freeze_Graph (.pb) からの量子化
4-2-4. Tensorflow saved_model (.pb) からの量子化
4-2-5. Tensorflow/Keras (.h5/.json) からの量子化
4-2-5-1. .h5/.json から Weight Quantization (重みのみの量子化)
4-2-5-2. キャリブレーション用データセットの生成
4-2-5-3. .h5/.json から Integer Quantization (8bit整数量子化)
4-2-5-4. .h5/.json から Full Integer Quantization (全8bit整数量子化)
4-2-5-5. .h5/.json から Float16 Quantization (Float16量子化)
4-2-5-6. Full Integer Quantization から EdgeTPU convert
4-2-6. Tensorflow.js 用モデルからの量子化
4-2-6-1. 事前準備
4-2-6-2. Tensorflow.js から saved_model の生成
4-2-6-3. Tensorflow v2.x で生成した saved_model を Tensorflow v1.x へ取り込んで入力形状を加工
4-2-6-4. Tensorflow v2.2.0 のインストール
4-2-6-5. saved_model から Weight Quantization (重みのみの量子化)
4-2-6-6. saved_model から Integer Quantization (8bit整数量子化)
4-2-6-7. saved_model から Full Integer Quantization (全8bit整数量子化)
4-2-6-8. saved_model から Float16 Quantization (Float16量子化)
4-2-6-9. Full Integer Quantization から EdgeTPU convert
4-2-7. TensorFlow Object Detection API で生成したモデルを量子化
4-2-7-1. Post-Process付きの .pb ファイルを生成する
4-2-7-2. Freeze_Graph から Weight Quantization (重みのみの量子化)
4-2-7-3. Freeze_Graph から Integer Quantization (8bit整数量子化)
4-2-7-4. Freeze_Graph から Full Integer Quantization (全8bit整数量子化)
4-2-7-5. Freeze_Graph から Float16 Quantization (Float16量子化)
4-2-7-6. Full Integer Quantization から EdgeTPU convert
4-2-8. Tensorflow Lite が非対応 かつ Tensorflow が対応済みのオペレーションを含むモデルの量子化
4-2-8-1. Mask-RCNN Inception V2 の .pb ファイルを生成する
4-2-8-2. Mask-RCNN Inception V2 の Weight Quantization (重みのみの量子化)
4-2-8-3. Mask-RCNN Inception V2 の Float16 Quantization (Float16量子化)
4-2-8-4. Flex Delegate (Tensorflow Select Ops) を有効にしたモデルの実行
4-2-9. PyTorch 用モデルからの量子化
4-2-9-1. 事前準備 (PyTorch->ONNX)
4-2-9-2. onnx2keras による ONNX->Keras コンバート
4-2-9-3. saved_model から Weight Quantization (重みのみの量子化)
4-2-9-4. saved_model から Integer Quantization (8bit整数量子化)
4-2-9-5. saved_model から Full Integer Quantization (全8bit整数量子化)
4-2-9-6. saved_model から Float16 Quantization (Float16量子化)
4-2-9-7. Full Integer Quantization から EdgeTPU convert
4-2-10. MediaPipe のモデル BlazeFace(.tflite) の量子化
4-2-10-1. flatc のビルド と schema.fbs のダウンロード
4-2-10-2. MediaPipe の BlazeFaceモデル(.tflite) をダウンロード
4-2-10-3. BlazeFace(.tflite) を saved_model(.pb) へ変換
4-2-10-4. saved_model から Weight Quantization (重みのみの量子化)
4-2-10-5. saved_model から Integer Quantization (8bit整数量子化)
4-2-10-6. saved_model から Full Integer Quantization (全8bit整数量子化)
4-2-10-7. saved_model から Float16 Quantization (Float16量子化)
4-2-10-8. Full Integer Quantization から EdgeTPU convert
4-3. 量子化モデル (.tflite) のパフォーマンスベンチマーク
4-3-1. TFLite Model Benchmark Tool のビルド
4-3-2. TFLite Model Benchmark Tool のオプション
4-3-3. Tensorflow Lite 標準のオペレーションのみを含むモデルのベンチマーク例 (XNNPACK無し、4 Threads)
4-3-4. Tensorflow Lite 標準のオペレーションのみを含むモデルのベンチマーク例 (XNNPACK有り、4 Threads)
4-3-5. Tensorflow Lite 標準以外のオペレーションを含むモデルのベンチマーク例 (Flex有効、XNNPACK無し、4 Threads)
4-3-6. Tensorflow Lite 標準以外のオペレーションを含むモデルのベンチマーク例 (Flex有効、XNNPACK有り、4 Threads)
4-3-7. Benchmark_Toolの実行ログサンプル
3. Environment
- Tensorflow-GPU v1.15.2
- Tensorflow v2.1.0, v2.2.0 or tf-nightly
- PythonAPIチューニング済み Tensorflow Lite
- PyTorch
- Caffe
- OpenVINO 2020.2
- OpenCV 4.2
- onnx2keras
- Netron
- RaspberryPi4 + Ubuntu aarch64
4. Procedure
4-1. Model の INPUT と OUTPUT の名前・型を調べるとともにバッチサイズ・型などを変更する
これが最も大変でいて手間が掛かる最初に必要な作業です。変換のパターンによって手間の多さが変わります。
4-1-1. Tensorflow checkpoint の場合
Freeze_Graphやsaved_modelが提供されていないパターンです。 このパターンで最も手っ取り早いのは、推論Test用のサンプルコードを読むか実行してみることです。 NetronやTensorflow公式の可視化ツール(Tensorboard や summarize_graph) を使用してモデルの構造を見ることも不可能ではりませんが、トレーニングで必要となる様々なオペレーションが残ったままファイルに大量出力されているため可視化に失敗するか、可視化できたとしてもグラフが巨大過ぎてINPUTとOUTPUTを探し出すのが困難です。
では、実際に実写をアニメーション化するモデル White-box-Cartoonization の INPUT/OUTPUT を例にとって確認してみます。様々な要素を網羅的に記載するため、今回はあえて手番が多い難易度高めのモデルを選定しています。 なお、このモデルの作業には v1.x系の Tensorflow v1.15.2 の導入が必要です。 Tensorflow v2.x を導入済みの方は一時的にアンインストールして v1.x系 を導入し直す必要があります。 あるいはTensorflow導入済みのDocker環境で作業を実施することで環境を汚すこと無く作業ができます。
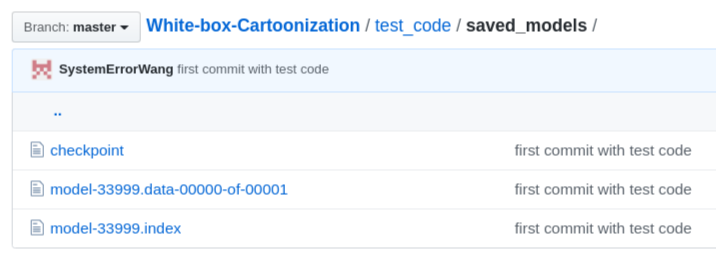
念の為、提供されているcheckpointを確認してみると。。。 はい、何故か親切にも .meta ファイルだけがコミットされていませんね。 この時点でヤル気が猛烈に減衰するのが普通の人です。 そうです。 この記事を読み始めたあなたは普通の人ではないです。 ともかく、作業を進めるうえでは特に問題になりませんのでこのまま次に進みます。
ます、推論Test用ロジック cartoonize.py を読みます。 すると、 プログラムの開始位置 main() の直後に cartoonize() メソッドが呼ばれているようですので中身を眺めてみます。 初心者に優しいシンプルなテストコードの場合はわずか1分でINPUTの定義部分にたどり着きます。 Tensorflow の入力オペレーションは placeholder を使用して定義されています。しかし、よく見ると 名前"name" 属性 が定義されていません。 後続の変換・確認作業がやりにくくなりますので、こういう場合は自分で名前を付けてよい、ととらえましょう。 また、テンソルの定義が None で汚染されています。 量子化を行う場合の制約事項として 入力解像度(画像処理系のモデルの場合は"解像度") が固定されていることが必須です。 よって解像度も固定してしまいます。 今回は 720x720 としました。
def cartoonize(load_folder, save_folder, model_path):
    input_photo = tf.placeholder(tf.float32, [1, None, None, 3]) #<--- ココがINPUT
    network_out = network.unet_generator(input_photo)
    final_out = guided_filter.guided_filter(input_photo, network_out, r=1, eps=5e-3)

    all_vars = tf.trainable_variables()
    gene_vars = [var for var in all_vars if 'generator' in var.name]
    saver = tf.train.Saver(var_list=gene_vars)
def cartoonize(load_folder, save_folder, model_path):
    input_photo = tf.placeholder(tf.float32, [1, 720, 720, 3], name='input') #<--- ココがINPUT
    network_out = network.unet_generator(input_photo)
    final_out = guided_filter.guided_filter(input_photo, network_out, r=1, eps=5e-3)

    all_vars = tf.trainable_variables()
    gene_vars = [var for var in all_vars if 'generator' in var.name]
    saver = tf.train.Saver(var_list=gene_vars)
なお、量子化をするうえでの placeholder に関する注意点は下記です。
1. N (バッチサイズ), H (高さ), W (幅), C (RGBチャンネル) 全てが整数値で固定されていること
2. NCHW (channel-first) で定義されている場合は NHWC (channel-last) で定義 あるいは 変換 すること
3. placeholder の型は tf.float32 とすること (もっぱら tf.uint8 で定義されているモデルが多いです)
4. tf.cast オペレーションは量子化操作に対応していないため可能な限り削除すること
ちなみに今回 720x720 とした理由は、画像の前処理部分のロジックに下記のように縦横720ピクセルを下回らないようにリサイズする動作が記載されていたためです。 このあたりはモデルに応じて指定可能なサイズに決まりがあるようですので、推論Test用ロジックをくまなく読むか、Training用ロジックをくまなく読んでみるしかありません。 White-box-Cartoonization は 720x720 より小さい解像度を指定した場合エラーとなり推論できませんでした。 高速化することが目的の場合は解像度を極力小さく指定することが重要ですので、ロジックを読みこむことが億劫な方はどこまで小さい値に設定できるか、トライアンドエラーを繰り返してみてください。
def resize_crop(image):
    h, w, c = np.shape(image)
    if min(h, w) > 720:
        if h > w:
            h, w = int(720*h/w), 720
        else:
            h, w = 720, int(720*w/h)
    image = cv2.resize(image, (w, h),
                       interpolation=cv2.INTER_AREA)
    h, w = (h//8)*8, (w//8)*8
    image = image[:h, :w, :]
    return image
世の中に出回っているモデルは画像を取り扱うものが多いため、下記のように 0-255 のRGB値を受け取る uint8型 で placeholder が定義されている場合があります。 このとき大抵の場合は、 placeholder の次のステップで cast オペレーションで float32 へ型変換しています。 前述のとおり、 tf.cast は量子化を行うときにエラーになりますので、このタイミングで削除してしまいましょう。 実際に推論を実行してみるときは、OpenCVやPillowで読み込んだ画像データは uint8型 になるため、Tensorflow へ画像を引き渡す直前にビジネスロジック側で Float32型 へ自分でキャストしておく必要があります。
input_photo = tf.placeholder(tf.uint8, [1, 720, 720, 3], name='input')
casted_photo = tf.cast(input_photo, tf.float32)
input_photo = tf.placeholder(tf.float32, [1, 720, 720, 3], name='input')
では次にOUTPUTの名前を調べます。 このモデル White-box-Cartoonization の推論Testロジックはとてもシンプルなので INPUT の定義行のすぐ下に最終OUTPUTが定義されていました。 ご丁寧に final_out という変数名になっています。 Netron や summarize_graph や Tensorboard を使用せずにOUTPUTの名前を調べるときには2つの方法があります。
1. プログラムを深堀していってモデル構造の終端付近を目視で調べて特定する
2. とにかくテスト実行してみてデバッグプリントで最終オペレーションの名前を調べる
ということで、私は手抜き大好き人間なので 2. の方法をとってみました。
def cartoonize(load_folder, save_folder, model_path):
input_photo = tf.placeholder(tf.float32, [1, 720, 720, 3], name='input')
network_out = network.unet_generator(input_photo)
final_out = guided_filter.guided_filter(input_photo, network_out, r=1, eps=5e-3) #<--- ココがOUTPUT
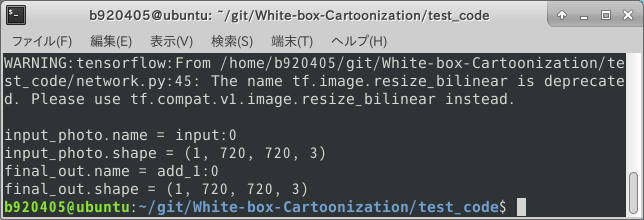
print("input_photo.name =", input_photo.name) #<--- INPUT名のデバッグプリント用に1行追加
print("input_photo.shape =", input_photo.shape) #<--- INPUTシェイプのデバッグプリント用に1行追加
print("final_out.name =", final_out.name) #<--- OUTPUT名のデバッグプリント用に1行追加
print("final_out.shape =", final_out.shape) #<--- OUTPUTシェイプのデバッグプリント用に1行追加
all_vars = tf.trainable_variables()
gene_vars = [var for var in all_vars if 'generator' in var.name]
saver = tf.train.Saver(var_list=gene_vars)
ここで推論Test用プログラムを実行してみたところ、先程追加したデバッグプリントの部分で INPUT と OUTPUT の名前と形状が出力されました。 どうやら OUTPUT の名前は add_1:0 のようです。 また、先程改造した placeholder の名前と形状が正しく反映されているようですね。
ここまでで、 checkpoint形式のモデルから INPUT/OUTPUT の名前を調べる手順は終了です。 .meta を生成する方法や、 Freeze_Graph や saved_model を生成する方法に関しては後続の手順で説明します。
4-1-2. Tensorflow Freeze_Graph の場合
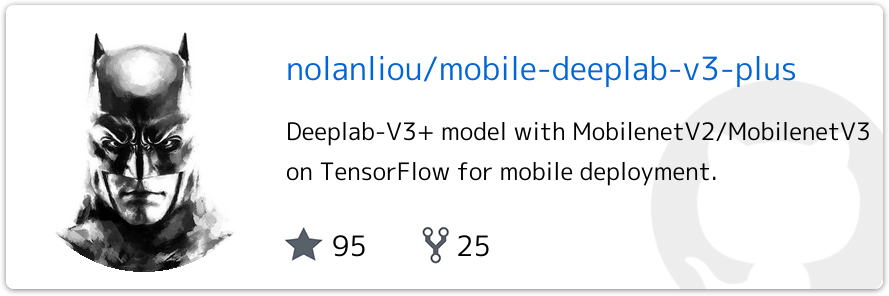
Freeze_Graph (.pb) 形式でモデルが提供されている場合はこちらのパターンになります。 この場合に INPUT/OUTPUT の名前を特定するのはとても簡単です。 ココでは Semantic Segmentation のモデル Mobile-DeeplabV3-plus (MobileNetV2) を例にとって確認してみます。
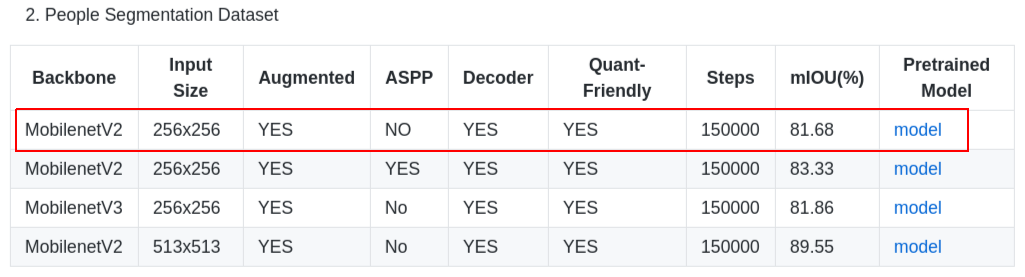
まずは、上記のリポジトリから Freeze_Graph (.pb) ファイルをダウンロードします。 ココでの注意点は ASPP などの特殊処理が入ったモデルは軒並み量子化に失敗しますので、なるべくシンプルな構造のモデルに限定して取り寄せることぐらいです。
コマンドラインを使用して Google Drive から資材をダウンロードする場合は、確認ダイアログを回避する必要があるため、下記のように3行のコマンドを実行することでダウンロード可能です。
$ curl -sc /tmp/cookie "https://drive.google.com/uc?export=download&id=1VF5yMz_tIkTOVfgmIgg7tPAJJEEcZ49B" > /dev/null
$ CODE="$(awk '/_warning_/ {print $NF}' /tmp/cookie)"
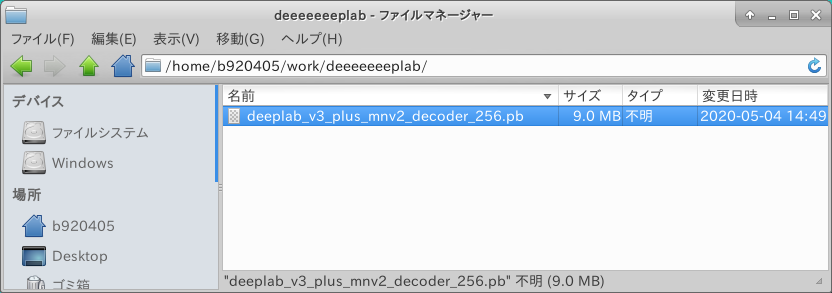
$ curl -Lb /tmp/cookie "https://drive.google.com/uc?export=download&confirm=${CODE}&id=1VF5yMz_tIkTOVfgmIgg7tPAJJEEcZ49B" -o deeplab_v3_plus_mnv2_decoder_256.pb
ダウンロードしたモデルの構造を確認します。 Netron という超便利サイトがありますのでまずはアクセスします。
https://lutzroeder.github.io/netron/
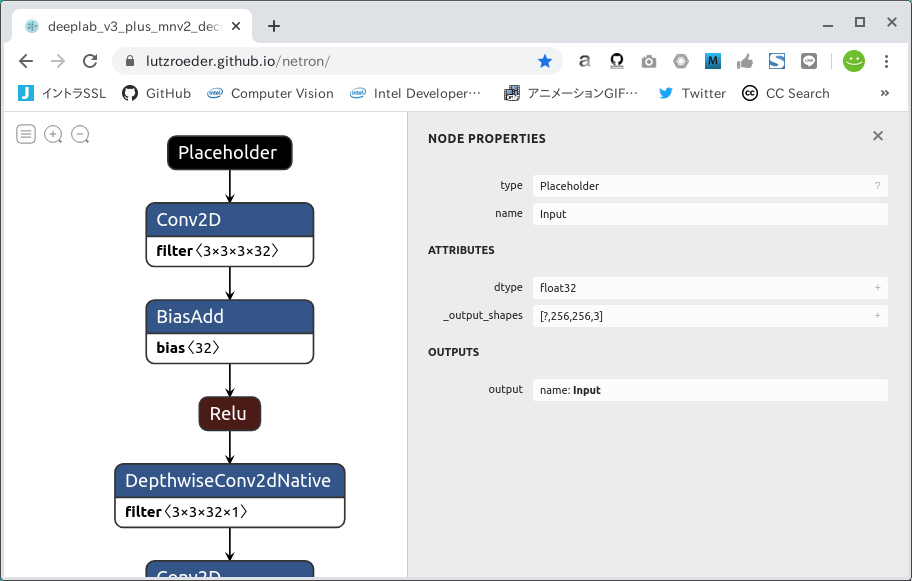
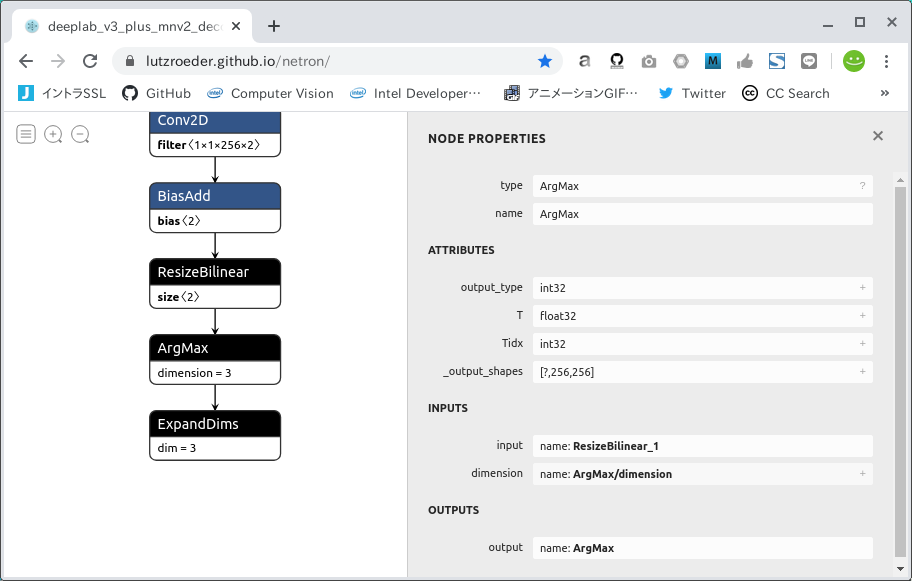
"Open Model..." というボタンをクリックして、先程ダウンロードした deeplab_v3_plus_mnv2_decoder_256.pb を指定して開きます。 すると。。。 一発ポンで INPUT/OUTPUT の名前が分かってしまいました。 INPUTは Input、 形状と型は Float32 [?, 256, 256, 3]、 OUTPUTは ArgMax、 形状と型は Float32 [?, 256, 256] のようです。 なお一見すると ExpandDims が最終OUTPUTとして適切ではないか、と思われるかもしれませんが、 実は Semantic Segmentation のモデルにほぼ共通することですが ArgMax を選定すれば問題ありません。 また、形状の ? の部分は可変バッチの None と同義ですが、 実はここだけは固定化しなくても量子化操作には問題がありません。 後続作業の量子化時に自動的に 1 へと変換されます。
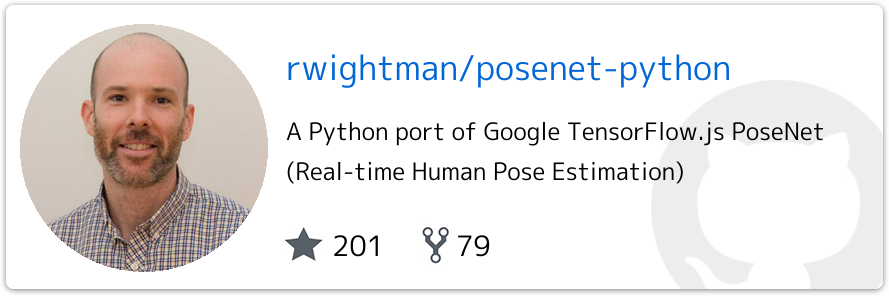
さて、簡単すぎましたね。 ぬるま湯につかってはいけません。 もう少し難易度を上げてみましょう。 次は下記の Tensorflow.js の Python実装 Posenet v1 を元に試してみましょう。
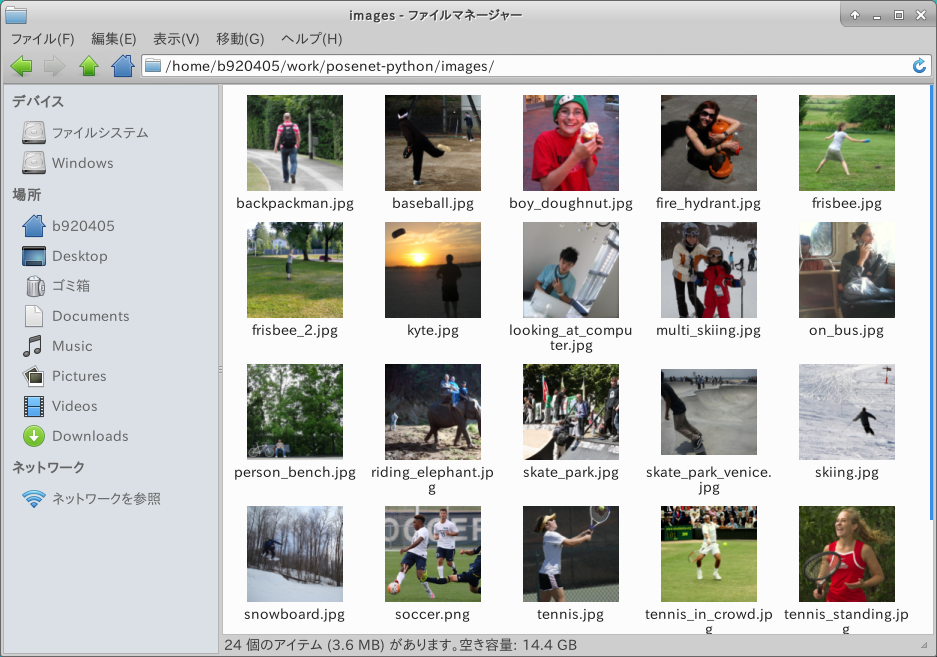
まずは、Freeze_GraphをゲットするためにリポジトリをCloneし、下記の通りコマンドを発行します。 --image_dir の引数は人が写った画像ファイルがあるフォルダパスならどこでも良いです。 私は images というフォルダを作成して人の画像を24枚置いてみました。
Tensorflow.js のモデルを Tensorflow のモデルに変換します。 下記の処理は Tensorflow v1.15.2 の導入が必要です。
$ sudo pip3 uninstall tensorboard-plugin-wit tb-nightly tensorboard \
                      tf-estimator-nightly tensorflow-gpu \
                      tensorflow tf-nightly tensorflow_estimator
$ sudo pip3 install tensorflow-gpu==1.15.2

$ git clone https://github.com/rwightman/posenet-python.git
$ cd posenet-python
$ python3 image_demo.py \
    --model 101 \
    --image_dir ./images \
    --output_dir ./output
処理が終わると _models というフォルダの配下に、 checkpoints .pb .pbtxt の3種類が生成されます。
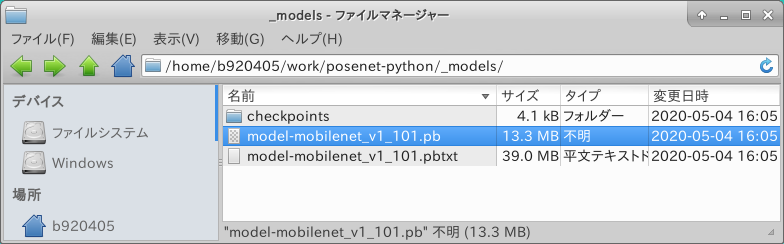
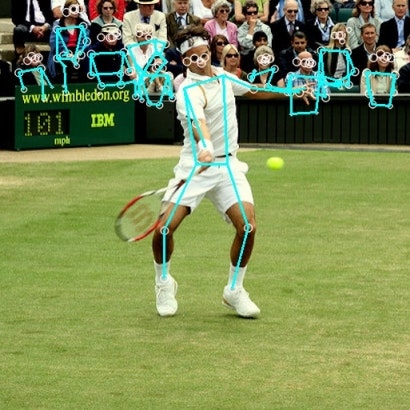
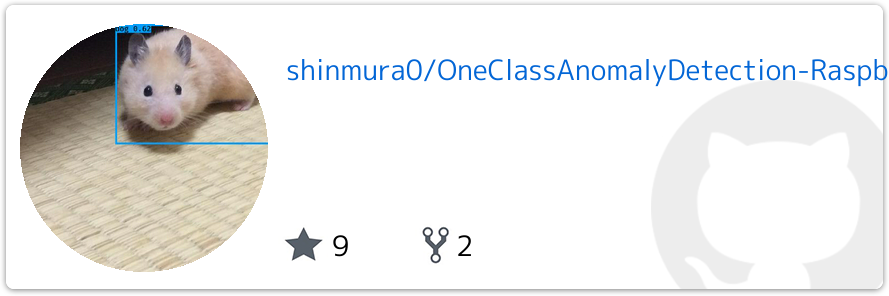
MobileNetV1ベースですので精度は極めて微妙です。 余談ですが、この記事の一番上のニコチャンマークのリンク先URLのリポジトリには ResNet50ベースで変換した高精度で遅い Posenet v2 の量子化モデルをコミット済みです。
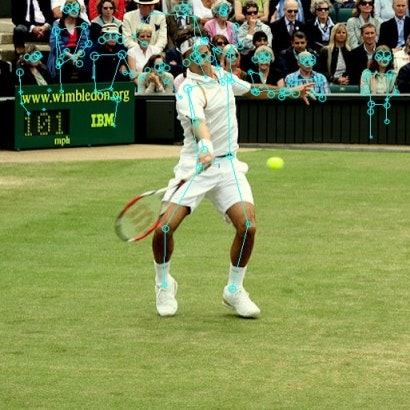
ちなみに下図が ResNet50 バックボーン版の Posenet v2 による同一画像への推論結果です。 分かりにくいですが精度が若干上がっているようです。
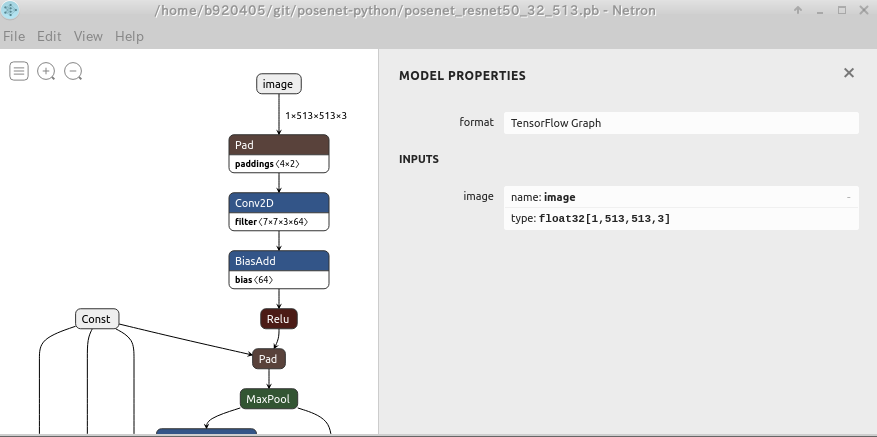
では、先程と同じように Netron を使用して .pb ファイルを可視化してみましょう。 って、げっ。。。 Freeze_Graph (.pb) の状態で名前、型と形状が name=image Float32 [1, ?, ?, 3] になってしまいました。 このままでは量子化操作が失敗します。 ということでココからは H (高さ) と W (幅) が 'None' なモデル をFreeze_Graphのまま形状変換する方法を説明します。 なおこの手順は Tensorflow v1.x のみで実施可能 かつ 全てのモデルで等しく機能しない点に注意が必要です。
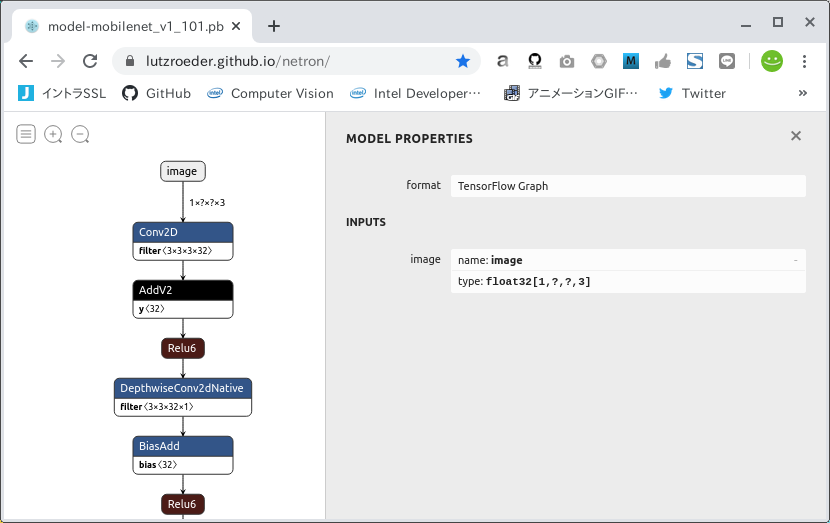
では、 Freeze_GraphのINPUTの形状を変換するプログラムを記載します。 大まかな流れは下記のとおりです。
1. 変換後に期待する形状を持つ placeholder を定義する
2. 既に有る Freeze_Graph を読み込む
3. 1.で定義した placeholder をモデルにimportする
4. ( placholder が正しく取り込まれたことをデバッグプリントで確認 )
5. Tensorflow v1.x系のツール TransformGraph で不必要な Node を一括削除
6. 整形済みの Freeze_Graph を .pb ファイルへ出力
### tensorflow-gpu==1.15.2

import tensorflow as tf
from tensorflow.tools.graph_transforms import TransformGraph

with tf.compat.v1.Session() as sess:

    # shape=[1, ?, ?, 3] -> shape=[1, 513, 513, 3]
    # name='image' specifies the placeholder name of the converted model
    inputs = tf.compat.v1.placeholder(tf.float32, shape=[1, 513, 513, 3], name='image')
    with tf.io.gfile.GFile('./model-mobilenet_v1_101.pb', 'rb') as f:
        graph_def = tf.compat.v1.GraphDef()
    graph_def.ParseFromString(f.read())

    # 'image:0' specifies the placeholder name of the model before conversion
    tf.graph_util.import_graph_def(graph_def, input_map={'image:0': inputs}, name='')
    print([n for n in tf.compat.v1.get_default_graph().as_graph_def().node if n.name == 'image'])

    # Delete Placeholder "image" before conversion
    # see: https://github.com/tensorflow/tensorflow/tree/master/tensorflow/tools/graph_transforms
    # TransformGraph(
    #     graph_def(),
    #     input_op_name,
    #     output_op_names,
    #     conversion options
    # )
    optimized_graph_def = TransformGraph(
                              tf.compat.v1.get_default_graph().as_graph_def(),
                              'image',
                              ['heatmap','offset_2','displacement_fwd_2','displacement_bwd_2'],
                              ['strip_unused_nodes(type=float, shape="1,513,513,3")'])

    tf.io.write_graph(optimized_graph_def, './', 'model-mobilenet_v1_101_513.pb', as_text=False)
TransformGraph の仕様・使い方は コチラの Graph Transform Tool をご覧ください。
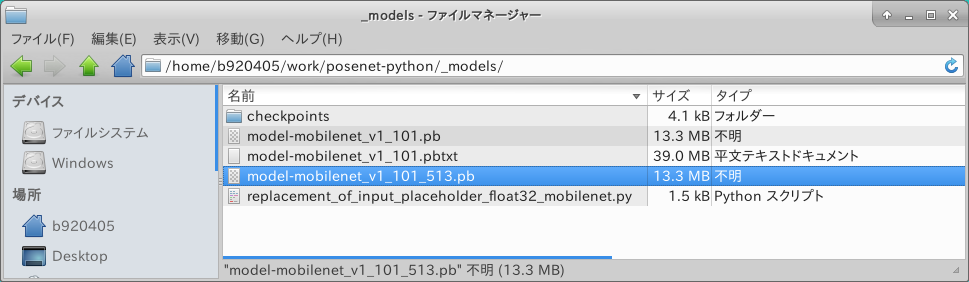
作成したINPUT形状変換プログラムを実行します。 プログラム実行後に生成されるFreeze_Graph model-mobilenet_v1_101_513.pb のINPUTの形状は [1, 513, 513, 3] を想定しています。 もう少し小さな形状への変換を希望する場合は shape=[1, 257, 257, 3] のように変更するだけです。
$ python3 replacement_of_input_placeholder_float32_mobilenet.py
生成された model-mobilenet_v1_101_513.pb の形状を Netron で確認してみます。 うん、成功していますね。
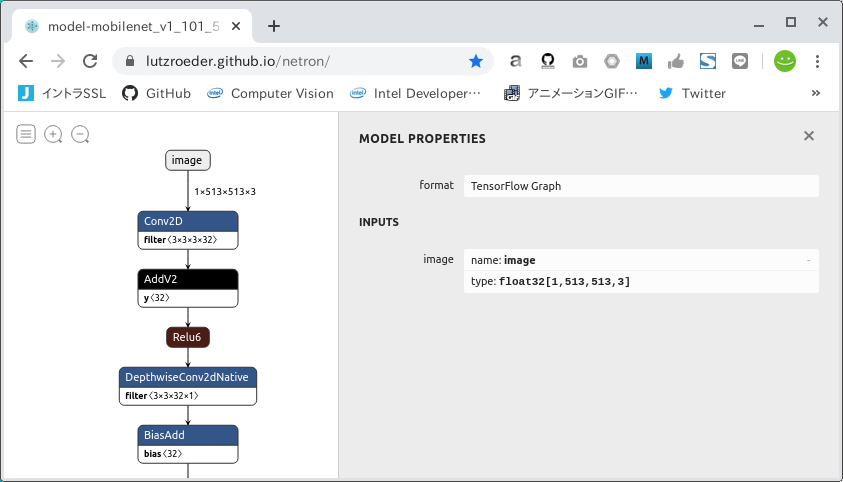
ここまでで、 Freeze_Graph形式のモデルから INPUT/OUTPUT の名前を調べる手順 および Freeze_Graph の形状を変換する手順の説明は終了です。
4-1-3. Tensorflow saved_model の場合
saved_model (.pb) 形式でモデルが提供されている場合はこちらのパターンになります。 この場合も INPUT/OUTPUT の名前を特定するのはとても簡単です。 ただし今のところ、この形式でトレーニング済みモデルを提供している事例はあまり見かけません。 今回は次の Head Pose Estimation を元にINPUTとOUTPUTの名前を確認してみましょう。
まずはリポジトリをcloneします。
$ git clone https://github.com/yinguobing/head-pose-estimation.git
$ cd head-pose-estimation/assets
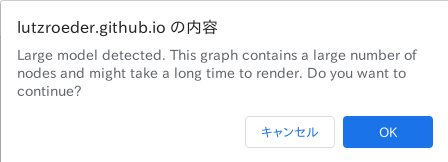
オペレータの数がとても多いsaved_modelをWeb版のNetronで表示すると下図のように警告が表示され、レンダリングに5分以上待たされることがあります。
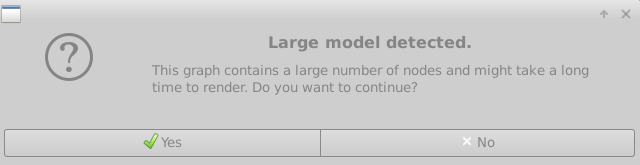
なお、プロプライエタリ版の場合は下図のように表示されます。
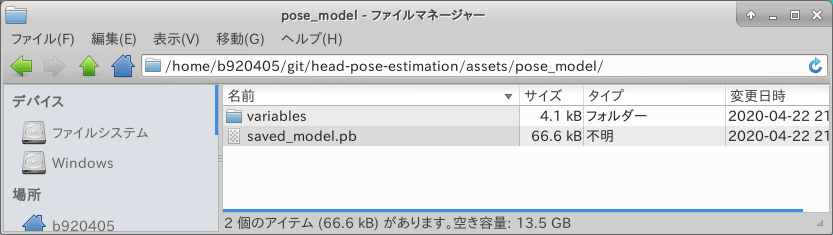
そこで、saved_model形式の INPUT/OUTPUT を手軽に調べる場合は、 saved_model_cli という標準コマンドを使用します。assets フォルダの配下に pose_model というフォルダがあり、さらにその下に saved_model.pb が配備されていますので、 assets フォルダの直下で pose_model フォルダに対して分析コマンドを実行します。
$ saved_model_cli show --dir pose_model --all

MetaGraphDef with tag-set: 'serve' contains the following SignatureDefs:

signature_def['predict']:
  The given SavedModel SignatureDef contains the following input(s):
    inputs['image'] tensor_info:
        dtype: DT_UINT8
        shape: (-1, -1, -1, 3)
        name: image_tensor:0
  The given SavedModel SignatureDef contains the following output(s):
    outputs['output'] tensor_info:
        dtype: DT_FLOAT
        shape: (-1, 136)
        name: layer6/final_dense:0
  Method name is: tensorflow/serving/predict

signature_def['serving_default']:
  The given SavedModel SignatureDef contains the following input(s):
    inputs['image'] tensor_info:
        dtype: DT_UINT8
        shape: (-1, -1, -1, 3)
        name: image_tensor:0
  The given SavedModel SignatureDef contains the following output(s):
    outputs['output'] tensor_info:
        dtype: DT_FLOAT
        shape: (-1, 136)
        name: layer6/final_dense:0
  Method name is: tensorflow/serving/predict
signature_def['serving_default'] のほうの定義を見ると、 INPUTは image Uint8[-1, -1, -1, 3]、 OUTPUTは output Float32[-1, 136] という定義になっているようです。 今までの例と同じようにINPUTは、 N (バッチサイズ)、 H (高さ)、 W (幅) が 「-1」 (? や None と同義) となっていますのでシグネチャの書き換えが必要です。 私が中途半端な説明をするより、次の記事 SavedModelについてのまとめ - Qiita - t_shimmuraさん がとても参考になりますのでそちらをご覧ください。 また、Head Pose Estimation だけに限って言えば、下記のリポジトリにトレーニングスクリプトとsaved_modelへのエクスポートスクリプトが記載されていますのでとても参考になるかと思います。

saved_modelに関しては構造を確認するためのコマンド saved_model_cli の使い方のみ説明しました。 後ほどの工程で checkpoint -> saved_model あるいは Freeze_Graph -> saved_model の変換スクリプトと合わせて触れるつもりです。
4-1-4. Tensorflow/Keras .h5/.json の場合
Keras (.h5/.json) 形式でモデルが提供されている場合はこちらのパターンになります。
例えば上記のリポジトリを元にINPUTとOUTPUTの名前を確認するには、トレーニング後に、
model = Model(inputs=xxxx,outputs=yyyy)
# model save
model_json = model.to_json()
open(model_path + 'model.json', 'w').write(model_json)
model.save_weights(model_path + 'weights.h5')
として出力した .json ファイルが必要です。 上記の例の model.json を Netron で開くと下図のように可視化されます。
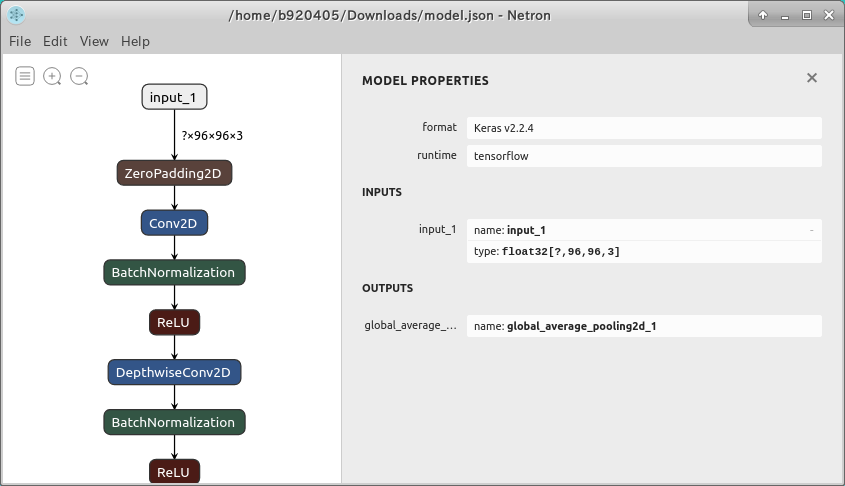
ただ、そんなことしなくてもKerasは構文がとてもシンプルですので、モデルのプログラム構造を直接みたほうが早いと思います。
なお、入力テンソルの形状を変更する場合は Keras —転移学習—入力テンソル形状の変更 のQAが参考になります。 INPUTサイズのみ異なる空のモデルを再定義して重みだけ再転送する方法が一番簡単そうです。
inputs = Input((None, None, 3))
.....
model = Model(inputs=[inputs], outputs=[outputs])
model.compile(optimizer='adam', loss='mean_squared_error')
model.load_weights('my_model_name.h5')

inputs2 = Input((512, 512, 3))
....
model2 = Model(inputs=[inputs2], outputs=[outputs])
model2.compile(optimizer='adam', loss='mean_squared_error')
model2.set_weights(model.get_weights())
4-2. 様々な量子化手順
このセクションでは早速様々なモデルを様々なパターンごとに量子化してみます。 あらゆるシチュエーションに手順を適合させるため、セクションごとに重複する内容が存在する点や、最短距離で量子化するのには本来不要な手順も含めている点をご容赦願います。
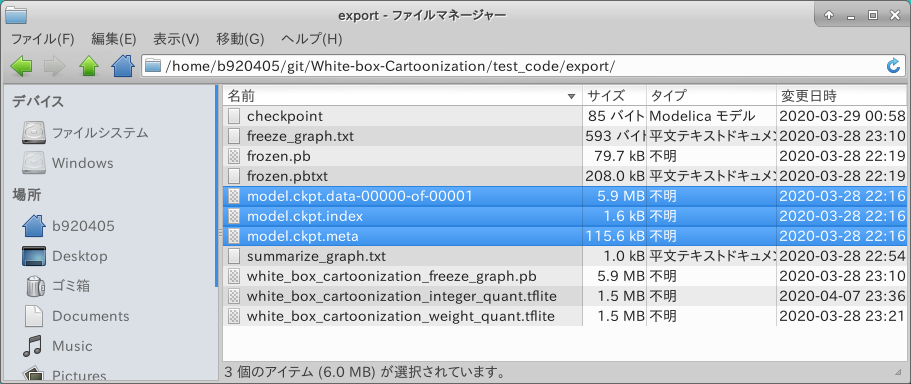
4-2-1. Tensorflow checkpoint (.ckpt) からの量子化
実写をアニメーション化するモデル White-box-Cartoonization を例に量子化します。 4-1-1. Tensorflow checkpoint の場合 に記載したとおり、このモデルのトレーニング済み checkpoint は .meta だけ存在しないという特殊な状態でリリースされています。 よくある普通の checkpoint は .index .data-00000-of-00001 .meta の3種類ですが、これはひとつだけファイルが不足しています。 この手順ではあえて .meta を生成する方法から説明しますが、 .meta が存在しないという特殊な状況下のみで実施する手順ですし、本来必要に迫られない限り不要な手順です。 あくまで一例としてとらえてください。 なお以下に説明する手順のうち、 4-2-1-2. checkpoint から Freeze_Graph を生成 はモデルの制約上 Tensorflow v1.15.2 で実施し、 4-2-1-3. Freeze_Graph から saved_model を生成 から 4-2-1-7. saved_model から Float16 Quantization (Float16量子化) は最新のオペレータへの対応とTensorflow本体のバグ回避のため、最新の Tensorflow v.2.2.x あるいは tf-nightly で実施します。
4-2-1-1. .index と .data-00000-of-00001 から .meta の生成
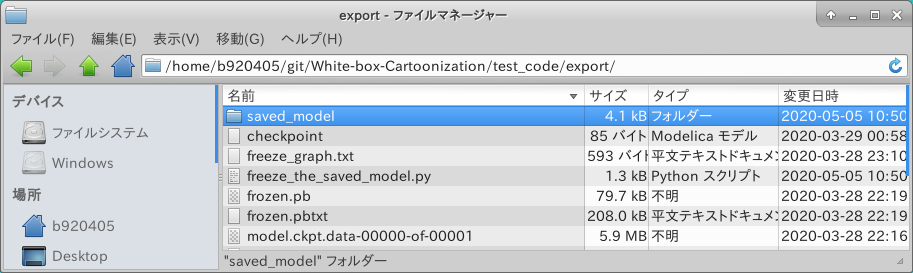
.index .data-00000-of-00001 .meta の3種類の checkpoint が提供されている場合は不要な手順です。ココでは .index と .data-00000-of-00001 から .meta を生成する方法を説明します。 White-box-Cartoonization のテスト用コードを極力流用して手を抜きます。 修正後のロジックの動きは下記のとおりです。
1. checkpoint 一時出力用のフォルダ export を生成する
2. モデルを構築する
3. INPUT/OUTPUTの名前や形状をデバッグプリントする
4. チェックポイントをリストアする
5. すぐに export フォルダへセーブする
def cartoonize(load_folder, save_folder, model_path):
    input_photo = tf.placeholder(tf.float32, [1, None, None, 3])
    network_out = network.unet_generator(input_photo)
    final_out = guided_filter.guided_filter(input_photo, network_out, r=1, eps=5e-3)


    all_vars = tf.trainable_variables()
    gene_vars = [var for var in all_vars if 'generator' in var.name]
    saver = tf.train.Saver(var_list=gene_vars)

    config = tf.ConfigProto()
    config.gpu_options.allow_growth = True
    sess = tf.Session(config=config)


    sess.run(tf.global_variables_initializer())
    saver.restore(sess, tf.train.latest_checkpoint(model_path))
def cartoonize(load_folder, save_folder, model_path):
    import sys
    import shutil
    shutil.rmtree('./export', ignore_errors=True)

    input_photo = tf.placeholder(tf.float32, [1, 720, 720, 3], name='input')
    network_out = network.unet_generator(input_photo)
    final_out = guided_filter.guided_filter(input_photo, network_out, r=1, eps=5e-3)
    print("input_photo.name =", input_photo.name)
    print("input_photo.shape =", input_photo.shape)
    print("final_out.name =", final_out.name)
    print("final_out.shape =", final_out.shape)
    all_vars = tf.trainable_variables()
    gene_vars = [var for var in all_vars if 'generator' in var.name]
    saver = tf.train.Saver(var_list=gene_vars)
    config = tf.ConfigProto()
    config.gpu_options.allow_growth = True
    sess = tf.Session(config=config)
    sess.run(tf.global_variables_initializer())
    saver.restore(sess, tf.train.latest_checkpoint(model_path))
    saver.save(sess, './export/model.ckpt')
    sys.exit(0)
実行してみます。
$ python3 cartoonize.py
無事に .index .data-00000-of-00001 .meta の3種類の checkpoint が生成されました。
- Go to Table of contents -
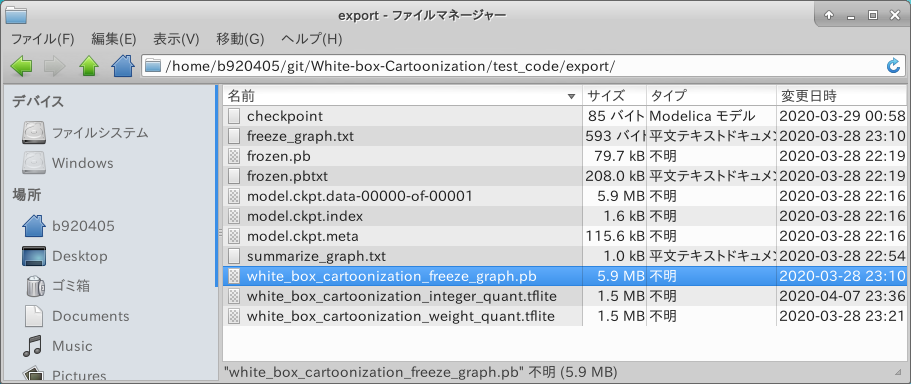
4-2-1-2. checkpoint (.meta) から Freeze_Graph を生成
今度は checkpoint から Freeze_Graph を生成してみます。 先程生成した .meta ファイルを取り込んで Freeze_Graph を生成してみましょう。 いちいち cartoonize メソッドを修正したサンプルを記載していますが、新規に足す部分だけを別の .py ファイルに切り出して実行しても問題ありません。
def cartoonize(load_folder, save_folder, model_path):
    import sys
    #import shutil
    #shutil.rmtree('./export', ignore_errors=True)

    #input_photo = tf.placeholder(tf.float32, [1, 720, 720, 3], name='input')
    #network_out = network.unet_generator(input_photo)
    #final_out = guided_filter.guided_filter(input_photo, network_out, r=1, eps=5e-3)
    #print("input_photo.name =", input_photo.name)
    #print("input_photo.shape =", input_photo.shape)
    #print("final_out.name =", final_out.name)
    #print("final_out.shape =", final_out.shape)
    #all_vars = tf.trainable_variables()
    #gene_vars = [var for var in all_vars if 'generator' in var.name]
    #saver = tf.train.Saver(var_list=gene_vars)
    #config = tf.ConfigProto()
    #config.gpu_options.allow_growth = True
    #sess = tf.Session(config=config)
    #sess.run(tf.global_variables_initializer())
    #saver.restore(sess, tf.train.latest_checkpoint(model_path))
    #saver.save(sess, './export/model.ckpt')
    #sys.exit(0)
    graph = tf.get_default_graph()
    sess = tf.Session()
    saver = tf.train.import_meta_graph('./export/model.ckpt.meta')
    saver.restore(sess, './export/model.ckpt')
    tf.train.write_graph(sess.graph_def, './export', 'white_box_cartoonization_freeze_graph.pbtxt', as_text=True)
    tf.train.write_graph(sess.graph_def, './export', 'white_box_cartoonization_freeze_graph.pb', as_text=False)
    sys.exit(0)
実行してみます。
$ python3 cartoonize.py
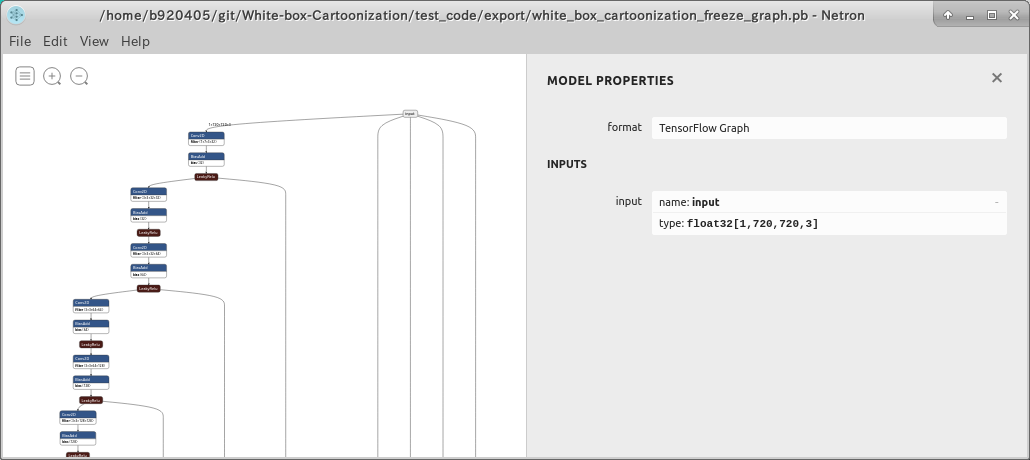
無事に white_box_cartoonization_freeze_graph.pb が生成されました。
Netron で構造を確認しても問題はなさそうです。
4-2-1-3. Freeze_Graph から saved_model を生成
Freeze_Graph から saved_model を生成します。 Tensorflow v1.x と Tensorflow v2.x のどちらでも動作するように記載します。 input_name= のところと outputs= のところは 4-1-1. Tensorflow checkpoint の場合 で特定した INPUT と OUTPUT の名前を指定します。 INPUTとOUTPUTの名前さえ特定できていて Freeze_Graph が手元に有る状態であれば、おそらくどのようなモデルにも利用可能です。
import tensorflow as tf
import os
import shutil
from tensorflow.python import ops

def get_graph_def_from_file(graph_filepath):
  tf.compat.v1.reset_default_graph()
  with ops.Graph().as_default():
    with tf.compat.v1.gfile.GFile(graph_filepath, 'rb') as f:
      graph_def = tf.compat.v1.GraphDef()
      graph_def.ParseFromString(f.read())
      return graph_def

def convert_graph_def_to_saved_model(export_dir, graph_filepath, input_name, outputs):
  graph_def = get_graph_def_from_file(graph_filepath)
  with tf.compat.v1.Session(graph=tf.Graph()) as session:
    tf.import_graph_def(graph_def, name='')
    tf.compat.v1.saved_model.simple_save(
        session,
        export_dir,# change input_image to node.name if you know the name
        inputs={input_name: session.graph.get_tensor_by_name('{}:0'.format(node.name))
            for node in graph_def.node if node.op=='Placeholder'},
        outputs={t.rstrip(":0"):session.graph.get_tensor_by_name(t) for t in outputs}
    )
    print('Graph converted to SavedModel!')

tf.compat.v1.enable_eager_execution()

input_name="input"
outputs = ['add_1:0']
shutil.rmtree('./saved_model', ignore_errors=True)
convert_graph_def_to_saved_model('./saved_model', './white_box_cartoonization_freeze_graph.pb', input_name, outputs)

"""
$ saved_model_cli show --dir saved_model --all

MetaGraphDef with tag-set: 'serve' contains the following SignatureDefs:

signature_def['serving_default']:
  The given SavedModel SignatureDef contains the following input(s):
    inputs['input'] tensor_info:
        dtype: DT_FLOAT
        shape: (1, 720, 720, 3)
        name: input:0
  The given SavedModel SignatureDef contains the following output(s):
    outputs['add_1'] tensor_info:
        dtype: DT_FLOAT
        shape: (1, 720, 720, 3)
        name: add_1:0
  Method name is: tensorflow/serving/predict
"""
実行してみます。
$ python3 freeze_the_saved_model.py
無事に生成されました。
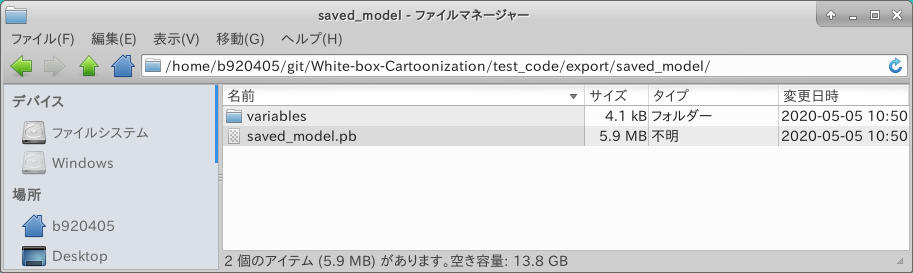
saved_model の構造を確認してみます。 うまくいったようですね。
$ saved_model_cli show --dir saved_model --all

MetaGraphDef with tag-set: 'serve' contains the following SignatureDefs:

signature_def['serving_default']:
  The given SavedModel SignatureDef contains the following input(s):
    inputs['input'] tensor_info:
        dtype: DT_FLOAT
        shape: (1, 720, 720, 3)
        name: input:0
  The given SavedModel SignatureDef contains the following output(s):
    outputs['add_1'] tensor_info:
        dtype: DT_FLOAT
        shape: (1, 720, 720, 3)
        name: add_1:0
  Method name is: tensorflow/serving/predict
4-2-1-4. saved_model から Weight Quantization (重みのみの量子化)
ようやく本題の量子化です。 saved_model から Weight Quantization を行い、Tensorflow Lite で動作可能な .tflite を生成するプログラムを作成します。
import tensorflow as tf

tf.compat.v1.enable_eager_execution()

# Weight Quantization - Input/Output=float32
converter = tf.lite.TFLiteConverter.from_saved_model('./saved_model')
converter.experimental_new_converter = True   #<--- Tensorflow v2.2.x以降を使用している場合は不要
converter.optimizations = [tf.lite.Optimize.OPTIMIZE_FOR_SIZE]
tflite_quant_model = converter.convert()
with open('./white_box_cartoonization_weight_quant.tflite', 'wb') as w:
    w.write(tflite_quant_model)
print("Weight Quantization complete! - white_box_cartoonization_weight_quant.tflite")
実行します。
$ python3 weight_quantization.py
無事生成されましたね。 ファイルサイズは元の Freeze_Graph の4分の1に縮小されています。 この時点で留意するべき点は、ファイルサイズがたとえ4分の1になったからといって推論パフォーマンスが4倍速になるわけではない、ということです。 重みの量子化は 単なるファイルサイズの圧縮 ほどの意味合いしかないということを理解する必要があります。 推論を実行する環境にも左右されますが、 一例として RaspberryPi4 のCPUで推論を行う際にパフォーマンスを向上したい場合は、次のセクションの 4-2-1-5. saved_model から Integer Quantization (8bit整数量子化) を実施する必要があります。

4-2-1-5. saved_model から Integer Quantization (8bit整数量子化)
saved_model から Integer Quantization を行い、Tensorflow Lite で動作可能な .tflite を生成するプログラムを作成します。 Integer Quantization を行う場合は、 Float32 の数値を UInt8 に変換する過程でキャリブレーション用の画像データを与える必要があります。 できることならトレーニング時に使用した画像を与えるのが望ましいですが、今回は手持ちで簡単に準備できるデータセットをそのまま使用しました。 tfds.load(...) と記載すると、 Googleがクラウド上の Tensorflow Datasets というところに学習用のデータセットを配備してくれていますので自動的にダンロードしてくれます。 ダウンロードは1回だけ実施すれば良く、2回目以降は download=True の部分を download=False と変更して実行することをおすすめします。 下記のサンプルロジックでは Pascal-VOC 2007 の画像データセットを自動的にダウンロードする設定にしてありますが、その他の画像データセットを使用したい場合は Tensorflow Datasets Catalog のページの左側のペインから色々と探してみてください。 大抵の画像データセットが揃っていますが、著作権やセンシティブな画像などの関係上、ものによっては手動でダウンロードしなければならないものも含まれます。 (例えば顔画像のデータセットなど) 各種量子化操作の中でも RaspberryPi4 のCPU単独で推論を実施した場合に最もパフォーマンスが発揮されるのはこの Integer Quantization です。 興味がある方はコチラの 3. TFLite Model Benchmark をご覧ください。 RaspberryPi4 に Ubuntu 19.10 を導入して Integer Quantization モデルを使用した場合のベンチマーク結果を記載しています。 また、こちらの Post-training quantization with TF2.0 Keras - nb.o’s Diary - Nextremer_nb_oさん のベンチマーク結果はとても参考になります。
とても重要なことですが、量子化に対応しているオペレーションの数が随時増え続けていますので、 Integer Quantization および後述の Full Integer Quantization の操作は最新のTensorflow (Tensorflow v2.2.x / tf-nightly) を使用して実施することをおすすめします。
representative_dataset_gen() の部分で実施している処理の流れは下記です。
1. Tensorflow Datasets で取得したデータをNumpy化
2. 画像サイズを INPUT のサイズ 720x720 にリサイズ
3. -1 から 1 の範囲に画像データを正規化
4. INPUTの形状 [1, 720, 720, 3] に合わせるため、[720, 720, 3] の画像データの先頭にバッチサイズ用の次元をひとつ追加
5. 画像を一枚戻す
import tensorflow as tf
import tensorflow_datasets as tfds
import numpy as np

def representative_dataset_gen():
  for data in raw_test_data.take(100):
    image = data['image'].numpy()
    image = tf.image.resize(image, (720, 720))
    image = image / 127.5 - 1
    image = image[np.newaxis,:,:,:]
    yield [image]

tf.compat.v1.enable_eager_execution()

raw_test_data, info = tfds.load(name="voc/2007",
                                 with_info=True,
                                 split="validation",
                                 data_dir="~/TFDS",
                                 download=True)

# Integer Quantization - Input/Output=float32
converter = tf.lite.TFLiteConverter.from_saved_model('./saved_model')
converter.experimental_new_converter = True   #<--- Tensorflow v2.2.x以降を使用している場合は不要
converter.optimizations = [tf.lite.Optimize.DEFAULT]
converter.target_spec.supported_ops = [tf.lite.OpsSet.TFLITE_BUILTINS,tf.lite.OpsSet.SELECT_TF_OPS]
converter.representative_dataset = representative_dataset_gen
tflite_quant_model = converter.convert()
with open('./white_box_cartoonization_integer_quant.tflite', 'wb') as w:
    w.write(tflite_quant_model)
print("Integer Quantization complete! - white_box_cartoonization_integer_quant.tflite")
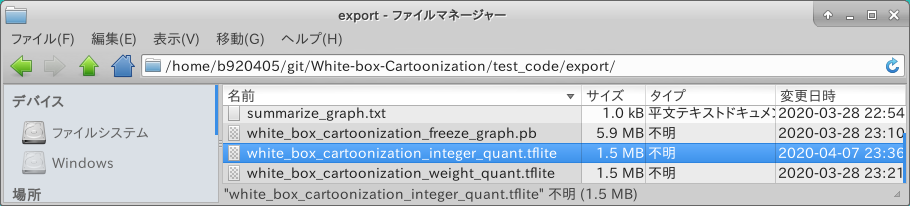
実行してみます。
$ python3 integer_quantization.py
無事に生成されましたね。
4-2-1-6. saved_model から Full Integer Quantization (全8bit整数量子化)
注意事項やロジックの構成は Integer Quantization とほぼ同じですので省略します。 では早速 Full Integer Quantization を実施するプログラムを記載します。 ※残念ながら2020年05月05日時点では White-box-Cartoonization のモデルに含まれる Div というオペレーションが Full Integer Quantization に対応していないため、下記のスクリプトを実行すると Abort します。 しかし、その他の Div を含まないモデルに関しては正常に動作しますので、その他のモデルへ流用する前提でロジックを記載しておきます。
なお、この Full Integer Quantization で生成した .tflite ファイルは、 EdgeTPU用のモデルを生成するときに必要となるファイルです。 RaspberryPi4 でCPU推論する場合のパフォーマンスは Integer Quantization モデルと全く同じです。
import tensorflow as tf
import tensorflow_datasets as tfds
import numpy as np

def representative_dataset_gen():
  for data in raw_test_data.take(100):
    image = data['image'].numpy()
    image = tf.image.resize(image, (720, 720))
    image = image / 127.5 - 1
    image = image[np.newaxis,:,:,:]
    yield [image]

tf.compat.v1.enable_eager_execution()

raw_test_data, info = tfds.load(name="voc/2007",
                                 with_info=True,
                                 split="validation",
                                 data_dir="~/TFDS",
                                 download=False)

# Integer Quantization - Input/Output=float32
converter = tf.lite.TFLiteConverter.from_saved_model('./saved_model')
converter.experimental_new_converter = True   #<--- Tensorflow v2.2.x以降を使用している場合は不要
converter.optimizations = [tf.lite.Optimize.DEFAULT]
converter.inference_input_type = tf.uint8
converter.inference_output_type = tf.uint8
converter.representative_dataset = representative_dataset_gen
tflite_quant_model = converter.convert()
with open('./white_box_cartoonization_full_integer_quant.tflite', 'wb') as w:
    w.write(tflite_quant_model)
print("Full Integer Quantization complete! - white_box_cartoonization_full_integer_quant.tflite")
4-2-1-7. saved_model から Float16 Quantization (Float16量子化)
GPUに最適化された Float16 演算に適した量子化モデルを生成します。 下記にプログラムを記載します。
import tensorflow as tf

tf.compat.v1.enable_eager_execution()

# Float16 Quantization - Input/Output=float32
converter = tf.lite.TFLiteConverter.from_saved_model('./saved_model')
converter.experimental_new_converter = True   #<--- Tensorflow v2.2.x以降を使用している場合は不要
converter.optimizations = [tf.lite.Optimize.DEFAULT]
converter.target_spec.supported_types = [tf.float16]
tflite_quant_model = converter.convert()
with open('./white_box_cartoonization_float16_quant.tflite', 'wb') as w:
    w.write(tflite_quant_model)
print("Float16 Quantization complete! - white_box_cartoonization_float16_quant.tflite")
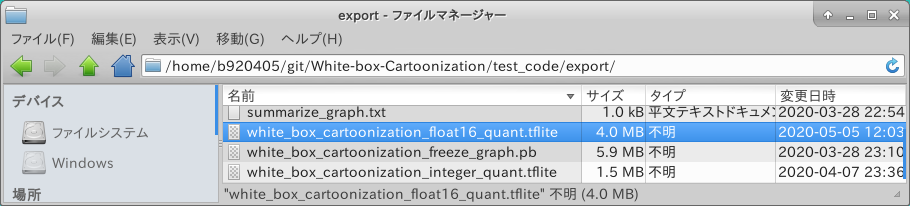
実行します。
$ python3 float16_quantization.py
無事に生成されたようですね。
4-2-1-8. Full Integer Quantization から EdgeTPU convert
Full Integer Quantization が成功していた場合に実施可能な手順です。 Google Coral EdgeTPU で使用するためのモデルコンパイルを実施します。 非対応のオペレーションが含まれていたり、 実装がうまくいっていないオペレーションがふくまれていたりすると Abort します。 私見ですがコンパイラはまだまだ不安定です。
EdgeTPU Compiler は こちらの Edge TPU Compiler に従って導入できます。
$ edgetpu_compiler -s white_box_cartoonization_full_integer_quant.tflite
ちなみに最新のコンパイラ 2.1.302470888 はマルチTPUでの効率的な推論に対応しているそうです。 現状は C++ のAPIしか提供されておらず、Python使いの私には荷が重いです。 3本も所有しているんですけど。。。
@iwatake2222 さんがこちらのリポジトリでいち早くPipeline処理を実装されています。

4-2-2. Tensorflow checkpoint (.meta) からの量子化
4-2-1-2. checkpoint (.meta) から Freeze_Graph を生成 から 4-2-1-8. Full Integer Quantization から EdgeTPU convert の手順と同じです。 モデルの特性に応じてキャリブレーションに使用する画像データセットを変更します。
4-2-3. Tensorflow Freeze_Graph (.pb) からの量子化
4-2-1-3. Freeze_Graph から saved_model を生成 から 4-2-1-8. Full Integer Quantization から EdgeTPU convert の手順と同じです。 モデルの特性に応じてキャリブレーションに使用する画像データセットを変更します。
4-2-4. Tensorflow saved_model (.pb) からの量子化
4-2-1-4. saved_model から Weight Quantization (重みのみの量子化) から 4-2-1-8. Full Integer Quantization から EdgeTPU convert の手順と同じです。 モデルの特性に応じてキャリブレーションに使用する画像データセットを変更します。
4-2-5. Tensorflow/Keras (.h5/.json) からの量子化
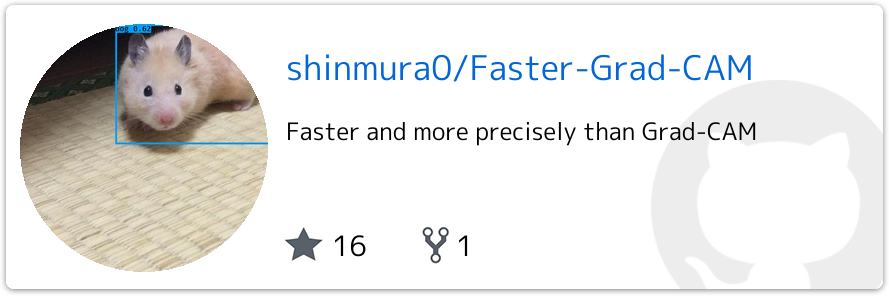
Keras の .h5 および .json 形式でモデルが提供されている場合はこちらのパターンになります。 今回は Faster-Grad-CAM を例にとって確認してみます。 Tensorflow v1.x および Tensorflow v2.1 までの古いTensorflowはKerasの量子化に OOMバグ (Out of Memory) があるようですので、 Tensorflow v2.2.0 あるいは tf-nightly を導入して作業することを推奨します。
ありがたいことに、キャリブレーションに必要な画像データセット以外の量子化に必要な素材が全てコミットされています。

不足しているキャリブレーション用データセットの生成にはこちらを活用させていただきます。

4-2-5-1. .h5/.json から Weight Quantization (重みのみの量子化)
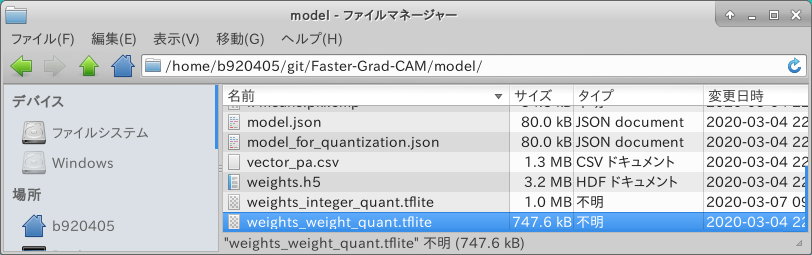
素材が揃っているためすぐに Weight Quantization を実施可能です。 まずはリポジトリをCloneします。
$ git clone https://github.com/shinmura0/Faster-Grad-CAM.git
$ cd Faster-Grad-CAM/model
Weight Quantization を実行するためのプログラムを記載します。 今までの Tensorflow checkpoint から量子化をするパターンと異なる部分は、 モデルと重みのロード部分とコンバート用メソッドの違いです。 TFLiteConverter には重みロード済みのモデルオブジェクトをそのまま渡すことができるようになっています。
1. model = tf.keras.models.model_from_json(open('model.json').read())
2. model.load_weights('weights.h5')
3. tf.lite.TFLiteConverter.from_keras_model(model)
import tensorflow as tf
tf.compat.v1.enable_eager_execution()
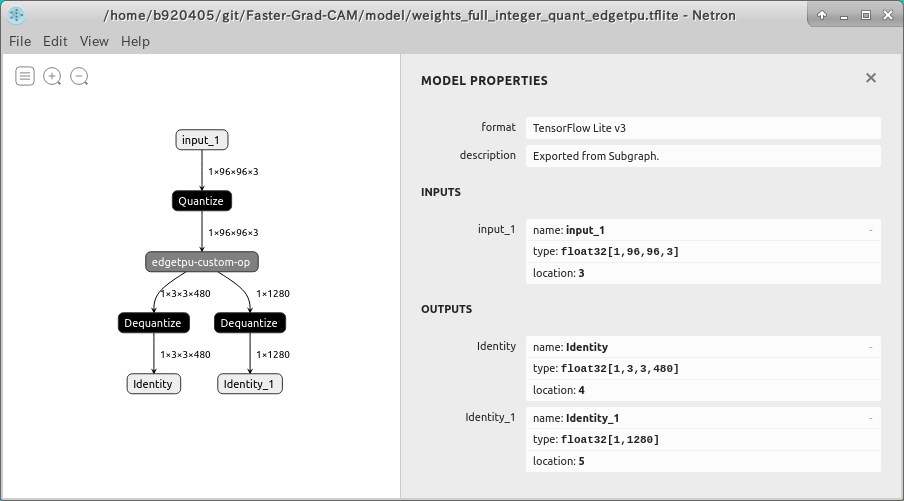
# Weight Quantization - Input/Output=float32
# INPUT = input_1 (float32, 1 x 96 x 96 x 3)
# OUTPUT = block_16_expand_relu, global_average_pooling2d_1
model = tf.keras.models.model_from_json(open('model.json').read())
model.load_weights('weights.h5')
converter = tf.lite.TFLiteConverter.from_keras_model(model)
converter.experimental_new_converter = True #<--- Tensorflow v2.2.x以降を使用している場合は不要
converter.optimizations = [tf.lite.Optimize.OPTIMIZE_FOR_SIZE]
tflite_quant_model = converter.convert()
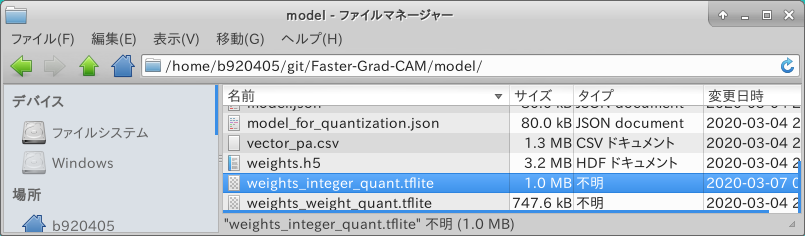
with open('./weights_weight_quant.tflite', 'wb') as w:
w.write(tflite_quant_model)
print("Weight Quantization complete! - weights_weight_quant.tflite")
実行してみます。
$ python3 weight_quantization.py
無事に生成されたようですね。
- Go to Table of contents -
4-2-5-2. キャリブレーション用データセットの生成
キャリブレーション用のデータセット画像を @karaage0703 さんのリポジトリからCloneします。 Faster-Grad-CAM のトレーニング済みモデルはこの gu データセットでトレーニングされています。 バラバラの画像を取り回しするのは面倒ですので、後続の手順で1つのファイルにパッキングします。
$ wget https://github.com/karaage0703/janken_dataset.git
$ cd gu
Numpyのバイナリ形式のファイルへパッキングするプログラムを記載します。
from PIL import Image
import os, glob
import numpy as np
dataset = []
files = glob.glob("*.JPG")
for file in files:
image = Image.open(file)
image = image.convert("RGB")
data = np.asarray(image)
dataset.append(data)
dataset = np.array(dataset)
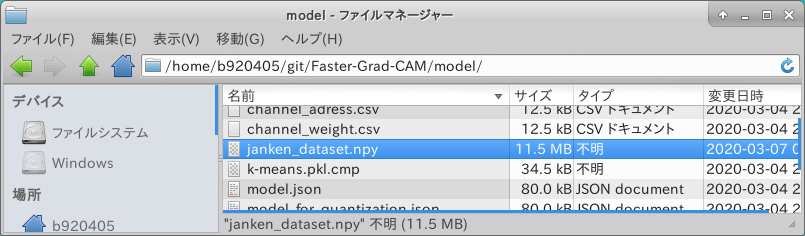
np.save("janken_dataset", dataset)
では、実行してみます。
$ python3 image_to_npy.py
無事に生成されたようです。
- Go to Table of contents -
4-2-5-3. .h5/.json から Integer Quantization (8bit整数量子化)
若干扱うメソッドが異なりますが Integer Quantization を行う方法も前述の方法とほぼ同じです。
import tensorflow as tf
import numpy as np

def representative_dataset_gen():
    raw_test_data = np.load('janken_dataset.npy')
    for image in raw_test_data:
        image = tf.image.resize(image, (96, 96))
        image = image / 255
        calibration_data = image[np.newaxis, :, :, :]
        yield [calibration_data]

tf.compat.v1.enable_eager_execution()

# Integer Quantization - Input/Output=float32
# INPUT  = input_1 (float32, 1 x 96 x 96 x 3)
# OUTPUT = block_16_expand_relu, global_average_pooling2d_1
model = tf.keras.models.model_from_json(open('model.json').read())
model.load_weights('weights.h5')
converter = tf.lite.TFLiteConverter.from_keras_model(model)
converter.experimental_new_converter = True   #<--- Tensorflow v2.2.x以降を使用している場合は不要
converter.optimizations = [tf.lite.Optimize.DEFAULT]
converter.representative_dataset = representative_dataset_gen
tflite_quant_model = converter.convert()
with open('./weights_integer_quant.tflite', 'wb') as w:
    w.write(tflite_quant_model)
print("Integer Quantization complete! - weights_integer_quant.tflite")
実行してみます。
$ python3 integer_quantization.py
無事に生成されたようです。
- Go to Table of contents -
4-2-5-4. .h5/.json から Full Integer Quantization (全8bit整数量子化)
Full Integer Quantization を行うプログラムを記載します。
import tensorflow as tf
import numpy as np
def representative_dataset_gen():
raw_test_data = np.load('janken_dataset.npy')
for image in raw_test_data:
image = tf.image.resize(image, (96, 96))
image = image / 255
calibration_data = image[np.newaxis, :, :, :]
yield [calibration_data]
tf.compat.v1.enable_eager_execution()
# Integer Quantization - Input/Output=float32
# INPUT = input_1 (float32, 1 x 96 x 96 x 3)
# OUTPUT = block_16_expand_relu, global_average_pooling2d_1
model = tf.keras.models.model_from_json(open('model.json').read())
model.load_weights('weights.h5')
converter = tf.lite.TFLiteConverter.from_keras_model(model)
converter.experimental_new_converter = True #<--- Tensorflow v2.2.x以降を使用している場合は不要
converter.optimizations = [tf.lite.Optimize.DEFAULT]
converter.inference_input_type = tf.uint8
converter.inference_output_type = tf.uint8
converter.representative_dataset = representative_dataset_gen
tflite_quant_model = converter.convert()
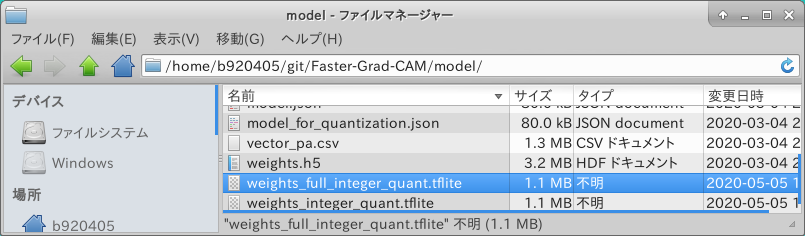
with open('./weights_full_integer_quant.tflite', 'wb') as w:
w.write(tflite_quant_model)
print("Full Integer Quantization complete! - weights_full_integer_quant.tflite")
実行してみます。
$ python3 full_integer_quantization.py
無事に生成されたようです。
- Go to Table of contents -
4-2-5-5. .h5/.json から Float16 Quantization (Float16量子化)
Float16 Quantization を行うプログラムを記載します。
import tensorflow as tf
tf.compat.v1.enable_eager_execution()
# Weight Quantization - Input/Output=float32
# INPUT = input_1 (float32, 1 x 96 x 96 x 3)
# OUTPUT = block_16_expand_relu, global_average_pooling2d_1
model = tf.keras.models.model_from_json(open('model.json').read())
model.load_weights('weights.h5')
converter = tf.lite.TFLiteConverter.from_keras_model(model)
converter.experimental_new_converter = True #<--- Tensorflow v2.2.x以降を使用している場合は不要
converter.optimizations = [tf.lite.Optimize.DEFAULT]
converter.target_spec.supported_types = [tf.float16]
tflite_quant_model = converter.convert()
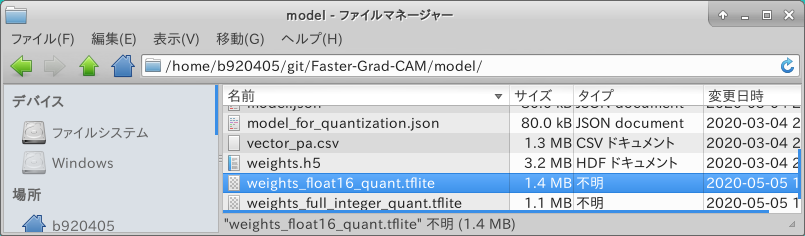
with open('./weights_float16_quant.tflite', 'wb') as w:
w.write(tflite_quant_model)
print("Float16 Quantization complete! - weights_float16_quant.tflite")
実行してみます。
$ python3 float16_quantization.py
無事に生成されたようですね。
- Go to Table of contents -
4-2-5-6. Full Integer Quantization から EdgeTPU convert
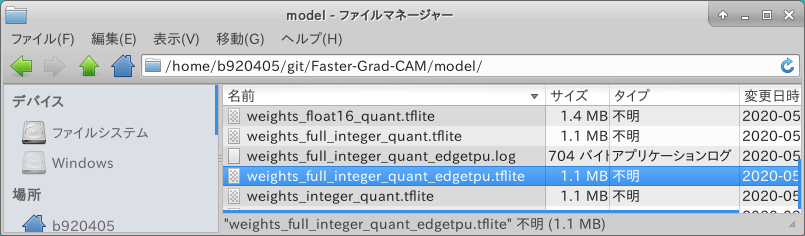
Full Integer Quantization を行ったモデルを使用して EdgeTPU対応モデル を生成します。
$ edgetpu_compiler -s weights_full_integer_quant.tflite
Edge TPU Compiler version 2.1.302470888

Model compiled successfully in 359 ms.

Input model: weights_full_integer_quant.tflite
Input size: 1.00MiB
Output model: weights_full_integer_quant_edgetpu.tflite
Output size: 1.06MiB
On-chip memory used for caching model parameters: 1014.00KiB
On-chip memory remaining for caching model parameters: 6.78MiB
Off-chip memory used for streaming uncached model parameters: 0.00B
Number of Edge TPU subgraphs: 1
Total number of operations: 71
Operation log: weights_full_integer_quant_edgetpu.log

Model successfully compiled but not all operations are supported by the Edge TPU. A percentage of the model will instead run on the CPU, which is slower. If possible, consider updating your model to use only operations supported by the Edge TPU. For details, visit g.co/coral/model-reqs.
Number of operations that will run on Edge TPU: 68
Number of operations that will run on CPU: 3

Operator                       Count      Status

DEPTHWISE_CONV_2D              17         Mapped to Edge TPU
DEQUANTIZE                     2          Operation is working on an unsupported data type
MEAN                           1          Mapped to Edge TPU
ADD                            10         Mapped to Edge TPU
QUANTIZE                       1          Operation is otherwise supported, but not mapped due to some unspecified limitation
PAD                            5          Mapped to Edge TPU
CONV_2D                        35         Mapped to Edge TPU
無事に生成されたようですね。
- Go to Table of contents -
4-2-6. Tensorflow.js 用モデルからの量子化
今度は一段難易度の高いタスクにチャレンジします。 最近Googleからリリースされた Tensorflow.js用の Posenet V2 ResNet50 の量子化を行います。 そもそも checkpoint とトレーニング用のコードが公開されていませんのでトリッキーな作業が必要です。 こちらのリポジトリを元に確認します。 Tensoflow v2.1.0 と Tensorflow v1.15.2 を切り替えながら作業を行う必要があります。 手間なのが嫌な方は PINTO_model_zoo へ全パターン変換済みの量子化モデルをコミット済みですでのそちらをご利用ください。


- Go to Table of contents -
4-2-6-1. 事前準備
$ sudo pip3 uninstall tensorboard-plugin-wit tb-nightly tensorboard \
                      tf-estimator-nightly tensorflow-gpu \
                      tensorflow tf-nightly tensorflow_estimator
$ sudo pip3 install tensorflow==2.1.0
$ git clone https://github.com/patlevin/tfjs-to-tf.git
$ cd tfjs-to-tf
$ sudo pip3 install . --no-deps
$ cd ..
$ git clone https://github.com/atomicbits/posenet-python.git
$ cd posenet-python
$ mkdir -p output
4-2-6-2. Tensorflow.js から saved_model の生成
下記のコマンドにより saved_model を生成します。 stride の指定により、精度と速度のバランスを調整したモデルを生成可能です。 また --image_dir の引数に指定するフォルダパスにあらかじめサンプル画像を1枚以上保存しておく必要があります。 では実行してみます。
$ python3 image_demo.py \
    --model resnet50 \
    --stride 16 \
    --image_dir ./images \
    --output_dir ./output
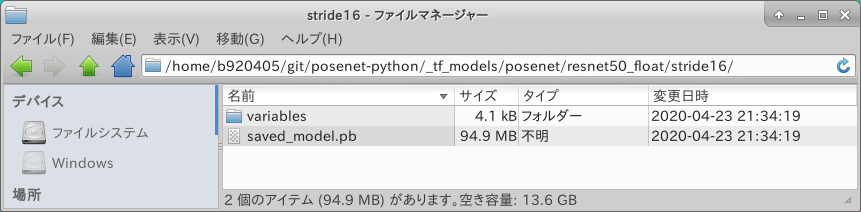
output stride を 16 に指定して実行しましたので、 _tf_models/posenet/resnet50_float/stride16/ の配下に saved_model が生成されました。
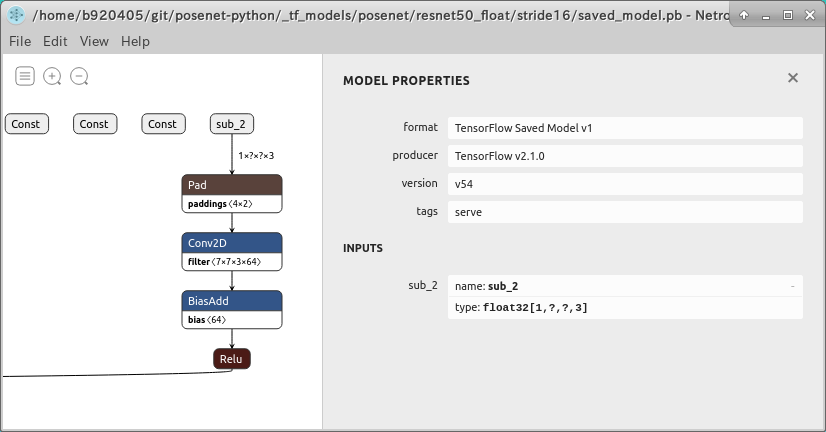
Netron で構造を確認してみます。 INPUTが sub_2 であることはわかったのですが、 形状が Float32 [1, ?, ?, 3] になっています。 このままでは量子化に失敗します。 ここからもう一段手を加えます。
※実は _tfjs_models/posenet/resnet50_float/stride16/model-stride16.json の中身の sub_2 のINPUT形状を手で修正して再コンバートするだけでINPUT形状の固定化は終わるのですが、 Tensorflow v2版 saved_model を Tensorflow v1.x で取り込んで加工するための特殊処理を説明するためだけに敢えて遠回りの説明をします。

- Go to Table of contents -
4-2-6-3. Tensorflow v2.x で生成した saved_model を Tensorflow v1.x へ取り込んで入力形状を加工
先ほど生成した saved_model を Tensorflow v1.15.2 へ取り込んで入力形状を加工します。 Tensorflow v1.15.2 を使用する理由は TransformGraph ツールを使用したいだけです。
$ sudo pip3 uninstall tensorboard-plugin-wit tb-nightly tensorboard \
                      tf-estimator-nightly tensorflow-gpu \
                      tensorflow tf-nightly tensorflow_estimator
$ sudo pip3 install tensorflow==1.15.2
saved_model の入力形状を変更するプログラムを記載します。 sub_2 という名前を image という名前に置き換えつつ入力形状を [1, ?, ?, 3] から [1, 513, 513, 3] に変換するサンプルです。 もう少し小さい入力形状に変更したい場合は 513 の部分を 257 のように変更する必要があります。 なお、今までご紹介したプログラムと若干異なる部分は、 Tensorflow v2.x で生成した saved_model を Tensorflow v1.x で取り込むために、 .pb ファイルを読み込むためのロジック部分を若干変更しているところです。
### tensorflow-gpu==1.15.2

import sys
import tensorflow as tf
from tensorflow.tools.graph_transforms import TransformGraph
from tensorflow.python.platform import gfile
from tensorflow.core.protobuf import saved_model_pb2
from tensorflow.python.util import compat

with tf.compat.v1.Session() as sess:

    # shape=[1, ?, ?, 3] -> shape=[1, 513, 513, 3]
    # name='image' specifies the placeholder name of the converted model

    inputs = tf.compat.v1.placeholder(tf.float32, shape=[1, 513, 513, 3], name='image')
    #inputs = tf.compat.v1.placeholder(tf.float32, shape=[1, 385, 385, 3], name='image')
    #inputs = tf.compat.v1.placeholder(tf.float32, shape=[1, 321, 321, 3], name='image')
    #inputs = tf.compat.v1.placeholder(tf.float32, shape=[1, 257, 257, 3], name='image')
    #inputs = tf.compat.v1.placeholder(tf.float32, shape=[1, 225, 225, 3], name='image')

    with gfile.FastGFile('_tf_models/posenet/resnet50_float/stride32/saved_model.pb', 'rb') as f:
        data = compat.as_bytes(f.read())
        sm = saved_model_pb2.SavedModel()
        sm.ParseFromString(data)
        if 1 != len(sm.meta_graphs):
            print('More than one graph found. Not sure which to write')
            sys.exit(1)

    # 'image:0' specifies the placeholder name of the model before conversion
    tf.graph_util.import_graph_def(sm.meta_graphs[0].graph_def, input_map={'sub_2:0': inputs}, name='')
    print([n for n in tf.compat.v1.get_default_graph().as_graph_def().node if n.name == 'image'])

    # Delete Placeholder "image" before conversion
    # see: https://github.com/tensorflow/tensorflow/tree/master/tensorflow/tools/graph_transforms
    # TransformGraph(
    #     graph_def(),
    #     input_name,
    #     output_names,
    #     conversion options
    # )
    optimized_graph_def = TransformGraph(
                              tf.compat.v1.get_default_graph().as_graph_def(),
                              'image',
                              ['float_heatmaps','float_short_offsets','resnet_v1_50/displacement_fwd_2/BiasAdd','resnet_v1_50/displacement_bwd_2/BiasAdd'],
                              ['strip_unused_nodes(type=float, shape="1,513,513,3")'])

    tf.io.write_graph(optimized_graph_def, './', 'posenet_resnet50_32_513.pb', as_text=False)
    with gfile.FastGFile('_tf_models/posenet/resnet50_float/stride32/saved_model.pb', 'rb') as f:
        data = compat.as_bytes(f.read())
        sm = saved_model_pb2.SavedModel()
        sm.ParseFromString(data)
        if 1 != len(sm.meta_graphs):
            print('More than one graph found. Not sure which to write')
            sys.exit(1)
では実行してみます。
$ python3 replacement_of_input_placeholder_float32_resnet.py
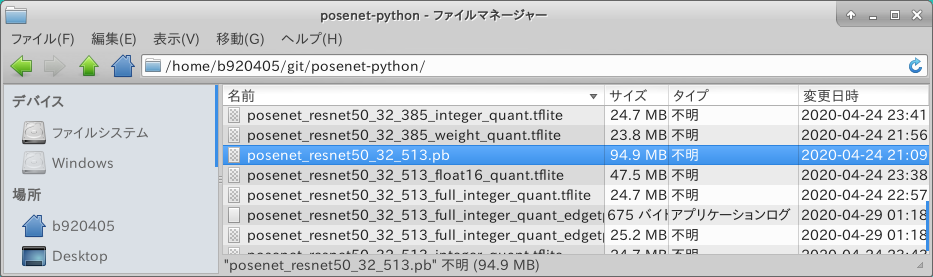
無事に生成されたようですね。
- Go to Table of contents -
4-2-6-4. Tensorflow v2.2.0 のインストール
量子化前に Tensorflow v1.15.2 を Tensorflow v2.2.0 へ変更します。
$ sudo pip3 uninstall tensorboard-plugin-wit tb-nightly tensorboard \
                      tf-estimator-nightly tensorflow-gpu \
                      tensorflow tf-nightly tensorflow_estimator
$ sudo pip3 install tensorflow==2.2.0
4-2-6-5. saved_model から Weight Quantization (重みのみの量子化)
ココから先の量子化手順は今までの手順と同じです。 下記に量子化のプログラムを記載します。
### tensorflow==2.2.0

import tensorflow as tf
import numpy as np

# Weight Quantization - Input/Output=float32
converter = tf.lite.TFLiteConverter.from_saved_model('saved_model_posenet_resnet50_16_225')
converter.optimizations = [tf.lite.Optimize.OPTIMIZE_FOR_SIZE]
tflite_quant_model = converter.convert()
with open('posenet_resnet50_16_225_weight_quant.tflite', 'wb') as w:
    w.write(tflite_quant_model)
print("Weight Quantization complete! - posenet_resnet50_16_225_weight_quant.tflite")

# Weight Quantization - Input/Output=float32
converter = tf.lite.TFLiteConverter.from_saved_model('saved_model_posenet_resnet50_16_257')
converter.optimizations = [tf.lite.Optimize.OPTIMIZE_FOR_SIZE]
tflite_quant_model = converter.convert()
with open('posenet_resnet50_16_257_weight_quant.tflite', 'wb') as w:
    w.write(tflite_quant_model)
print("Weight Quantization complete! - posenet_resnet50_16_257_weight_quant.tflite")

# Weight Quantization - Input/Output=float32
converter = tf.lite.TFLiteConverter.from_saved_model('saved_model_posenet_resnet50_16_321')
converter.optimizations = [tf.lite.Optimize.OPTIMIZE_FOR_SIZE]
tflite_quant_model = converter.convert()
with open('posenet_resnet50_16_321_weight_quant.tflite', 'wb') as w:
    w.write(tflite_quant_model)
print("Weight Quantization complete! - posenet_resnet50_16_321_weight_quant.tflite")

# Weight Quantization - Input/Output=float32
converter = tf.lite.TFLiteConverter.from_saved_model('saved_model_posenet_resnet50_16_385')
converter.optimizations = [tf.lite.Optimize.OPTIMIZE_FOR_SIZE]
tflite_quant_model = converter.convert()
with open('posenet_resnet50_16_385_weight_quant.tflite', 'wb') as w:
    w.write(tflite_quant_model)
print("Weight Quantization complete! - posenet_resnet50_16_385_weight_quant.tflite")

# Weight Quantization - Input/Output=float32
converter = tf.lite.TFLiteConverter.from_saved_model('saved_model_posenet_resnet50_16_513')
converter.optimizations = [tf.lite.Optimize.OPTIMIZE_FOR_SIZE]
tflite_quant_model = converter.convert()
with open('posenet_resnet50_16_513_weight_quant.tflite', 'wb') as w:
    w.write(tflite_quant_model)
print("Weight Quantization complete! - posenet_resnet50_16_513_weight_quant.tflite")


# Weight Quantization - Input/Output=float32
converter = tf.lite.TFLiteConverter.from_saved_model('saved_model_posenet_resnet50_32_225')
converter.optimizations = [tf.lite.Optimize.OPTIMIZE_FOR_SIZE]
tflite_quant_model = converter.convert()
with open('posenet_resnet50_32_225_weight_quant.tflite', 'wb') as w:
    w.write(tflite_quant_model)
print("Weight Quantization complete! - posenet_resnet50_32_225_weight_quant.tflite")

# Weight Quantization - Input/Output=float32
converter = tf.lite.TFLiteConverter.from_saved_model('saved_model_posenet_resnet50_32_257')
converter.optimizations = [tf.lite.Optimize.OPTIMIZE_FOR_SIZE]
tflite_quant_model = converter.convert()
with open('posenet_resnet50_32_257_weight_quant.tflite', 'wb') as w:
    w.write(tflite_quant_model)
print("Weight Quantization complete! - posenet_resnet50_32_257_weight_quant.tflite")

# Weight Quantization - Input/Output=float32
converter = tf.lite.TFLiteConverter.from_saved_model('saved_model_posenet_resnet50_32_321')
converter.optimizations = [tf.lite.Optimize.OPTIMIZE_FOR_SIZE]
tflite_quant_model = converter.convert()
with open('posenet_resnet50_32_321_weight_quant.tflite', 'wb') as w:
    w.write(tflite_quant_model)
print("Weight Quantization complete! - posenet_resnet50_32_321_weight_quant.tflite")

# Weight Quantization - Input/Output=float32
converter = tf.lite.TFLiteConverter.from_saved_model('saved_model_posenet_resnet50_32_385')
converter.optimizations = [tf.lite.Optimize.OPTIMIZE_FOR_SIZE]
tflite_quant_model = converter.convert()
with open('posenet_resnet50_32_385_weight_quant.tflite', 'wb') as w:
    w.write(tflite_quant_model)
print("Weight Quantization complete! - posenet_resnet50_32_385_weight_quant.tflite")

# Weight Quantization - Input/Output=float32
converter = tf.lite.TFLiteConverter.from_saved_model('saved_model_posenet_resnet50_32_513')
converter.optimizations = [tf.lite.Optimize.OPTIMIZE_FOR_SIZE]
tflite_quant_model = converter.convert()
with open('posenet_resnet50_32_513_weight_quant.tflite', 'wb') as w:
    w.write(tflite_quant_model)
print("Weight Quantization complete! - posenet_resnet50_32_513_weight_quant.tflite")
4-2-6-6. saved_model から Integer Quantization (8bit整数量子化)
Integer Quantization の方法も今までと同じです。 キャリブレーション用データセットに使用した画像は人だけが写った画像100枚です。
import tensorflow as tf
import tensorflow_datasets as tfds
import numpy as np
from PIL import Image
import os
import glob

## Generating a calibration data set
def representative_dataset_gen():
    folder = ["images"]
    image_size = 225
    raw_test_data = []
    for name in folder:
        dir = "./" + name
        files = glob.glob(dir + "/*.jpg")
        for file in files:
            image = Image.open(file)
            image = image.convert("RGB")
            image = image.resize((image_size, image_size))
            image = np.asarray(image).astype(np.float32)
            image = image[np.newaxis,:,:,:]
            raw_test_data.append(image)

    for data in raw_test_data:
        yield [data]

# Integer Quantization - Input/Output=float32
converter = tf.lite.TFLiteConverter.from_saved_model('saved_model_posenet_resnet50_16_225')
converter.optimizations = [tf.lite.Optimize.DEFAULT]
converter.representative_dataset = representative_dataset_gen
tflite_quant_model = converter.convert()
with open('posenet_resnet50_16_225_integer_quant.tflite', 'wb') as w:
    w.write(tflite_quant_model)
print("Integer Quantization complete! - posenet_resnet50_16_225_integer_quant.tflite")

# # Integer Quantization - Input/Output=float32
# converter = tf.lite.TFLiteConverter.from_saved_model('saved_model_posenet_resnet50_16_257')
# converter.optimizations = [tf.lite.Optimize.DEFAULT]
# converter.representative_dataset = representative_dataset_gen
# tflite_quant_model = converter.convert()
# with open('posenet_resnet50_16_257_integer_quant.tflite', 'wb') as w:
#     w.write(tflite_quant_model)
# print("Integer Quantization complete! - posenet_resnet50_16_257_integer_quant.tflite")

# # Integer Quantization - Input/Output=float32
# converter = tf.lite.TFLiteConverter.from_saved_model('saved_model_posenet_resnet50_16_321')
# converter.optimizations = [tf.lite.Optimize.DEFAULT]
# converter.representative_dataset = representative_dataset_gen
# tflite_quant_model = converter.convert()
# with open('posenet_resnet50_16_321_integer_quant.tflite', 'wb') as w:
#     w.write(tflite_quant_model)
# print("Integer Quantization complete! - posenet_resnet50_16_321_integer_quant.tflite")

# # Integer Quantization - Input/Output=float32
# converter = tf.lite.TFLiteConverter.from_saved_model('saved_model_posenet_resnet50_16_385')
# converter.optimizations = [tf.lite.Optimize.DEFAULT]
# converter.representative_dataset = representative_dataset_gen
# tflite_quant_model = converter.convert()
# with open('posenet_resnet50_16_385_integer_quant.tflite', 'wb') as w:
#     w.write(tflite_quant_model)
# print("Integer Quantization complete! - posenet_resnet50_16_385_integer_quant.tflite")

# # Integer Quantization - Input/Output=float32
# converter = tf.lite.TFLiteConverter.from_saved_model('saved_model_posenet_resnet50_16_513')
# converter.optimizations = [tf.lite.Optimize.DEFAULT]
# converter.representative_dataset = representative_dataset_gen
# tflite_quant_model = converter.convert()
# with open('posenet_resnet50_16_513_integer_quant.tflite', 'wb') as w:
#     w.write(tflite_quant_model)
# print("Integer Quantization complete! - posenet_resnet50_16_513_integer_quant.tflite")


# Integer Quantization - Input/Output=float32
converter = tf.lite.TFLiteConverter.from_saved_model('saved_model_posenet_resnet50_32_225')
converter.optimizations = [tf.lite.Optimize.DEFAULT]
converter.representative_dataset = representative_dataset_gen
tflite_quant_model = converter.convert()
with open('posenet_resnet50_32_225_integer_quant.tflite', 'wb') as w:
    w.write(tflite_quant_model)
print("Integer Quantization complete! - posenet_resnet50_32_225_integer_quant.tflite")

# # Integer Quantization - Input/Output=float32
# converter = tf.lite.TFLiteConverter.from_saved_model('saved_model_posenet_resnet50_32_257')
# converter.optimizations = [tf.lite.Optimize.DEFAULT]
# converter.representative_dataset = representative_dataset_gen
# tflite_quant_model = converter.convert()
# with open('posenet_resnet50_32_257_integer_quant.tflite', 'wb') as w:
#     w.write(tflite_quant_model)
# print("Integer Quantization complete! - posenet_resnet50_32_257_integer_quant.tflite")

# # Integer Quantization - Input/Output=float32
# converter = tf.lite.TFLiteConverter.from_saved_model('saved_model_posenet_resnet50_32_321')
# converter.optimizations = [tf.lite.Optimize.DEFAULT]
# converter.representative_dataset = representative_dataset_gen
# tflite_quant_model = converter.convert()
# with open('posenet_resnet50_32_321_integer_quant.tflite', 'wb') as w:
#     w.write(tflite_quant_model)
# print("Integer Quantization complete! - posenet_resnet50_32_321_integer_quant.tflite")

# # Integer Quantization - Input/Output=float32
# converter = tf.lite.TFLiteConverter.from_saved_model('saved_model_posenet_resnet50_32_385')
# converter.optimizations = [tf.lite.Optimize.DEFAULT]
# converter.representative_dataset = representative_dataset_gen
# tflite_quant_model = converter.convert()
# with open('posenet_resnet50_32_385_integer_quant.tflite', 'wb') as w:
#     w.write(tflite_quant_model)
# print("Integer Quantization complete! - posenet_resnet50_32_385_integer_quant.tflite")

# # Integer Quantization - Input/Output=float32
# converter = tf.lite.TFLiteConverter.from_saved_model('saved_model_posenet_resnet50_32_513')
# converter.optimizations = [tf.lite.Optimize.DEFAULT]
# converter.representative_dataset = representative_dataset_gen
# tflite_quant_model = converter.convert()
# with open('posenet_resnet50_32_513_integer_quant.tflite', 'wb') as w:
#     w.write(tflite_quant_model)
# print("Integer Quantization complete! - posenet_resnet50_32_513_integer_quant.tflite")
4-2-6-7. saved_model から Full Integer Quantization (全8bit整数量子化)
Full Integer Quantization の方法も今までと同じです。 キャリブレーション用データセットに使用した画像は人だけが写った画像100枚です。
import tensorflow as tf
import tensorflow_datasets as tfds
import numpy as np
from PIL import Image
import os
import glob

## Generating a calibration data set
def representative_dataset_gen():
    folder = ["images"]
    image_size = 225
    raw_test_data = []
    for name in folder:
        dir = "./" + name
        files = glob.glob(dir + "/*.jpg")
        for file in files:
            image = Image.open(file)
            image = image.convert("RGB")
            image = image.resize((image_size, image_size))
            image = np.asarray(image).astype(np.float32)
            image = image[np.newaxis,:,:,:]
            raw_test_data.append(image)

    for data in raw_test_data:
        yield [data]

# Integer Quantization - Input/Output=uint8
converter = tf.lite.TFLiteConverter.from_saved_model('saved_model_posenet_resnet50_16_225')
converter.optimizations = [tf.lite.Optimize.DEFAULT]
converter.representative_dataset = representative_dataset_gen
converter.target_spec.supported_ops = [tf.lite.OpsSet.TFLITE_BUILTINS_INT8]
converter.inference_input_type = tf.uint8
converter.inference_output_type = tf.uint8
tflite_quant_model = converter.convert()
with open('posenet_resnet50_16_225_full_integer_quant.tflite', 'wb') as w:
    w.write(tflite_quant_model)
print("Integer Quantization complete! - posenet_resnet50_16_225_full_integer_quant.tflite")

# # Integer Quantization - Input/Output=uint8
# converter = tf.lite.TFLiteConverter.from_saved_model('saved_model_posenet_resnet50_16_257')
# converter.optimizations = [tf.lite.Optimize.DEFAULT]
# converter.representative_dataset = representative_dataset_gen
# converter.target_spec.supported_ops = [tf.lite.OpsSet.TFLITE_BUILTINS_INT8]
# converter.inference_input_type = tf.uint8
# converter.inference_output_type = tf.uint8
# tflite_quant_model = converter.convert()
# with open('posenet_resnet50_16_257_full_integer_quant.tflite', 'wb') as w:
#     w.write(tflite_quant_model)
# print("Integer Quantization complete! - posenet_resnet50_16_257_full_integer_quant.tflite")

# # Integer Quantization - Input/Output=uint8
# converter = tf.lite.TFLiteConverter.from_saved_model('saved_model_posenet_resnet50_16_321')
# converter.optimizations = [tf.lite.Optimize.DEFAULT]
# converter.representative_dataset = representative_dataset_gen
# converter.target_spec.supported_ops = [tf.lite.OpsSet.TFLITE_BUILTINS_INT8]
# converter.inference_input_type = tf.uint8
# converter.inference_output_type = tf.uint8
# tflite_quant_model = converter.convert()
# with open('posenet_resnet50_16_321_full_integer_quant.tflite', 'wb') as w:
#     w.write(tflite_quant_model)
# print("Integer Quantization complete! - posenet_resnet50_16_321_full_integer_quant.tflite")

# # Integer Quantization - Input/Output=uint8
# converter = tf.lite.TFLiteConverter.from_saved_model('saved_model_posenet_resnet50_16_385')
# converter.optimizations = [tf.lite.Optimize.DEFAULT]
# converter.representative_dataset = representative_dataset_gen
# converter.target_spec.supported_ops = [tf.lite.OpsSet.TFLITE_BUILTINS_INT8]
# converter.inference_input_type = tf.uint8
# converter.inference_output_type = tf.uint8
# tflite_quant_model = converter.convert()
# with open('posenet_resnet50_16_385_full_integer_quant.tflite', 'wb') as w:
#     w.write(tflite_quant_model)
# print("Integer Quantization complete! - posenet_resnet50_16_385_full_integer_quant.tflite")

# # Integer Quantization - Input/Output=uint8
# converter = tf.lite.TFLiteConverter.from_saved_model('saved_model_posenet_resnet50_16_513')
# converter.optimizations = [tf.lite.Optimize.DEFAULT]
# converter.representative_dataset = representative_dataset_gen
# converter.target_spec.supported_ops = [tf.lite.OpsSet.TFLITE_BUILTINS_INT8]
# converter.inference_input_type = tf.uint8
# converter.inference_output_type = tf.uint8
# tflite_quant_model = converter.convert()
# with open('posenet_resnet50_16_513_full_integer_quant.tflite', 'wb') as w:
#     w.write(tflite_quant_model)
# print("Integer Quantization complete! - posenet_resnet50_16_513_full_integer_quant.tflite")


# Integer Quantization - Input/Output=uint8
converter = tf.lite.TFLiteConverter.from_saved_model('saved_model_posenet_resnet50_32_225')
converter.experimental_new_converter = True
converter.optimizations = [tf.lite.Optimize.DEFAULT]
converter.representative_dataset = representative_dataset_gen
converter.target_spec.supported_ops = [tf.lite.OpsSet.TFLITE_BUILTINS_INT8]
converter.inference_input_type = tf.uint8
converter.inference_output_type = tf.uint8
tflite_quant_model = converter.convert()
with open('posenet_resnet50_32_225_full_integer_quant.tflite', 'wb') as w:
    w.write(tflite_quant_model)
print("Integer Quantization complete! - posenet_resnet50_32_225_full_integer_quant.tflite")

# # Integer Quantization - Input/Output=uint8
# converter = tf.lite.TFLiteConverter.from_saved_model('saved_model_posenet_resnet50_32_257')
# converter.optimizations = [tf.lite.Optimize.DEFAULT]
# converter.representative_dataset = representative_dataset_gen
# converter.target_spec.supported_ops = [tf.lite.OpsSet.TFLITE_BUILTINS_INT8]
# converter.inference_input_type = tf.uint8
# converter.inference_output_type = tf.uint8
# tflite_quant_model = converter.convert()
# with open('posenet_resnet50_32_257_full_integer_quant.tflite', 'wb') as w:
#     w.write(tflite_quant_model)
# print("Integer Quantization complete! - posenet_resnet50_32_257_full_integer_quant.tflite")

# # Integer Quantization - Input/Output=uint8
# converter = tf.lite.TFLiteConverter.from_saved_model('saved_model_posenet_resnet50_32_321')
# converter.optimizations = [tf.lite.Optimize.DEFAULT]
# converter.representative_dataset = representative_dataset_gen
# converter.target_spec.supported_ops = [tf.lite.OpsSet.TFLITE_BUILTINS_INT8]
# converter.inference_input_type = tf.uint8
# converter.inference_output_type = tf.uint8
# tflite_quant_model = converter.convert()
# with open('posenet_resnet50_32_321_full_integer_quant.tflite', 'wb') as w:
#     w.write(tflite_quant_model)
# print("Integer Quantization complete! - posenet_resnet50_32_321_full_integer_quant.tflite")

# # Integer Quantization - Input/Output=uint8
# converter = tf.lite.TFLiteConverter.from_saved_model('saved_model_posenet_resnet50_32_385')
# converter.optimizations = [tf.lite.Optimize.DEFAULT]
# converter.representative_dataset = representative_dataset_gen
# converter.target_spec.supported_ops = [tf.lite.OpsSet.TFLITE_BUILTINS_INT8]
# converter.inference_input_type = tf.uint8
# converter.inference_output_type = tf.uint8
# tflite_quant_model = converter.convert()
# with open('posenet_resnet50_32_385_full_integer_quant.tflite', 'wb') as w:
#     w.write(tflite_quant_model)
# print("Integer Quantization complete! - posenet_resnet50_32_385_full_integer_quant.tflite")

# # Integer Quantization - Input/Output=uint8
# converter = tf.lite.TFLiteConverter.from_saved_model('saved_model_posenet_resnet50_32_513')
# converter.optimizations = [tf.lite.Optimize.DEFAULT]
# converter.representative_dataset = representative_dataset_gen
# converter.target_spec.supported_ops = [tf.lite.OpsSet.TFLITE_BUILTINS_INT8]
# converter.inference_input_type = tf.uint8
# converter.inference_output_type = tf.uint8
# tflite_quant_model = converter.convert()
# with open('posenet_resnet50_32_513_full_integer_quant.tflite', 'wb') as w:
#     w.write(tflite_quant_model)
# print("Integer Quantization complete! - posenet_resnet50_32_513_full_integer_quant.tflite")
4-2-6-8. saved_model から Float16 Quantization (Float16量子化)
Float16 Quantization の方法も今までと同じです。
import tensorflow as tf
import tensorflow_datasets as tfds
import numpy as np
from PIL import Image
import os
import glob


# Integer Quantization - Input/Output=float32
converter = tf.lite.TFLiteConverter.from_saved_model('saved_model_posenet_resnet50_16_225')
converter.optimizations = [tf.lite.Optimize.DEFAULT]
converter.target_spec.supported_types = [tf.float16]
tflite_quant_model = converter.convert()
with open('posenet_resnet50_16_225_float16_quant.tflite', 'wb') as w:
    w.write(tflite_quant_model)
print("Integer Quantization complete! - posenet_resnet50_16_225_float16_quant.tflite")

# Integer Quantization - Input/Output=float32
converter = tf.lite.TFLiteConverter.from_saved_model('saved_model_posenet_resnet50_16_257')
converter.optimizations = [tf.lite.Optimize.DEFAULT]
converter.target_spec.supported_types = [tf.float16]
tflite_quant_model = converter.convert()
with open('posenet_resnet50_16_257_float16_quant.tflite', 'wb') as w:
    w.write(tflite_quant_model)
print("Integer Quantization complete! - posenet_resnet50_16_257_float16_quant.tflite")

# Integer Quantization - Input/Output=float32
converter = tf.lite.TFLiteConverter.from_saved_model('saved_model_posenet_resnet50_16_321')
converter.optimizations = [tf.lite.Optimize.DEFAULT]
converter.target_spec.supported_types = [tf.float16]
tflite_quant_model = converter.convert()
with open('posenet_resnet50_16_321_float16_quant.tflite', 'wb') as w:
    w.write(tflite_quant_model)
print("Integer Quantization complete! - posenet_resnet50_16_321_float16_quant.tflite")

# Integer Quantization - Input/Output=float32
converter = tf.lite.TFLiteConverter.from_saved_model('saved_model_posenet_resnet50_16_385')
converter.optimizations = [tf.lite.Optimize.DEFAULT]
converter.target_spec.supported_types = [tf.float16]
tflite_quant_model = converter.convert()
with open('posenet_resnet50_16_385_float16_quant.tflite', 'wb') as w:
    w.write(tflite_quant_model)
print("Integer Quantization complete! - posenet_resnet50_16_385_float16_quant.tflite")

# Integer Quantization - Input/Output=float32
converter = tf.lite.TFLiteConverter.from_saved_model('saved_model_posenet_resnet50_16_513')
converter.optimizations = [tf.lite.Optimize.DEFAULT]
converter.target_spec.supported_types = [tf.float16]
tflite_quant_model = converter.convert()
with open('posenet_resnet50_16_513_float16_quant.tflite', 'wb') as w:
    w.write(tflite_quant_model)
print("Integer Quantization complete! - posenet_resnet50_16_513_float16_quant.tflite")


# Integer Quantization - Input/Output=float32
converter = tf.lite.TFLiteConverter.from_saved_model('saved_model_posenet_resnet50_32_225')
converter.optimizations = [tf.lite.Optimize.DEFAULT]
converter.target_spec.supported_types = [tf.float16]
tflite_quant_model = converter.convert()
with open('posenet_resnet50_32_225_float16_quant.tflite', 'wb') as w:
    w.write(tflite_quant_model)
print("Integer Quantization complete! - posenet_resnet50_32_225_float16_quant.tflite")

# Integer Quantization - Input/Output=float32
converter = tf.lite.TFLiteConverter.from_saved_model('saved_model_posenet_resnet50_32_257')
converter.optimizations = [tf.lite.Optimize.DEFAULT]
converter.target_spec.supported_types = [tf.float16]
tflite_quant_model = converter.convert()
with open('posenet_resnet50_32_257_float16_quant.tflite', 'wb') as w:
    w.write(tflite_quant_model)
print("Integer Quantization complete! - posenet_resnet50_32_257_float16_quant.tflite")

# Integer Quantization - Input/Output=float32
converter = tf.lite.TFLiteConverter.from_saved_model('saved_model_posenet_resnet50_32_321')
converter.optimizations = [tf.lite.Optimize.DEFAULT]
converter.target_spec.supported_types = [tf.float16]
tflite_quant_model = converter.convert()
with open('posenet_resnet50_32_321_float16_quant.tflite', 'wb') as w:
    w.write(tflite_quant_model)
print("Integer Quantization complete! - posenet_resnet50_32_321_float16_quant.tflite")

# Integer Quantization - Input/Output=float32
converter = tf.lite.TFLiteConverter.from_saved_model('saved_model_posenet_resnet50_32_385')
converter.optimizations = [tf.lite.Optimize.DEFAULT]
converter.target_spec.supported_types = [tf.float16]
tflite_quant_model = converter.convert()
with open('posenet_resnet50_32_385_float16_quant.tflite', 'wb') as w:
    w.write(tflite_quant_model)
print("Integer Quantization complete! - posenet_resnet50_32_385_float16_quant.tflite")

# Integer Quantization - Input/Output=float32
converter = tf.lite.TFLiteConverter.from_saved_model('saved_model_posenet_resnet50_32_513')
converter.optimizations = [tf.lite.Optimize.DEFAULT]
converter.target_spec.supported_types = [tf.float16]
tflite_quant_model = converter.convert()
with open('posenet_resnet50_32_513_float16_quant.tflite', 'wb') as w:
    w.write(tflite_quant_model)
print("Integer Quantization complete! - posenet_resnet50_32_513_float16_quant.tflite")
4-2-6-9. Full Integer Quantization から EdgeTPU convert
EdgeTPUコンパイルの方法も今までの方法と同じです。
$ edgetpu_compiler -s posenet_resnet50_16_225_full_integer_quant.tflite
$ edgetpu_compiler -s posenet_resnet50_16_257_full_integer_quant.tflite
$ edgetpu_compiler -s posenet_resnet50_16_321_full_integer_quant.tflite
$ edgetpu_compiler -s posenet_resnet50_16_385_full_integer_quant.tflite
$ edgetpu_compiler -s posenet_resnet50_16_513_full_integer_quant.tflite
$ edgetpu_compiler -s posenet_resnet50_32_225_full_integer_quant.tflite
$ edgetpu_compiler -s posenet_resnet50_32_257_full_integer_quant.tflite
$ edgetpu_compiler -s posenet_resnet50_32_321_full_integer_quant.tflite
$ edgetpu_compiler -s posenet_resnet50_32_385_full_integer_quant.tflite
$ edgetpu_compiler -s posenet_resnet50_32_513_full_integer_quant.tflite
4-2-7. TensorFlow Object Detection API で生成したモデルを量子化
Tensorflow Object Detection API なんぞや? な人は こちらの記事 TensorFlowの物体検出用ライブラリ「Object Detection API」を手軽に使えるソフト「Object Detection Tools」を作ってみた - からあげさん と下記のリポジトリをご覧ください。 とても役に立ちます。

Object Detection API によるトレーニングの方法は上記記事でかなりクリアになりますのでココでは触れませんが、当記事ではパフォーマンスを改善するために、生成されたモデルをPost-Process付きのモデルとして量子化する手順を説明します。 Tensorflow v1.15.2 を使用します。
https://github.com/tensorflow/models.git をCloneして Object Detection API を使用して 44,548 STEP 学習を回した MobileNetV2-SSDLite のチェックポイントが手元にある状態を想定します。
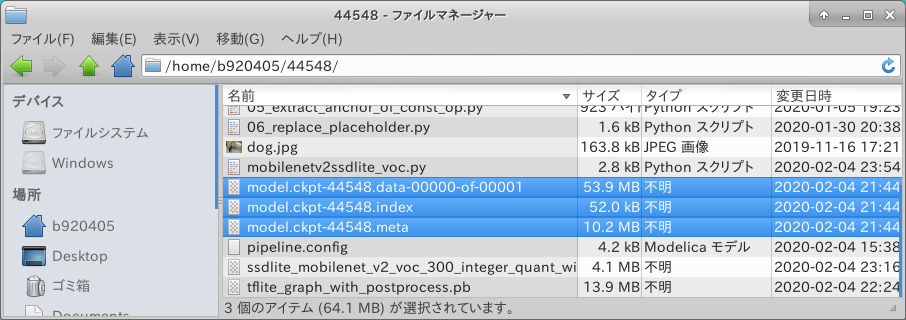
4-2-7-1. Post-Process付きの .pb ファイルを生成する
下記のコマンドを実行することで 後処理 (Post-Process) 付きの Freeze_Graph が出力されます。
$ cd ${HOME}/models/research
$ export PYTHONPATH=`pwd`:`pwd`/slim:$PYTHONPATH
$ mkdir -p export

$ python3 object_detection/export_tflite_ssd_graph.py \
    --pipeline_config_path=pipeline.config \
    --trained_checkpoint_prefix=model.ckpt-44548 \
    --output_directory=export \
    --add_postprocessing_op=True
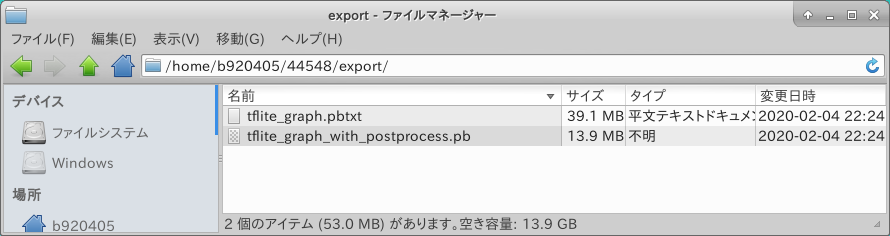
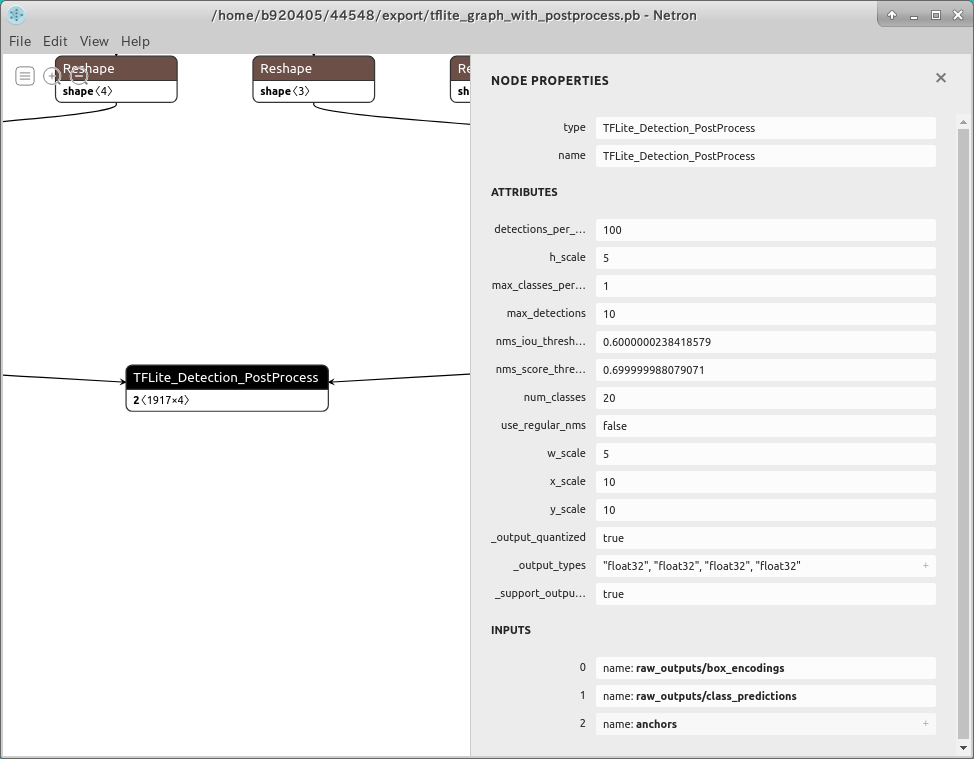
TFLite_Detection_PostProcess はカスタムオペレーションです。
4-2-7-2. Freeze_Graph から Weight Quantization (重みのみの量子化)
特別なことは行いませんが下記が量子化時のポイントです。
1. Tensorflow v1.x のAPI from_frozen_graph を使用する
2. カスタムオペレーションを含む.pbファイルのため、 converter.allow_custom_ops = True を指定する
import tensorflow as tf
tf.compat.v1.enable_eager_execution()
# Weight Quantization - Input/Output=float32
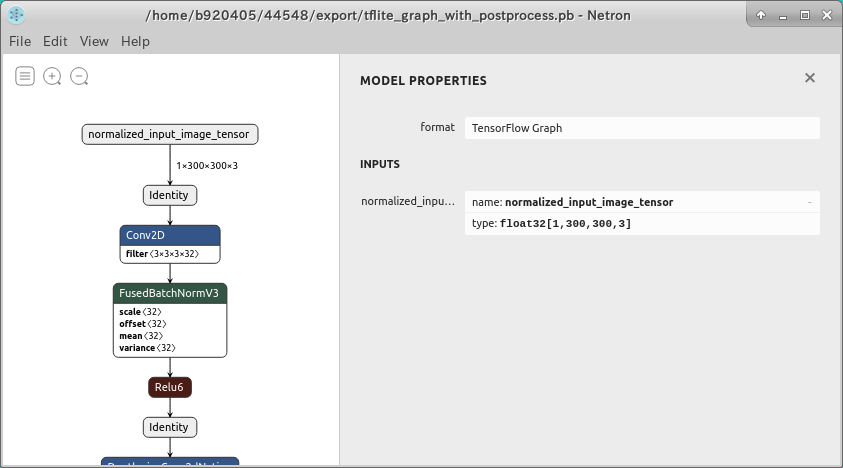
graph_def_file="tflite_graph_with_postprocess.pb"
input_arrays=["normalized_input_image_tensor"]
output_arrays=['TFLite_Detection_PostProcess','TFLite_Detection_PostProcess:1',
'TFLite_Detection_PostProcess:2','TFLite_Detection_PostProcess:3']
input_tensor={"normalized_input_image_tensor":[1,300,300,3]}
converter = tf.lite.TFLiteConverter.from_frozen_graph(graph_def_file, input_arrays,
output_arrays,input_tensor)
converter.optimizations = [tf.lite.Optimize.OPTIMIZE_FOR_SIZE]
converter.allow_custom_ops = True
tflite_quant_model = converter.convert()
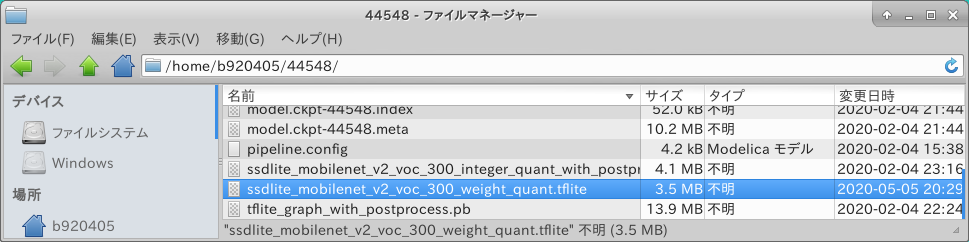
with open('./ssdlite_mobilenet_v2_voc_300_weight_quant.tflite', 'wb') as w:
w.write(tflite_quant_model)
print("Weight Quantization complete! - ssdlite_mobilenet_v2_voc_300_weight_quant.tflite")
実行してみます。
$ python3 weight_quantization.py
無事に生成されたようですね。
- Go to Table of contents -
4-2-7-3. Freeze_Graph から Integer Quantization (8bit整数量子化)
Weight Quantization とほぼ同じです。
import tensorflow as tf
import tensorflow_datasets as tfds
import numpy as np

def representative_dataset_gen():
  for data in raw_test_data.take(100):
    image = data['image'].numpy()
    image = tf.image.resize(image, (300, 300))
    image = image[np.newaxis,:,:,:]
    image = image - 127.5
    image = image * 0.007843
    yield [image]

tf.compat.v1.enable_eager_execution()

raw_test_data, info = tfds.load(name="voc/2007", with_info=True,
                                split="validation", data_dir="~/TFDS", download=False)

# Integer Quantization - Input/Output=float32
graph_def_file="tflite_graph_with_postprocess.pb"
input_arrays=["normalized_input_image_tensor"]
output_arrays=['TFLite_Detection_PostProcess','TFLite_Detection_PostProcess:1',
               'TFLite_Detection_PostProcess:2','TFLite_Detection_PostProcess:3']
input_tensor={"normalized_input_image_tensor":[1,300,300,3]}

converter = tf.lite.TFLiteConverter.from_frozen_graph(graph_def_file, input_arrays,
                                                      output_arrays,input_tensor)
converter.allow_custom_ops=True
converter.optimizations = [tf.lite.Optimize.DEFAULT]
converter.representative_dataset = representative_dataset_gen
tflite_quant_model = converter.convert()
with open('./ssdlite_mobilenet_v2_voc_300_integer_quant_with_postprocess.tflite', 'wb') as w:
    w.write(tflite_quant_model)
print("Integer Quantization complete! - ssdlite_mobilenet_v2_voc_300_integer_quant_with_postprocess.tflite")
4-2-7-4. Freeze_Graph から Full Integer Quantization (全8bit整数量子化)
import tensorflow as tf
import tensorflow_datasets as tfds
import numpy as np

def representative_dataset_gen():
  for data in raw_test_data.take(100):
    image = data['image'].numpy()
    image = tf.image.resize(image, (300, 300))
    image = image[np.newaxis,:,:,:]
    image = image - 127.5
    image = image * 0.007843
    yield [image]

tf.compat.v1.enable_eager_execution()

raw_test_data, info = tfds.load(name="voc/2007", with_info=True,
                                split="validation", data_dir="~/TFDS", download=False)

# Full Integer Quantization - Input/Output=float32
graph_def_file="tflite_graph_with_postprocess.pb"
input_arrays=["normalized_input_image_tensor"]
output_arrays=['TFLite_Detection_PostProcess','TFLite_Detection_PostProcess:1',
               'TFLite_Detection_PostProcess:2','TFLite_Detection_PostProcess:3']
input_tensor={"normalized_input_image_tensor":[1,300,300,3]}

converter = tf.lite.TFLiteConverter.from_frozen_graph(graph_def_file, input_arrays,
                                                      output_arrays,input_tensor)
converter.optimizations = [tf.lite.Optimize.DEFAULT]
converter.allow_custom_ops=True
converter.target_spec.supported_ops = [tf.lite.OpsSet.TFLITE_BUILTINS_INT8,tf.lite.OpsSet.SELECT_TF_OPS]
converter.representative_dataset = representative_dataset_gen
tflite_quant_model = converter.convert()
with open('./ssdlite_mobilenet_v2_voc_300_full_integer_quant_with_postprocess.tflite', 'wb') as w:
    w.write(tflite_quant_model)
print("Full Integer Quantization complete! - ssdlite_mobilenet_v2_voc_300_full_integer_quant_with_postprocess.tflite")
4-2-7-5. Freeze_Graph から Float16 Quantization (Float16量子化)
import tensorflow as tf

tf.compat.v1.enable_eager_execution()

# Float16 Quantization - Input/Output=float32
graph_def_file="tflite_graph_with_postprocess.pb"
input_arrays=["normalized_input_image_tensor"]
output_arrays=['TFLite_Detection_PostProcess','TFLite_Detection_PostProcess:1',
               'TFLite_Detection_PostProcess:2','TFLite_Detection_PostProcess:3']
input_tensor={"normalized_input_image_tensor":[1,300,300,3]}

converter = tf.lite.TFLiteConverter.from_frozen_graph(graph_def_file, input_arrays,
                                                      output_arrays,input_tensor)
converter.optimizations = [tf.lite.Optimize.DEFAULT]
converter.target_spec.supported_types = [tf.float16]
converter.allow_custom_ops = True
tflite_quant_model = converter.convert()
with open('./ssdlite_mobilenet_v2_voc_300_float16_quant.tflite', 'wb') as w:
    w.write(tflite_quant_model)
print("Float16 Quantization complete! - ssdlite_mobilenet_v2_voc_300_float16_quant.tflite")
4-2-7-6. Full Integer Quantization から EdgeTPU convert
$ edgetpu_compiler -s ssdlite_mobilenet_v2_voc_300_full_integer_quant_with_postprocess.tflite
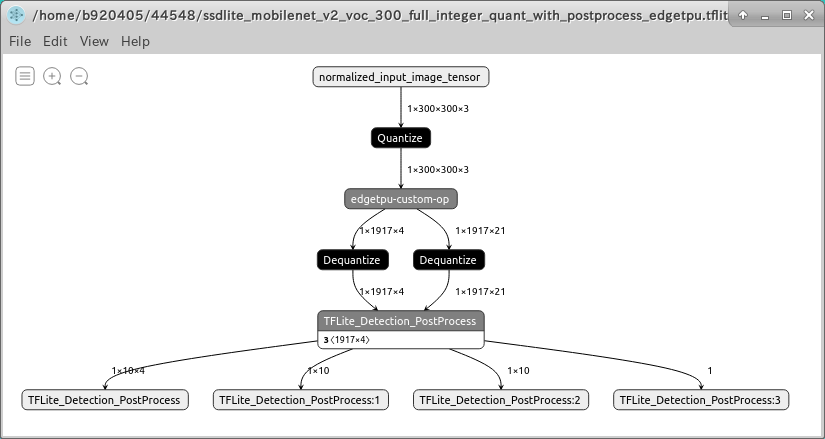
4-2-8. Tensorflow Lite が非対応 かつ Tensorflow が対応済みのオペレーションを含むモデルの量子化
Tensorflow Liteで実装されているオペレータはTensorflow本体と全く同じではなくかなりの量が未実装のままとなっています。 Tensorflowで昔から脈々と実装されてきたモデル達は、残念ながら少し前までは全てをTensorflow Liteへ変換することが難しかったです。 しかし、昨年末頃に実装された Flex Delegate というデリゲート機能により、Tensorflow Liteで未実装のオペレータがある場合はTensorflow本体へ処理をオフロードして実行することが可能になりました。 まだ実装が完璧ではないようで、 Integer Quantization ができないモデルが存在したり、 C++ のAPIしか提供されておらず、Python のAPIが存在しない、などの制約があります。 あまり認知度は高くないようですが、 C++ で実装ができるエンジニアの方々にとっては何気にモデル活用の幅が広がる便利機能なのでは、と認識しています。
ココでは、 Mask-RCNN Inception V2 を例にとって説明します。 なお Mask-RCNN Inception V2 は現在のところ、 残念ながら Integer Quantization と Full Integer Quantization には対応していません。 また、 この手順を実施するためには、 Tensorflow v2.2.0 あるいは tf-nightly の導入が必要です。


1. https://github.com/tensorflow/models/blob/master/research/object_detection/g3doc/detection_model_zoo.md#coco-trained-models
2. http://download.tensorflow.org/models/object_detection/mask_rcnn_inception_v2_coco_2018_01_28.tar.gz
4-2-8-1. Mask-RCNN Inception V2 の .pb ファイルを生成する
Tensorflow Object Detection API が導入されている前提で進めていきます。 まずは、公式Webサイトから Mask-RCNN Inception V2 のチェックポイントをダウンロードし、 Object Detection API のスクリプトにより Freeze_Graph へ変換します。
https://github.com/matterport/Mask_RCNN/issues/563
https://github.com/PINTO0309/TensorflowLite-flexdelegate

$ cd ~/Downloads
$ wget http://download.tensorflow.org/models/object_detection/mask_rcnn_inception_v2_coco_2018_01_28.tar.gz
$ tar -zxvf mask_rcnn_inception_v2_coco_2018_01_28.tar.gz
$ cd ${HOME}/models/research
$ export PYTHONPATH=`pwd`:`pwd`/slim:$PYTHONPATH
$ mkdir -p ${HOME}/Downloads/mask_rcnn_inception_v2_coco_2018_01_28/export

$ sudo pip3 uninstall tensorboard-plugin-wit tb-nightly tensorboard \
                      tf-estimator-nightly tensorflow-gpu \
                      tensorflow tf-nightly tensorflow_estimator
$ sudo pip3 install tensorflow==2.2.0

$ python3 object_detection/export_inference_graph.py \
  --input_type=image_tensor \
  --pipeline_config_path=${HOME}/Downloads/mask_rcnn_inception_v2_coco_2018_01_28/pipeline.config \
  --trained_checkpoint_prefix=${HOME}/Downloads/mask_rcnn_inception_v2_coco_2018_01_28/model.ckpt \
  --output_directory=${HOME}/Downloads/mask_rcnn_inception_v2_coco_2018_01_28/test \
  --input_shape=1,256,256,3 \
  --write_inference_graph=True

$ python3 object_detection/export_inference_graph.py \
  --input_type=image_tensor \
  --pipeline_config_path=${HOME}/Downloads/mask_rcnn_inception_v2_coco_2018_01_28/pipeline.config \
  --trained_checkpoint_prefix=${HOME}/Downloads/mask_rcnn_inception_v2_coco_2018_01_28/model.ckpt \
  --output_directory=${HOME}/Downloads/mask_rcnn_inception_v2_coco_2018_01_28/test \
  --input_shape=1,512,512,3 \
  --write_inference_graph=True
4-2-8-2. Mask-RCNN Inception V2 の Weight Quantization (重みのみの量子化)
この作業のポイントは下記です。
1. Tensorflow v2.2.0-rc0以上 が導入されていること
2. converter.target_spec.supported_ops に tf.lite.OpsSet.SELECT_TF_OPS が指定されていること
### tensorflow==2.2.0

import tensorflow as tf

# Weight Quantization - Input/Output=float32
converter = tf.lite.TFLiteConverter.from_saved_model('./saved_model')
converter.experimental_new_converter = True
converter.optimizations = [tf.lite.Optimize.OPTIMIZE_FOR_SIZE]
converter.target_spec.supported_ops = [tf.lite.OpsSet.TFLITE_BUILTINS,tf.lite.OpsSet.SELECT_TF_OPS]
tflite_quant_model = converter.convert()
with open('./mask_rcnn_inception_v2_coco_weight_quant.tflite', 'wb') as w:
    w.write(tflite_quant_model)
print("Weight Quantization complete! - mask_rcnn_inception_v2_coco_weight_quant.tflite")
4-2-8-3. Mask-RCNN Inception V2 の Float16 Quantization (Float16量子化)
作業のポイントは Weight Quantization と同じです。
### tensorflow==2.2.0

import tensorflow as tf

# Float16 Quantization - Input/Output=float32
converter = tf.lite.TFLiteConverter.from_saved_model('./saved_model')
converter.experimental_new_converter = True
converter.optimizations = [tf.lite.Optimize.DEFAULT]
converter.target_spec.supported_ops = [tf.lite.OpsSet.TFLITE_BUILTINS,tf.lite.OpsSet.SELECT_TF_OPS]
converter.target_spec.supported_types = [tf.float16]
converter.representative_dataset = representative_dataset_gen
tflite_quant_model = converter.convert()
with open('./mask_rcnn_inception_v2_coco_float16_quant.tflite', 'wb') as w:
    w.write(tflite_quant_model)
print("Float16 Quantization complete! - mask_rcnn_inception_v2_coco_float16_quant.tflite")
4-2-8-4. Flex Delegate (Tensorflow Select Ops) を有効にしたモデルの実行
残念ながら私には C++ で実装するスキルがありません。 ですが、限界ギリギリまでチョコ実装を頑張ってみて、 Tensorflow Lite の非対応オペレーションを含む ENet を動作させることまでは成功しました。 中身はぐちゃぐちゃですが、 こちらのリポジトリ TensorflowLite-flexdelegate に残骸を置いてあります。 Tensorflow Lite に対し、 Flex機能を有効にするようにビルドを掛ける必要があります。 この記事内で説明するにはツラすぎます。。。 詳細は上記のリポジトリをご覧ください。
4-2-9. PyTorch 用モデルからの量子化
最近、 PyTorch実装の面白いモデル・プロジェクトが増えてきているような気がします。 そこで PyTorch モデルを Tensorflow Lite の量子化モデルへ変換する方法の一例をご紹介します。 ココでは、 3D Multi-Person Pose Estimation の PyTorchモデル を Tensorflow Lite の量子化モデルへ変換してみます。 これ 3D PoseEstimation (Multi-Person) by OpenVINO + Corei7 CPU only [14 FPS-18 FPS] - Qiita - PINTO が元ネタです。 作業の実施には Tensorflow v2.2.0 が必要です。
3D PoseEstimation+OpenVINO+Corei7 CPU only+720p USB Camera [推論スピード 18 FPS相当]
— Super PINTO (@PINTO03091) March 21, 2020
yukihiko-chan には勝てません。 が、CPU onlyかつHD 画質でこのパフォーマンスが出ます。 録画とUI表示にパフォーマンスを持って行かれています。 3Dモデリングはきついと思います。https://t.co/rvZC00Olrl
下記に公開されているモデルとコンバーターを活用させてもらいます。

- Go to Table of contents -
4-2-9-1. 事前準備 (PyTorch->ONNX)
PyTorchの量子化ワークフローの概要は下記のとおりです。
1. open_model_zoo をCloneする
2. open_model_zoo の downloader.py を使用して公開モデルをダウンロードする
3. open_model_zoo の converter.py を使用して PyTorch モデルを ONNX モデルに変換する
( PyTorchの標準機能 torch.onnx._export(...)でもたぶんOK )
4. onnx2keras を使用して ONNX モデルを Keras モデルに変換する
5. Keras モデルを saved_model へ変換する
6. saved_model を量子化する
$ git clone https://github.com/opencv/open_model_zoo.git
$ cd open_model_zoo/tools/downloader
$ ./downloader.py --name human-pose-estimation-3d-0001
$ ./converter.py --name human-pose-estimation-3d-0001
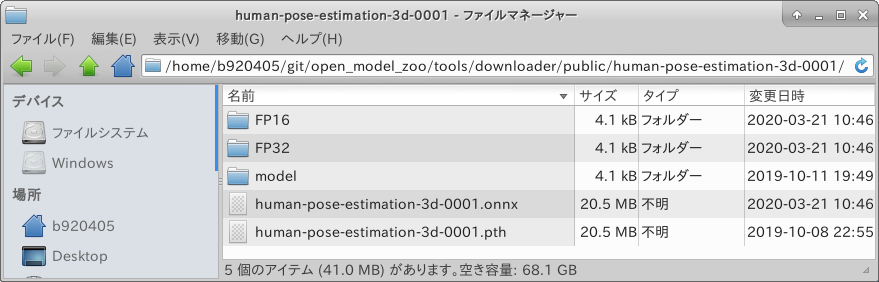
ONNXモデルの構造の一部は下図のとおりになっています。
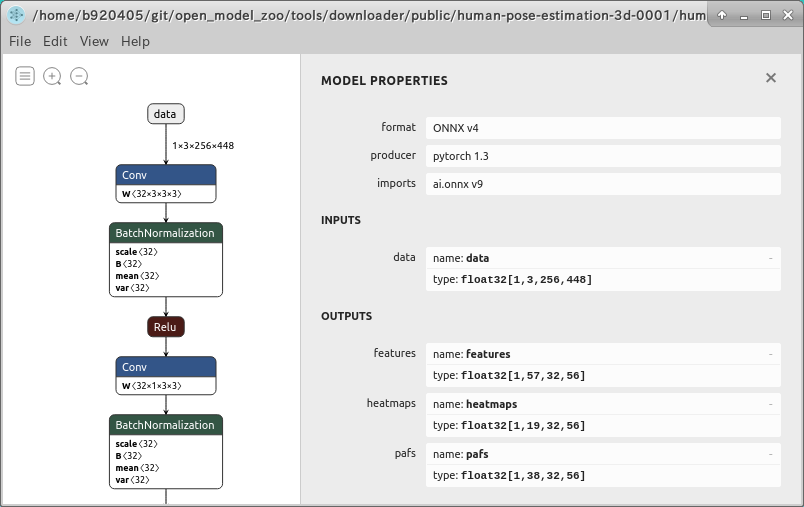
- Go to Table of contents -
4-2-9-2. onnx2keras による ONNX->Keras コンバート
まず Tensorflow v2.2.0 と onnx2keras をインストールします。
$ sudo pip3 uninstall tensorboard-plugin-wit tb-nightly tensorboard \
                      tf-estimator-nightly tensorflow-gpu \
                      tensorflow tf-nightly tensorflow_estimator
$ sudo pip3 install tensorflow==2.2.0
$ sudo pip3 install onnx2keras
次に ONNX モデルから Keras モデルへ変換し、ついでに saved_model へ変換するためのプログラムを記載します。
import onnx
from onnx2keras import onnx_to_keras
import tensorflow as tf
import shutil

onnx_model = onnx.load('human-pose-estimation-3d-0001.onnx')
k_model = onnx_to_keras(onnx_model=onnx_model, input_names=['data'], change_ordering=True)

shutil.rmtree('saved_model', ignore_errors=True)
tf.saved_model.save(k_model, 'saved_model')
実行してみます。
$ python3 onnx_to_keras.py
無事に生成されたようですね。 ここまできてしまえば今までさんざん取り組んできた量子化の手順と何も変わりませんので簡単ですね。
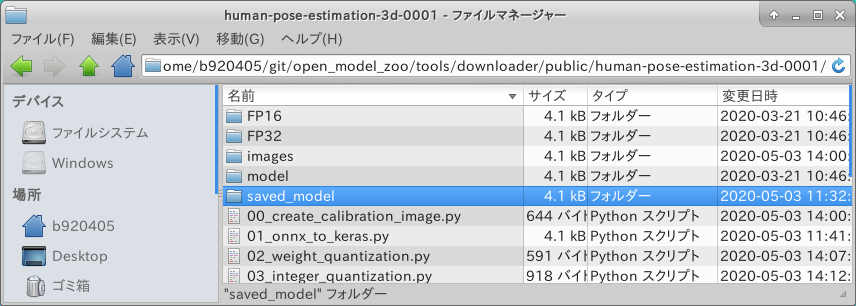
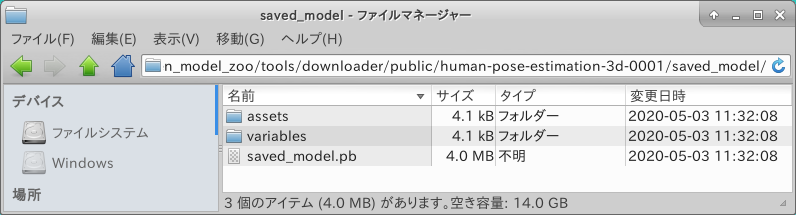
- Go to Table of contents -
4-2-9-3. saved_model から Weight Quantization (重みのみの量子化)
### tensorflow=2.2.0

import tensorflow as tf

# Weight Quantization - Input/Output=float32
converter = tf.lite.TFLiteConverter.from_saved_model('saved_model')
converter.optimizations = [tf.lite.Optimize.OPTIMIZE_FOR_SIZE]
#converter.target_spec.supported_ops = [tf.lite.OpsSet.TFLITE_BUILTINS,tf.lite.OpsSet.SELECT_TF_OPS]
tflite_quant_model = converter.convert()
with open('human_pose_estimation_3d_0001_256x448_weight_quant.tflite', 'wb') as w:
    w.write(tflite_quant_model)
print("Weight Quantization complete! - human_pose_estimation_3d_0001_256x448_weight_quant.tflite")
4-2-9-4. saved_model から Integer Quantization (8bit整数量子化)
キャリブレーション用の画像データセットは Pascal-VOC 2007 から抽出した人だけが写っている画像100枚です。
### tensorflow==2.2.0

import tensorflow as tf
import numpy as np

def representative_dataset_gen():
    for image in raw_test_data:
        image = tf.image.resize(image, (256, 448))
        image = image[np.newaxis,:,:,:]
        image = image - 127.5
        image = image * 0.007843
        yield [image]

raw_test_data = np.load('calibration_data_img.npy', allow_pickle=True)

# Integer Quantization - Input/Output=float32
converter = tf.lite.TFLiteConverter.from_saved_model('saved_model')
converter.optimizations = [tf.lite.Optimize.DEFAULT]
converter.representative_dataset = representative_dataset_gen
tflite_quant_model = converter.convert()
with open('human_pose_estimation_3d_0001_256x448_integer_quant.tflite', 'wb') as w:
    w.write(tflite_quant_model)
print("Integer Quantization complete! - human_pose_estimation_3d_0001_256x448_integer_quant.tflite")
4-2-9-5. saved_model から Full Integer Quantization (全8bit整数量子化)
### tensorflow==2.2.0

import tensorflow as tf
import numpy as np

def representative_dataset_gen():
    for image in raw_test_data:
        image = tf.image.resize(image, (256, 448))
        image = image[np.newaxis,:,:,:]
        image = image - 127.5
        image = image * 0.007843
        yield [image]

raw_test_data = np.load('calibration_data_img.npy', allow_pickle=True)

# Full Integer Quantization - Input/Output=float32
converter = tf.lite.TFLiteConverter.from_saved_model('saved_model')
converter.optimizations = [tf.lite.Optimize.DEFAULT]
converter.inference_input_type = tf.uint8
converter.inference_output_type = tf.uint8
converter.representative_dataset = representative_dataset_gen
tflite_quant_model = converter.convert()
with open('human_pose_estimation_3d_0001_256x448_full_integer_quant.tflite', 'wb') as w:
    w.write(tflite_quant_model)
print("Full Integer Quantization complete! - human_pose_estimation_3d_0001_256x448_full_integer_quant.tflite")
4-2-9-6. saved_model から Float16 Quantization (Float16量子化)
### tensorflow==2.2.0

import tensorflow as tf

# Float16 Quantization - Input/Output=float32
converter = tf.lite.TFLiteConverter.from_saved_model('saved_model')
converter.optimizations = [tf.lite.Optimize.DEFAULT]
converter.target_spec.supported_types = [tf.float16]
tflite_quant_model = converter.convert()
with open('human_pose_estimation_3d_0001_256x448_float16_quant.tflite', 'wb') as w:
    w.write(tflite_quant_model)
print("Float16 Quantization complete! - human_pose_estimation_3d_0001_256x448_float16_quant.tflite")
4-2-9-7. Full Integer Quantization から EdgeTPU convert
Full Integer Quantization モデルを使用して EdgeTPU モデルへコンパイルします。
$ edgetpu_compiler -s human_pose_estimation_3d_0001_256x448_full_integer_quant.tflite
モデルの序盤に登場する Elu というオペレータが量子化に対応していないため、誠に残念な感じの EdgeTPU モデルが生成されました。 しかし、序盤の一部はなんとかEdgeTPU対応されているように見えますね。
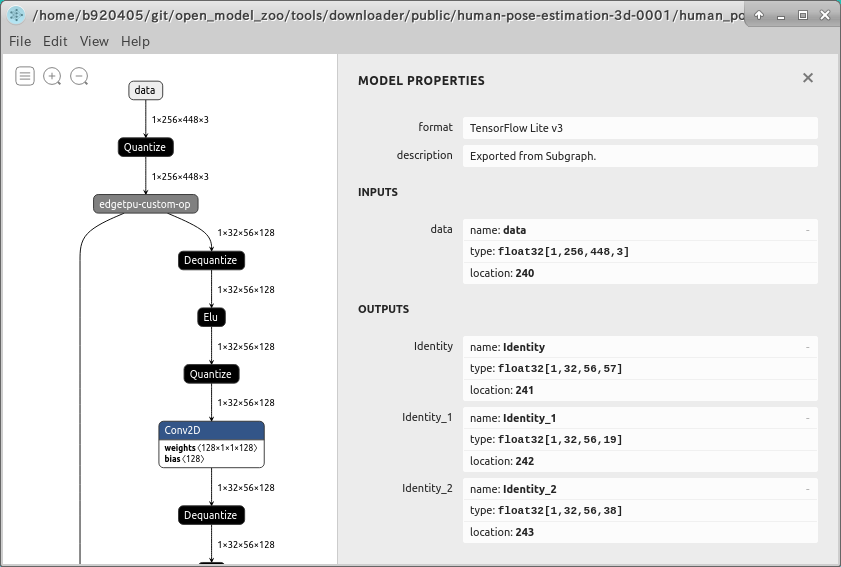
- Go to Table of contents -
4-2-10. MediaPipe のモデル BlazeFace(.tflite) の量子化
ここでは Google の MediaPipe というプロジェクトで公開されている BlazeFace というモデルを量子化します。 中の人によると "MediaPipe has made it extremely easy to build our 3D person pose reconstruction demo app, facilitating accelerated neural network inference on device and synchronization of our result visualization with the video capture stream. Highly recommended!" だそうです。 これは今までの量子化ワークフローの中でも最も難易度が高いパターンになります。 そもそも checkpoint や Freeze_Graph、 saved_model の全てが提供されておらず、 .tflite のみが提供されているパターンです。 変換の手順は下記のとおりです。
1. flatc をビルドする
2. schema.fbs をダウンロードする
3. BlazeFace のモデル face_detection_front.tflite をダウンロードする
4. .tflite を flatc を使用して .json へパースする
5. .tflite から重みを抽出しながら 4. の .json から読み取ったモデル構造を元にネットワークを生成する
6. 5. で抽出した重みとネットワークを使用して saved_model へ変換する
7. 各種量子化を行う
4-2-10-1. flatc のビルド と schema.fbs のダウンロード
$ cd ~
$ git clone https://github.com/google/flatbuffers.git
$ cd flatbuffers
$ cmake -G "Unix Makefiles"

-- The C compiler identification is GNU 7.5.0
-- The CXX compiler identification is GNU 7.5.0
-- Check for working C compiler: /usr/bin/cc
-- Check for working C compiler: /usr/bin/cc -- works
-- Detecting C compiler ABI info
-- Detecting C compiler ABI info - done
-- Detecting C compile features
-- Detecting C compile features - done
-- Check for working CXX compiler: /usr/bin/c++
-- Check for working CXX compiler: /usr/bin/c++ -- works
-- Detecting CXX compiler ABI info
-- Detecting CXX compiler ABI info - done
-- Detecting CXX compile features
-- Detecting CXX compile features - done
-- Looking for strtof_l
-- Looking for strtof_l - found
-- Looking for strtoull_l
-- Looking for strtoull_l - found
-- `tests/monster_test.fbs`: add generation of C++ code with '--no-includes;--gen-compare'
-- `tests/monster_test.fbs`: add generation of binary (.bfbs) schema
-- `tests/namespace_test/namespace_test1.fbs`: add generation of C++ code with '--no-includes;--gen-compare'
-- `tests/namespace_test/namespace_test2.fbs`: add generation of C++ code with '--no-includes;--gen-compare'
-- `tests/union_vector/union_vector.fbs`: add generation of C++ code with '--no-includes;--gen-compare'
-- `tests/native_type_test.fbs`: add generation of C++ code with ''
-- `tests/arrays_test.fbs`: add generation of C++ code with '--scoped-enums;--gen-compare'
-- `tests/arrays_test.fbs`: add generation of binary (.bfbs) schema
-- `tests/monster_test.fbs`: add generation of C++ embedded binary schema code with '--no-includes;--gen-compare'
-- `tests/monster_extra.fbs`: add generation of C++ code with '--no-includes;--gen-compare'
-- `samples/monster.fbs`: add generation of C++ code with '--no-includes;--gen-compare'
-- `samples/monster.fbs`: add generation of binary (.bfbs) schema
Proceeding with version: 1.12.0.42
-- Configuring done
-- Generating done
-- Build files have been written to: /home/b920405/git/flatbuffers

$ make

Scanning dependencies of target flatc
[  1%] Building CXX object CMakeFiles/flatc.dir/src/idl_parser.cpp.o
[  2%] Building CXX object CMakeFiles/flatc.dir/src/idl_gen_text.cpp.o
[  3%] Building CXX object CMakeFiles/flatc.dir/src/reflection.cpp.o
[  4%] Building CXX object CMakeFiles/flatc.dir/src/util.cpp.o
[  5%] Building CXX object CMakeFiles/flatc.dir/src/idl_gen_cpp.cpp.o
[  7%] Building CXX object CMakeFiles/flatc.dir/src/idl_gen_csharp.cpp.o
[  8%] Building CXX object CMakeFiles/flatc.dir/src/idl_gen_dart.cpp.o
[  9%] Building CXX object CMakeFiles/flatc.dir/src/idl_gen_kotlin.cpp.o
[ 10%] Building CXX object CMakeFiles/flatc.dir/src/idl_gen_go.cpp.o
[ 11%] Building CXX object CMakeFiles/flatc.dir/src/idl_gen_java.cpp.o
[ 12%] Building CXX object CMakeFiles/flatc.dir/src/idl_gen_js_ts.cpp.o
[ 14%] Building CXX object CMakeFiles/flatc.dir/src/idl_gen_php.cpp.o
[ 15%] Building CXX object CMakeFiles/flatc.dir/src/idl_gen_python.cpp.o
[ 16%] Building CXX object CMakeFiles/flatc.dir/src/idl_gen_lobster.cpp.o
[ 17%] Building CXX object CMakeFiles/flatc.dir/src/idl_gen_lua.cpp.o
[ 18%] Building CXX object CMakeFiles/flatc.dir/src/idl_gen_rust.cpp.o
[ 20%] Building CXX object CMakeFiles/flatc.dir/src/idl_gen_fbs.cpp.o
[ 21%] Building CXX object CMakeFiles/flatc.dir/src/idl_gen_grpc.cpp.o
[ 22%] Building CXX object CMakeFiles/flatc.dir/src/idl_gen_json_schema.cpp.o
[ 23%] Building CXX object CMakeFiles/flatc.dir/src/idl_gen_swift.cpp.o
[ 24%] Building CXX object CMakeFiles/flatc.dir/src/flatc.cpp.o
[ 25%] Building CXX object CMakeFiles/flatc.dir/src/flatc_main.cpp.o
[ 27%] Building CXX object CMakeFiles/flatc.dir/src/code_generators.cpp.o
[ 28%] Building CXX object CMakeFiles/flatc.dir/grpc/src/compiler/cpp_generator.cc.o
[ 29%] Building CXX object CMakeFiles/flatc.dir/grpc/src/compiler/go_generator.cc.o
[ 30%] Building CXX object CMakeFiles/flatc.dir/grpc/src/compiler/java_generator.cc.o
[ 31%] Building CXX object CMakeFiles/flatc.dir/grpc/src/compiler/python_generator.cc.o
[ 32%] Building CXX object CMakeFiles/flatc.dir/grpc/src/compiler/swift_generator.cc.o
[ 34%] Linking CXX executable flatc
[ 34%] Built target flatc
Scanning dependencies of target flathash
[ 35%] Building CXX object CMakeFiles/flathash.dir/src/flathash.cpp.o
[ 36%] Linking CXX executable flathash
[ 36%] Built target flathash
Scanning dependencies of target flatbuffers
[ 37%] Building CXX object CMakeFiles/flatbuffers.dir/src/idl_parser.cpp.o
[ 38%] Building CXX object CMakeFiles/flatbuffers.dir/src/idl_gen_text.cpp.o
[ 40%] Building CXX object CMakeFiles/flatbuffers.dir/src/reflection.cpp.o
[ 41%] Building CXX object CMakeFiles/flatbuffers.dir/src/util.cpp.o
[ 42%] Linking CXX static library libflatbuffers.a
[ 42%] Built target flatbuffers
Scanning dependencies of target generated_code
[ 43%] Run generation: 'samples/monster.bfbs'
[ 44%] Run generation: 'tests/monster_test_generated.h'
[ 45%] Run generation: 'tests/monster_test.bfbs'
[ 47%] Run generation: 'tests/namespace_test/namespace_test1_generated.h'
[ 48%] Run generation: 'tests/namespace_test/namespace_test2_generated.h'
[ 49%] Run generation: 'tests/union_vector/union_vector_generated.h'
[ 50%] Run generation: 'tests/native_type_test_generated.h'
[ 51%] Run generation: 'tests/arrays_test_generated.h'
[ 52%] Run generation: 'tests/arrays_test.bfbs'
[ 54%] Run generation: 'tests/monster_test_bfbs_generated.h'
[ 55%] Run generation: 'tests/monster_extra_generated.h'
[ 56%] Run generation: 'samples/monster_generated.h'
[ 57%] All generated files were updated.
[ 57%] Built target generated_code
Scanning dependencies of target flatsamplebfbs
[ 58%] Building CXX object CMakeFiles/flatsamplebfbs.dir/src/idl_parser.cpp.o
[ 60%] Building CXX object CMakeFiles/flatsamplebfbs.dir/src/idl_gen_text.cpp.o
[ 61%] Building CXX object CMakeFiles/flatsamplebfbs.dir/src/reflection.cpp.o
[ 62%] Building CXX object CMakeFiles/flatsamplebfbs.dir/src/util.cpp.o
[ 63%] Building CXX object CMakeFiles/flatsamplebfbs.dir/samples/sample_bfbs.cpp.o
[ 64%] Linking CXX executable flatsamplebfbs
[ 65%] Built target flatsamplebfbs
Scanning dependencies of target flatsamplebinary
[ 67%] Building CXX object CMakeFiles/flatsamplebinary.dir/samples/sample_binary.cpp.o
[ 68%] Linking CXX executable flatsamplebinary
[ 69%] Built target flatsamplebinary
Scanning dependencies of target flattests
[ 70%] Building CXX object CMakeFiles/flattests.dir/src/idl_parser.cpp.o
[ 71%] Building CXX object CMakeFiles/flattests.dir/src/idl_gen_text.cpp.o
[ 72%] Building CXX object CMakeFiles/flattests.dir/src/reflection.cpp.o
[ 74%] Building CXX object CMakeFiles/flattests.dir/src/util.cpp.o
[ 75%] Building CXX object CMakeFiles/flattests.dir/src/idl_gen_fbs.cpp.o
[ 76%] Building CXX object CMakeFiles/flattests.dir/tests/test.cpp.o
[ 77%] Building CXX object CMakeFiles/flattests.dir/tests/test_assert.cpp.o
[ 78%] Building CXX object CMakeFiles/flattests.dir/tests/test_builder.cpp.o
[ 80%] Building CXX object CMakeFiles/flattests.dir/tests/native_type_test_impl.cpp.o
[ 81%] Building CXX object CMakeFiles/flattests.dir/src/code_generators.cpp.o
[ 82%] Linking CXX executable flattests
[ 91%] Built target flattests
Scanning dependencies of target flatsampletext
[ 92%] Building CXX object CMakeFiles/flatsampletext.dir/src/idl_parser.cpp.o
[ 94%] Building CXX object CMakeFiles/flatsampletext.dir/src/idl_gen_text.cpp.o
[ 95%] Building CXX object CMakeFiles/flatsampletext.dir/src/reflection.cpp.o
[ 96%] Building CXX object CMakeFiles/flatsampletext.dir/src/util.cpp.o
[ 97%] Building CXX object CMakeFiles/flatsampletext.dir/samples/sample_text.cpp.o
[ 98%] Linking CXX executable flatsampletext
[100%] Built target flatsampletext

$ cp flatc ~ && cd ~
$ wget https://github.com/tensorflow/tensorflow/blob/master/tensorflow/lite/schema/schema.fbs
4-2-10-2. MediaPipe の BlazeFaceモデル(.tflite) をダウンロード
$ wget https://github.com/google/mediapipe/tree/master/mediapipe/models/face_detection_front.tflite
4-2-10-3. BlazeFace(.tflite) を saved_model(.pb) へ変換
### tensorflow-gpu==1.15.2

#!/usr/bin/env python
# coding: utf-8

import os
import numpy as np
import json
import tensorflow as tf
import shutil
from pathlib import Path
home = str(Path.home())

os.environ['CUDA_VISIBLE_DEVICES'] = '0'
schema = "schema.fbs"
binary = home + "/flatc"
model_path = "face_detection_front.tflite"
output_pb_path = "face_detection_front.pb"
output_savedmodel_path = "saved_model"
model_json_path = "face_detection_front.json"
num_tensors = 176
output_node_names = ['classificators', 'regressors']

def gen_model_json():
    if not os.path.exists(model_json_path):
        cmd = (binary + " -t --strict-json --defaults-json -o . {schema} -- {input}".format(input=model_path, schema=schema))
        print("output json command =", cmd)
        os.system(cmd)


def parse_json():
    j = json.load(open(model_json_path))
    op_types = [v['builtin_code'] for v in j['operator_codes']]
    # print('op types:', op_types)
    ops = j['subgraphs'][0]['operators']
    # print('num of ops:', len(ops))
    return ops, op_types


def make_graph(ops, op_types, interpreter):
    tensors = {}
    input_details = interpreter.get_input_details()
    output_details = interpreter.get_output_details()
    # print(input_details)
    for input_detail in input_details:
        tensors[input_detail['index']] = tf.compat.v1.placeholder(
            dtype=input_detail['dtype'],
            shape=input_detail['shape'],
            name=input_detail['name'])

    for index, op in enumerate(ops):
        print('op: ', op)
        op_type = op_types[op['opcode_index']]
        if op_type == 'CONV_2D':
            input_tensor = tensors[op['inputs'][0]]
            weights_detail = interpreter._get_tensor_details(op['inputs'][1])
            bias_detail = interpreter._get_tensor_details(op['inputs'][2])
            output_detail = interpreter._get_tensor_details(op['outputs'][0])
            # print('weights_detail: ', weights_detail)
            # print('bias_detail: ', bias_detail)
            # print('output_detail: ', output_detail)
            weights_array = interpreter.get_tensor(weights_detail['index'])
            weights_array = np.transpose(weights_array, (1, 2, 3, 0))
            bias_array = interpreter.get_tensor(bias_detail['index'])
            weights = tf.Variable(weights_array, name=weights_detail['name'])
            bias = tf.Variable(bias_array, name=bias_detail['name'])
            options = op['builtin_options']
            output_tensor = tf.nn.conv2d(
                input_tensor,
                weights,
                strides=[1, options['stride_h'], options['stride_w'], 1],
                padding=options['padding'],
                dilations=[
                    1, options['dilation_h_factor'],
                    options['dilation_w_factor'], 1
                ],
                name=output_detail['name'] + '/conv2d')
            output_tensor = tf.add(
                output_tensor, bias, name=output_detail['name'])
            tensors[output_detail['index']] = output_tensor
        elif op_type == 'DEPTHWISE_CONV_2D':
            input_tensor = tensors[op['inputs'][0]]
            weights_detail = interpreter._get_tensor_details(op['inputs'][1])
            bias_detail = interpreter._get_tensor_details(op['inputs'][2])
            output_detail = interpreter._get_tensor_details(op['outputs'][0])
            # print('weights_detail: ', weights_detail)
            # print('bias_detail: ', bias_detail)
            # print('output_detail: ', output_detail)
            weights_array = interpreter.get_tensor(weights_detail['index'])
            weights_array = np.transpose(weights_array, (1, 2, 3, 0))
            bias_array = interpreter.get_tensor(bias_detail['index'])
            weights = tf.Variable(weights_array, name=weights_detail['name'])
            bias = tf.Variable(bias_array, name=bias_detail['name'])
            options = op['builtin_options']
            output_tensor = tf.nn.depthwise_conv2d(
                input_tensor,
                weights,
                strides=[1, options['stride_h'], options['stride_w'], 1],
                padding=options['padding'],
                # dilations=[
                #     1, options['dilation_h_factor'],
                #     options['dilation_w_factor'], 1
                # ],
                name=output_detail['name'] + '/depthwise_conv2d')
            output_tensor = tf.add(
                output_tensor, bias, name=output_detail['name'])
            tensors[output_detail['index']] = output_tensor
        elif op_type == 'MAX_POOL_2D':
            input_tensor = tensors[op['inputs'][0]]
            output_detail = interpreter._get_tensor_details(op['outputs'][0])
            options = op['builtin_options']
            output_tensor = tf.nn.max_pool(
                input_tensor,
                ksize=[
                    1, options['filter_height'], options['filter_width'], 1
                ],
                strides=[1, options['stride_h'], options['stride_w'], 1],
                padding=options['padding'],
                name=output_detail['name'])
            tensors[output_detail['index']] = output_tensor
        elif op_type == 'PAD':
            input_tensor = tensors[op['inputs'][0]]
            output_detail = interpreter._get_tensor_details(op['outputs'][0])
            paddings_detail = interpreter._get_tensor_details(op['inputs'][1])
            # print('output_detail:', output_detail)
            # print('paddings_detail:', paddings_detail)
            paddings_array = interpreter.get_tensor(paddings_detail['index'])
            paddings = tf.Variable(
                paddings_array, name=paddings_detail['name'])
            output_tensor = tf.pad(
                input_tensor, paddings, name=output_detail['name'])
            tensors[output_detail['index']] = output_tensor
        elif op_type == 'RELU':
            output_detail = interpreter._get_tensor_details(op['outputs'][0])
            input_tensor = tensors[op['inputs'][0]]
            output_tensor = tf.nn.relu(
                input_tensor, name=output_detail['name'])
            tensors[output_detail['index']] = output_tensor
        elif op_type == 'RESHAPE':
            input_tensor = tensors[op['inputs'][0]]
            output_detail = interpreter._get_tensor_details(op['outputs'][0])
            options = op['builtin_options']
            output_tensor = tf.reshape(
                input_tensor, options['new_shape'], name=output_detail['name'])
            tensors[output_detail['index']] = output_tensor
        elif op_type == 'ADD':
            output_detail = interpreter._get_tensor_details(op['outputs'][0])
            input_tensor_0 = tensors[op['inputs'][0]]
            input_tensor_1 = tensors[op['inputs'][1]]
            output_tensor = tf.add(input_tensor_0, input_tensor_1, name=output_detail['name'])
            tensors[output_detail['index']] = output_tensor
        elif op_type == 'CONCATENATION':
            output_detail = interpreter._get_tensor_details(op['outputs'][0])
            input_tensor_0 = tensors[op['inputs'][0]]
            input_tensor_1 = tensors[op['inputs'][1]]
            options = op['builtin_options']
            output_tensor = tf.concat([input_tensor_0, input_tensor_1],
                                      options['axis'],
                                      name=output_detail['name'])
            tensors[output_detail['index']] = output_tensor
        else:
            raise ValueError(op_type)


def main():

    tf.compat.v1.disable_eager_execution()

    gen_model_json()
    ops, op_types = parse_json()

    interpreter = tf.lite.Interpreter(model_path)
    interpreter.allocate_tensors()
    input_details = interpreter.get_input_details()
    output_details = interpreter.get_output_details()
    print(input_details)
    print(output_details)
    for i in range(num_tensors):
        detail = interpreter._get_tensor_details(i)
        print(detail)

    make_graph(ops, op_types, interpreter)

    config = tf.compat.v1.ConfigProto()
    config.gpu_options.allow_growth = True
    graph = tf.compat.v1.get_default_graph()
    # writer = tf.summary.FileWriter(os.path.splitext(output_pb_path)[0])
    # writer.add_graph(graph)
    # writer.flush()
    # writer.close()
    with tf.compat.v1.Session(config=config, graph=graph) as sess:
        sess.run(tf.compat.v1.global_variables_initializer())
        graph_def = tf.compat.v1.graph_util.convert_variables_to_constants(
            sess=sess,
            input_graph_def=graph.as_graph_def(),
            output_node_names=output_node_names)

        with tf.io.gfile.GFile(output_pb_path, 'wb') as f:
            f.write(graph_def.SerializeToString())

        shutil.rmtree('saved_model', ignore_errors=True)
        tf.compat.v1.saved_model.simple_save(
            sess,
            output_savedmodel_path,
            inputs={'input': graph.get_tensor_by_name('input:0')},
            outputs={
                'classificators': graph.get_tensor_by_name('classificators:0'),
                'regressors': graph.get_tensor_by_name('regressors:0')
            })

if __name__ == '__main__':
    main()

"""
$ saved_model_cli show --dir saved_model --all

MetaGraphDef with tag-set: 'serve' contains the following SignatureDefs:

signature_def['serving_default']:
  The given SavedModel SignatureDef contains the following input(s):
    inputs['input'] tensor_info:
        dtype: DT_FLOAT
        shape: (1, 128, 128, 3)
        name: input:0
  The given SavedModel SignatureDef contains the following output(s):
    outputs['classificators'] tensor_info:
        dtype: DT_FLOAT
        shape: (1, -1, 1)
        name: classificators:0
    outputs['regressors'] tensor_info:
        dtype: DT_FLOAT
        shape: (1, -1, 16)
        name: regressors:0
  Method name is: tensorflow/serving/predict
"""
$ python3 blazeface_tflite_to_pb.py
4-2-10-4. saved_model から Weight Quantization (重みのみの量子化)
### tensorflow==2.2.0

import tensorflow as tf
import numpy as np

# Weight Quantization - Input/Output=float32
converter = tf.lite.TFLiteConverter.from_saved_model('saved_model')
converter.optimizations = [tf.lite.Optimize.OPTIMIZE_FOR_SIZE]
tflite_quant_model = converter.convert()
with open('face_detection_front_128_weight_quant.tflite', 'wb') as w:
    w.write(tflite_quant_model)
print("Weight Quantization complete! - face_detection_front_128_weight_quant.tflite")
$ python3 weight_quantization.py
4-2-10-5. saved_model から Integer Quantization (8bit整数量子化)
### tensorflow==2.2.0

import tensorflow as tf
import tensorflow_datasets as tfds
import numpy as np
from PIL import Image
import os
import glob

def representative_dataset_gen():
  for data in raw_test_data.take(100):
    image = data['image'].numpy()
    image = tf.image.resize(image, (128, 128))
    image = image[np.newaxis,:,:,:]
    image = image - 127.5
    image = image * 0.007843
    yield [image]

raw_test_data, info = tfds.load(name="the300w_lp", with_info=True, split="train", data_dir="~/TFDS", download=True)

# Integer Quantization - Input/Output=float32
converter = tf.lite.TFLiteConverter.from_saved_model('saved_model')
converter.optimizations = [tf.lite.Optimize.DEFAULT]
converter.representative_dataset = representative_dataset_gen
tflite_quant_model = converter.convert()
with open('face_detection_front_128_integer_quant.tflite', 'wb') as w:
    w.write(tflite_quant_model)
print("Integer Quantization complete! - face_detection_front_128_integer_quant.tflite")
$ python3 integer_quantization.py
4-2-10-6. saved_model から Full Integer Quantization (全8bit整数量子化)
### tensorflow==2.2.0

import tensorflow as tf
import tensorflow_datasets as tfds
import numpy as np
from PIL import Image
import os
import glob

def representative_dataset_gen():
  for data in raw_test_data.take(100):
    image = data['image'].numpy()
    image = tf.image.resize(image, (128, 128))
    image = image[np.newaxis,:,:,:]
    image = image - 127.5
    image = image * 0.007843
    yield [image]

raw_test_data, info = tfds.load(name="the300w_lp", with_info=True, split="train", data_dir="~/TFDS", download=False)

# Integer Quantization - Input/Output=uint8
converter = tf.lite.TFLiteConverter.from_saved_model('saved_model')
converter.optimizations = [tf.lite.Optimize.DEFAULT]
converter.representative_dataset = representative_dataset_gen
converter.target_spec.supported_ops = [tf.lite.OpsSet.TFLITE_BUILTINS_INT8]
converter.inference_input_type = tf.uint8
converter.inference_output_type = tf.uint8
tflite_quant_model = converter.convert()
with open('face_detection_front_128_full_integer_quant.tflite', 'wb') as w:
    w.write(tflite_quant_model)
print("Full Integer Quantization complete! - face_detection_front_128_full_integer_quant.tflite")
$ python3 full_integer_quantization.py
4-2-10-7. saved_model から Float16 Quantization (Float16量子化)
### tensorflow==2.2.0

import tensorflow as tf
import tensorflow_datasets as tfds
import numpy as np
from PIL import Image
import os
import glob

# Float16 Quantization - Input/Output=float32
converter = tf.lite.TFLiteConverter.from_saved_model('saved_model')
converter.optimizations = [tf.lite.Optimize.DEFAULT]
converter.target_spec.supported_types = [tf.float16]
tflite_quant_model = converter.convert()
with open('face_detection_front_128_float16_quant.tflite', 'wb') as w:
    w.write(tflite_quant_model)
print("Float16 Quantization complete! - face_detection_front_128_float16_quant.tflite")
$ python3 float16_quantization.py
4-2-10-8. Full Integer Quantization から EdgeTPU convert
$ edgetpu_compiler -s face_detection_front_128_full_integer_quant.tflite
4-3. 量子化モデル (.tflite) のパフォーマンスベンチマーク
生成した .tflite ファイルのパフォーマンスのベンチマークをする際に、 モデルの特性に応じた検証用プログラムを毎回書くのはとても手間です。 そこで私は Tensorflow の公式リポジトリで公開されている Benchmark用プログラム をコンパイルして利用しています。 推論時の Multi-Thread数 を調整できたり、 XNNPACK や GPU Delegate を起動オプションで有効にするだけで、かなり簡単に各種環境を再現したうえでベンチマークをとることができる便利ツールです。 ココでは実際にビルドして利用する方法を説明します。
https://github.com/PINTO0309/PINTO_model_zoo#3-tflite-model-benchmark
4-3-1. TFLite Model Benchmark Tool のビルド
私がすぐに手元で準備できる3環境だけ下記に整備する手順を記載します。 その他の環境については皆さんで実施してください。
$ sudo apt-get install python-future

## Bazel for Ubuntu18.04 x86_64 install
$ wget https://github.com/bazelbuild/bazel/releases/download/2.0.0/bazel-2.0.0-installer-linux-x86_64.sh
$ sudo chmod +x bazel-2.0.0-installer-linux-x86_64.sh
$ ./bazel-2.0.0-installer-linux-x86_64.sh
$ sudo apt-get install -y openjdk-8-jdk

## Bazel for RaspberryPi3/4 Raspbian/Debian Buster armhf install
$ wget https://github.com/PINTO0309/Bazel_bin/raw/master/2.0.0/Raspbian_Debian_Buster_armhf/openjdk-8-jdk/install.sh
$ ./install.sh
$ curl -sc /tmp/cookie \
  "https://drive.google.com/uc?export=download&id=1LQUSal55R6fmawZS9zZuk6-5ZFOdUqRK" > /dev/null
$ CODE="$(awk '/_warning_/ {print $NF}' /tmp/cookie)"
$ curl -Lb /tmp/cookie \
  "https://drive.google.com/uc?export=download&confirm=${CODE}&id=1LQUSal55R6fmawZS9zZuk6-5ZFOdUqRK" \
  -o adoptopenjdk-8-hotspot_8u222-b10-2_armhf.deb
$ sudo apt-get install -y ./adoptopenjdk-8-hotspot_8u222-b10-2_armhf.deb

## Bazel for RaspberryPi3/4 Raspbian/Debian Buster aarch64 install
$ wget https://github.com/PINTO0309/Bazel_bin/raw/master/2.0.0/Raspbian_Debian_Buster_aarch64/openjdk-8-jdk/install.sh
$ ./install.sh
$ curl -sc /tmp/cookie \
  "https://drive.google.com/uc?export=download&id=1VwLxzT3EOTbhSzwvRF2H4ChTQyTQBt3x" > /dev/null
$ CODE="$(awk '/_warning_/ {print $NF}' /tmp/cookie)"
$ curl -Lb /tmp/cookie \
  "https://drive.google.com/uc?export=download&confirm=${CODE}&id=1VwLxzT3EOTbhSzwvRF2H4ChTQyTQBt3x" \
  -o adoptopenjdk-8-hotspot_8u222-b10-2_arm64.deb
$ sudo apt-get install -y ./adoptopenjdk-8-hotspot_8u222-b10-2_arm64.deb

## Clone Tensorflow v2.1.0+
$ git clone --depth 1 https://github.com/tensorflow/tensorflow.git
$ cd tensorflow

## Build and run TFLite Model Benchmark Tool

## Flex Delegate disabled version, it only takes a very short time to build.
$ bazel build \
  -c opt \
  tensorflow/lite/tools/benchmark:benchmark_model

## Flex Delegate valid version, it takes a long time to build.
$ bazel build \
  -c opt \
  --config=noaws \
  --config=nohdfs \
  --config=nonccl \
  tensorflow/lite/tools/benchmark:benchmark_model_plus_flex
4-3-2. TFLite Model Benchmark Tool のオプション
$ bazel run -c opt tensorflow/lite/tools/benchmark:benchmark_model -- --help

Flags:
    --input_layer_value_files=          string  optional    A map-like string representing value file. Each item is separated by ',', and the item value consists of input layer name and value file path separated by ':', e.g. input1:file_path1,input2:file_path2. If the input_name appears both in input_layer_value_range and input_layer_value_files, input_layer_value_range of the input_name will be ignored.
    --use_xnnpack=false                 bool    optional    use XNNPack
    --disable_nnapi_cpu=false           bool    optional    Disable the NNAPI CPU device
    --nnapi_accelerator_name=           string  optional    the name of the nnapi accelerator to use (requires Android Q+)
    --nnapi_execution_preference=       string  optional    execution preference for nnapi delegate. Should be one of the following: fast_single_answer, sustained_speed, low_power, undefined
    --use_nnapi=false                   bool    optional    use nnapi delegate api
    --use_gpu=false                     bool    optional    use gpu
    --max_delegated_partitions=0        int32   optional    Max partitions to be delegated.
    --profiling_output_csv_file=        string  optional    File path to export profile data as CSV, if not set prints to stdout.
    --max_profiling_buffer_entries=1024 int32   optional    max profiling buffer entries
    --enable_op_profiling=false         bool    optional    enable op profiling
    --require_full_delegation=false     bool    optional    require delegate to run the entire graph
    --allow_fp16=false                  bool    optional    allow fp16
    --use_legacy_nnapi=false            bool    optional    use legacy nnapi api
    --num_runs=50                       int32   optional    expected number of runs, see also min_secs, max_secs
    --input_layer_value_range=          string  optional    A map-like string representing value range for *integer* input layers. Each item is separated by ':', and the item value consists of input layer name and integer-only range values (both low and high are inclusive) separated by ',', e.g. input1,1,2:input2,0,254
    --input_layer_shape=                string  optional    input layer shape
    --input_layer=                      string  optional    input layer names
    --graph=                            string  optional    graph file name
    --warmup_min_secs=0.5               float   optional    minimum number of seconds to rerun for, potentially making the actual number of warm-up runs to be greater than warmup_runs
    --warmup_runs=1                     int32   optional    minimum number of runs performed on initialization, to allow performance characteristics to settle, see also warmup_min_secs
    --output_prefix=                    string  optional    benchmark output prefix
    --benchmark_name=                   string  optional    benchmark name
    --num_threads=1                     int32   optional    number of threads
    --run_delay=-1                      float   optional    delay between runs in seconds
    --max_secs=150                      float   optional    maximum number of seconds to rerun for, potentially making the actual number of runs to be less than num_runs. Note if --max-secs is exceeded in the middle of a run, the benchmark will continue to the end of the run but will not start the next run.
    --min_secs=1                        float   optional    minimum number of seconds to rerun for, potentially making the actual number of runs to be greater than num_runs
4-3-3. Tensorflow Lite 標準のオペレーションのみを含むモデルのベンチマーク例 (XNNPACK無し、4 Threads)
$ bazel run -c opt tensorflow/lite/tools/benchmark:benchmark_model -- \
  --graph=${HOME}/work/tensorflow/head_pose_estimator_integer_quant.tflite \
  --num_threads=4 \
  --warmup_runs=1 \
  --enable_op_profiling=true
4-3-4. Tensorflow Lite 標準のオペレーションのみを含むモデルのベンチマーク例 (XNNPACK有り、4 Threads)
$ bazel run -c opt tensorflow/lite/tools/benchmark:benchmark_model -- \
  --graph=${HOME}/work/tensorflow/head_pose_estimator_integer_quant.tflite \
  --num_threads=4 \
  --warmup_runs=1 \
  --use_xnnpack=true \
  --enable_op_profiling=true
4-3-5. Tensorflow Lite 標準以外のオペレーションを含むモデルのベンチマーク例 (Flex有効、XNNPACK無し、4 Threads)
$ bazel run \
  -c opt \
  --config=noaws \
  --config=nohdfs \
  --config=nonccl \
  tensorflow/lite/tools/benchmark:benchmark_model_plus_flex -- \
  --graph=${HOME}/git/tf-monodepth2/monodepth2_flexdelegate_weight_quant.tflite \
  --num_threads=4 \
  --warmup_runs=1 \
  --enable_op_profiling=true
4-3-6. Tensorflow Lite 標準以外のオペレーションを含むモデルのベンチマーク例 (Flex有効、XNNPACK有り、4 Threads)
$ bazel run \
  -c opt \
  --config=noaws \
  --config=nohdfs \
  --config=nonccl \
  tensorflow/lite/tools/benchmark:benchmark_model_plus_flex -- \
  --graph=${HOME}/git/tf-monodepth2/monodepth2_flexdelegate_weight_quant.tflite \
  --num_threads=4 \
  --warmup_runs=1 \
  --use_xnnpack=true \
  --enable_op_profiling=true
4-3-7. Benchmark_Toolの実行ログサンプル
STARTING!
Min num runs: [50]
Min runs duration (seconds): [1]
Max runs duration (seconds): [150]
Inter-run delay (seconds): [-1]
Num threads: [4]
Benchmark name: []
Output prefix: []
Min warmup runs: [1]
Min warmup runs duration (seconds): [0.5]
Graph: [/home/b920405/work/tensorflow/head_pose_estimator_integer_quant.tflite]
Input layers: []
Input shapes: []
Input value ranges: []
Input layer values files: []
Allow fp16 : [0]
Require full delegation : [0]
Enable op profiling: [1]
Max profiling buffer entries: [1024]
CSV File to export profiling data to: []
Max number of delegated partitions : [0]
Use gpu : [0]
Use xnnpack : [0]
Loaded model /home/b920405/work/tensorflow/head_pose_estimator_integer_quant.tflite
The input model file size (MB): 7.37157
Initialized session in 0.39ms.
Running benchmark for at least 1 iterations and at least 0.5 seconds but terminate if exceeding 150 seconds.
count=3 first=182671 curr=171990 min=171990 max=182671 avg=176216 std=4636

Running benchmark for at least 50 iterations and at least 1 seconds but terminate if exceeding 150 seconds.
count=50 first=174371 curr=183952 min=173778 max=203173 avg=181234 std=6641

Average inference timings in us: Warmup: 176216, Init: 390, Inference: 181234
Profiling Info for Benchmark Initialization:
============================== Run Order ==============================
                 [node type]              [start]     [first]    [avg ms]        [%]      [cdf%]      [mem KB]  [times called]  [Name]
             AllocateTensors                0.000       0.058       0.058   100.000%    100.000%         0.000          1   AllocateTensors/0

============================== Top by Computation Time ==============================
                 [node type]              [start]     [first]    [avg ms]        [%]      [cdf%]      [mem KB]  [times called]  [Name]
             AllocateTensors                0.000       0.058       0.058   100.000%    100.000%         0.000          1   AllocateTensors/0

Number of nodes executed: 1
============================== Summary by node type ==============================
                 [Node type]      [count]     [avg ms]      [avg %]     [cdf %]   [mem KB]  [times called]
             AllocateTensors            1        0.058     100.000%    100.000%      0.000          1

Timings (microseconds): count=1 curr=58
Memory (bytes): count=0
1 nodes observed

Operator-wise Profiling Info for Regular Benchmark Runs:
============================== Run Order ==============================
                 [node type]              [start]     [first]    [avg ms]        [%]      [cdf%]      [mem KB]  [times called]  [Name]
                    QUANTIZE                0.000       0.164       0.166     0.092%      0.092%         0.000          1   [input_image_tensor_int8]:0
                     CONV_2D                0.166       9.293       9.710     5.358%      5.449%         0.000          1   [conv2d/Relu]:1
                 MAX_POOL_2D                9.876       0.523       0.547     0.302%      5.751%         0.000          1   [max_pooling2d/MaxPool]:2
                     CONV_2D               10.423      40.758      41.859    23.097%     28.848%         0.000          1   [conv2d_2/Relu]:3
                     CONV_2D               52.282      73.752      76.566    42.248%     71.095%         0.000          1   [conv2d_3/Relu]:4
                 MAX_POOL_2D              128.848       0.259       0.261     0.144%     71.240%         0.000          1   [max_pooling2d_2/MaxPool]:5
                     CONV_2D              129.109      15.460      16.203     8.940%     80.180%         0.000          1   [conv2d_4/Relu]:6
                     CONV_2D              145.312      13.194      13.908     7.674%     87.854%         0.000          1   [conv2d_5/Relu]:7
                 MAX_POOL_2D              159.220       0.043       0.046     0.026%     87.880%         0.000          1   [max_pooling2d_3/MaxPool]:8
                     CONV_2D              159.266       4.272       4.473     2.468%     90.348%         0.000          1   [conv2d_6/Relu]:9
                     CONV_2D              163.740       5.437       5.745     3.170%     93.518%         0.000          1   [conv2d_7/Relu]:10
                 MAX_POOL_2D              169.485       0.029       0.031     0.017%     93.535%         0.000          1   [max_pooling2d_4/MaxPool]:11
                     CONV_2D              169.516       4.356       4.558     2.515%     96.050%         0.000          1   [conv2d_8/Relu]:12
             FULLY_CONNECTED              174.074       6.666       6.992     3.858%     99.908%         0.000          1   [dense/Relu]:13
             FULLY_CONNECTED              181.066       0.160       0.167     0.092%    100.000%         0.000          1   [logits/BiasAdd_int8]:14
                  DEQUANTIZE              181.232       0.001       0.001     0.000%    100.000%         0.000          1   [logits/BiasAdd]:15

============================== Top by Computation Time ==============================
                 [node type]              [start]     [first]    [avg ms]        [%]      [cdf%]      [mem KB]  [times called]  [Name]
                     CONV_2D               52.282      73.752      76.566    42.248%     42.248%         0.000          1   [conv2d_3/Relu]:4
                     CONV_2D               10.423      40.758      41.859    23.097%     65.344%         0.000          1   [conv2d_2/Relu]:3
                     CONV_2D              129.109      15.460      16.203     8.940%     74.285%         0.000          1   [conv2d_4/Relu]:6
                     CONV_2D              145.312      13.194      13.908     7.674%     81.959%         0.000          1   [conv2d_5/Relu]:7
                     CONV_2D                0.166       9.293       9.710     5.358%     87.316%         0.000          1   [conv2d/Relu]:1
             FULLY_CONNECTED              174.074       6.666       6.992     3.858%     91.174%         0.000          1   [dense/Relu]:13
                     CONV_2D              163.740       5.437       5.745     3.170%     94.344%         0.000          1   [conv2d_7/Relu]:10
                     CONV_2D              169.516       4.356       4.558     2.515%     96.859%         0.000          1   [conv2d_8/Relu]:12
                     CONV_2D              159.266       4.272       4.473     2.468%     99.327%         0.000          1   [conv2d_6/Relu]:9
                 MAX_POOL_2D                9.876       0.523       0.547     0.302%     99.629%         0.000          1   [max_pooling2d/MaxPool]:2

Number of nodes executed: 16
============================== Summary by node type ==============================
                 [Node type]      [count]     [avg ms]      [avg %]     [cdf %]   [mem KB]  [times called]
                     CONV_2D            8      173.016      95.471%     95.471%      0.000          8
             FULLY_CONNECTED            2        7.157       3.949%     99.421%      0.000          2
                 MAX_POOL_2D            4        0.884       0.488%     99.908%      0.000          4
                    QUANTIZE            1        0.166       0.092%    100.000%      0.000          1
                  DEQUANTIZE            1        0.000       0.000%    100.000%      0.000          1

Timings (microseconds): count=50 first=174367 curr=183949 min=173776 max=203169 avg=181231 std=6640
Memory (bytes): count=0
16 nodes observed

Note: as the benchmark tool itself affects memory footprint, the following is only APPROXIMATE to the actual memory footprint of the model at runtime. Take the information at your discretion.
Peak memory footprint (MB): init=0 overall=14.7656
5. Finally
気づいたら知り合いオールスター登場みたいな記事になってしまいました。 しかし。。。半年間貯めた情報を一気に記事に起こすの。。。 めっちゃしんどい。。。 誰かのお役に立てることを祈ります。