はじめに
この記事では、lodash (lodash.throttle) に依存しない、React 向けの throttle のカスタムフックを自前で実装する方法を説明します。
以下の記事の throttle バージョンです。
throttle とは
throttle とは、頻繁に発生するイベントに対して、一定時間内に一度だけ処理を実行するためのテクニックです。
連続してイベントが発生しても、指定された時間間隔ごとで処理を実行します。
throttle と似た概念に、以前の記事で実装した debounce があります。
両者の違いは、処理を実行するタイミングです。
- debounce: 連続するイベントが終了してから、一度だけ処理を実行
- throttle: 連続するイベント中に、一定時間ごとに処理を実行
このように、debounce は「最後のイベント」に、throttle は「時間間隔」に注目している点が大きな違いです。
さて、lodash の throttle には、debounce と同様に leading と trailing のオプションが提供されています 1。
-
leading:trueに設定すると、イベントが発生した直後に一度だけ関数を実行します (デフォルトはtrue) -
trailing:trueに設定すると、連続するイベントが終了した後に、最後に一度だけ関数を実行します (デフォルトはtrue)
この記事では、leading と trailing の動作を含めて自前で実装を進めていきます。
シンプルな throttle の実装
まずは、各オプションの対応は考えずに、シンプルな throttle を実装していきます。
この記事での、シンプルな throttle で期待する動作は、leading が true かつ trailing が false の場合の動作です。
これは、関数が連続で呼び出されている間は、一定時間ごとに実行されるという動作です。
また、trailing が false のため、最後の呼び出しで更新されることは保証されません。
具体的には、最後の呼び出しがたまたま一定時間の区切りの最初であれば更新されますが、それ以外の場合は無視されるという動作になります。
カスタムフックの定義
まずは、カスタムフックの定義を以下のようにし、任意の引数・戻り値の関数へ対応できるようにします。
export const useThrottle = <T, U extends any[]>(
  func: (...args: U) => T,
  args: U,
  wait: number = 0
): T | undefined => {
  // ...
};
-
<T, U extends any[]>: 任意の引数・戻り値の関数へ対応 -
func: throttle したい関数 -
args:funcに渡す引数の配列(依存配列として機能) -
wait: 処理の実行間隔(ミリ秒) -
T | undefined:funcの実行結果
内部状態の管理
throttle の処理で保持する必要がある情報を管理するために、useState と useRef を使用します。
const [result, setResult] = useState<T | undefined>(undefined);
const timeoutRef = useRef<ReturnType<typeof setTimeout> | null>(null);
-
result: throttle された関数funcの最新の実行結果を保持する State -
timeoutRef:setTimeoutの ID を保持するための Ref です-
timeoutRefの変更によって再レンダリングされないようにuseStateではなくuseRefを利用します
-
throttle 処理の実装
useEffect を使うことで、引数 args の変更を監視し、wait ミリ秒が経過するたびに func を実行します。
useEffect(() => {
  if (!timeoutRef.current) {
    setResult(func(...args));
    timeoutRef.current = setTimeout(() => {
      timeoutRef.current = null;
    }, wait);
  }
}, [...args]);

// アンマウント時にタイマーをクリアするための useEffect
useEffect(() => {
  return () => {
    if (timeoutRef.current) {
      clearTimeout(timeoutRef.current);
      timeoutRef.current = null;
    }
  };
}, []);
一つ目の useEffect の中で行われている処理は、与えられた関数の実行と、実行から wait ミリ秒経っているかどうかのフラグ管理です。
timeoutRef.current にタイマーの情報が存在しない(直近で func が実行されておらず、wait ミリ秒経過している)場合のみ、func を実行して result を更新するようにします。
その後、新しくタイマーをセットし、wait ミリ秒後にタイマーの情報をクリアします。
このタイマーが存在する間は、func が再度実行されることはありません。
これらの処理により、イベントが連続して発生しても、wait 時間ごとに一度だけ処理が実行されるシンプルな throttle が実装できます。
全体のコード
import { useEffect, useRef, useState } from "react";

export const useThrottle = <T, U extends any[]>(
  func: (...args: U) => T,
  args: U,
  wait: number = 0
): T | undefined => {
  const [result, setResult] = useState<T | undefined>(undefined);
  const timeoutRef = useRef<ReturnType<typeof setTimeout> | null>(null);

  useEffect(() => {
    if (!timeoutRef.current) {
      setResult(func(...args));
      timeoutRef.current = setTimeout(() => {
        timeoutRef.current = null;
      }, wait);
    }
  }, [...args]);

  useEffect(() => {
    return () => {
      if (timeoutRef.current) {
        clearTimeout(timeoutRef.current);
        timeoutRef.current = null;
      }
    };
  }, []);

  return result;
};
挙動の確認
シンプルな throttle の挙動を確認してみます。
const App = () => {
  const [value, setValue] = useState("");
  const [throttleValue, setThrottleValue] = useState("");

  useThrottle(setThrottleValue, [value], 1000);

  return (
    <div>
      <input onChange={(e) => setValue(e.target.value)} />
      <p>Input value: {value}</p>
      <p>Throttle value: {throttleValue}</p>
    </div>
  );
};
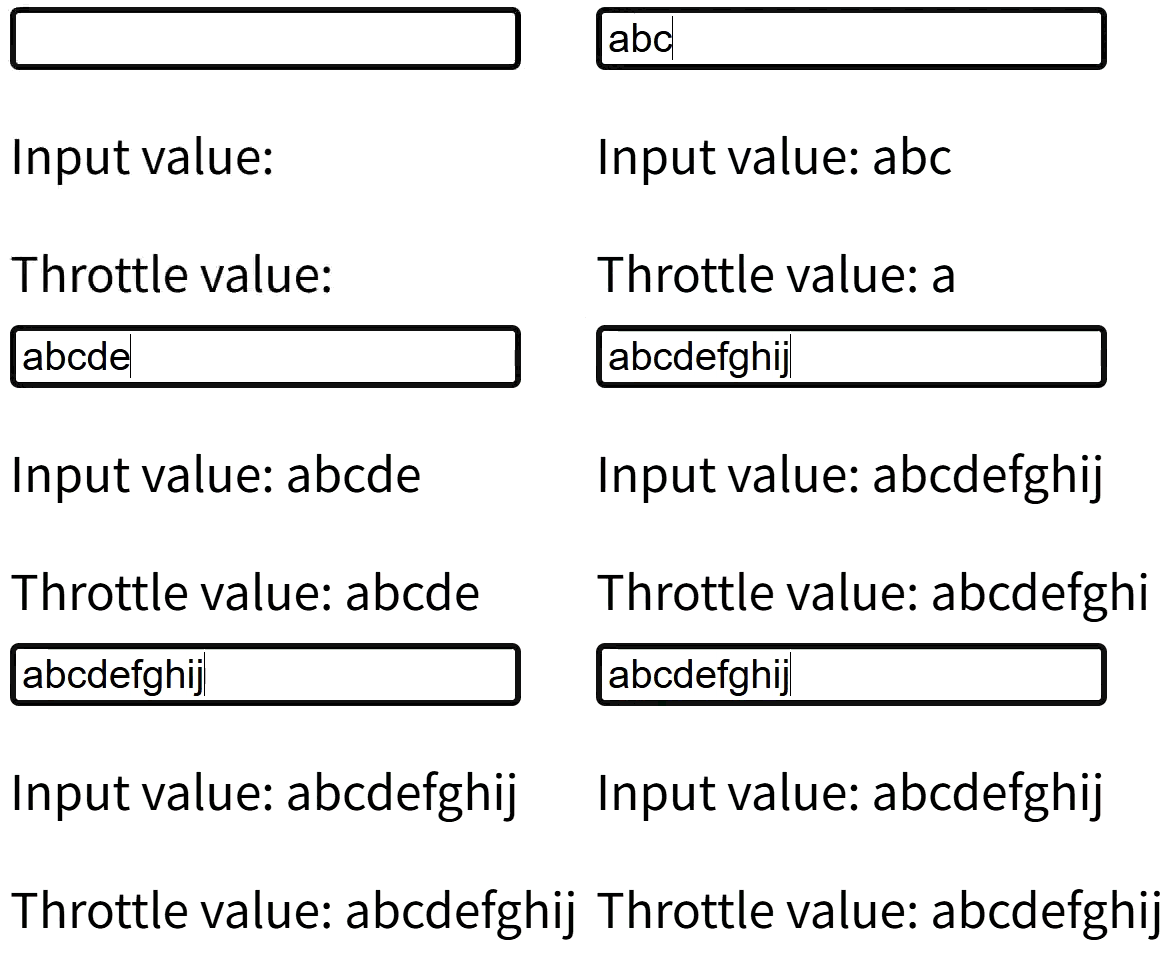
入力されている文字に応じて「Input value: 」はリアルタイムに更新されますが、「Throttle value: 」は入力開始直後と、その後 1000ms ごとに更新されていることがわかります。
また、入力が終了後に待っても、最後の文字は反映されないことも分かります。
leading と trailing の追加
ここからが本題で、leading と trailing オプションを追加して、lodash の throttle に近い挙動を実装します。
leading と trailing の挙動について
leading と trailing は真偽値で、その組み合わせによって、以下の4通りの挙動が期待されます。
-
leading: false,trailing: falseの場合- 更新は一切行われません
-
leading: false,trailing: trueの場合- イベントが発生し続ける限り、一定時間 (
waitミリ秒) ごとに一度、その期間の最後に関数を実行します
- イベントが発生し続ける限り、一定時間 (
-
leading: true,trailing: falseの場合- 最初に一度実行され、その後はイベントが続く限り、一定時間 (
waitミリ秒) ごとに一度、その期間の最初に関数を実行します- 先程のシンプルな throttle の実装と同じ挙動になります
- 最初に一度実行され、その後はイベントが続く限り、一定時間 (
-
leading: true,trailing: trueの場合- 最初の呼び出しで一度実行され、その後もイベントが続く限り一定時間 (
waitミリ秒) ごとに関数を実行します - これにより、最初と最後の更新が両方とも保証されます
- 最初の呼び出しで一度実行され、その後もイベントが続く限り一定時間 (
カスタムフックの定義
ここから実装を書いていきますが、シンプルな throttle からの変更点のみを書きます。
まず、オプションの型を定義し、カスタムフックの定義に options を追加します。
type ThrottleOptions = {
  leading?: boolean;
  trailing?: boolean;
};
 export const useThrottle = <T, U extends any[]>(
   func: (...args: U) => T,
   args: U,
   wait: number = 0,
+  options: ThrottleOptions = {}
 ): T | undefined => {
内部状態の管理
最新の args の値を参照できるように useRef で管理します。
また、options のデフォルト値もここで設定しておきます。
  const [result, setResult] = useState<T | undefined>(undefined);
  const timeoutRef = useRef<ReturnType<typeof setTimeout> | null>(null);
+ const lastArgs = useRef<U | null>(null);

+ const { leading = true, trailing = true } = options;
throttle 処理の実装
useEffect 内で leading と trailing の真偽値に応じて処理を分岐させます。
  if (!timeoutRef.current) {
-   setResult(func(...args));
+   if (leading) setResult(func(...args));
+   else if (trailing) lastArgs.current = args;

    timeoutRef.current = setTimeout(() => {
+     if (trailing && lastArgs.current) {
+       setResult(func(...lastArgs.current));
+       lastArgs.current = null;
+     }
      timeoutRef.current = null;
    }, wait);
+ } else {
+   lastArgs.current = args;
  }
シンプルな throttle の際に説明した通り、timeoutRef.current が存在しない場合は、wait ミリ秒が経過した直後か、最初の呼び出しであることを示しています。
まず、leading が true であれば、func をすぐに実行します。
そうでなく、trailing が true である場合、args の内容を lastArgs に保存することで、trailing の処理に備えておきます。
その後、タイマーをセットし、wait ミリ秒後に trailing の処理を行えるようにします。
また、timeoutRef.current が存在する(wait ミリ秒以内に連続してイベントが発生している)場合は、trailing の処理に備えて lastArgs.current に現在の引数 args を保存します。
全体のコード
import { useEffect, useRef, useState } from "react";

type ThrottleOptions = {
  leading?: boolean;
  trailing?: boolean;
};

export const useThrottle = <T, U extends any[]>(
  func: (...args: U) => T,
  args: U,
  wait: number = 0,
  options: ThrottleOptions = {}
): T | undefined => {
  const [result, setResult] = useState<T | undefined>(undefined);
  const timeoutRef = useRef<ReturnType<typeof setTimeout> | null>(null);
  const lastArgs = useRef<U | null>(null);

  const { leading = true, trailing = true } = options;

  useEffect(() => {
    if (!timeoutRef.current) {
      if (leading) setResult(func(...args));
      else if (trailing) lastArgs.current = args;

      timeoutRef.current = setTimeout(() => {
        if (trailing && nextArgs.current) {
          setResult(func(...lastArgs.current));
          lastArgs.current = null;
        }
        timeoutRef.current = null;
      }, wait);
    } else {
      lastArgs.current = args;
    }
  }, [...args]);

  useEffect(() => {
    return () => {
      if (timeoutRef.current) {
        clearTimeout(timeoutRef.current);
        timeoutRef.current = null;
      }
    };
  }, []);

  return result;
};
挙動の確認
シンプルな throttle の挙動を確認した際に利用したコードの、useThrottle の部分にオプションを追加して、それぞれの挙動を確認します。
useThrottle(setThrottleValue, [value], 1000, {
  // 各ケースでこの部分を変更して試す
  leading: false,
  trailing: false,
});
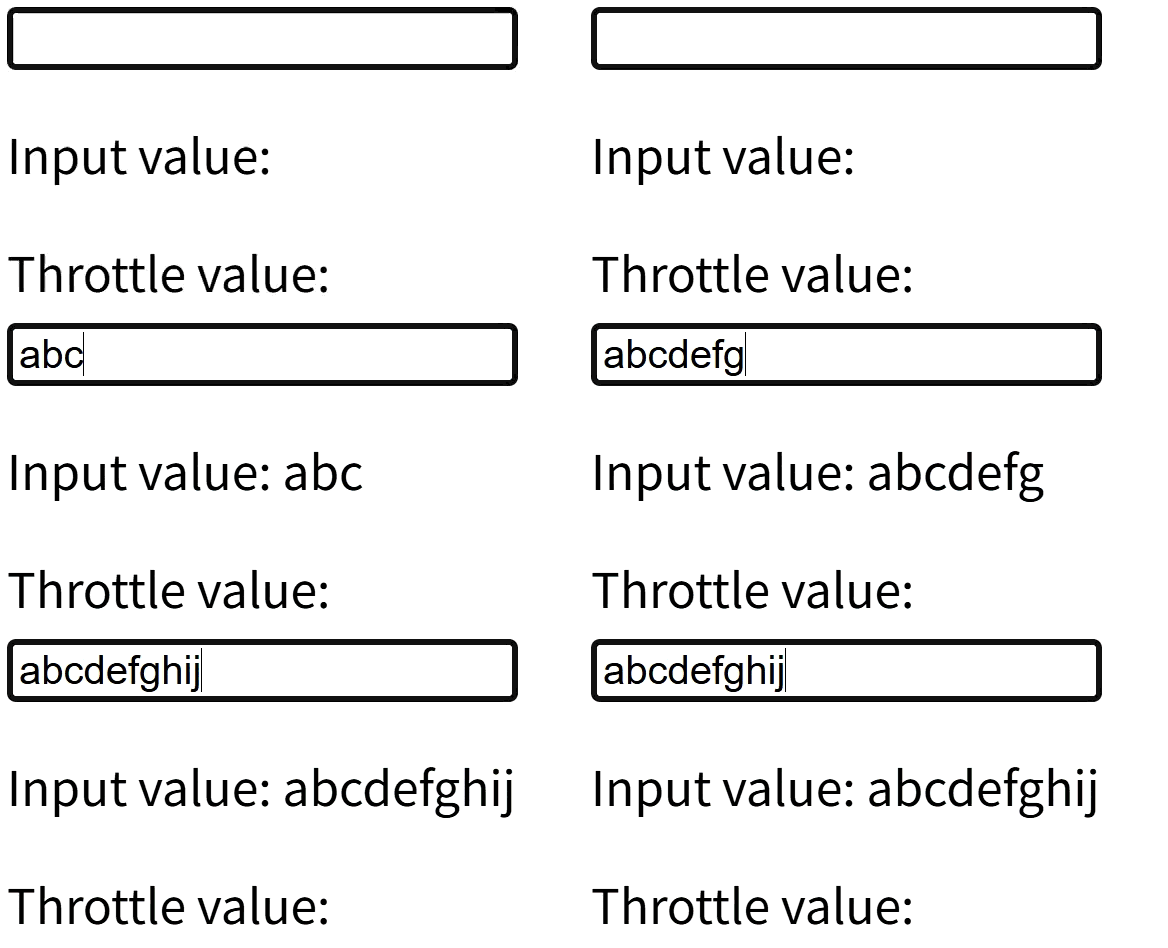
leading: false, trailing: false の場合
この設定では、throttle された関数は実行されません。
「Throttle value: 」は初期値のまま更新されないことが確認できます。
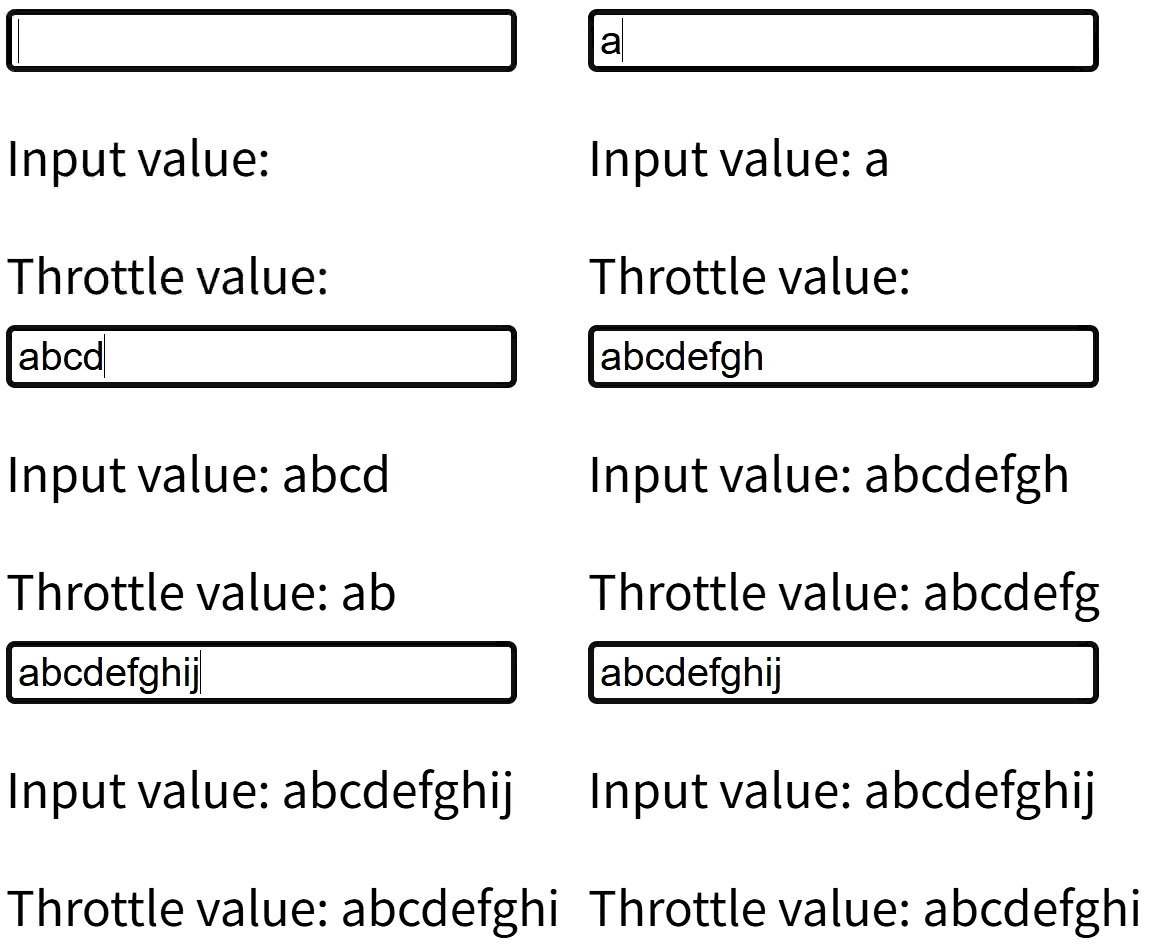
leading: false, trailing: true の場合
この設定では、wait ミリ秒経過ごとに「Throttle value: 」が更新されます。
入力の最初では、更新はされません。
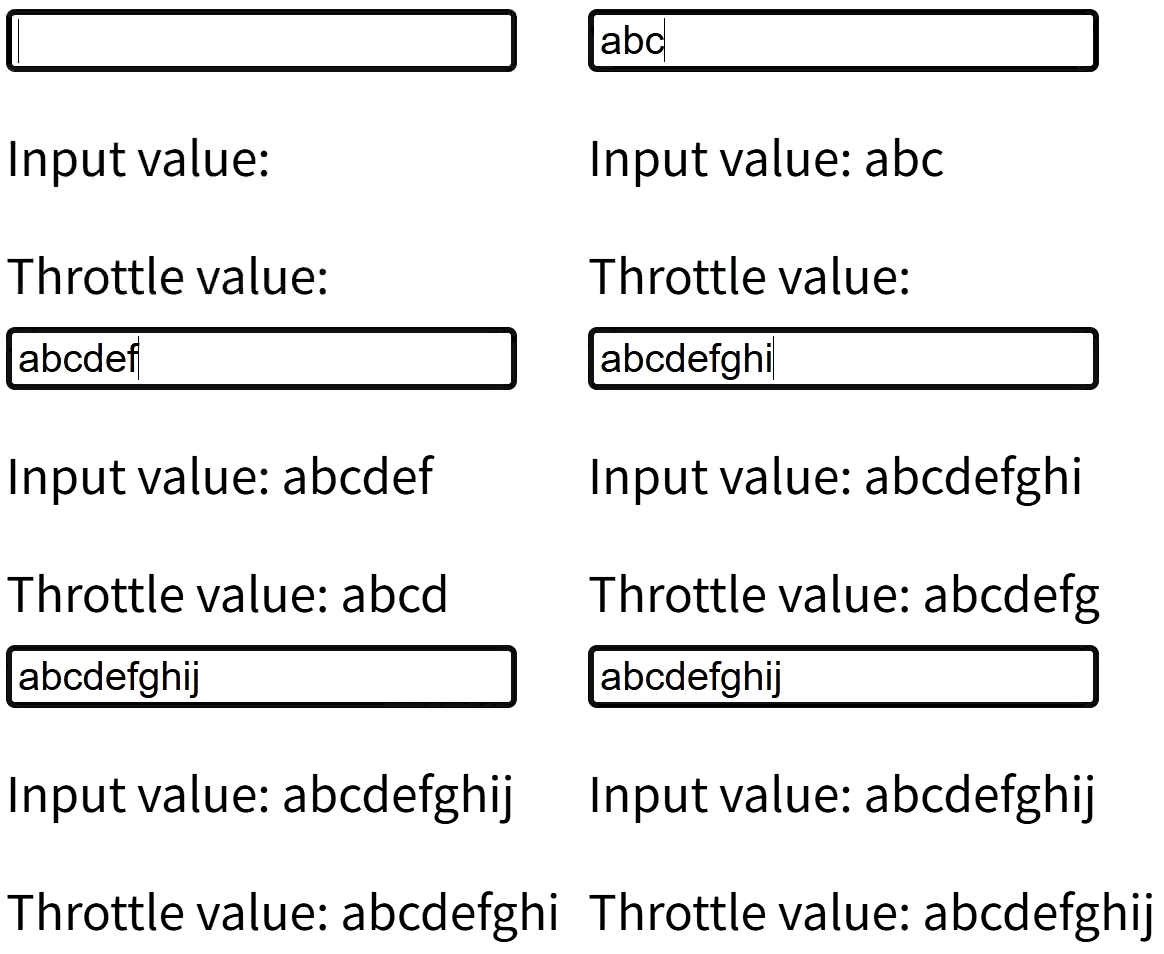
leading: true, trailing: false の場合
この設定は、シンプルな throttle と同じ挙動です。
入力開始直後と、その後 wait ミリ秒ごとに「Throttle value: 」が更新されます。
入力停止後には、更新はされません。
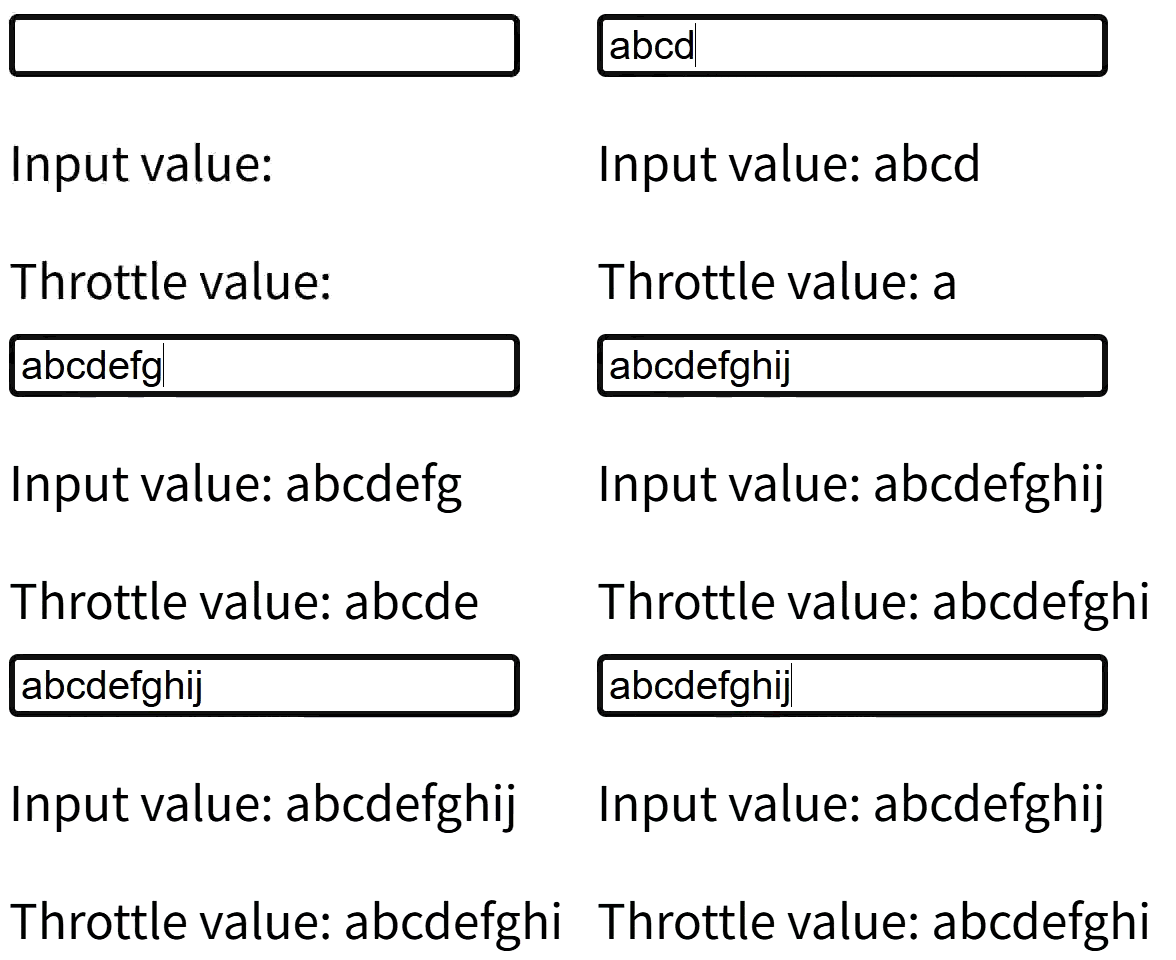
leading: true, trailing: true の場合
入力開始直後と、その後 wait ミリ秒ごとに「Throttle value: 」が更新されます。
さらに、入力が停止したあとにも、最後に発生したイベントの値で最終的な更新が行われます。
おわりに
この記事では、lodash に依存せず、React 環境で利用可能な throttle のカスタムフックを自前で実装する方法について説明しました。
debounce と throttle は似ていますが、下記のようにユースケースが異なります。
- debounce: ユーザーが入力し終えた後に、APIコールを実行するようなケース
- throttle: スクロールイベントのように、一定間隔で処理を実行したいケース
これらを状況に応じて使い分けることで、よりパフォーマンスの高いアプリケーションを構築できます。
