jQuery mobileを利用する
jQuery mobileはひとつのHTML内で複数のページを定義し、ボタンアクション等でページ遷移を実現することができます。これにより、まるでネイティブアプリのようなルック&フィールを実現できます。
ヘッダ内でjQuery mobileのCSSとJSを読み込みます。
<link rel="stylesheet" href="http://ajax.googleapis.com/ajax/libs/jquerymobile/1.4.5/jquery.mobile.min.css" />
<script src="http://ajax.googleapis.com/ajax/libs/jquerymobile/1.4.5/jquery.mobile.min.js"></script>
HTML本体では以下のようにページを作成します。
<body>
<div data-role="page" id="main">
    <div data-role="header">
        <h1>ConoHa API sample</h1>
    </div><!-- header -->
    <div data-role="content">
    <h2 id="description"></h2>
    <table id='server_table'>
    <tr><th>#</th><th>状態</th><th>ネームタグ</th><th>リージョン</th></tr>
    </table>
    </div><!-- content -->
</div><! -- page -->
</body>
一つの画面 = ページをdivで定義(data-role="page")し、更にその中でヘッダ(data-role="footer")・フッタ(data-role="header")、ページの中身を定義します(data-role="content")。
ここでは、jQuery mobile対応に加えて、テーブルにヘッダを追加しました。
設定画面の追加
設定の保存先
user ID, password, tenant IDはローカルストレージに保存することにします。
window.localStorage['user_id'];
window.localStorage['password'];
window.localStorage['tenant_id'];
UIの作成
メインページのヘッダの中に設定ボタンを定義します。
    <div data-role="header">
        <h1>ConoHa API sample</h1>
        <a href="#setting" id="setting_button" data-icon="gear" data-mini="true" class="ui-btn-right" data-transition="slideup">設定</a>
    </div><!-- header -->
次に設定画面のページを作成します。
<div data-role="page" id="setting">
    <div data-role="header" data-add-back-btn="true" data-back-btn-text="戻る">
        <h1>設定</h1>
        <a href="" data-icon="gear" data-mini="true" class="ui-btn-right" id="save">保存</a>
    </div><!-- header -->

    <div data-role="content">
        <p><label for="user_id">user id</label><input type="text" name="user_id" id="user_id"></p>
        <p><label for="password">password</label><input type="password" name="password" id="password"></p>
        <p><label for="tenant_id">tenant id</label><input type="text" name="tenant_id" id="tenant_id"></p>
        <div id='save_message'>saved</div>
    </div><!-- content -->
</div><!-- page -->
アクションの作成
まず、設定画面が表示されるタイミングでuser ID等をローカルストレージから読みこんでinputに表示させます。表示されるタイミングは設定ボタンが押されるタイミングなので、このアクションに記述します。
  $('#setting_button').click(function(){
      $('#user_id').val(window.localStorage['user_id']);
      $('#password').val(window.localStorage['password']);
      $('#tenant_id').val(window.localStorage['tenant_id']);

      //Hide message
      $('#save_message').hide();

      settingAction();
  });
次に保存ボタンが押された時にローカルストレージに保存する処理を作成します。
  $('#save').click(function(){
    window.localStorage['user_id'] = $('#user_id').val();
    window.localStorage['password'] = $('#password').val();
    window.localStorage['tenant_id'] = $('#tenant_id').val();

    $('#save_message').fadeIn().fadeOut(1000);
  });
リロードボタンを実装する
UIの作成
ヘッダの中にリロードボタンを定義します。
    <div data-role="header">
        <h1>ConoHa API sample</h1>
        <a href="" id="reload" class="ui-btn-left">リロード</a>
        <a href="#setting" id="setting_button" data-icon="gear" data-mini="true" class="ui-btn-right" data-transition="slideup">設定</a>
    </div><!-- header -->
アクションの作成
リロードボタンを押した時に実行されるアクションを定義します。
  // Reload
  $('#reload').click(function () {
    $('.server_item').remove();
    getServerInfo();
  });

  // API access
  var getServerInfo = function() {
    user_id = window.localStorage['user_id'];
    password = window.localStorage['password'];
    tenant_id = window.localStorage['tenant_id'];

    for (key in regions) {
      if (window.localStorage["token_" + key] === undefined) {
        access(getTokenUrl(regions[key]), getTokenData(), token_type, tokenOnSuccess, key).done(function(){
          access(getServersDetailUrl(regions[this]), servers_detail_data, servers_detail_type, serversDetailOnSuccess, this);
        });
      } else {
        access(getServersDetailUrl(regions[key]), servers_detail_data, servers_detail_type, serversDetailOnSuccess, key);
      }
    }
  }
ここでは今まで$.(function(){})内で直接呼び出していたAPIアクセスの処理をgetServerInfoという関数にまとめ、それをボタンアクションから呼ぶようにしました。
設定画面での設定を反映させるため、最初にローカルストレージからuer ID等を読み込んでいます。
その他
文字コード
iOSでは文字コードを設定しないと全力で文字化けします。なので一般的なHTMLの文字設定を行います。
<html lang="ja">
<head>
<meta charset="utf-8">
iOSのステータスバー
iOS7.0以上の場合、OSのステータスバーとjQuery mobileのヘッダ要素が重なってしまうようです。
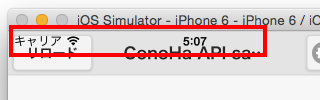
以下のサイトを参考にObjective-Cのコードを追加し、描画領域を下にずらします。
[JQuery mobileでPhonegap(Cordova)アプリをつくる](JQuery mobileでPhonegap(Cordova)アプリをつくる)
- (void)createGapView
{
(中略)
    //Workaround to the status bar problem
    NSString* version  = [[UIDevice currentDevice] systemVersion];
    if ([version floatValue] > 7.0) {
        webViewBounds.origin.y += 20;
        webViewBounds.size.height -= 20;
    }
(後略)
}
動作確認
起動するとこのような画面になります。認証情報がないので何も表示されません。

設定画面はこんなかんじです。

保存ボタンを押して戻り、リロードすると。。。

無事に表示されました!
次回
次回はサーバの作成、削除機能を追加します。