こちらの続きです
まずはM5StickC PlusでCAN通信ができるようにします。
手順
1.platformIOでプロジェクト作成
以下を参考にしてM5StickC Plus用の新規プロジェクトを作成する
2.プロジェクトの設定
ESP32CANライブラリをプロジェクトに追加する
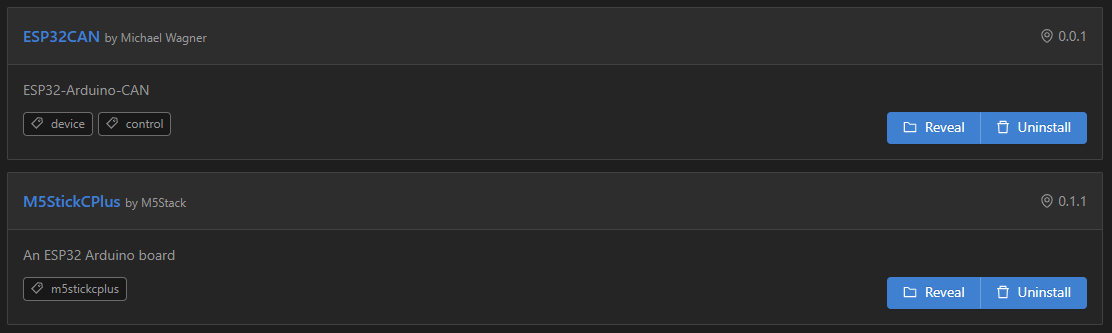
platformio.iniにmonitor_speedを追記します
platformio.ini
[env:m5stick-c]
platform = espressif32
board = m5stick-c
framework = arduino
lib_deps =
	m5stack/M5StickCPlus@^0.1.1
	miwagner/ESP32CAN@^0.0.1
monitor_speed = 115200
3.CAN送受信のコードを記述
main.cppを以下のように記述します。
main.cpp
main.cpp
#include "M5StickCPlus.h"
#include "ESP32CAN.h"
#include "CAN_config.h"

// ========================
// GPIO 定義
// ========================
#define TX_GPIO GPIO_NUM_32  // TXピン
#define RX_GPIO GPIO_NUM_33  // RXピン

// ========================
// グローバル変数
// ========================
CAN_device_t CAN_cfg;  // CAN設定構造体

// ========================
// CAN 初期化関数
// ========================
void initCAN() {
    CAN_cfg.speed = CAN_SPEED_500KBPS;
    CAN_cfg.tx_pin_id = TX_GPIO;
    CAN_cfg.rx_pin_id = RX_GPIO;
    CAN_cfg.rx_queue = xQueueCreate(10, sizeof(CAN_frame_t));  // 受信キュー

    if (ESP32Can.CANInit() == ESP_OK) {
        Serial.println("CAN bus started successfully!");
    } else {
        Serial.println("CAN bus failed to start!");
        while (1);  // 停止
    }
}

// ========================
// CAN 送信関数(ESP32CAN 用)
// ========================
int can_tx_ESP32CAN(uint32_t id, uint8_t *data, uint8_t len) {
    CAN_frame_t txFrame = { 0 };
    txFrame.FIR.B.FF = CAN_frame_std;
    txFrame.MsgID = id;
    txFrame.FIR.B.DLC = (len > 8) ? 8 : len;
    memcpy(txFrame.data.u8, data, txFrame.FIR.B.DLC);

    Serial.print("送信データ: ");
    for (int i = 0; i < txFrame.FIR.B.DLC; i++) {
        Serial.printf("%02X ", txFrame.data.u8[i]);
    }

    if (ESP32Can.CANWriteFrame(&txFrame) == ESP_OK) {
        Serial.println("-> 送信成功");
        return 0;
    } else {
        Serial.println("-> 送信エラー");
        return -1;
    }
}

// ========================
// CAN 受信関数(ESP32CAN 用)
// ========================
int can_rx_ESP32CAN(uint32_t *id, uint8_t *data, uint8_t *len) {
    CAN_frame_t rxFrame = { 0 };

    if (xQueueReceive(CAN_cfg.rx_queue, &rxFrame, pdMS_TO_TICKS(100)) == pdTRUE) {
        *id = rxFrame.MsgID;
        *len = rxFrame.FIR.B.DLC;
        memcpy(data, rxFrame.data.u8, *len);
        return 0;
    }

    return -1;  // 受信失敗
}

// ========================
// Arduino 初期化関数
// ========================
void setup() {
    M5.begin();
    Serial.begin(115200);
    initCAN();
}

// ========================
// メインループ
// ========================
void loop() {
    // 送信
    uint8_t tx_data[] = {0x12, 0x34, 0x56};
    can_tx_ESP32CAN(0x123, tx_data, sizeof(tx_data));

    // 受信
    uint32_t can_id;
    uint8_t rx_data[8];
    uint8_t len;

    if (can_rx_ESP32CAN(&can_id, rx_data, &len) == 0) {
        Serial.printf("受信: ID=0x%X, DLC=%d, データ=", can_id, len);
        for (int i = 0; i < len; i++) {
            Serial.printf("%02X ", rx_data[i]);
        }
        Serial.println();
    }

    delay(1000);  // 周期調整
}
コードの説明
- CAN送信時は、送信データを can_tx_ESP32CAN の中で ESP32CAN.CANWriteFrame に渡して処理する
- CAN受信時は、受信データがキューに格納されるので can_rx_ESP32CAN で取り出して処理する
- 受信データが格納されるキューは initCAN の中で CAN_cfg.rx_queue で指定して、ESP32CAN.CANInit で連携開始する


以下を参考にしています。
4.送信の確認
ラズパイ側のCANを起動しておかないと送信されません。
ラズパイ側の環境設定は以下をご参照ください。
車両診断通信プロトコル:UDSをラズパイでシミュレート
platformIOのプロジェクトをビルドしてM5StickC Plusにアップロードすると、CANメッセージを1秒間隔で繰り返し送信します。
ラズパイ側でcandumpして確認します。
# candump can0
  can0  123   [3]  12 34 56
  can0  123   [3]  12 34 56
  can0  123   [3]  12 34 56
  can0  123   [3]  12 34 56
5.受信の確認
ラズパイ側から"cansend can0 456#789ABC"でCANメッセージを送信すると、
M5StickC Plus側のSerial Monitorで以下のように受信できていることが確認できます。
受信: ID=0x456, DLC=3, データ=78 9A BC
CAN通信編 以上